Backup and Restore Virtual Machines in Proxmox
Knowing how to backup a VM and restore it later is an essential part of your VM knowledge. Learn to do it with Proxmox.

We should all be doing these. Backing up ensures that if something happens to your virtual machine(s), you have a second unaffected copy that you can restore.
Proxmox happens to have a handy backup/restore feature built in, and in this tutorial I'll be showing you how simple it is to keep your virtual machines backed up and safe.
I'll also show you how to restore one of these backups should something go wrong.
Backing up a Virtual Machine
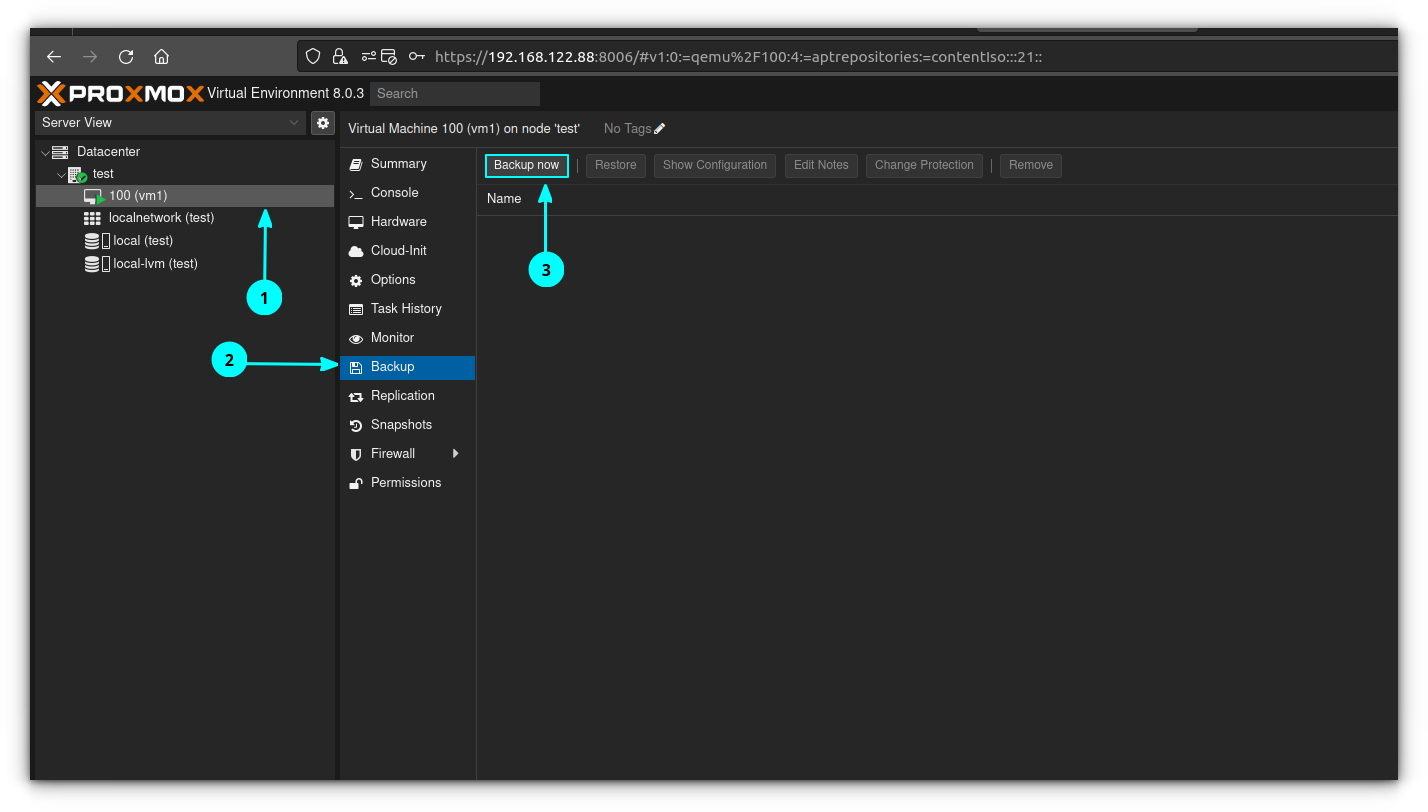
Begin by selecting your VM, and then select "Backup" on the next column over. Click on "Backup Now".
Storage is where you want the VM to be stored. If you don't have external storage attached to your server you will have the option of whatever internal storage is allocated to the server. "Mode" has several options - snapshot will take a literal snapshot of the VM while it's running, and make a copy of it using that. I recommend using this option for production virtual machines to avoid downtime.
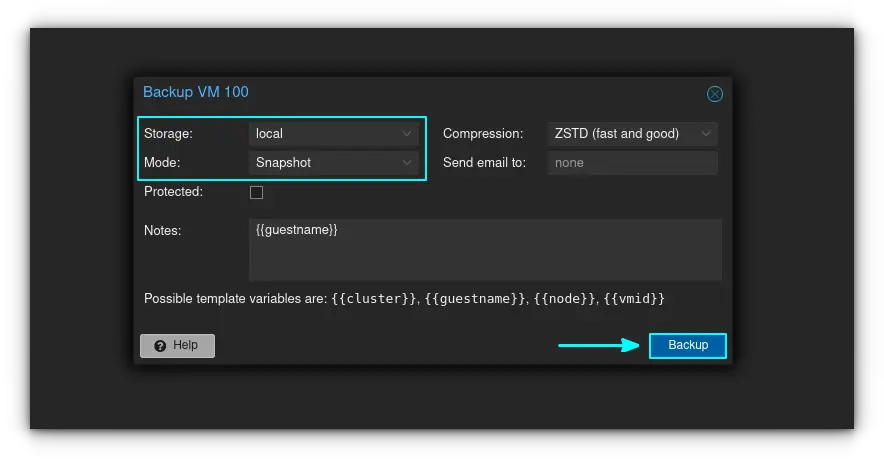
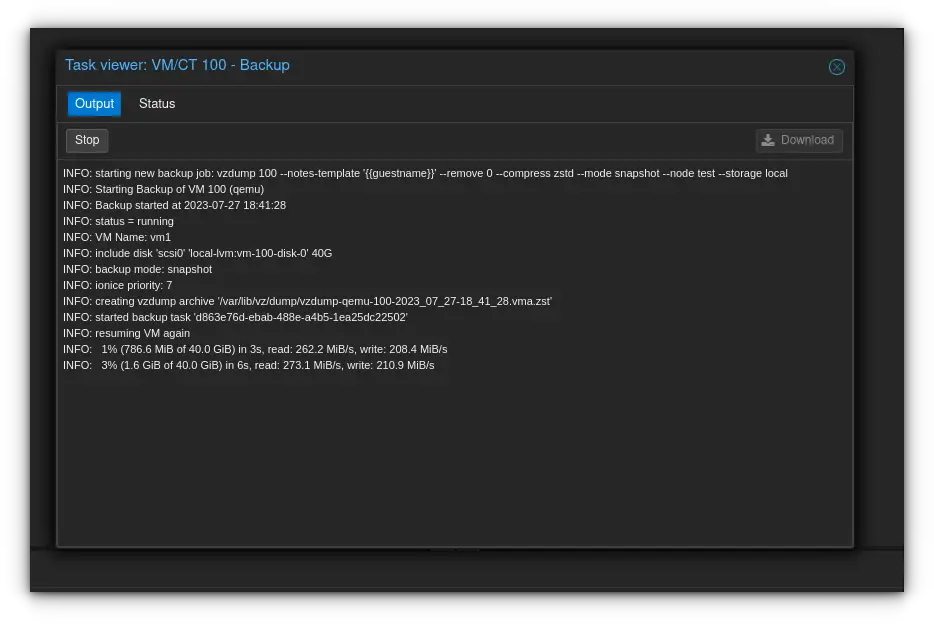
When you're ready click on "Backup" and watch it go. You'll know it's done when it displays TASK OK on the bottom of the window that appears:
You might wish to store your backup elsewhere for protection. To access the backup file, SSH into your Proxmox server as so :
ssh [email protected]The backup is stored in the following directory and will be in .zst format. You can then scp the file to your desired location:
cd /var/lib/vz/dump
scp vzdump-qemu-100.xxxx.xxx.xxx.zst destination/dir
Restoring a Proxmox Backup
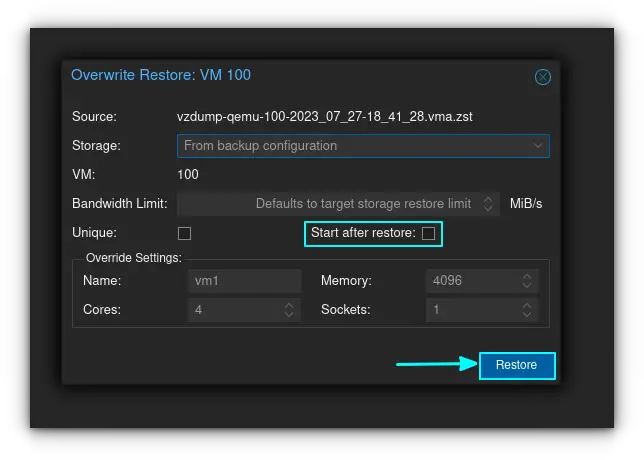
For example purposes, we'll just pretend that I completely trashed the virtual machine I have here as an example. But luckily, I took a backup and everything will be ok once I restore it. So to restore the backup, simply click on the backup, and click "Restore Now"
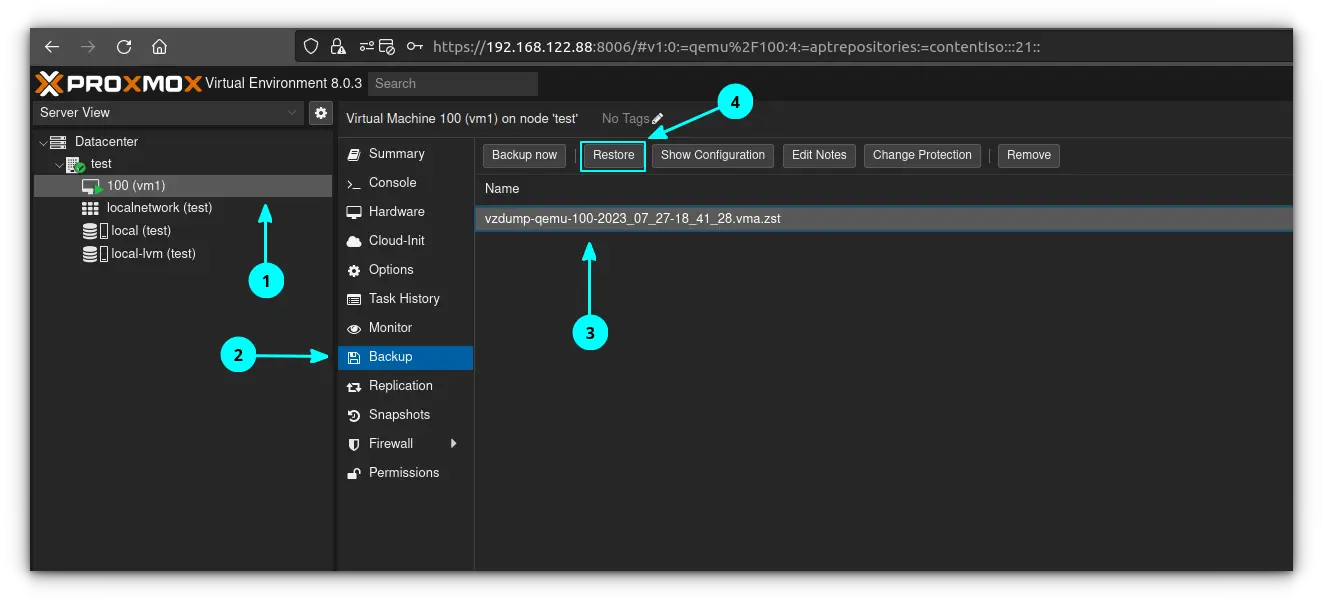
Set your options according to the menu below, and then click the "Restore" button. The restore will proceed, and the virtual machine will be powered off unless you click the "Start after Restore" button.
And that's it! The next article in this series will be about making a template out of a virtual machine. Hope this helped you!
I'm an experienced System Administrator with a focus on transitioning into a Computer Systems Analyst role.
