Adding Shared Storage to Proxmox Installation
In this part of the Proxmox tutorial series, you'll learn to add shared storage to a Proxmox installation.

So far in this Proxmox series, you have learned about installing Proxmox and creating virtual machines and containers.
In this part, you'll learn about adding shared storage in Proxmox.
Proxmox VE supports shared storage – for instance, you could use your network attached storage device as a shared storage medium for one or more nodes, or simply as external and larger storage for a single node.
Add shared storage in Proxmox
In this tutorial, I will be setting up shared storage on a single node using my Synology NAS device with an NFS share.
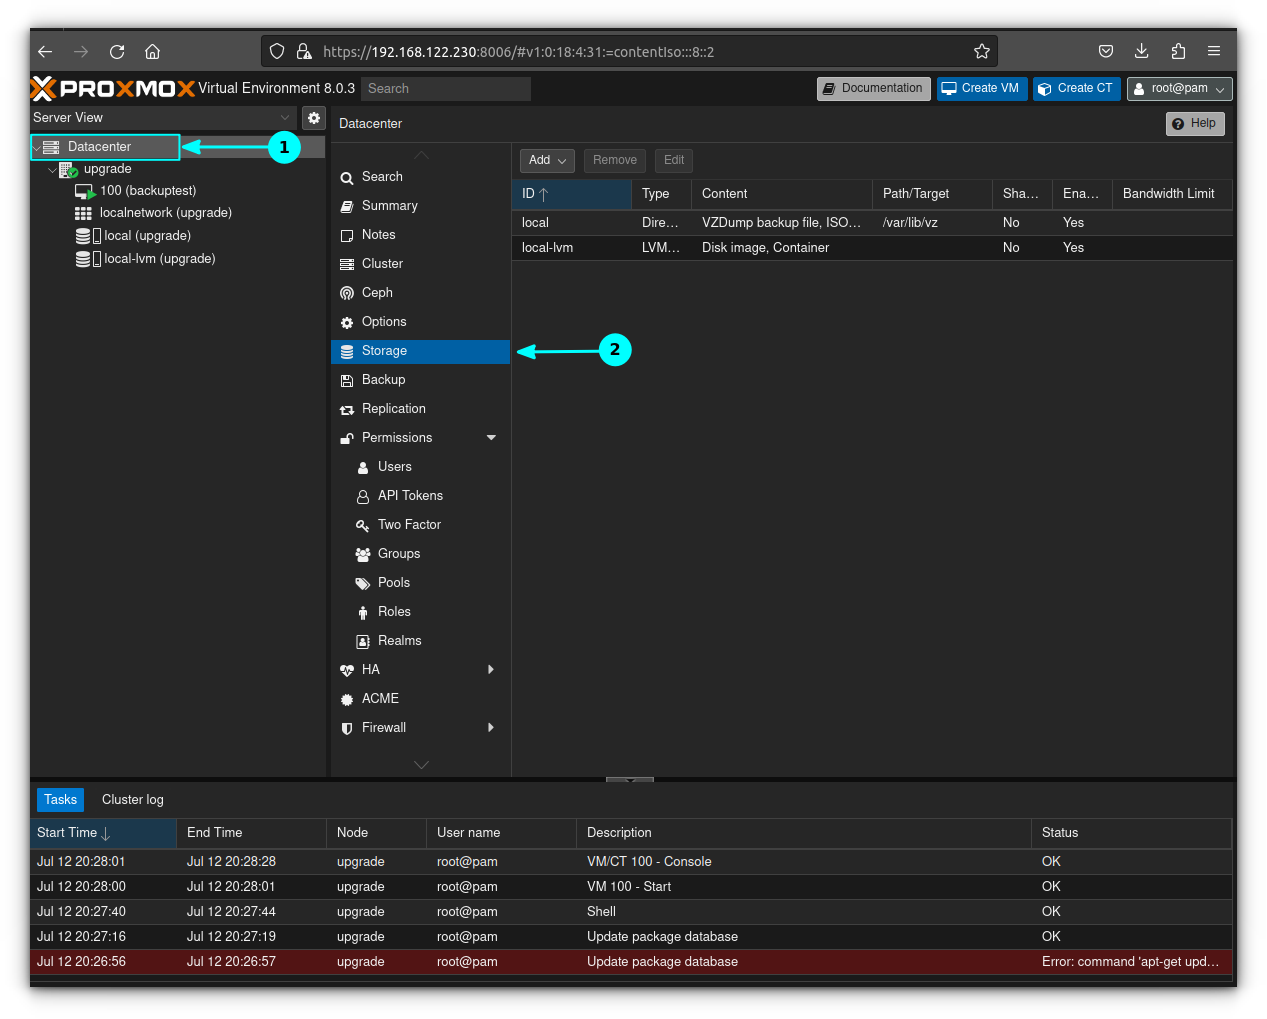
Click on the Datacenter tab on the left side of your Proxmox GUI, and click on “Storage”.
Click on "Add" and select NFS in the dropdown menu:
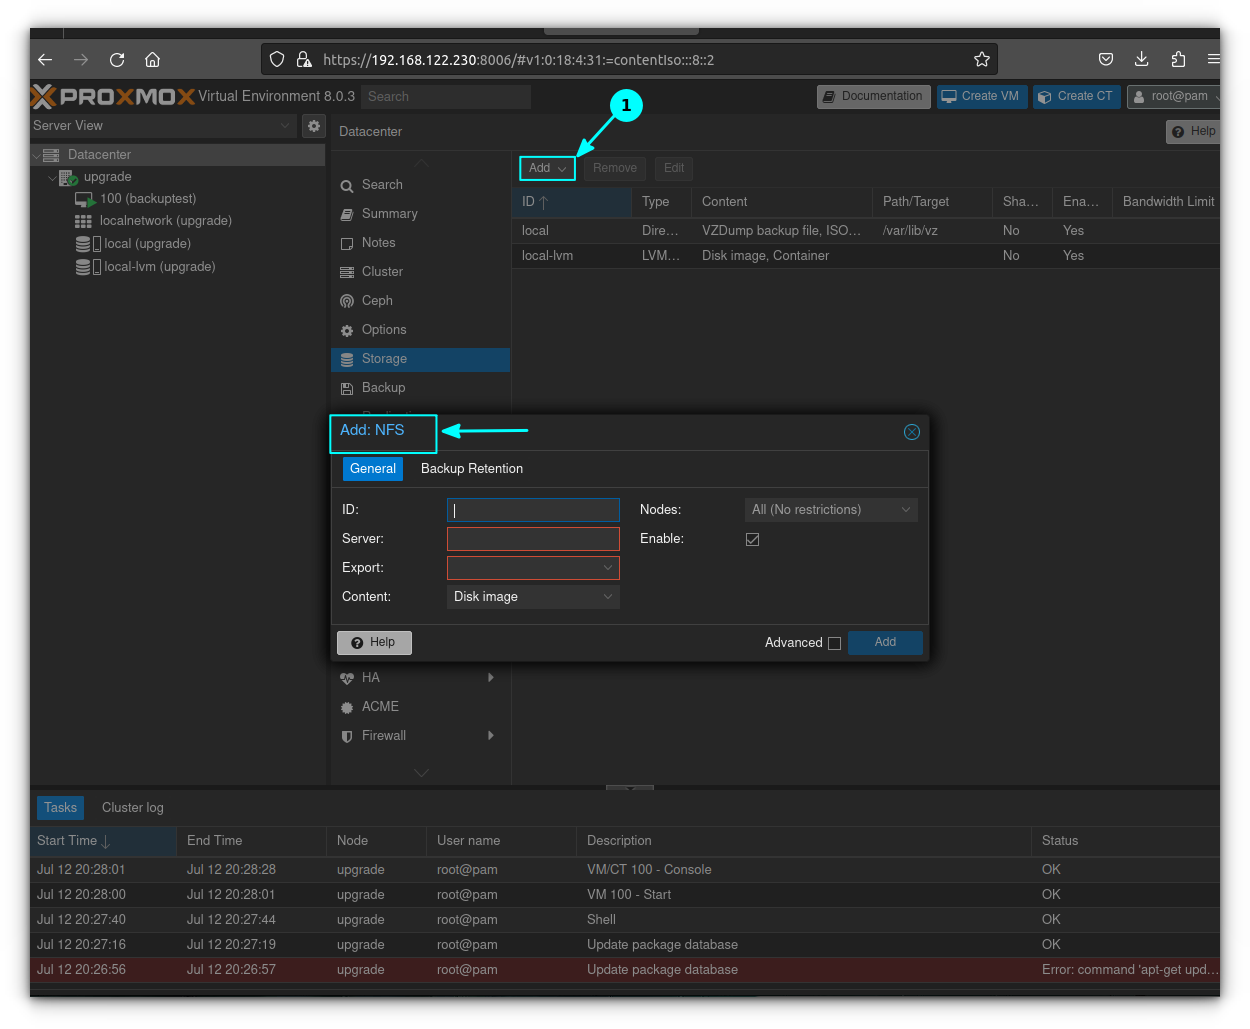
ID can be whatever you want the name of your storage to be to Proxmox. Server is the IP of the NAS or storage device being used. Export is the full path to the shared directory being used for storage. For content, highlight everything that you want to enable this storage device for (ISOs, VMs, CTs, etc).. Everything else can be left default:

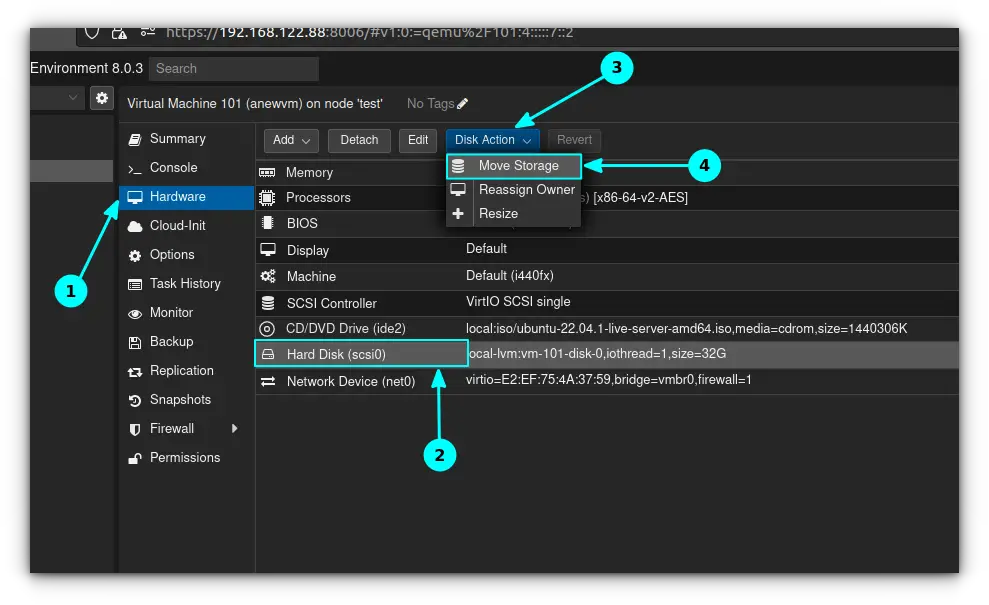
The storage device is now available in the datacenter tab alongside the internal storage of your server. Let's test it out by moving a virtual machine to it. Click on your VM and click on the Hardware tab. Click and highlight "Hard Disk" and then press the button on the top that says "Disk Action". Click "Move Storage":
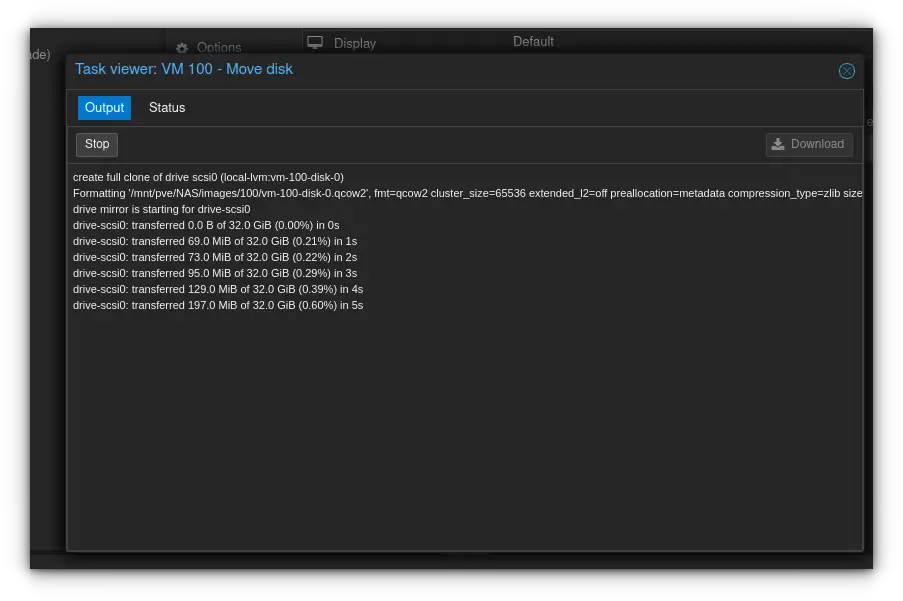
Select your new storage device (in my case it was the NAS device), and delete the source if desired. Then click on "Move Disk":
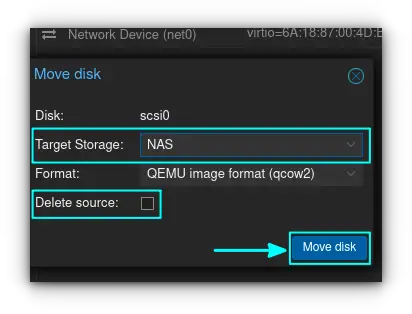
Once the status window displays "TASK OK" you're done. Continue migrating your other VMs.
I hope you like this quick Proxmox tutorial. Stay tuned for more as I'll discuss backing up and restoring VMS, upgrading the Proxmox version, cloning and templating.