Chapter 5: Windows - Organize Your Work Inside a Session
In the previous chapter, you learned how to create, name, detach, and reattach tmux sessions.
Now you already have the main workspace. But imagine you're working on a project and need to do several things at once.
You want one terminal for your application, another for logs, another for Git commands, and another for testing. You could open four separate terminal windows.
Or, you can keep everything inside the same tmux session. That's where windows come in.
A tmux window is essentially a terminal tab inside a session. Once you understand sessions, windows are the next layer of organization.
What Is a Tmux Window?
Remember the hierarchy from Chapter 1:
Session
   │
   ├── Window
   ├── Window
   └── Window
A session represents the overall context. Windows represent the different tasks inside that context. For example, imagine you're working on an application called my-api.
You could have: my-api: (editor, server, logs, git), which will look like below in tmux:
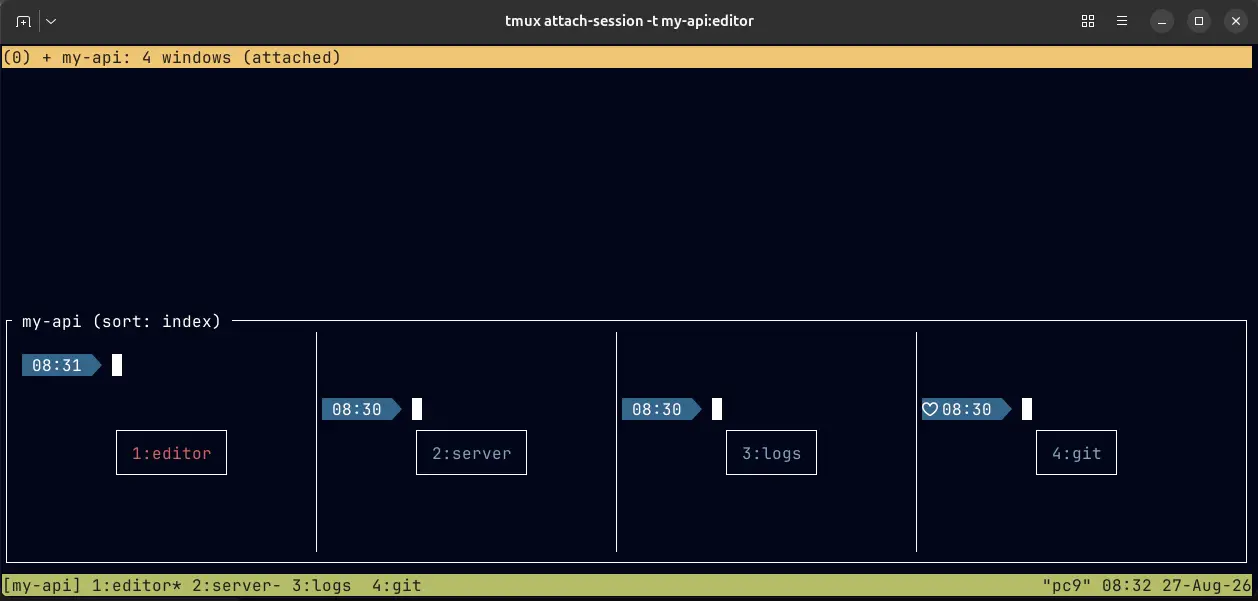
All four windows belong to the same my-api session. This is useful because everything related to the project stays together.
Create a New Window
Let's create one. Inside your tmux session, press:
Ctrl+b cRemember the prefix sequence:
- Press
Ctrl+b - Release the keys
- Press
c
new window creation in tmux
A new window appears. You are now working inside that new window. You can run any normal commands here.
The important part is that you haven't created a new session. You've simply created another workspace inside the same session.
Switch Between Windows
Once you have multiple windows, you need a way to move between them.
Use:
Ctrl+b nThis moves to the next window.
To move to the previous window:
Ctrl+b pYou can also jump directly to a window by its number.
For example:
Ctrl+b 2takes you to window 2.
And:
Ctrl+b 1takes you to window 1.
You can see below how the star pointer changes when we change windows:
Switching between windows in tmux
This is one reason the numbers shown in the tmux status bar are useful.
Rename a Window
The default window name is usually based on the process running inside it.
For example, you might see:
0:bashThat's not very descriptive.
Let's give the window a useful name.
Press:
Ctrl+b ,Tmux will ask you for a new name.
For example:
editorPress Enter.
Your status bar should now show something similar to:
1:editorNow you immediately know what that window is for.
renaming a window in tmux
Good names make a big difference once you have several windows.
Close a Window
When you're finished with a window, you can close it by exiting the shell running inside it:
exitIf that is the only shell in the window, the window closes.
You can also use the tmux command:
Ctrl+b &Tmux will ask you to confirm before killing the current window.
Closing a window in tmux
Be careful with this command because closing a window also closes the processes running inside it.
For example, if a server is running in that window, closing the window will terminate that server process.
So think of it this way:
Create window → Start work
Close window  → Finish that workspace
All of these windows are still part of the same session. That means you can detach from the session and later reattach your windows will still be there. This is the combination that makes tmux powerful.
Practice
Spend a few minutes switching between your windows without looking at the shortcut table. The goal isn't perfect memorization yet; it's becoming comfortable moving around your tmux workspace.
Create a session called:
tmux new -s practiceCreate three windows and name them:
commands
logs
monitoring
Practice moving between them. Then detach:
Ctrl+b dand reattach:
tmux attach -t practiceYour windows should still be exactly where you left them. You now know how to organize different tasks using windows. But sometimes switching between windows isn't enough.
What if you want to see your application logs and run commands at the same time? Instead of creating another window, you can split the current window into multiple terminal areas.
Those are called panes. In the next chapter, we'll create, navigate, resize, and zoom panes!