

With tmux, you can create multiple terminal sessions that can be opened (attached) and closed (detached) or displayed simultaneously, all from one window.
Learning how to use a terminal multiplexer will save you a lot of headaches if you spend a lot of time in the terminal. This is especially true if your work involves accessing remote machines via command line only.
Screen vs tmux
Tmux is considered to be the next evolutionary step forward from the GNU Screen multiplexer.
If you’re used to the screen command, you’ll find it easy to get started right away. There are many similarities between the two applications. We had a great response to our screen command article, and I feel like our readers will really enjoy using some of the updated features of tmux.
If you are a little lost and don’t know what this article is about yet, that is totally fine. We’re going to walk through everything together. I will show you how to install tmux and how to perform basic operations.
Install tmux
Tmux is a popular application, and it should be available in your Linux distribution’s official repository. You can install it using the package manager of your distribution.
On Debian and Ubuntu-based distributions, you can install it using the following command:
sudo apt install tmux
Using tmux
As we touched on, tmux is a great application to make you more productive. It is a powerful piece of software, but it can be a little confusing to get started with.
I will guide you through critical features one at a time. My goal is to ease you in and show you the basic functionality. There are so many ways to customize tmux, that we won’t be able to cover everything in this article. If you are curious about an article on advanced features and functionalities, let us know in the comment section!
Create a session in tmux
Open a terminal and use the following command:
christopher@linuxhandbook:~$ tmux
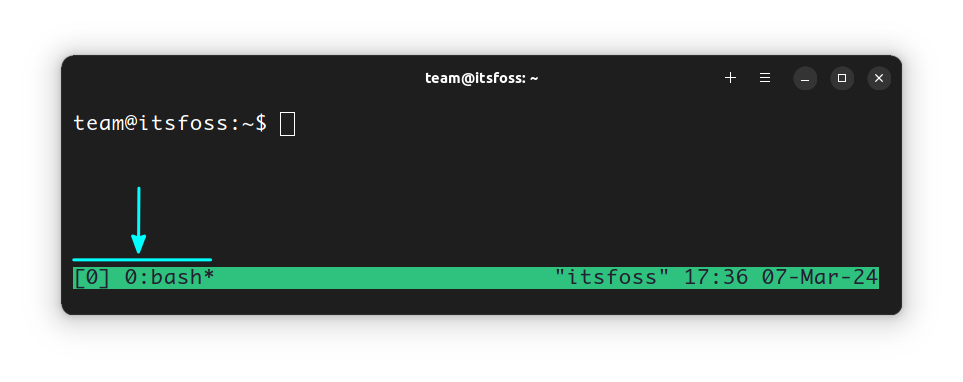
This should bring you into tmux. You will see a command prompt as usual, but you will now see a taskbar style menu on the bottom of the terminal that will say something like 0:bash*. The asterisk indicates that this is your active window.
Let’s create a couple of windows that you can switch between. You can do this by using the prefix [CTRL + b] + c.
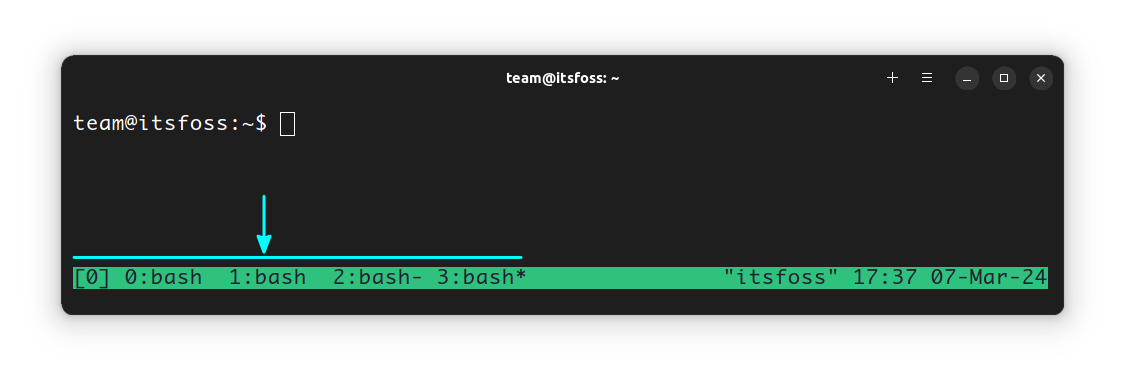
You should see on the taskbar that something named 1:bash has been added. Let’s add two more before you continue further.
It should now look like the screenshot below. You should have a total of four new terminal windows (you’ll only see one window at a time).
The automatic window name
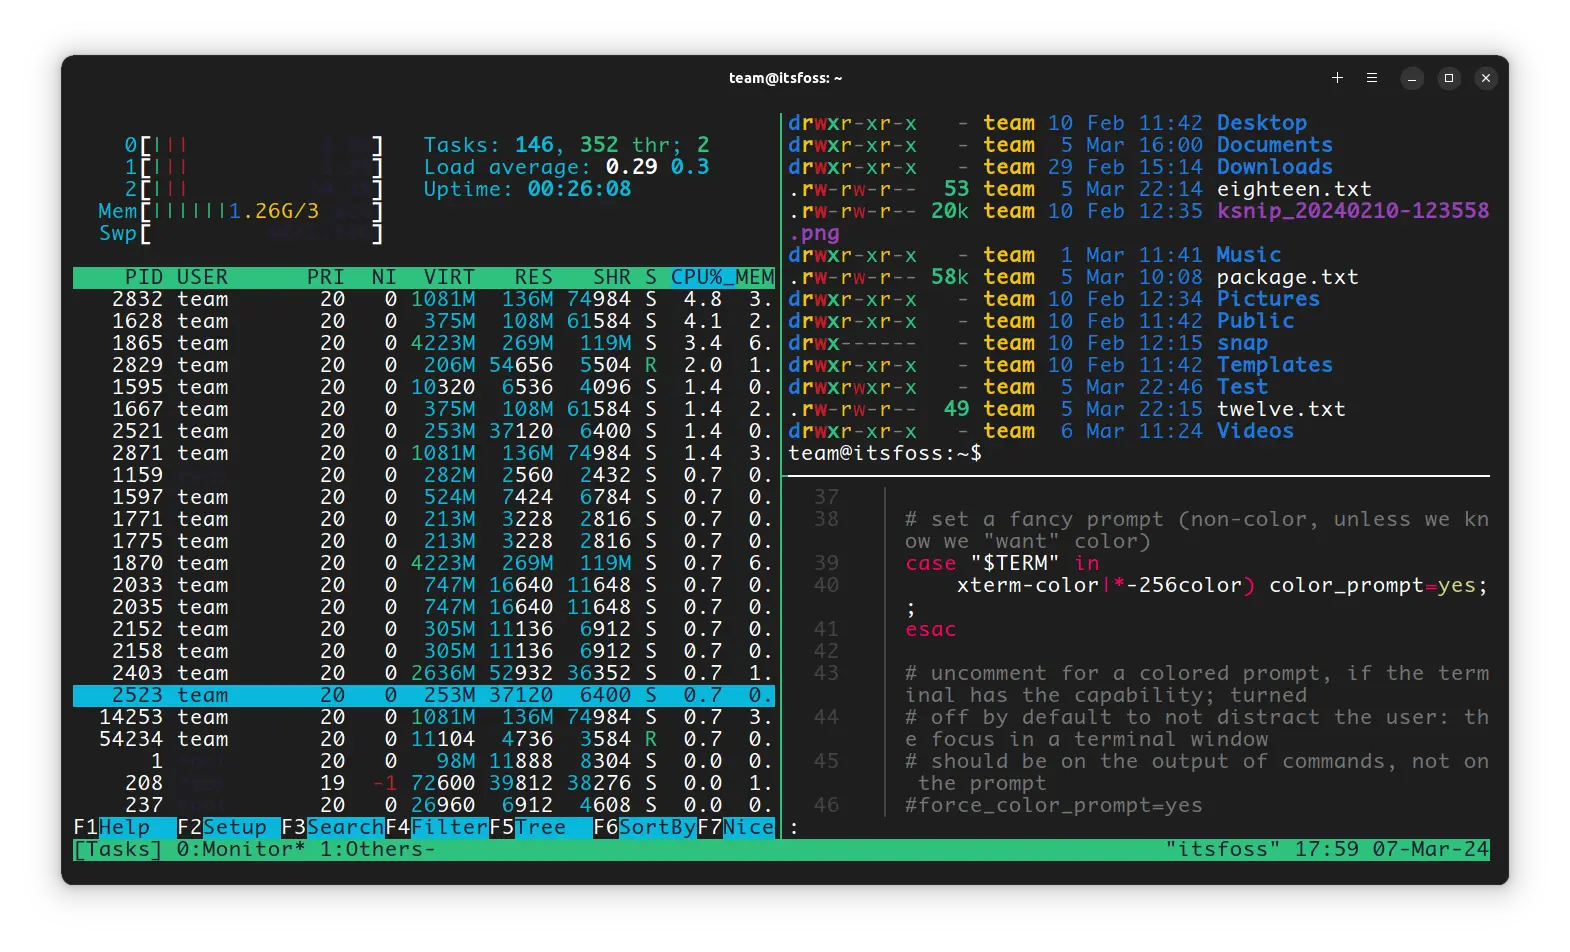
Tmux can actually identify certain programs and rename your windows automatically (if you haven’t named your window explicitly). For example, if you run the top command in a window, you’ll notice that the window name is changed from bash to top.

Session vs Window vs Pane (split) in tmux
Before you go any further, you should know the difference between session, window, and pane in tmux.
A session can have multiple windows. A window is basically a terminal. You can split a window between several vertical and horizontal panes. This means a terminal window can have multiple terminals in it.
You can create a tmux session for a specific topic/project. For example, if you manage three servers, maybe you can create one session for each server to perform tasks. Use a window for monitoring system resources and another for performing some maintenance tasks. The system monitoring window can have multiple panes to monitor memory, CPU, and disk usage.
Switching between windows in a tmux session
Remember that CTRL+b (simultaneously) is like your “tmux key”. It tells the software that you want to enter a command. Look at the table below to get started navigating the tmux interface.
| Go to Previous Window | Go to Next Window | Go to Nth Window |
|---|---|---|
| [CTRL + b] + p | [CTRL + b] + n | [CTRL + b] + {0, 1, 2, 3, etc.} |
Now you can move “back and forth” or select a specific instance by its ID number. Try those things out until it feels comfortable.
Ready? Awesome. Let’s check out some of the other functionalities.
Switch using window list
Another option uses [CTRL + b] + w. This gives you a visual overview of sessions. You can use the arrow keys to select the desired windows/panes.
Using interactive window switch in Tmux
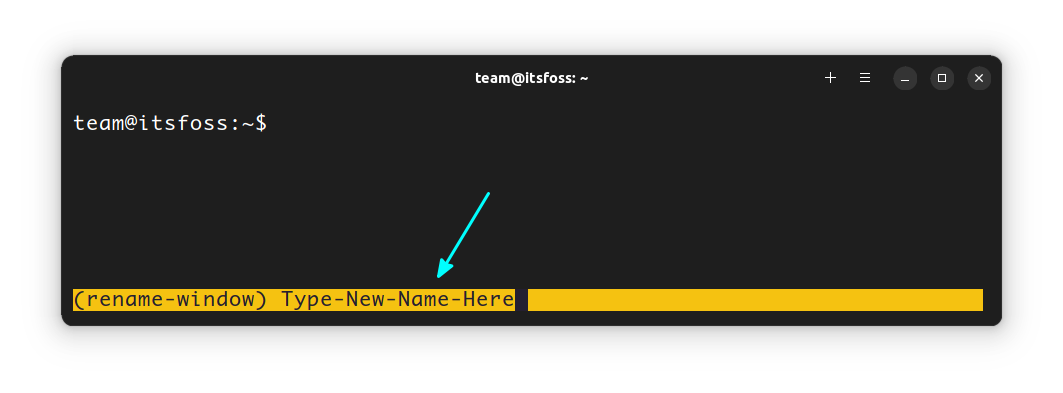
Name or rename windows in tmux
You can name your current window with the following key combination:
[CTRL + b] + ,
Name your tmux session
You may find it helpful to name your sessions with meaningful titles to keep things organized. Let’s try naming your first session with tmux.
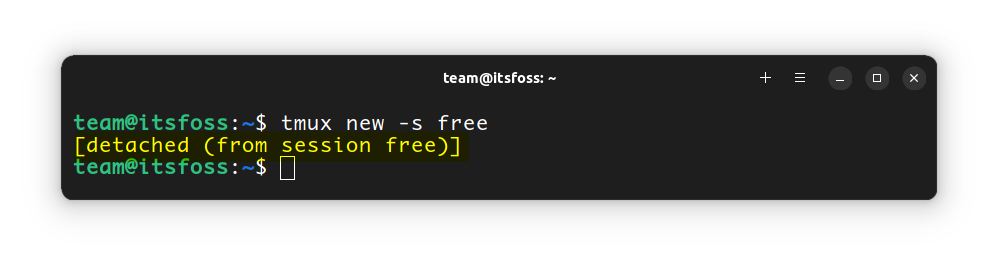
You can name it anything that we want, but in this case, I will name it “free”. Enter the following command:
tmux new -s free
You should now have a new session of tmux running. If you look in the bottom-left area of the window, you will see the name of your session rather than the generic ‘bash’.

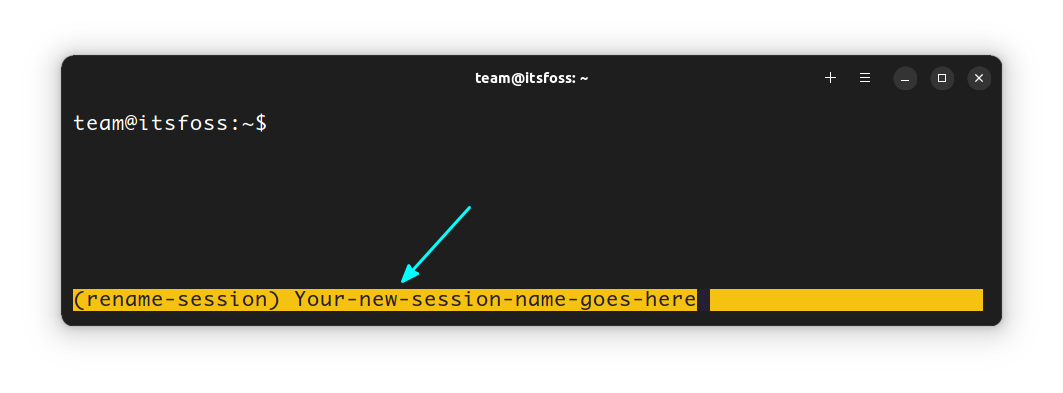
If you already created a session, you may name it or rename it using the following key combination:
[ctrl+b] + $
Detach a session (come out of tmux session but keep it running in the background)
Before you continue, let’s begin running free with the watch command, which will update the results every 2 seconds.
watch free
If you are not familiar with free or watch, I recommend that you check out the watch and free command. Knowledge of their functionality, however, is not essential for using them with tmux.
Okay, so once the program begins, go ahead and detach the session. Use this key combination:
[ctrl + b] + d
This should return you to a standard command prompt. Keep in mind that the tmux session is still running in the background, and you can enter it again whenever you want.
List tmux sessions
What happened to your session? It is still running in the background. You can re-open the session by name or by ID number, but what if you forget the session name?
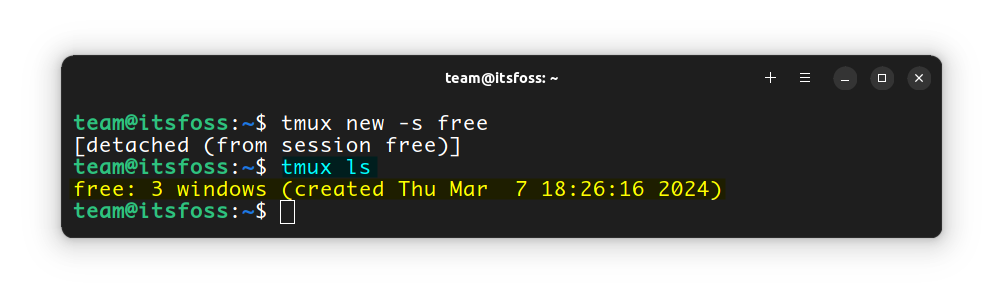
There is a list function built into tmux:
tmux ls
This will list all your current tmux sessions. Running it will produce output like this:
christopher@linuxhandbook:~$ tmux ls
free: 1 windows (created Sat Feb 29 03:16:31 2020) [80x23]
As you can see, it also lists how many windows a session has.
Re-enter a session in Tmux (also known as attach)
To reopen your tmux session, you can use the tmux command with attach or attach-session option like this:
tmux attach -t session_name_or_number
Here is an animation that shows all these steps until this point in the demonstration.
Tmux Commands Animated Overview
Creating multiple panes in tmux
Now that you have an understanding of the basics, you can go further and create multiple panes.
| Horizontal (Left/Right) | Vertical (Top/Bottom) |
|---|---|
| [CTRL + b] + % | [CTRL + b] + " |
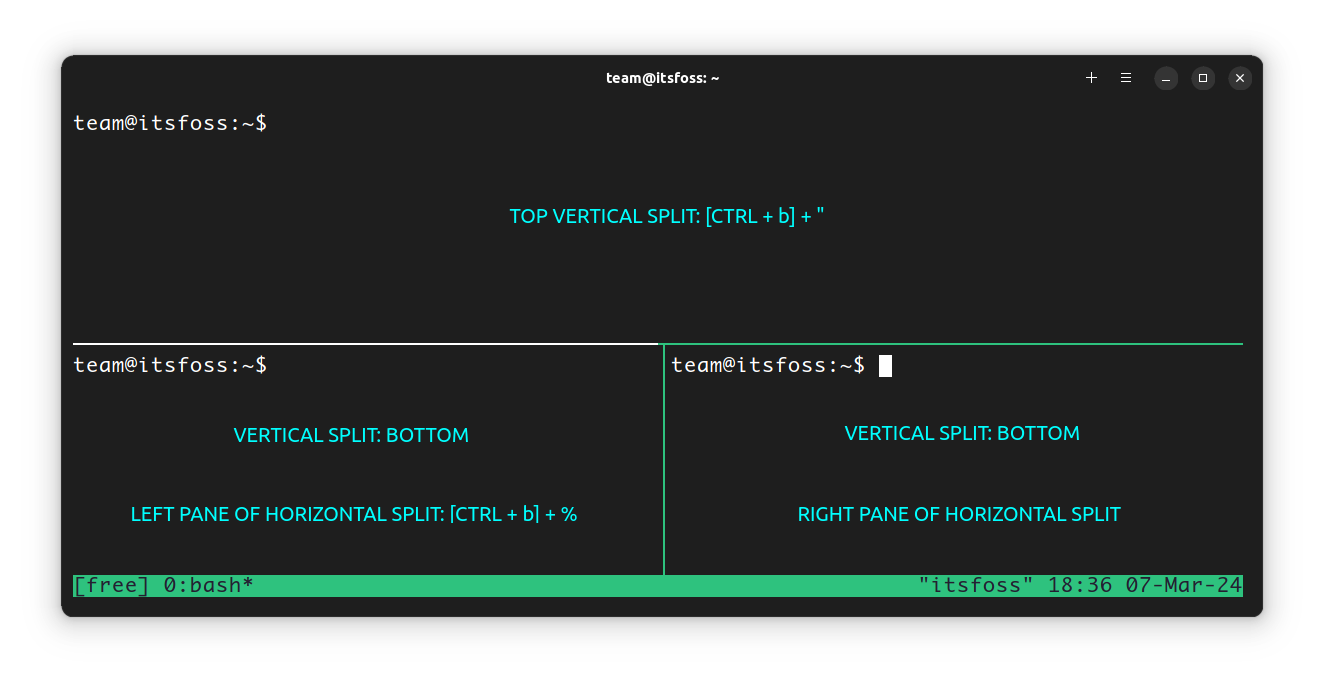
Let’s get some practice with these commands by creating a vertical split followed by a horizontal split.
[ctrl + b] + "
[ctrl + b] +  %
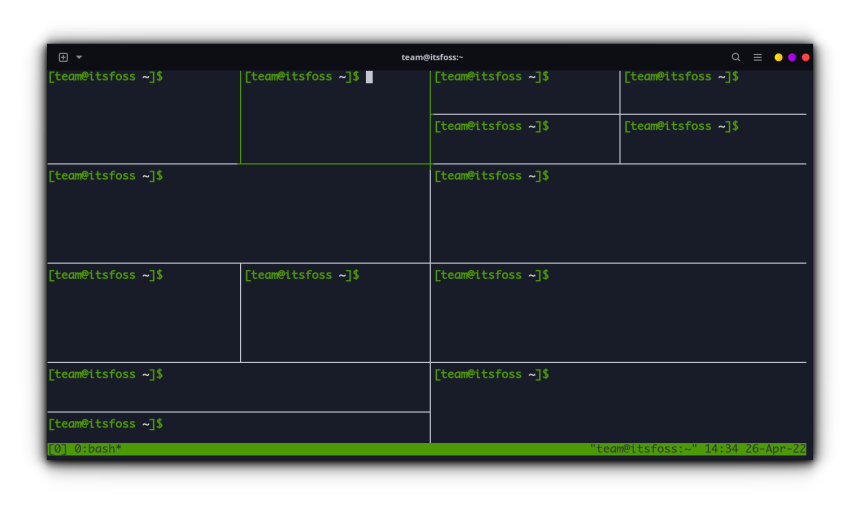
If you’ve entered the commands in that order, you should have three panes that look this:
You can use [CTRL + b] + space key to toggle the layout of the currently focused pane.

Switching between panes
To switch between the splits you can use the tmux prefix [CTRL + b] + arrow keys.
[ctrl+b] + arrow keys
This cycles the panes in the direction you choose. The selected pane will be highlighted in green.
Zoom into a pane
You can also “zoom” into a selected pane with the [CTRL +b ] + z. This will bring the selected screen to full size. To exit the zoom mode, hit [CTRL + b] + z again.
Killing or closing panes
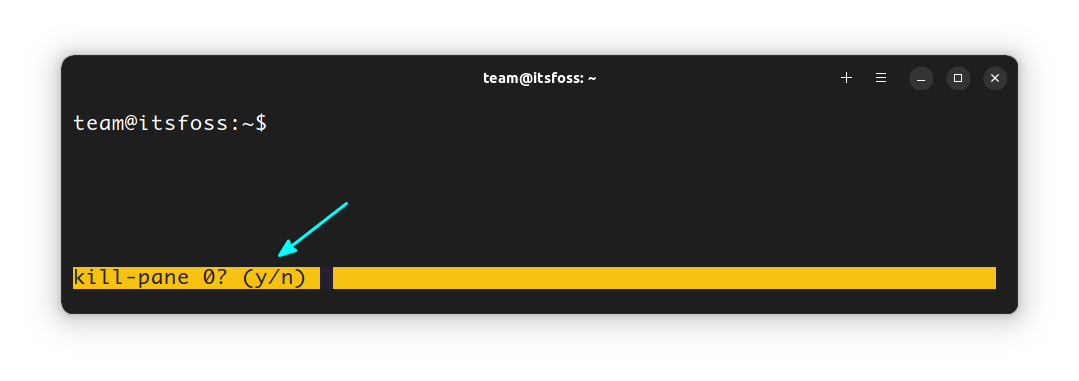
This is an important one. You can close a pane (splits) by using the prefix [CTRL + b] + x.
It will ask you for the confirmation:
kill-pane 0? (y/n)
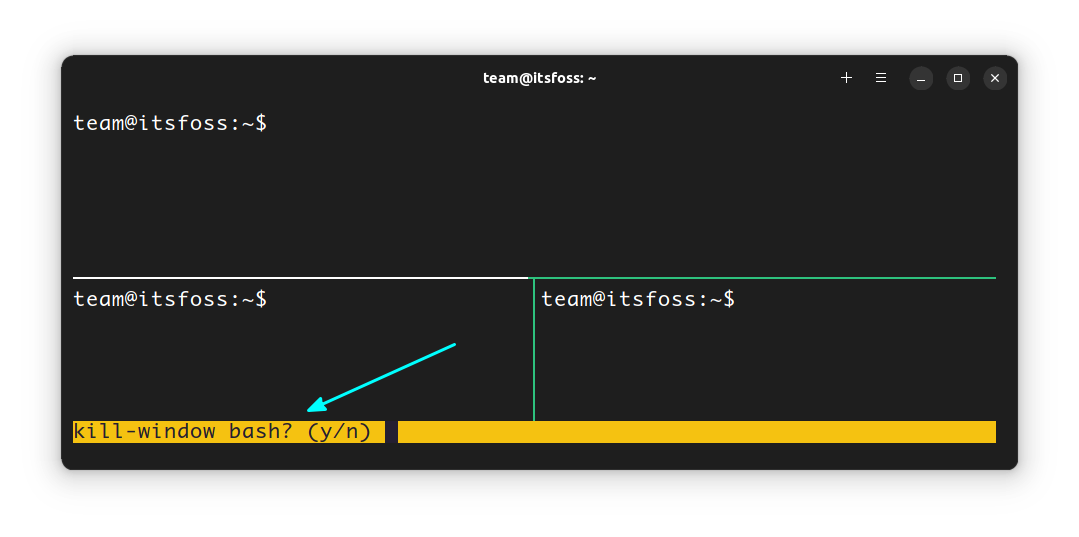
Killing or closing windows in tmux
In order to close the current window (tabs), use:
[ctrl + b] + &
It will ask for your confirmation:
kill-window window_name? (y/n)
Killing sessions in tmux
To kill the current tmux session you are using, you’ll have to kill all the windows first. That’s not very convenient, is it?
You can selectively kill a tmux session using its name or number like this:
tmux kill-session -t session_name_or_number
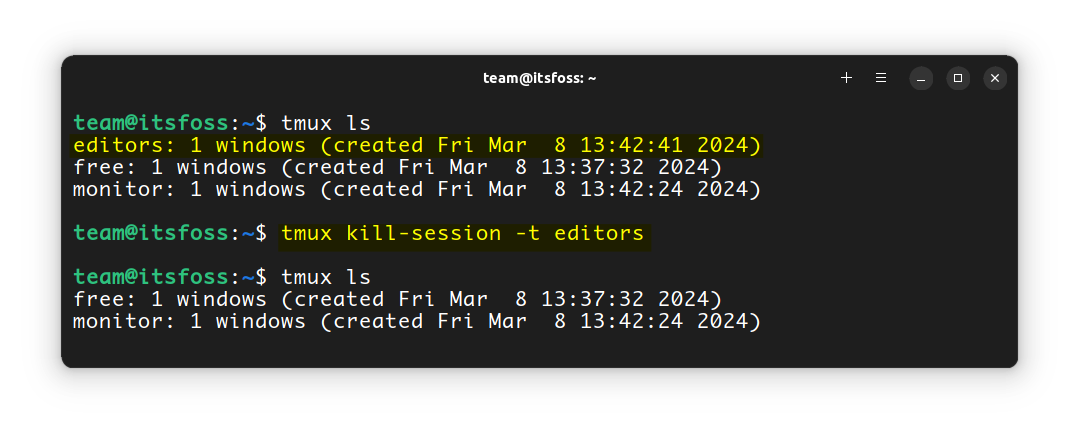
It will kill the session even if you are inside the session.
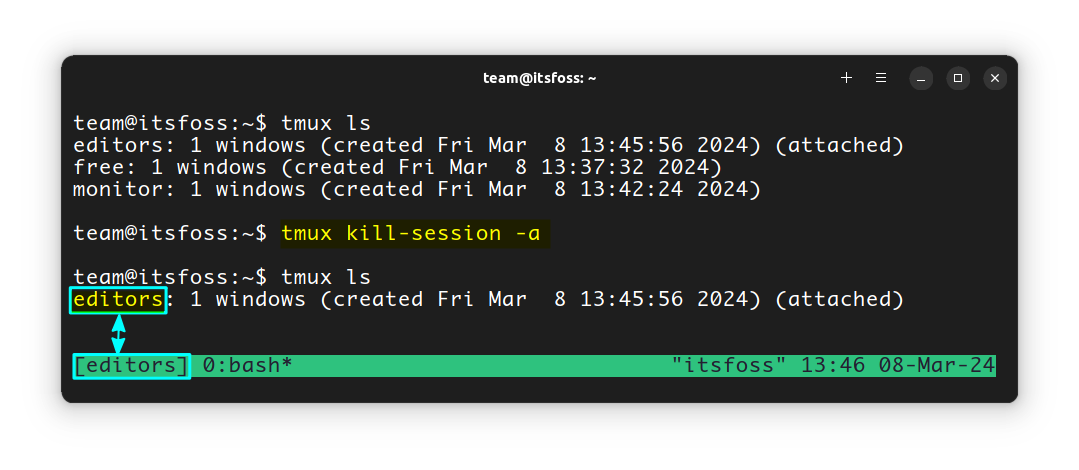
If you want to kill all the sessions except the one you are currently using (or the last one you used), use this command:
tmux kill-session -a
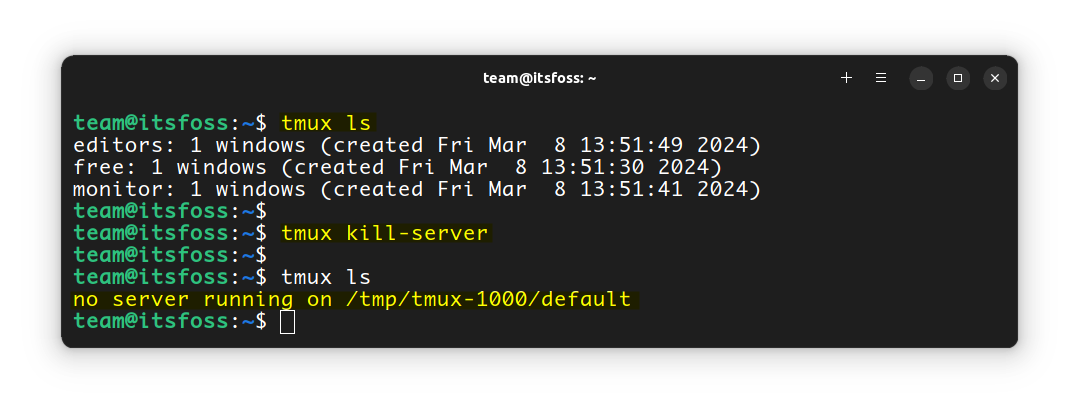
To kill all tmux sessions in one go, you can use this magical command:
tmux kill-server
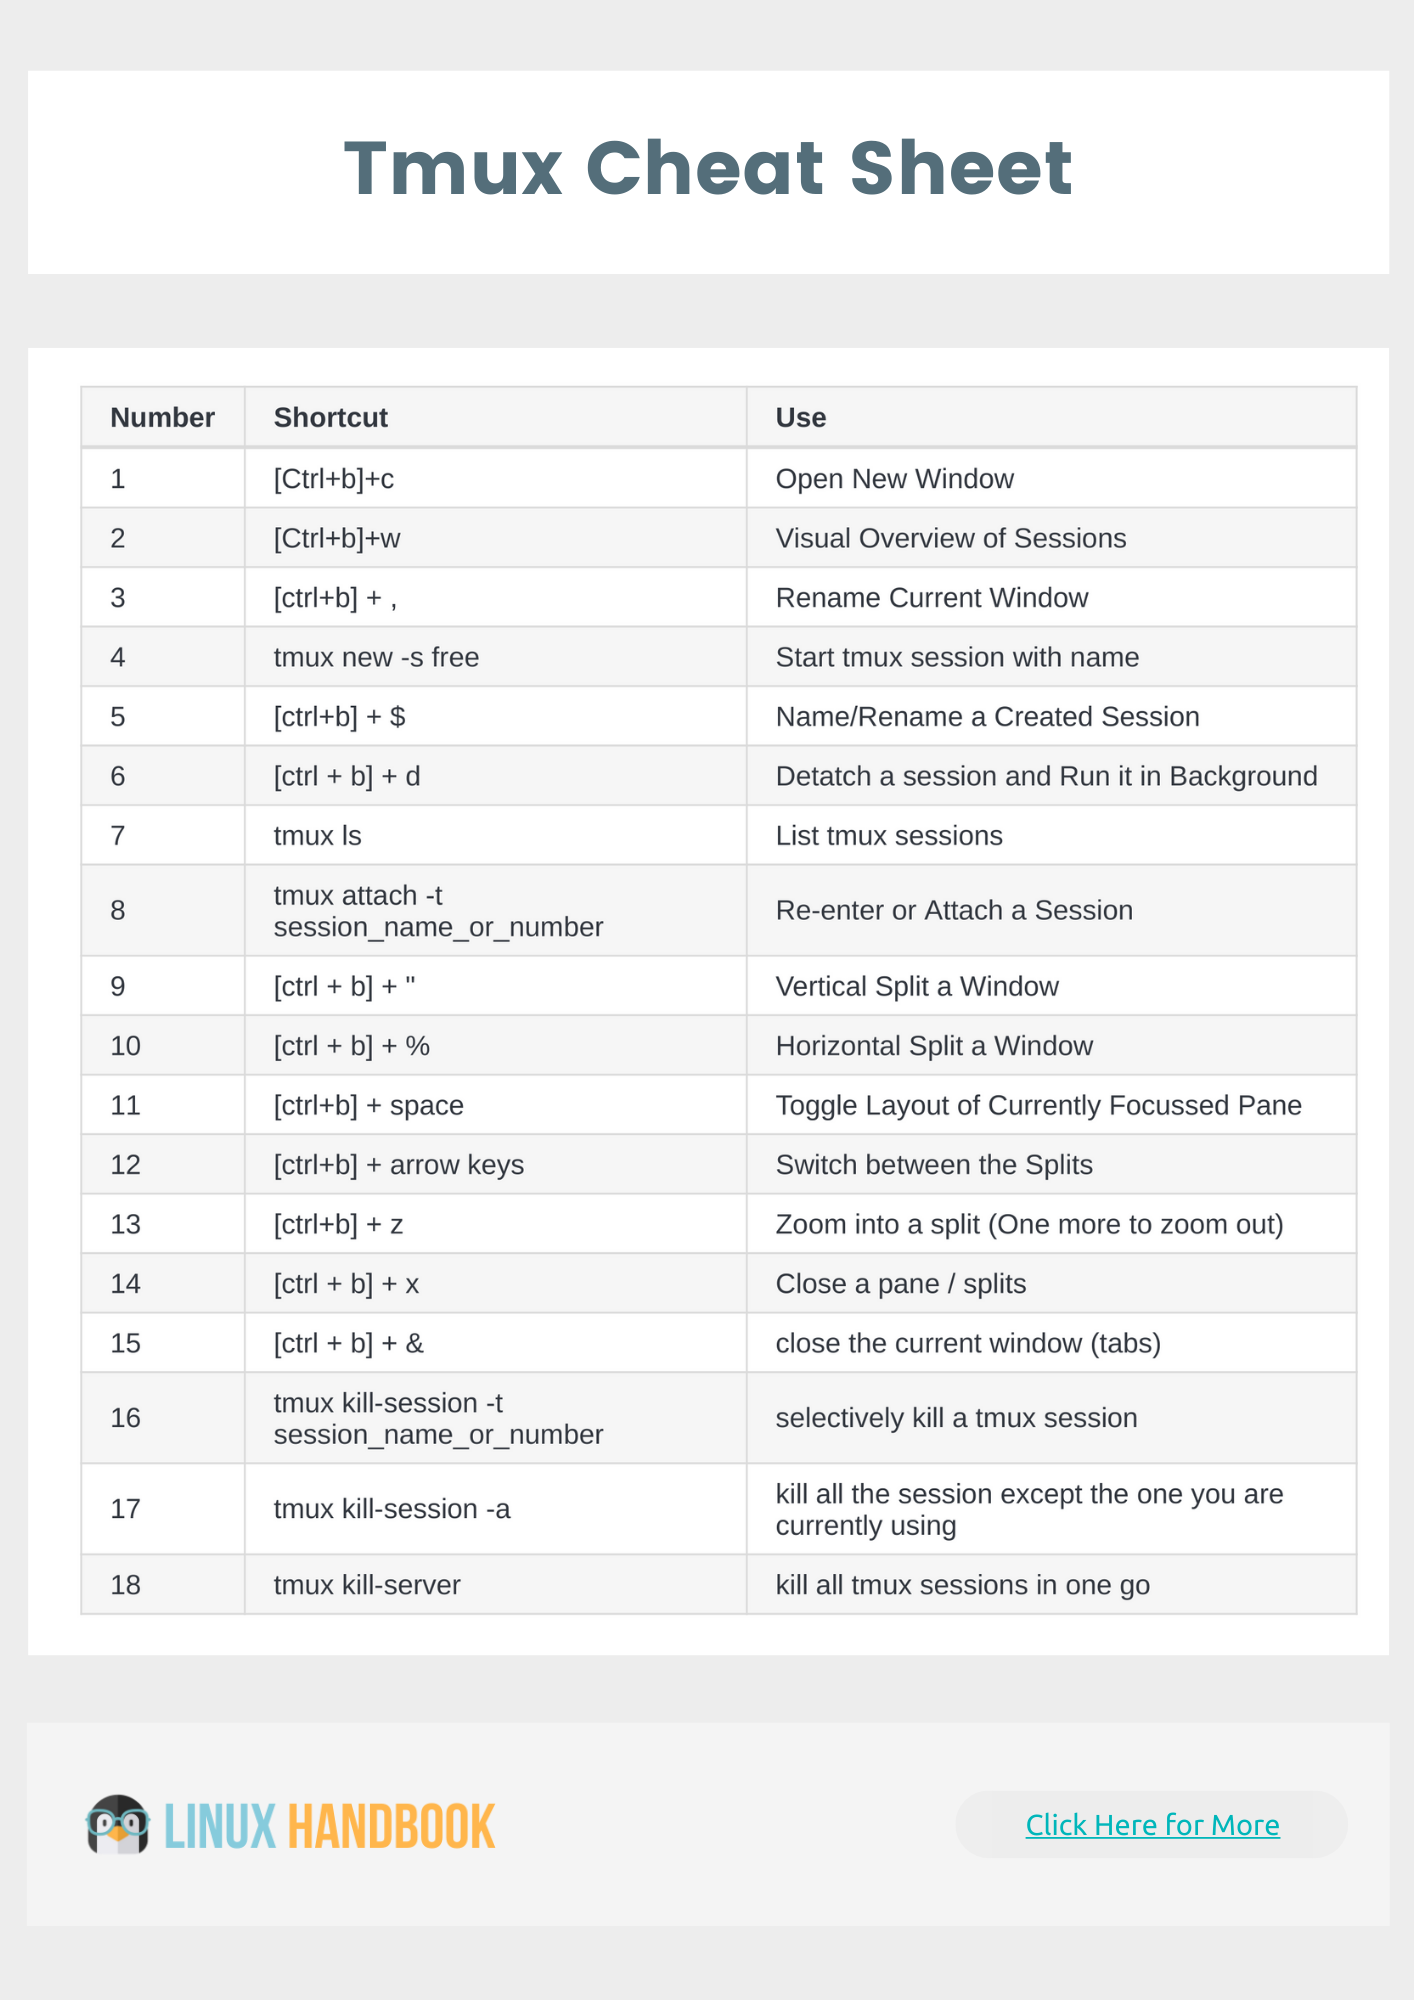
Download tmux cheat sheet
You learned the basics of tmux but remembering all the commands is not easy, specially in the beginning. This is why I am summarizing all the commands in the table below. You may also download it in PDF form.
| Commands and Key Combinations | Explanation |
|---|---|
| tmux | Start new session |
| tmux new -s name | Start new session with name |
| tmux ls | List all the sessions |
| tmux kill-session -t name | Kill the mentioned session |
| tmux kill-session -a | Kill all sessions except the current or last used session |
| tmux kill-server | Kill all tmux sessions |
| tmux attach -t name | Attach/enter the mentioned session |
| [CTRL + b] + d | Detach/exit the current session |
| [CTRL + b] + $ | Name or rename current session |
| [CTRL + b] + c | Create new window |
| [CTRL + b] + , | Name or rename current window |
| [CTRL + b] + w | List all windows |
| [CTRL + b] + & | Kill the current window |
| [CTRL + b] + n/p/N | Move to next/previous/Nth window |
| [CTRL + b] + % | Create horizontal pane (New left and right panes) |
| [CTRL + b] + “ | Create vertical pane (New top and bottom panes) |
| [CTRL + b] + space key | Toggle the layout of the current panes |
| [CTRL + b] + z | Zoom into the current pane |
| [CTRL + b] + x | Kill the current pane |
Conclusion
Thank you for following along with our introduction to tmux. As you can see, there are a wide variety of applications. I hope that this basic overview has given you some ideas about how you can use tmux to improve your workflow.
We'll be covering the steps discussed here in a bit more detail, in their dedicated page. You can find them from the left sidebar of this page.
As always, if you have any questions, please leave them below in the comment section.
