

The Vim editor is like an ocean – wonderful and joyful to be in, but there will always be things you don't know.
While you cannot discover the ocean alone, you can always learn from others' experiences.
I am sharing a few tips in this article that will help you use Vim like a pro.
I use them regularly and I have seen expert Vim users sharing them in various communities.
You should add them to your vimrc file, wherever applicable. You'll have a better and smoother experience using the ever-versatile Vim editor. Trust me on this.
1: Always use the built-in help
I can not stress this enough. The biggest and least used tip is "RTFM" (Read the f**king manual).
Obviously, there is the Internet, humanity's biggest collective resource for untapped knowledge, but what happens when Stack Overflow goes down?
Getting yourself habituated to Vim's built-in help is the biggest favour you can do for yourself.
The syntax for looking at Vim's internal help is as follows:
| Prefix | Example | Context |
|---|---|---|
: |
:help :w |
Help regarding the ':w' command |
| none | :help j |
Help regarding 'j' key in context to Normal mode |
v_ |
:help v_J |
Help about using 'J' key in context to Visual mode |
i_ |
:help i_<Esc> |
Help about using 'Esc' key in context to Insert mode |
/ |
:help /\n |
Help about search pattern '\n' |
2: Open as normal user, save as root user
In my memory of editing system files, you can easily forget adding sudo before editing a file in Vim. This opens a file in the 'readonly' mode. Meaning you can not write anything to it.
But you might have made some significant changes. And there might be no way of remembering every single edit you made. Hence, exiting with unsaved work is not an option.

In those scenarios, type the following command in Vim:
:w !sudo tee %Once you type this command, you will be asked for the password for sudo command. Enter that, and your changes will be saved.
sudoedit command instead of sudo vim for editing files that require superuser privilages.Let us break this down and understand what is happening here...
:w– This is the write command. Since no argument is given, Vim will write the whole file to standard output.!sudo– Run the 'sudo' command as a shell command, not as a Vim commandtee– The tee command is used to read from standard input and write it either to standard output or to a file%– Vim substitutes this by the name of the current file that you are editing.
The :w command writes the whole file to STDOUT (standard output). Then, we use the sudo command (since what we are editing is a system file after all) to obtain temporary privilege.
The percent sign (%) represents our filename and the tee command takes Vim's output from STDOUT and writes it to the % file.
This essentially works out to <Vim's STDOUT> | sudo tee /etc/ssh/sshd_config. A bit complex initially, but so is Vim ;)
3: Convert all spaces to tabs and vice-a-versa
We all have a preference for using either tabs or spaces over the other.
But what if you are editing an indented text file contradicting your preference?
3.1: Convert all spaces to tabs
When the current file is intended to use spaces, and you wish to convert them to tabs, there are two Vim commands that you need to run.
These two commands are as follows:
:set noexpandtab
:retab!
Doing so will convert all spaces to their equivalent of tabs. If the document uses two spaces as indentation width, they will be converted to 1 tab. If four spaces are used as a single indentation width, those four tabs will be replaced with one tab character.
3.2: Convert all tabs to spaces
If the file you are editing is intended with tabs and you want to convert the tabs to spaces, there are four Vim commands you must run.
:set expandtab
:set tabstop=4
:set shiftwidth=4
:retab
The first command (expandtab) tells Vim to expand tabs with spaces. The second command (tabstop) command how many spaces are used as one 'indentation block'.
In our case, we are defining "1 tab = 4 spaces". The shiftwidth command is used to control indentation when using >> operator, this too, is set to 4 spaces.
Finally, the retab command converts all tabs (that are used for indentation) to spaces.
4: Indent all lines
Wrongly indented lines can create havoc for Python and YAML programs.
To indent all lines, press the gg key to reach the top. Then press the = key to denote 'indent' and finally press the G key to denote 'last line'.
Repeat with me; it is gg=G key combination to indent all lines.
This will automatically indent (to the best of Vim's ability) all lines from the first line to the last line.
Below is a demonstration where I indent Rust code using the :gg=G command.
As you can see (from this limited preview), all the lines are correctly indented.
The icing is that lines do not have to be wrongly indented to use Vim's indentation.
5: Preserve indentation when you paste code
Admit it; we all have copy pasted code from the internet at least once. But what to do when the indentation gets messed up when you paste it?
To avoid that, add the following line to your .vimrc file:
set pastetoggle=<F2>With this change to your vimrc file, press the F2 key before you paste code. Doing so will ensure that your code gets pasted with the correct indentation.
6: Start writing with the correct indent depth
This is a handy trick that I learned only recently. Suppose you are on the first column of a line, but what you write needs to be indented.
How do you do that in a smart way? Without pressing tabs/spaces?
The answer is to use the S key in Normal mode.
When you are on the first column of a line, enter the Normal mode by pressing Esc key. Then press the S (uppercase) key. This will move your cursor to the appropriate indent depth and automatically enter into Insert mode so that you can start typing.
You can see, in this demonstration, my cursor was on the first column, and by pressing the S key, the cursor moved to the correct indent depth and Vim switched from Normal mode to Insert mode.
Pretty neat!
7: Show diff before saving the file
We have all been there. "I modified this file, but don't know what I changed and now I am afraid the change will cause unexpected issues down the road."
The remedy to this problem is to view the difference between the buffer and the file.
To do so, execute the following command in Vim itself:
:w !diff % -Let's break this down so you understand what is happening...
:wis the Vim command to save/write. In this particular scenario, where no file name is specified in the command, the output is written to the STDIN (standard input) file.:!<command>is the syntax for executing a shell command. In our case, we are running thediffcommand in our shell.%represents the name of the current file that is unmodified. Try this with:!echo %.-is the STDIN file for thediffcommand.
So, this command first writes all the [unsaved] content to the STDIN file. Then the diff command reads the current file (%) and comparing it against the STDIN (-) file.
This command roughly equates to this shell command -> diff <original-file> <Vim's STDOUT>.
8: Show spelling mistakes
If you have been using only Vim ever since the beginning, good for you! But some people are also introduced to word processing software like Microsoft Word.
It has a feature (or a curse, for people with non-English names), where the spell-checker of MS Word places a red squiggly line under a misspelled word.
That feature might appear to be "missing" from Vim. Well, not exactly.
Vim has a spell checker built into it. You can enable it using the following command:
:set spellUpon doing this, you might see misspelled words get highlighted. The way they are highlighted depends on your Vim color scheme. I get a white underline under misspelled words here.
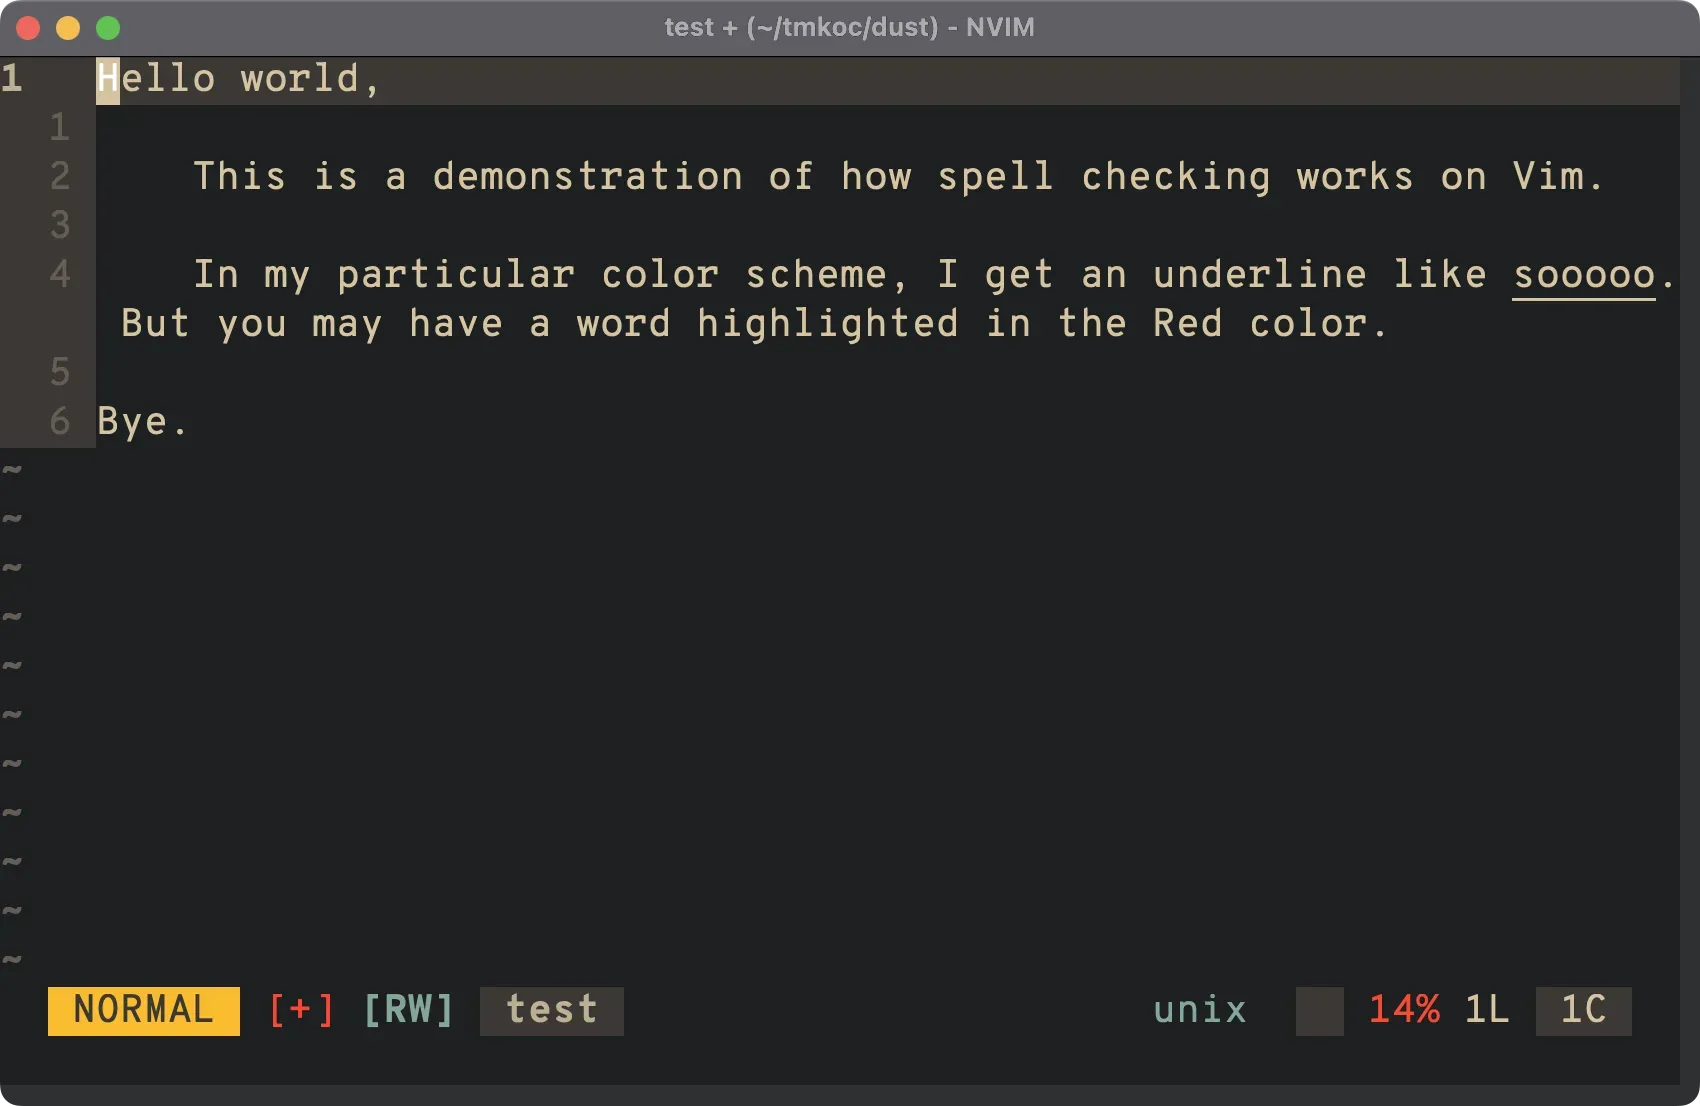
Your mileage may vary with the method of highlighting a word.
To make this the default Vim behaviour, you can add the following line to your .vimrc file:
set spell9: Show line numbers
Like many Vim users, you might have tried to enable line numbers in Vim.
There are two methods to indicate the line numbers. One is Absolute line numbering. In this, you get the absolute number for each line, just like any other code editor or IDE.
The second is Relative line numbering. In this, the current line gets the number '0' and every other line gets a relative number in context to the line on which the cursor is.
If you liked both, but had to make a tough choice of choosing one over the other, you are not alone. But you also don't have to choose one over the other. You can have both!
You can enable "Hybrid line numbering" in Vim by adding the following line to your .vimrc:
set number relativenumberThis will show the absolute line number on the line with your cursor and relative line numbers for other lines.
Below is a screenshot demonstrating how it Hybrid line numbering works:
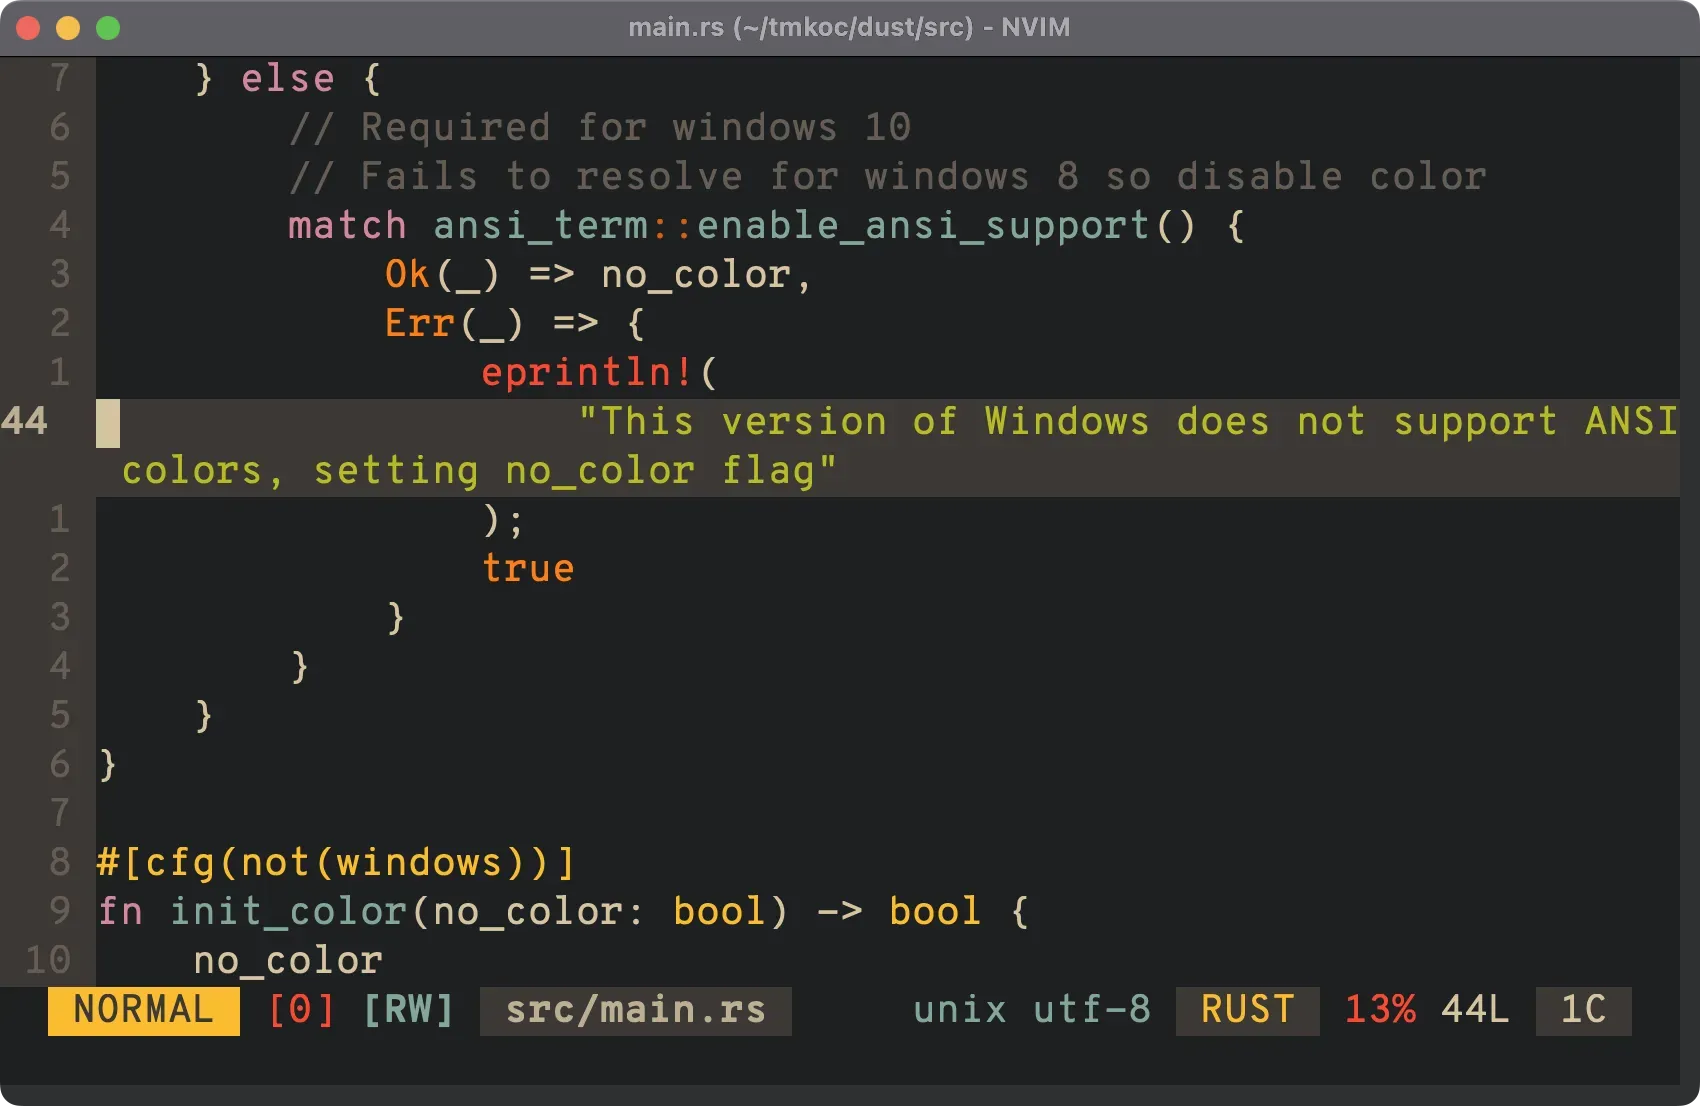
Currently, my cursor is at the 44th line, so that line has the absolute line number. But the lines above and below my cursor have a relative number with respect to the line which has the cursor.
10: Open Vim with the cursor on a particular line
There might have been times in your past when you wanted to open Vim with the cursor set to a particular line instead of the first line.
This can be done by making use of the +linenum option. Below is the syntax to do so:
vim +linenum FILEReplace the word linenum with an actual number.
Here you can see that I open the /etc/ssh/sshd_config file with my cursor on the lines 20 and 50. That was done using the +linenum option.
11: Use readable color schemes
When it comes to using color schemes, people often choose the ones that they find most attractive or aethetically pleasing. But when you Vim as a code editor cum IDE, it is nice to give up some eye candy in favour of getting colorschemes with better visual guides.
A good colorscheme only looks good, but an excellent colorscheme helps you easily identify keywords, variables and other identifiers with the help of colors.
A few of my personal favorite colorschemes are as follows:
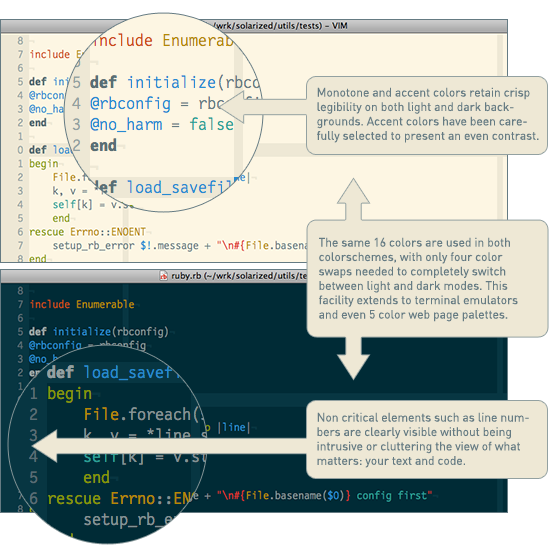
- Purify [preview]
- Solarized [preview]
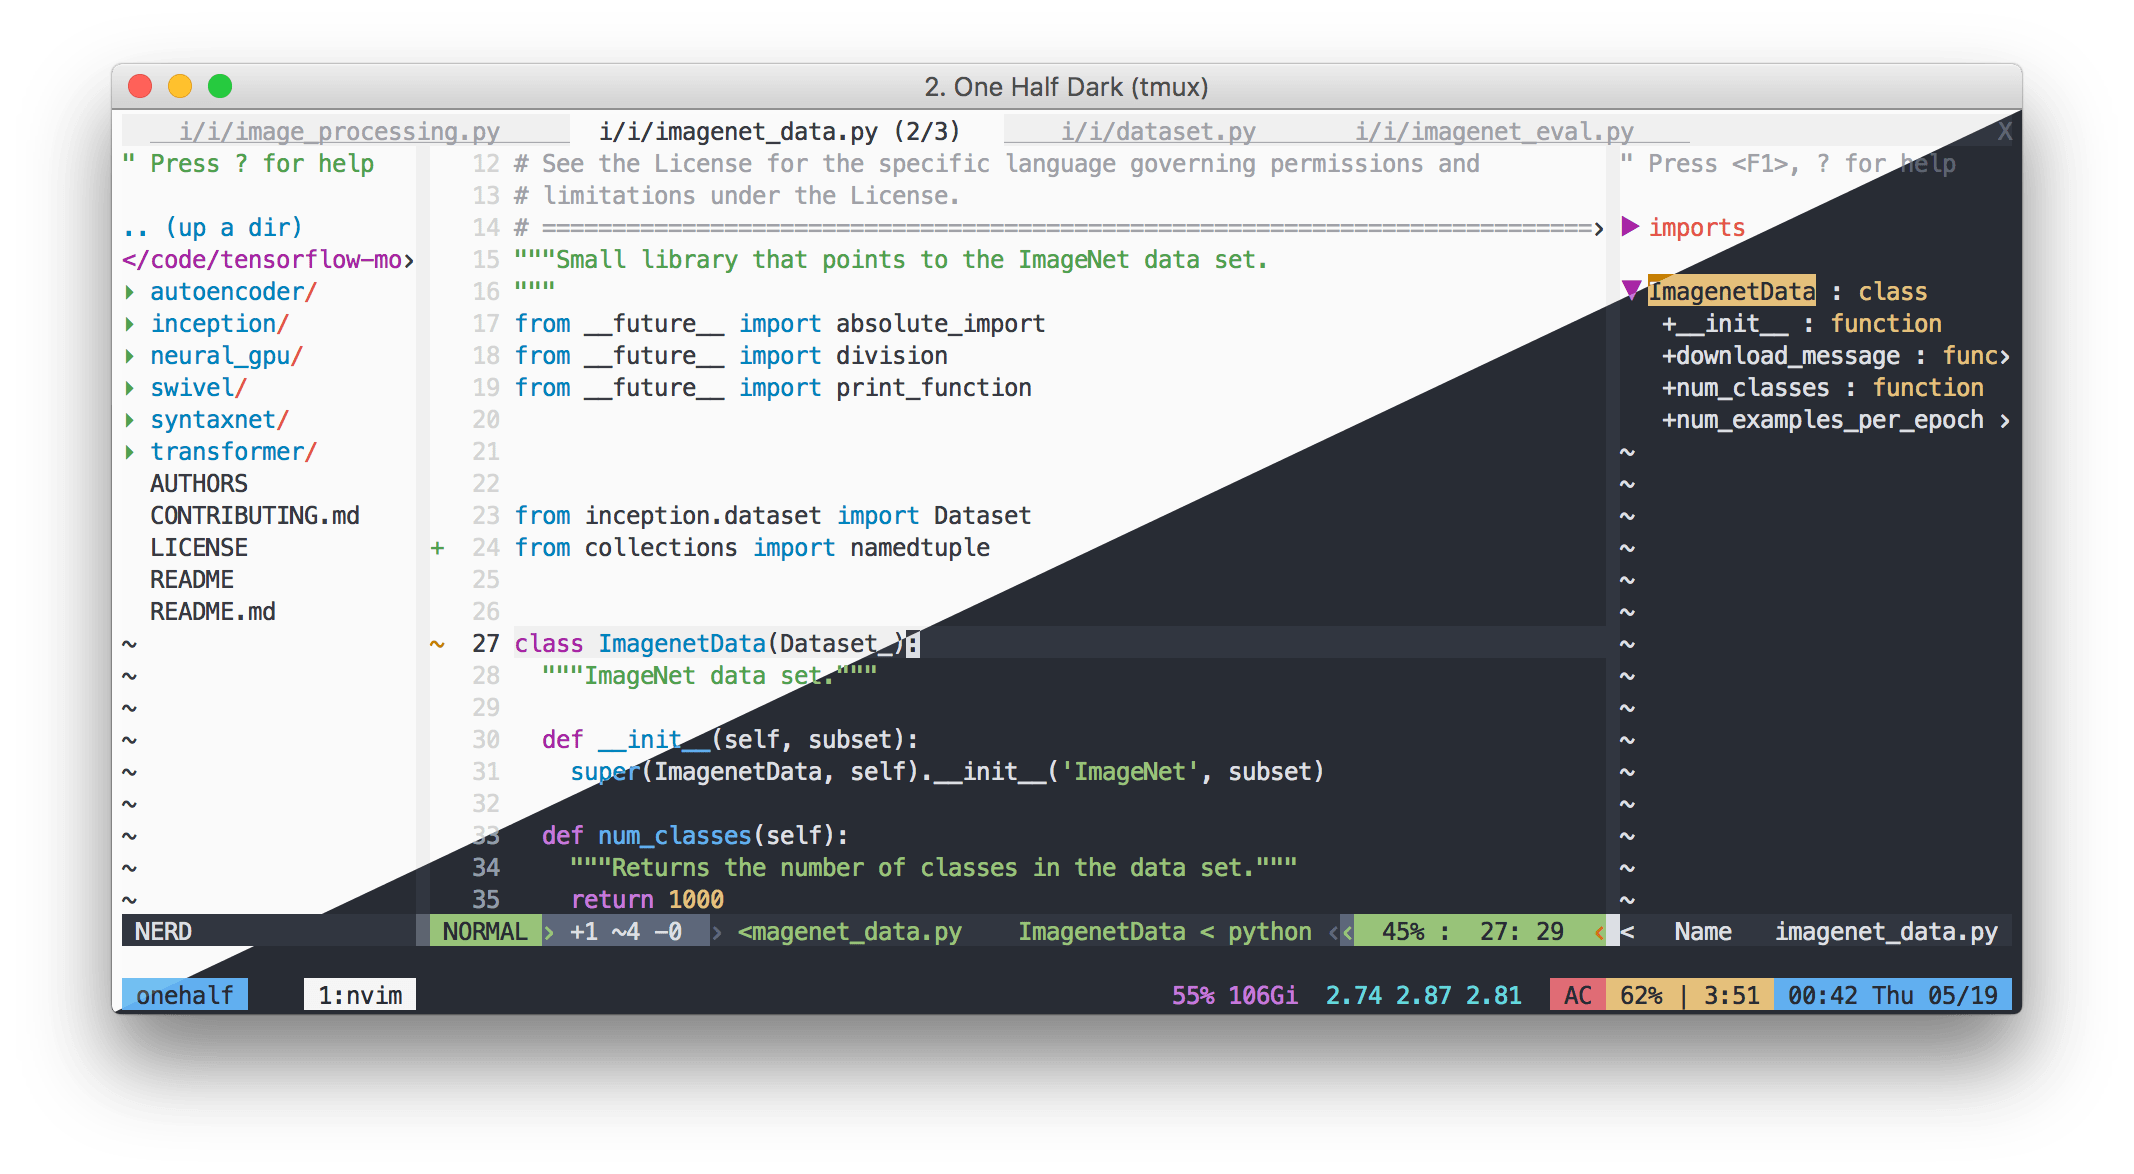
- onehalf [preview]
- Molokai [preview]
- vim-code-dark [preview]
- base16-gruvbox-dark-hard [preview] (from base16)
If you are not sure about how to use colorschemes in Vim, we have it covered on Linux Handbook :)
Bonus Tip: Delete text even when you are in Insert mode
We all know that you can use the d and x keys to delete text when you are in Normal mode. But what if you want something akin to dd in Insert mode?
In that case, below are a few key bindings that you can use:
Ctrl + w: Delete previous word (equivalent todbin Normal mode)Ctrl + h: Delete previous characterCtrl + u: Delete all the previous characters until the start of line (equivalent tod0in Normal mode)
Conclusion
I shared some of my favorite Vim tips. It involves things like indenting the whole file, getting a file diff before saving, opening a file with the cursor at a particular line, and more...
Some are minor productivity pushes, while others – saving as root user – can be critical productivity boosters.
I have not included anything on Vim visual mode. However, you should get familiar with it as well.

Comment and let me know which tip(s) you will be using. Is there any other cool Vim trick you are proud of? Share it with the rest of us.
