Color Schemes in Vim: How to Change and Use Them
Dark or light or something else? The all-rounder Vim editor lets you set color schemes of your preference. Here's how achieve that.


Color scheme is one of the sought after features in many code editors.
Vim is not behind any modern code editor in terms of features. It provides different built-in color schemes for you. In addition to that, you can also use third party color themes.
How? Let me show you.
Get a list of pre-installed color schemes
Vim ships with a few color schemes, which might get the job done. Vim 8 series ships with 18 color schemes.
Before you try a color scheme, make sure that syntax highlighting is turned on in Vim. That can be done by either saving syntax on in your 'vimrc' or by running :syntax on in an active Vim session.
There are two ways to check for available color schemes.
Show color schemes from Vim session
When you open Vim, you can type the following instruction to get a list of available color schemes.
:colorscheme [space] [press 'Ctrl + d']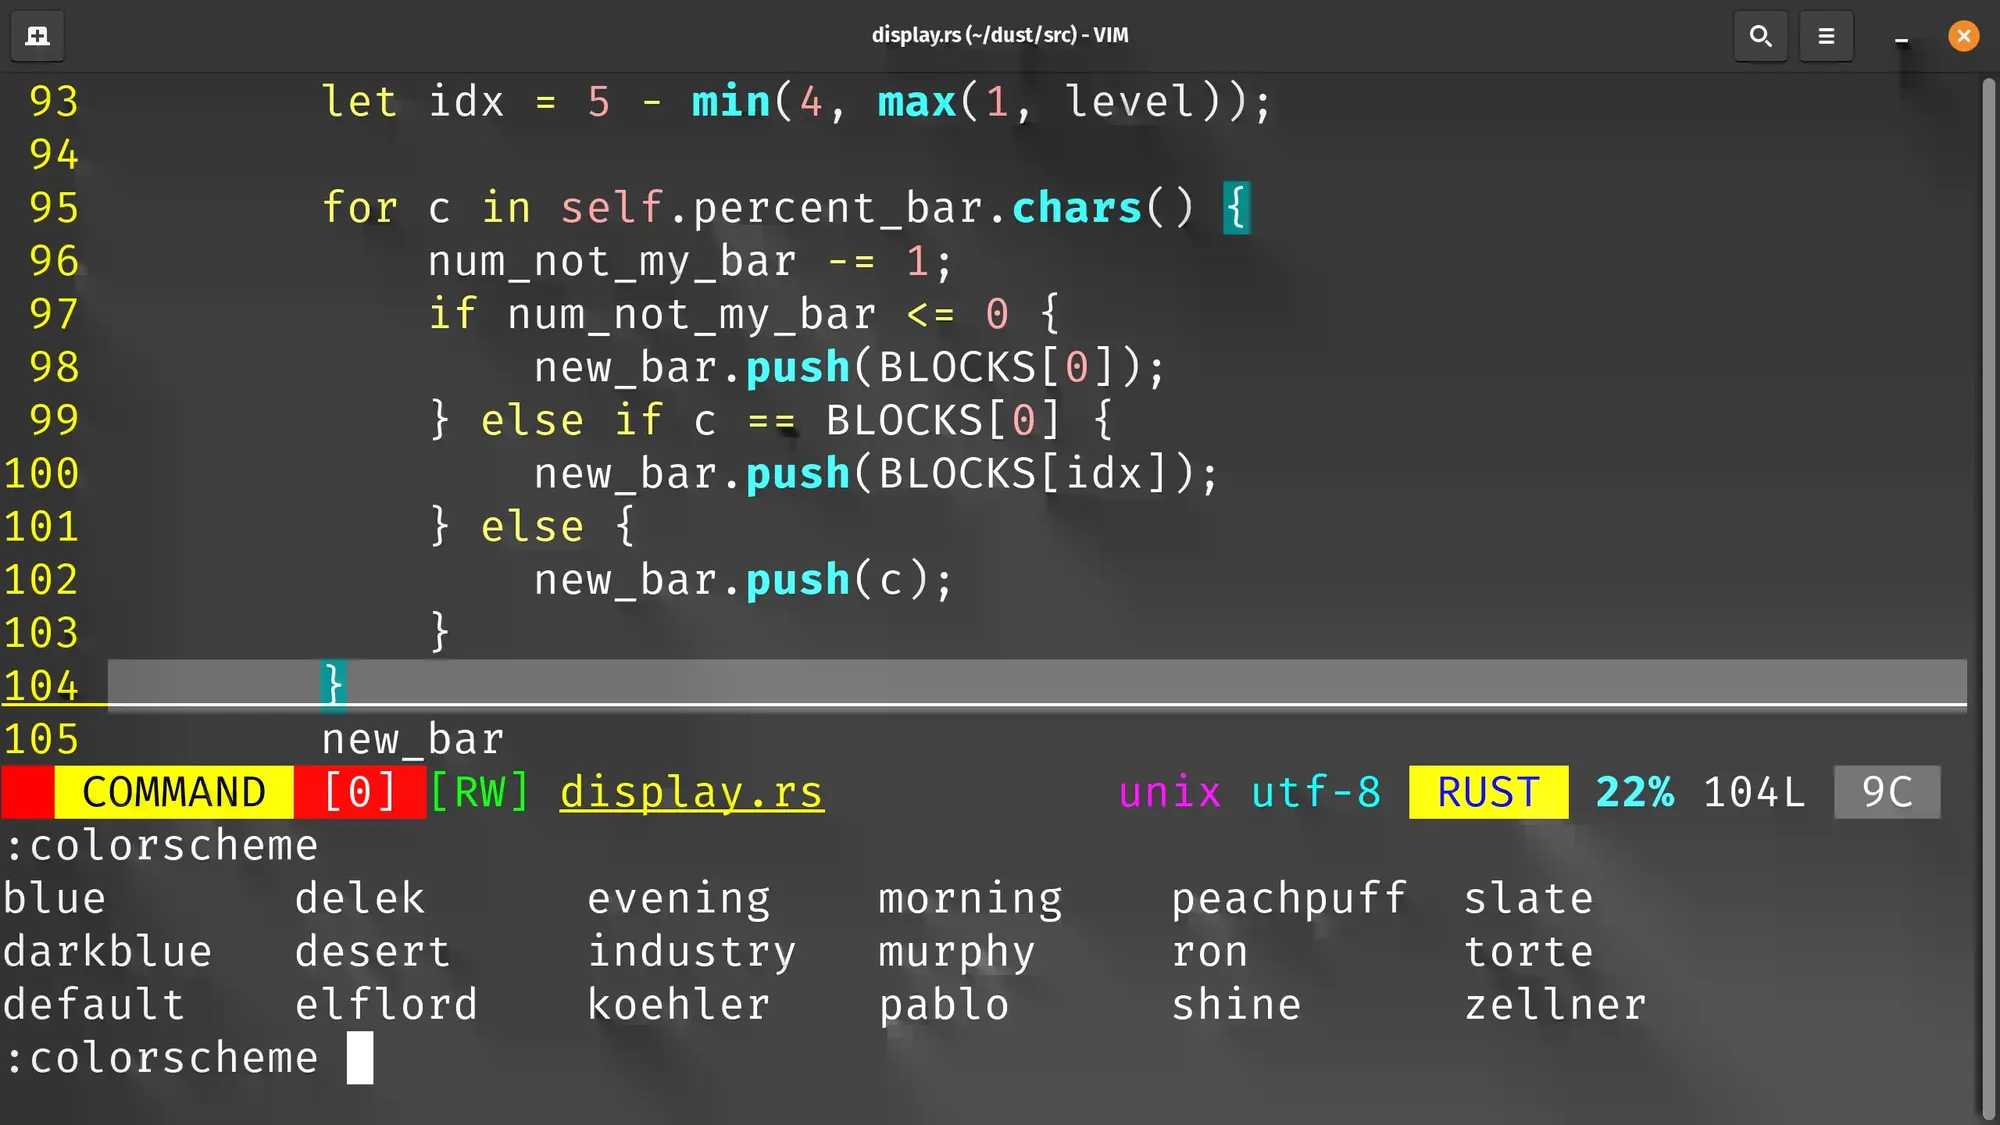
Show color schemes from terminal
To check the color schemes that are available on your systems, you can run the following command.
$ ls /usr/share/vim/vim81/colors | grep .vim
blue.vim
darkblue.vim
default.vim
delek.vim
desert.vim
elflord.vim
evening.vim
industry.vim
koehler.vim
morning.vim
murphy.vim
pablo.vim
peachpuff.vim
ron.vim
shine.vim
slate.vim
torte.vim
zellner.vim
Try out color schemes
To temporarily use a color scheme, use one of the following commands from Normal mode.
:colo <color-scheme-name>

:colors <color-scheme-name>

:colorscheme <color-scheme-name>
The files listed above are the color schemes that my system had. It might vary on your system.
In this gif, you can see that I am trying out every default color scheme that Vim ships with.
Permanently set color scheme
You tried a color scheme and ended up liking it. And you want to make it permanent.
To achieve that, append the following line in your user's 'vimrc' file.
colorscheme <color-scheme-name-here>That's it! Save and close the 'vimrc' file and next time you open Vim, the color scheme will automatically get selected.
Third-party color schemes for Vim
There are a vast number of color schemes available on the Internet.
A few resources to find the best colors scheme according to your taste are:
- base16 themes - These are 128 different themes that use colors with a base of sixteen (hexadecimal representation). The linked website is only for previews (use
jandkto move through color schemes). Color schemes for Vim are in this repository. - vimcolorschemes - An aggregation of some of the most popular color schemes on Github.
Installing third party color schemes
There are two ways you can install a third party color scheme.
Either you can use a plugin manager for Vim, or manually clone the repository to the right place.
When you visit the repository hosting color schemes, that repository will always contain a README. Make sure you read it thoroughly.
Plugin manager
A pre-requisite of this method is that you have vim-plug installed and know how to use it.
Most of the time, all you need is to call vim-plug from your 'vimrc' as shown below:
" begin plugin section
call plug#begin()

Plug '<GITHUB-USERNAME>/<REPOSITORY-NAME>'

" end plugin section
call plug#end()
So, if I want to install the spaceduck theme that is available for Vim, below is how my 'vimrc' would look like.
" begin plugin section
call plug#begin()

Plug 'sheerun/vim-polyglot'

" end plugin section
call plug#end()
And finally, enable that colors scheme by adding the following line to your 'vimrc' (if you had not done that already).
colorscheme <color-scheme-name>The project's README will contain how you can install the color scheme. If the steps mentioned in the README differ than what this article mentions, follow the README's steps as the plugin author knows best about their plugin.
Manually clone repository
As mentioned above, most color schemes can be installed in a similar fashion using the vim-plug plugin manager but some require different commands.
If you want a consistent way to obtain third party color schemes, steps are given below.
- If you are using Vim, clone the repository in
~/.vim/colors. If you use Neovim, clone the repository in~/.config/nvim/colors. - Enter the cloned repository and you will find a directory called 'colors'.
- Execute
mv colors/*.vim ../(this will move all thecolor-scheme-name.vimfiles into ~/.vim/colors/or into~/.config/nvim/colors/, depending if you are using Vim or Neovim. - Add the line
colorscheme <color-scheme-name>to your 'vimrc'.
Create your own color scheme
If all the third party colors schemes that you have taken a look at do not line up to your taste, you can create your own color scheme. But that is an extremely time consuming thing to do.
Below is the syntax to temporarily test color scheme:
:highlight [group] [key=value]If you have the time and patience to manually configure all colors to make a complete color scheme, you can take a look at the Vim documentation.

Conclusion
This article covered how you can use the default color schemes that Vim ships with and how you can enable either one of them.
We also went over how if the default themes might not be per your tase, how you can use third party color schemes.
If you are interested in learning more than just the Vim Basics, I highly recommend using this program by Jovica Ilic.

About the author
 Abhishek Prakash
Creator of Linux Handbook and It's FOSS. An ardent Linux user who has new-found love for self-hosting, homelabs and local AI.