Install the Awesome Zsh and Make it the Default Shell
This tutorial will give you a short introduction to Zsh, steps to install Zsh and make it a default shell whenever you login to terminal.

What is Zsh (Z Shell)?
Z Shell (zsh in short), is a shell just like bash. It is used as a login shell (where you get a greeting and you will type in username and password) and as a command line interpreter (where you type Linux commands such as ls, cd).
You might wonder why someone needs to switch if every shell does these two functions. One of the main reasons is that his/her’s relative experience with different shells. And another reason is that each shell has unique features such as auto-completion, frequently used commands listing, etc. Feel free to share your reason in the comments.
To learn more, refer the official page. or read an argument on why you should use zsh.
How to install Zsh
This tutorial is tested on Ubuntu 18.04 LTS. It should work with other versions of Ubuntu as well. If not, tell us in the comments.
You can install zsh with following commands in Debian/Ubuntu based distributions:
sudo apt-get update
sudo apt-get install zsh
You need sudoer rights to run above commands. If you don’t have such rights, contact your system admin. If you are the administrator, then refer to this article to learn about creating a sudoer.
In Fedora, Red Hat and CentOS, you can use the DNF package manager to install Zsh:
sudo dnf install zshTo check whether you have installed zsh correctly or not, run zsh by zsh --version.
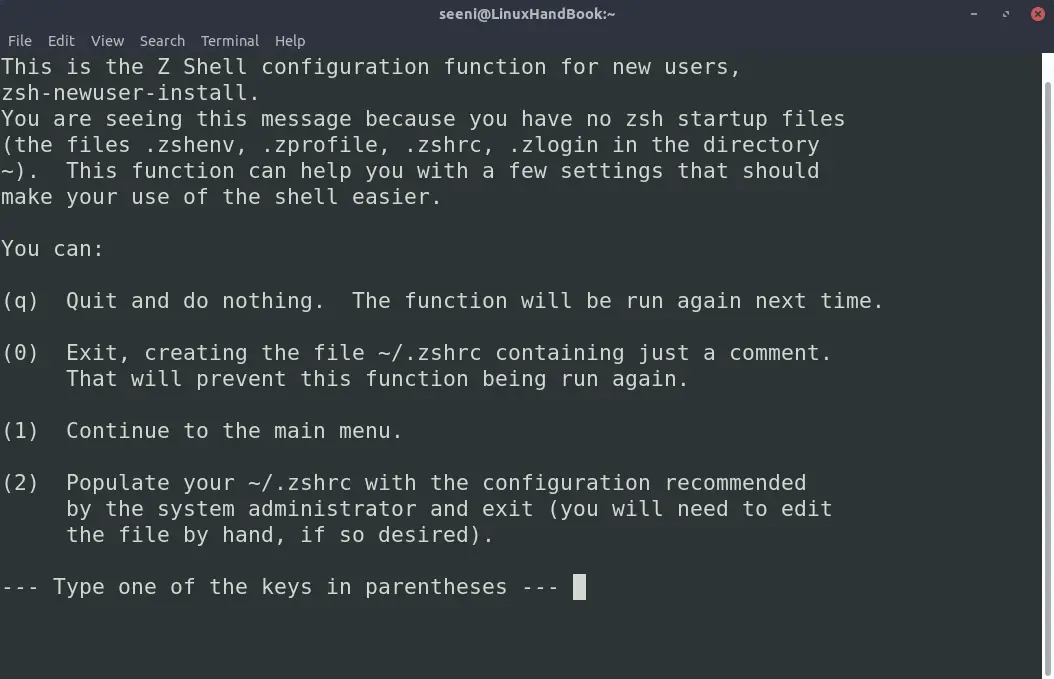
Once done with the installation, you need to do a little configuration setup (if you haven’t done it already). First, change the shell by typing zsh in the terminal to get a prompt like this.

If you want to explore the options choose 1 and set it up. But I would recommend choosing 2 for now and then change the configuration whenever you need it.
Note that when you are running zsh for the first time and you accidentally happened to have one of these files (.zshenv .zshrc, .zlogin), the above prompt will not appear at that situation. Delete the files if you want to avoid using older configurations and run zsh again.
Make zsh the default shell
You can make any shell as your default shell if you know the location(or symbolic link) of the shell. In our case, zsh has a symbolic link /bin/zsh.
chsh -s /bin/zsh seeniAbove command will set zsh as the default shell for seeni. after a getting a password to check whether user running this command is “seeni,”. If you are the doing for it another user and you are the root or you have sudoer permissions, prepend sudo to the above command as follows.
sudo chsh -s /bin/zsh seeniWhen you login the next time, check which shell you are using. If it’s zsh, this means that zsh is now the default shell on your system.
Congratulations! You manage to install zsh and make it the default shell. I hope you found this article useful. If you have suggestions or questions about this article, please let us know in the comments.
Linux Enthusiast, Software Developer, AI engineer and fond of professional life drama. I am Learning new stuff every day and so excited to share those with you. Follow me on twitter @Seeni_Inc