Enable Syntax Highlighting in Zsh
Improve your Zsh experience by enabling syntax highlighting. Here's how to do that.


Enabling the syntax highlighting on ZSH can be a lifesaver, especially if you are into development.
And in this tutorial, I will walk you through ways to enable syntax highlighting in ZSH:
- Using syntax highlighting extension (easy)
- Using the Oh My ZSH plugin (recommended)
So let's start with the first method.
Enable syntax highlighting on ZSH using the extension (easy)
This is the easiest way to enable syntax highlighting on ZSH.
To install syntax highlighting extension, you will have to have git installed on your system.
And if you are using Debian/Ubuntu-based system, you can use the following command to install git :
sudo apt install gitOnce you have git installed, use the following command to clone the zsh-syntax-highlighting repository:
git clone https://github.com/zsh-users/zsh-syntax-highlighting.gitNext, you will have to add this syntax highlighting extension to the .zshrc file using the following command:
echo "source ${(q-)PWD}/zsh-syntax-highlighting/zsh-syntax-highlighting.zsh" >> ${ZDOTDIR:-$HOME}/.zshrcAnd finally, enable the syntax highlighting to your current shell using by sourcing the file using the following command:
source ./zsh-syntax-highlighting/zsh-syntax-highlighting.zshThat's it!
Here are the before and after results:

Enable syntax highlighting on ZSH using the Oh My ZSH (recommended)
Oh My ZSH is the framework that allows you to do various tweaks to your ZSH.
Also, you get some basic configuration by default making it look way better than the default ZSH.
And that's the reason why I recommend this instead of the first method.
First, install the Oh My ZSH on your system using the following command:
sh -c "$(wget https://raw.github.com/ohmyzsh/ohmyzsh/master/tools/install.sh -O -)"And if the ZSH is not your default shell, it will ask whether you want to make it the default:
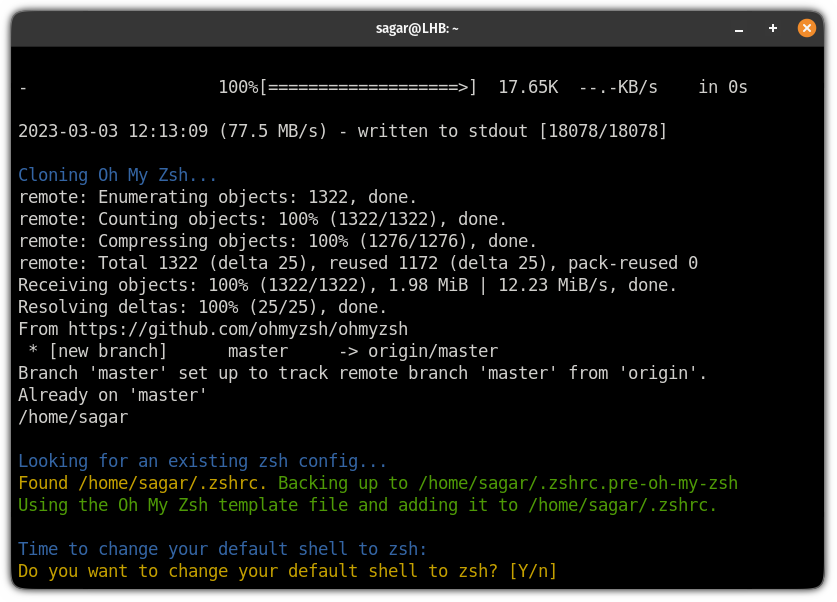
I would recommend you make it the default shell!
Now, clone the zsh-syntax-highlighting repository using the following command:
git clone https://github.com/zsh-users/zsh-syntax-highlighting.git ${ZSH_CUSTOM:-~/.oh-my-zsh/custom}/plugins/zsh-syntax-highlightingNext, open the /.zshrc file:
nano ~/.zshrcAnd add zsh-syntax-highlighting in the plugins as shown:
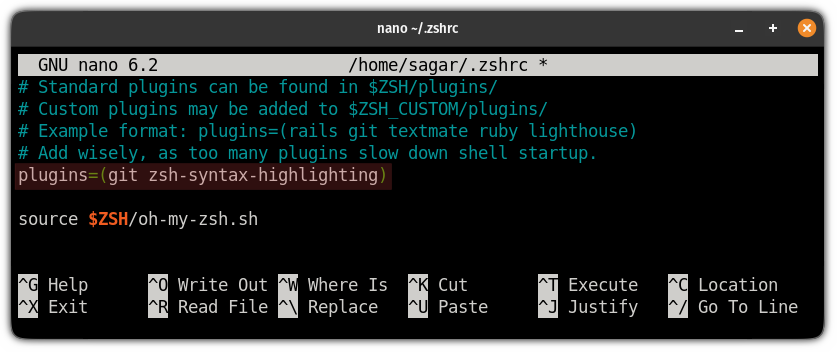
Now, save changes and exit from the nano text editor.
To enable the change, log out and log back in.
And here are the before and after results:

A night and day difference! Isn't it?
You can do a lot more with ZSH! Learn How to
If you want to learn how you can add multiple plugins like syntax highlighting and auto-suggestions with a pretty theme, you can refer to the given guide:

I hope you will find this guide helpful.
And if you have any queries, let me know in the comments.
About the author
 Sagar Sharma
A software engineer who loves to tinker with hardware till it gets crashed. While reviving my crashed system, you can find me reading literature, manga, or watering my plants.