
Ghost is an open source content management system which is suitable for a blog, newsletter or membership website.
It is superfast and SEO optimized. We love it here at Linux Handbook. Our website uses Ghost, of course.
Now, you may opt for a managed Ghost instance from the makers of Ghost itself. It would cost you a lot but you won't have to put effort in deploying Ghost, updating it and maintaining it. And of course, it helps the development of Ghost project.
If you want to avoid spending a lot or take matters in your hand with a 'do it yourself' approach, you may self-host Ghost on your server.
In this tutorial, I'll show you the steps to deploy Ghost with Docker.
Self-hosting Ghost with Docker
Here's the thing. Some cloud server providers like DigitalOcean also provide one-click Ghost deployment. That could be the easy way out if you don't want the trouble of the initial Ghost set up and configuration.

That aside, let's see what you need to deploy Ghost with Docker on a Linux server.
Requirements
Aside from familiarity with Linux commands, knowing the basics of Docker Compose will also be helpful here.
- A Linux server. You can use a physical server, virtual machine or cloud servers. You may sign up with our partner Linode and get $100 in free credits.
- Docker and Docker Compose installed on your server.
- Access to the DNS of your domain where you want to deploy Ghost.
- Nginx reverse proxy setup with www/non-www redirection and allowed upload limits.

Step 0: Get the initial set up ready
You need to have Docker and Docker Compose installed on your system. You may refer to these tutorials to get instructions for Ubuntu.


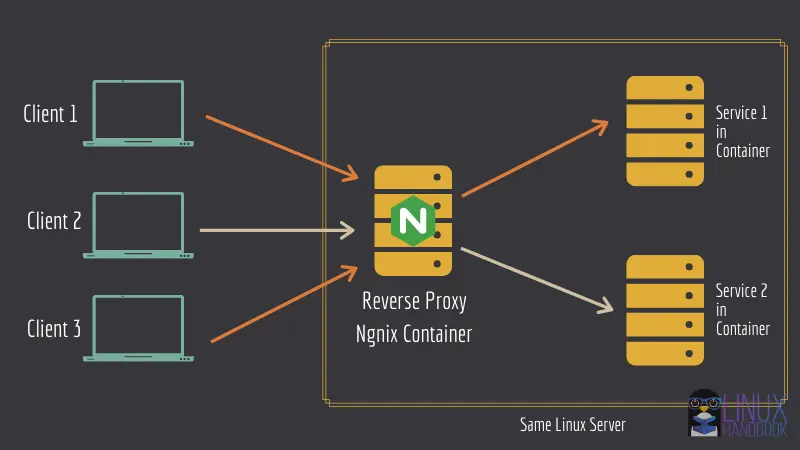
Other than that, you also need to have Ngnix reverse proxy setup. This is beneficial if you want to have more than one Ghost or some other web service installed on the same server.
Now, I have covered this topic in detail in the tutorial linked below so I am not going to repeat the same steps here. However, you must have this setup on your system.
Follow this tutorial till Step 4:
Step 1: Preparing the deployment of Ghost
I use Jwilder reverse proxy method here because it takes into account SSL certificates, www/non-www redirection and allowed upload limits.
How to handle SSL certificates is already described in the link shared above in the requirements section. Additionally, I will describe how to enable www/non-www redirection and increase permitted upload limits.
WWW/non-WWW Redirection
Depending on your SEO preferences, you may want to set redirection of www to non-www or vice versa. For example, if your blog is hosted at domain.com, users visiting www.domain.com must be redirected to it (just how GitHub's domain works).
Similarly, if you host it at www.domain.com, users visiting domain.com must be redirected (just how Linode's domain works).
WWW to non-WWW
Create a file named www.domain.com within the nginx docker compose directory with the following content and save it:
rewrite ^/(.*)$ https://domain.com/$1 permanent;
Non-WWW to WWW
Create a file named domain.com within the nginx docker compose directory with the following content and save it:
rewrite ^/(.*)$ https://www.domain.com/$1 permanent;
Now, suppose you want to use WWW to non-WWW redirection. All you have to do is bind mount the file in the volumes section of your Nginx service configuration:
- ./www.domain.com:/etc/nginx/vhost.d/www.domain.com
Increase Permitted Upload Limits
Image uploads can be affected by the default maximum upload size of 50 MB. To set a maximum upload limit and avoid issues when uploading images on Docker, say for 1 GB, create a file named client_max_upload_size.conf and save it with the following content:
client_max_body_size 1G;
Later you need to mount it just as described with the previous file:
- ./client_max_upload_size.conf:/etc/nginx/conf.d/client_max_upload_size.conf
Run docker-compose up -d from the Nginx directory to update your Nginx configuration.
First of all, the Ghost deployment configuration essentially consists of two main components:
Since you're deploying Ghost with Docker, all the above components are set up as their own respective containers.
For the database service, I'll use an internal network called ghost as it only needs to be visible for the Ghost service.
networks:
  - ghost
But for the Ghost service, of course, the same net network used on the reverse proxy configuration must be specified along with the ghost network, and only then would it be possible to get it up and running with the Nginx Docker container.
networks:
  - net
  - ghost
Now consider how they are configured individually with Docker Compose:
For MariaDB, I use the official MariaDB 10.5.3 image which is available on Docker Hub:
    ghostdb:
        image: mariadb:10.5.3
        volumes:
            - ghostdb:/var/lib/mysql
        restart: on-failure
        env_file:
            - ./mariadb.env
        networks:
            - ghost
Here I use a volume called ghostdb to store the database data at /var/lib/mysql. I also set the relevant environment variables in the env_file called mariadb.env:
MYSQL_RANDOM_ROOT_PASSWORD=1
MYSQL_USER=mariadbuser
MYSQL_PASSWORD=mariadbpassword
MYSQL_DATABASE=ghost
For the Ghost service itself, instead of using a latest tag, I specifically prefer to use the version number tagged on Docker Hub launched by the developers as a stable release. Here, at this time of writing, it is 4.5.0:
    ghost:
        image: ghost:4.5.0
        volumes:
            - ghost:/var/lib/ghost/content
            - ./config.json:/var/lib/ghost/config.production.json
        env_file:
            - ./ghost-mariadb.env
        restart: on-failure
        depends_on: ghostdb
        networks:
            - net
            - ghost
The bind mounted config.json file consists of SMTP(Mailgun) and essential log rotation(error focused) settings:
{
  "url": "http://localhost:2368",
  "server": {
    "port": 2368,
    "host": "0.0.0.0"
  },
  "mail": {
    "transport": "SMTP",
    "options": {
        "service": "Mailgun",
        "host": "smtp.eu.mailgun.org",
        "port": 465,
        "secureConnection": true,
        "auth": {
            "user": "replace-me-with-a-mailgun-configured-email-address",
            "pass": "replace-me-with-the-relevant-mailgun-apikey-of-50-characters"
        }
    }
  },
  "logging": {
    "path": "content/logs/",
    "level": "error",
    "rotation": {
      "enabled": true,
      "count": 10,
      "period": "1d"
  },
    "transports": [
      "file",
      "stdout"
    ]
  },
  "process": "systemd",
  "paths": {
    "contentPath": "/var/lib/ghost/content"
  }
}
If it must use MySQL/MariaDB, the Ghost service has to rely on the ghostdb service for it to be operational. This can be made sure only when you have bind mounted the ghost-mariadb.env file(shown in the volumes section of the Ghost database service) with the correct database configuration according to mariadb.env in the database service, which would be: database__client, database__connection__host, database__connection__user, database__connection__password and database__connection__database.
I'll also assign each of the environment variables VIRTUAL_HOST and LETSENCRYPT_HOST to both domain.com as well as www.domain.com respectively, in order to ensure both exist. This absolutely ensures the redirections and SSL certificates work smoothly without issues. I want my main URL to be without www so I set it as url=https://domain.com. Since you will be using this setup for production-level usage, the NODE_ENV variable is set to production mode. These details also need to be added.
Therefore, the full environment file(ghost-mariadb.env) for the Ghost service would be:
VIRTUAL_HOST=domain.com,www.domain.com
LETSENCRYPT_HOST=domain.com,www.domain.com
url=https://domain.com
NODE_ENV=production

database__client=mysql
database__connection__host=ghostdb
database__connection__user=mariadbuser
database__connection__password=mariadbpassword
database__connection__database=ghost
Inconsistencies in the above data could make Ghost erroneously switch to SQLite. You don't want that. So please make sure all the above parameters correspond correctly with the database service discussed for mariadb.env above.
Each of the database services will have its own respective Docker volumes for storing user and content data. I'll create them as external volumes:
docker volume create ghostdb
docker volume create ghost
Now you need to include a volumes section within the docker compose file with the following details:
volumes:
  ghost:
    external: true
  ghostdb:
    external: true
You now have the necessary components for deploying Ghost.
Step 2: Deploying Ghost
Now you should have the docker-compose file ready. It's time to use this file.
Create the Ghost docker compose directory on your server:
mkdir ghost
Go into the directory to edit the necessary files:
cd ghost
Now create the following docker-compose file based on our discussions so far:
version: '3.7'
services:
    ghostdb:
       image: mariadb:10.5.3
       volumes:
          - ghostdb:/var/lib/mysql
       restart: on-failure
       env_file:
          - ./mariadb.env
       networks:
          - ghost

    ghost:
      image: ghost:4.5.0
      volumes:
        - ghost:/var/lib/ghost/content
        - ./config.json:/var/lib/ghost/config.production.json
      env_file:
        - ./ghost-mariadb.env
      restart: on-failure
      depends_on:
        - ghostdb
      networks:
        - net
        - ghost
volumes:
  ghost:
    external: true
  ghostdb:
    external: true

networks:
  net:
    external: true
  ghost:
    internal: true
Also, do not forget to create the other configuration files as discussed above: config.json, mariadb.env and ghost-mariadb.env within the same directory.
Start the Ghost instance:
docker-compose up -d
Access the Ghost domain specified in the configuration using your specified domain URL.
Step 3: Setting up your Ghost Admin account
Note that in order to setup your administrator account, you must go to domain.com/ghost and follow the on-screen instructions until you have claimed your site as ghost admin.
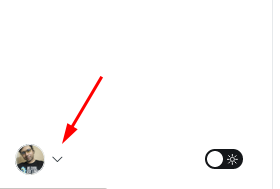
To double-check, do confirm you are indeed using MySQL/MariaDB and not SQLite. Navigate to your user icon at the bottom left:
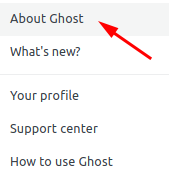
Now you can be sure that you are actually using the separate database container which will display as mysql regardless of whether you are using a MySQL or MariaDB Docker image:
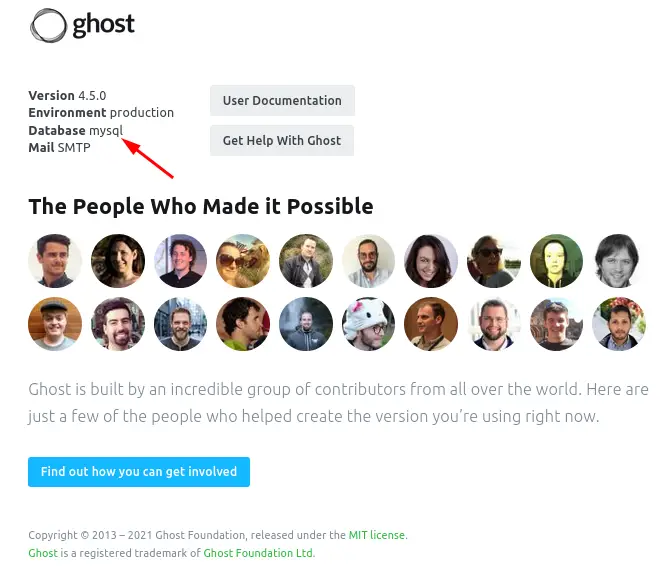
You can also see that the other three parameters: Version, Environment and Mail, are set as expected based on our above-mentioned steps. So that's it! You have successfully deployed Ghost as a self-hosted instance on your server!
Tips for maintaining your self-hosted Ghost instance
Here are a few tips that will help you in maintaining your Ghost instance.
Monitor Ghost Logs in Real-time
If you want to check the container's logs while it's deployed in real time, you can run:
docker logs -f ghost_ghost_1
Backup and Restore Ghost Volumes without Downtime
Using a cloud + local approach, you can backup and restore your ghost volumes without downtime.
Update Ghost Containers without Downtime
With the --scale flag on Docker Compose, you can create a new container based on the latest version of Ghost. When it's done, you can remove the old one. This results in zero downtime.

There are a few more tips you can read in the article below.

You may also want to Deploy & Manage Ghost Themes Using GitHub Actions to simplify your work.
If you encounter a bug, have problems or have a suggestion, please let me know by leaving a comment below.


