![Create an Uptime Monitor for Your Websites With 'Upptime' Tool and GitHub [No Server Needed]](/content/images/size/w30/format/avif/2021/01/website-uptime-monitor.png)

If you manage servers and websites, you know how important it is to know in time if the website is down. You don't want downtime affecting yours or your client's business and service, do you?
There are ways to monitor your websites for downtime. You can configure your server with uptime monitoring tools or opt for an uptime monitoring service like Better Uptime (also has pretty good free tier).
 Jipi from Metrics Watch
Recently, I came across an even easier and painless way of setting up an uptime monitor. This awesome open source project called Upptime allows you to easily set up your own uptime monitor for free with GitHub.
The best part is that you don't to install an agent or tool on your server. It is entirely handled using GitHub's tools.
Upptime: Monitor websites uptime with GitHub
Here's what you get with Upptime:
- Monitor any website (yours or someone else's website) every 5 minutes with GitHub Actions. It also stores response time stats.
- You can configure downtime notification to be sent via email, Slack, Telegram and custom webhooks. This way you can easily find out when a website goes down.
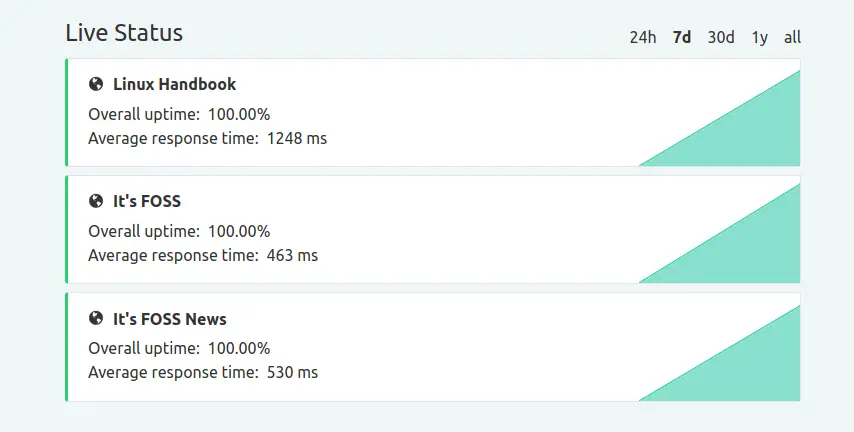
- Optionally, you can set up a status page and share the URL with your team members or clients so that they can also visualize the uptime stats and outage history.
- If a server returns some response code other than 200, an issue will be generated automatically in the repository along with that being noticeable on the static frontend.
Sounds good, right? Let me show you the steps to configure Upptime.
Configuring Upptime for downtime monitoring
Setting up Upptime requires minimal technical knowledge and is completely free of cost. All you need is a GitHub account.
Step 1. Create an identical Upptime repository
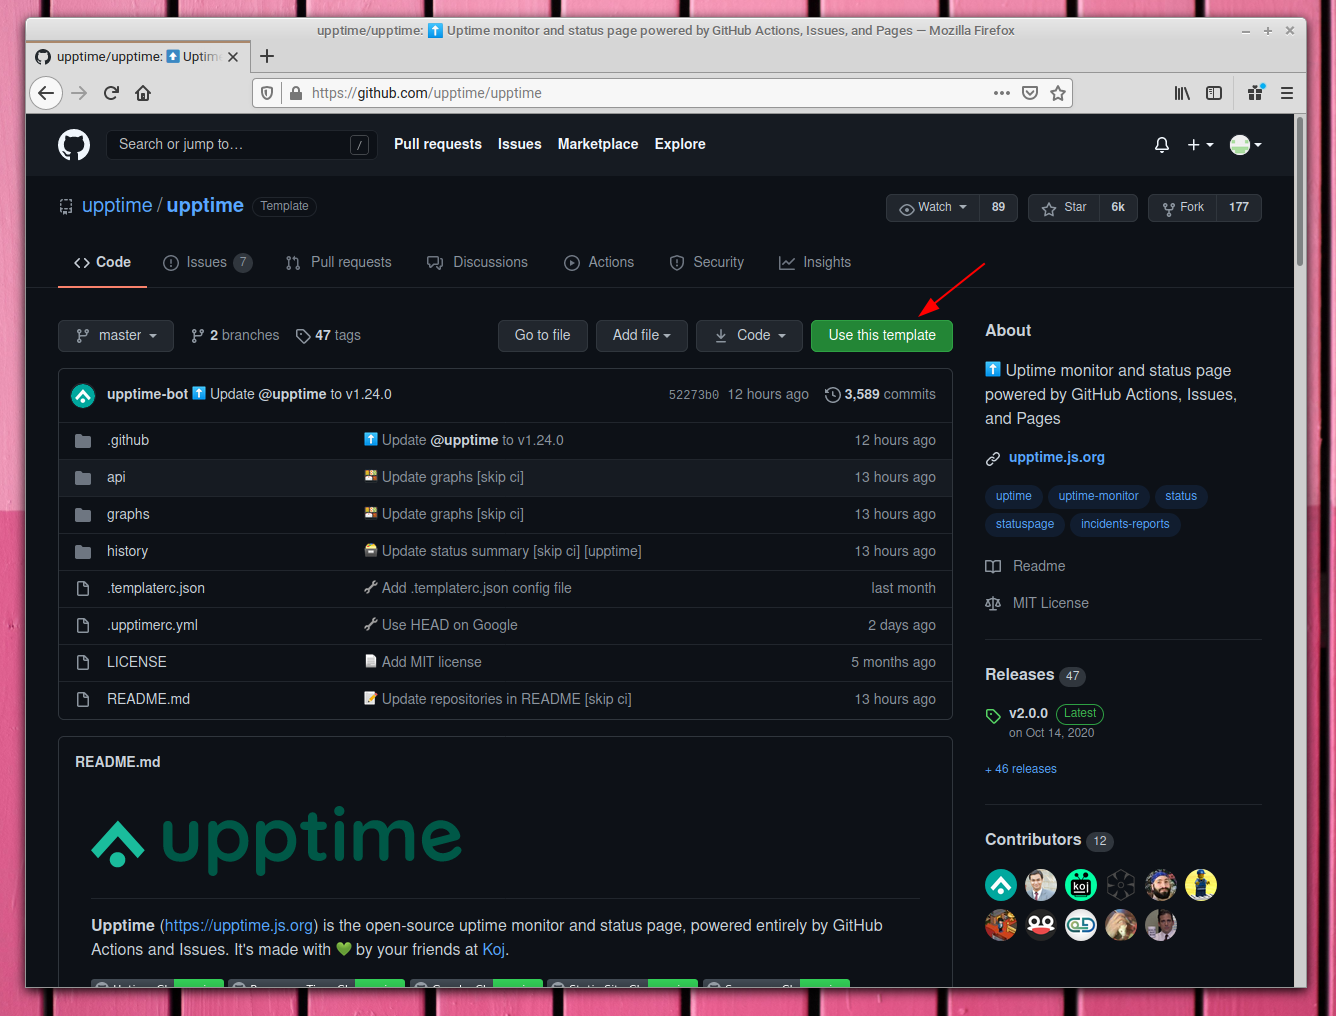
By identical I mean having the same files and directory structure. You might think that you now have to fork the official repository, but that's not it. Upptime's official repository is a template repository.
A template repository is a special type of repository, which lets others create a similar repository from it (same files, same directory structure). One of the key differences between a template repository and a fork is that when you fork some repo, all the previous commits are now part of this forked repository, it's good for contributing to some project. On the other hand a template repository lets someone start a fresh new project with the same files and directories.
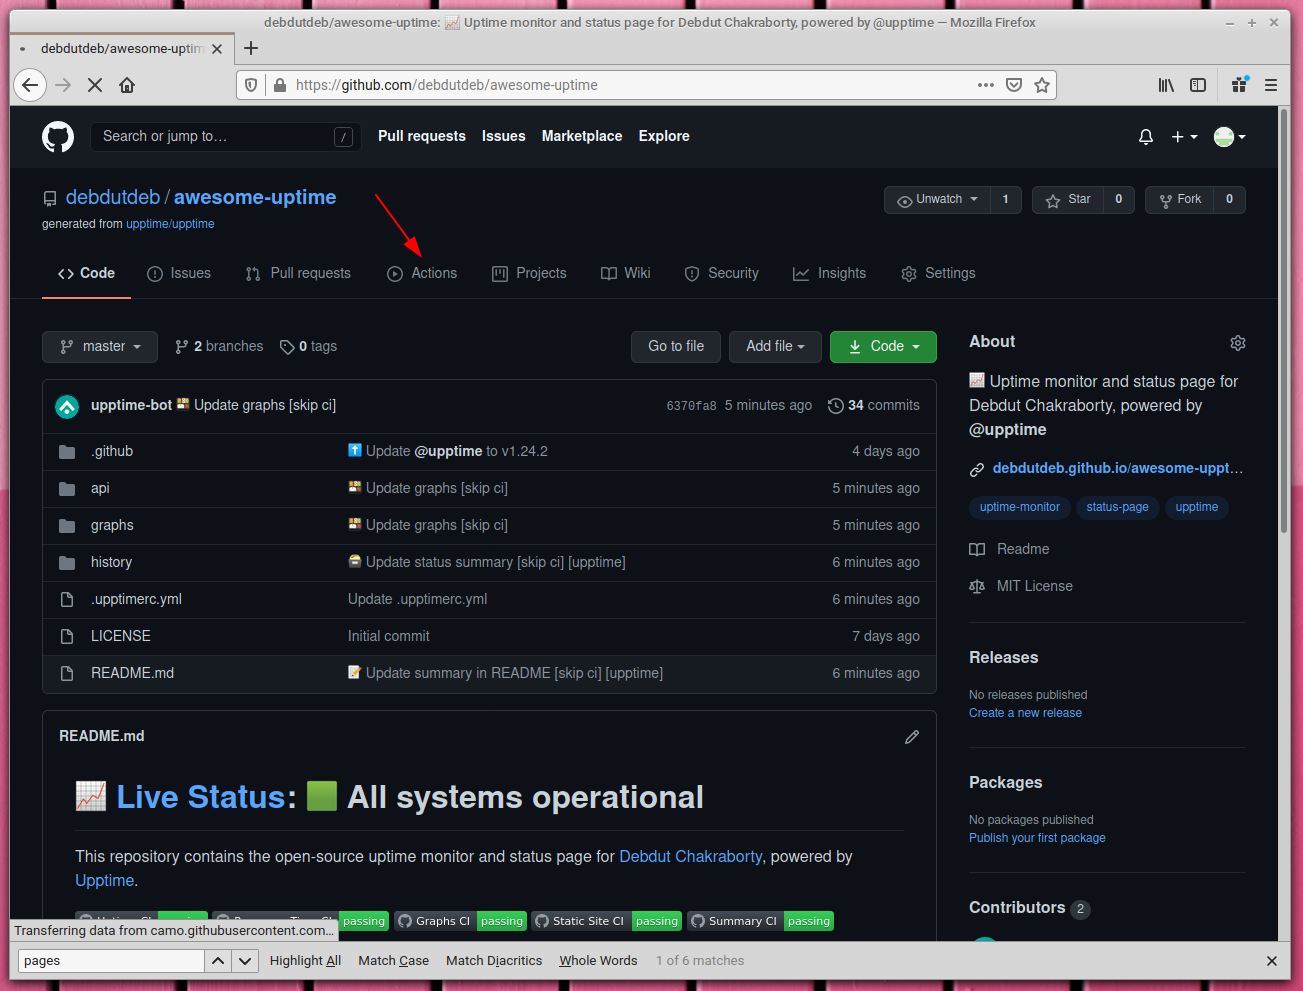
Head over to Upptime's GitHub repository. On the top right side you should be able to see a green button titled "Use this template". Click on it.
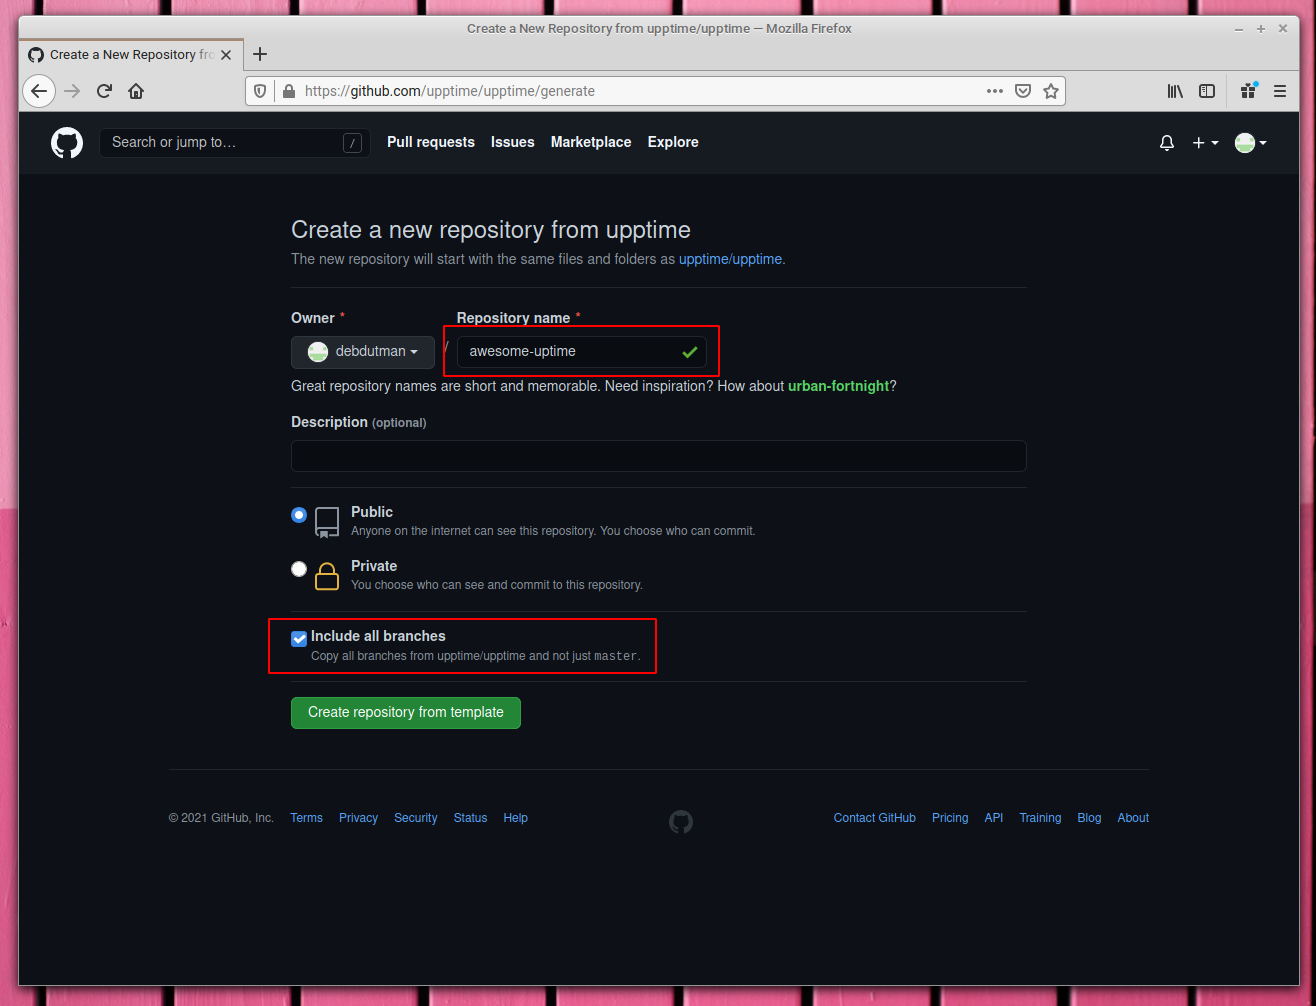
Now give this new repository a nice name. I'm going to name mine "awesome-uptime".
There's a checkbox above "create repository from template", labeled "Include all branches", make sure you check that. Otherwise, you won't be able to use GitHub Pages for the static website showing stats.
Step 2. Configuration
Before publishing, there are a couple of things that need configuring. Some of these may not be necessary if you don't want any internet facing frontend, which is understandable.
I. Add GH_PAT
By default, Upptime checks if the given websites are up or not every five minutes, depending on the result it either opens an issue (in case a site is down) or commits the relevant information like status, response time, etc.
To do so, it needs access to this repository. So, you are going to provide it the access by providing it a personal access token.
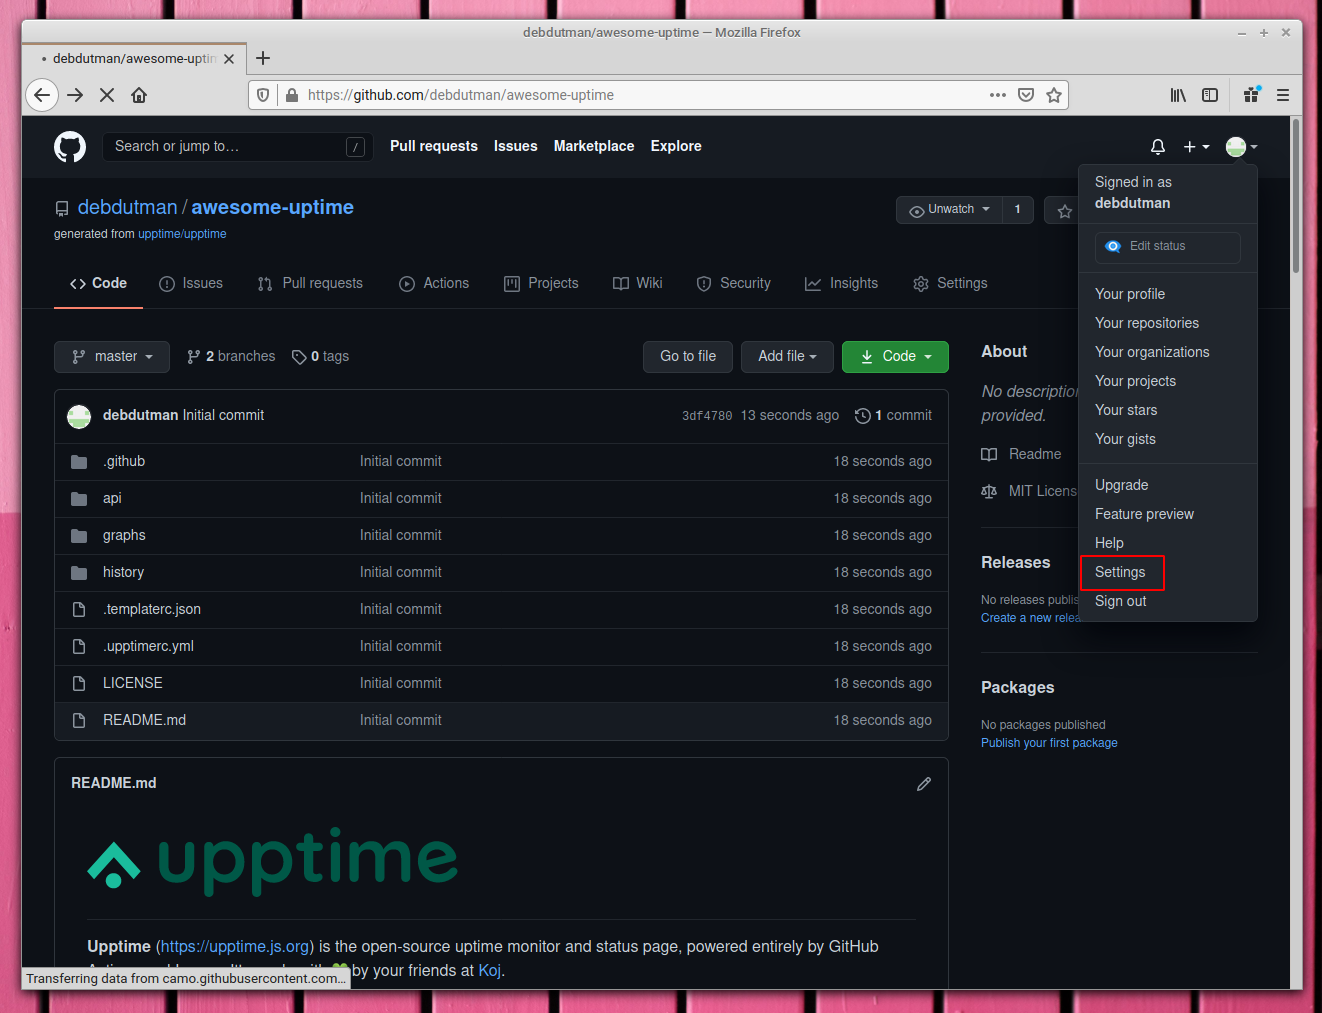
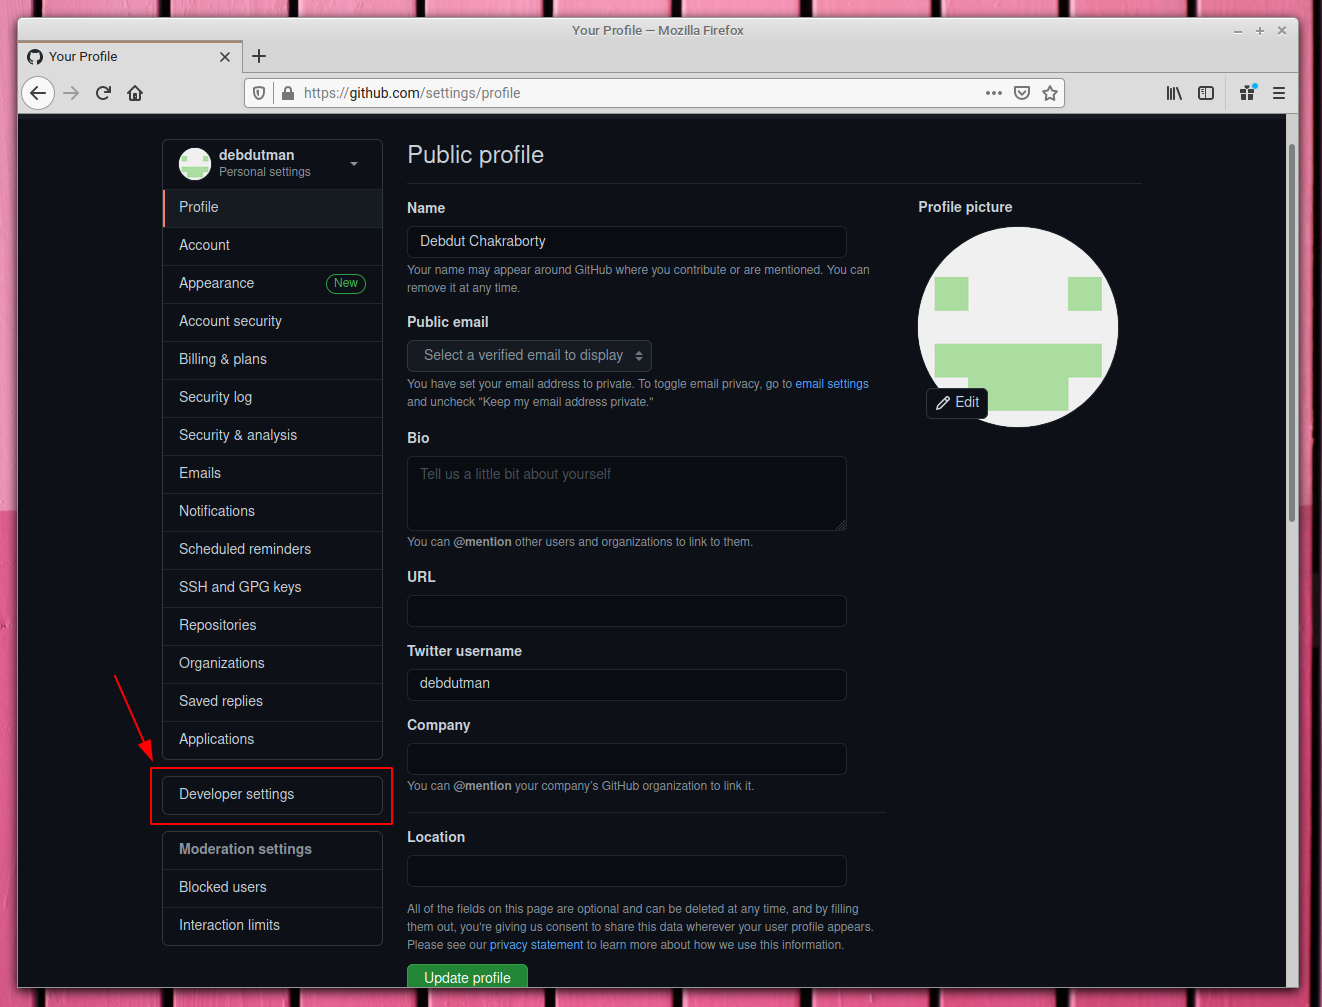
Go to your account settings:
And click on "Developer settings" from the left sidebar.
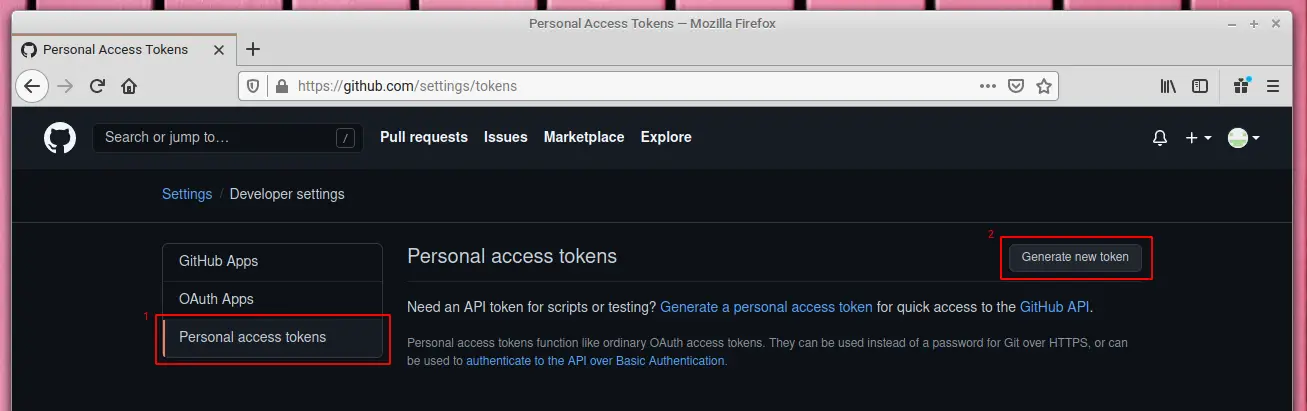
Now again on the left sidebar you should be able to see an option "Personal access tokens", click on it. Do you see the "Generate new token" option? Hit it.
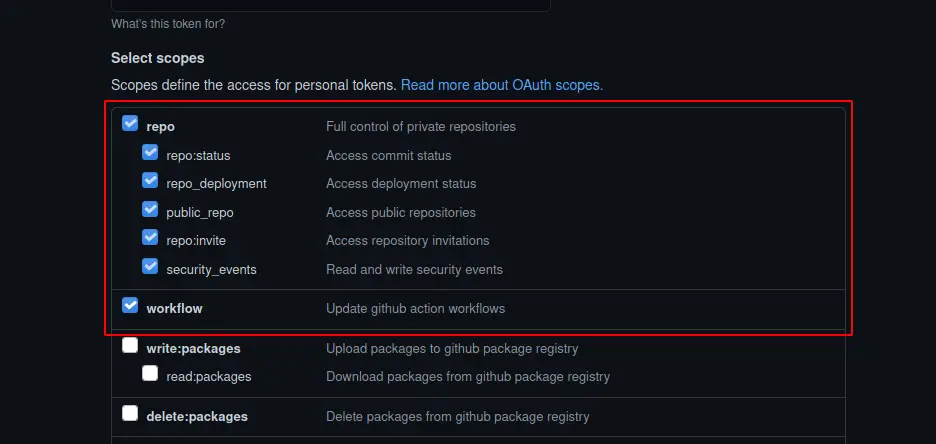
From this list, select "repo" and "workflow". Read the descriptions of these specific permissions to understand why we need to select these.
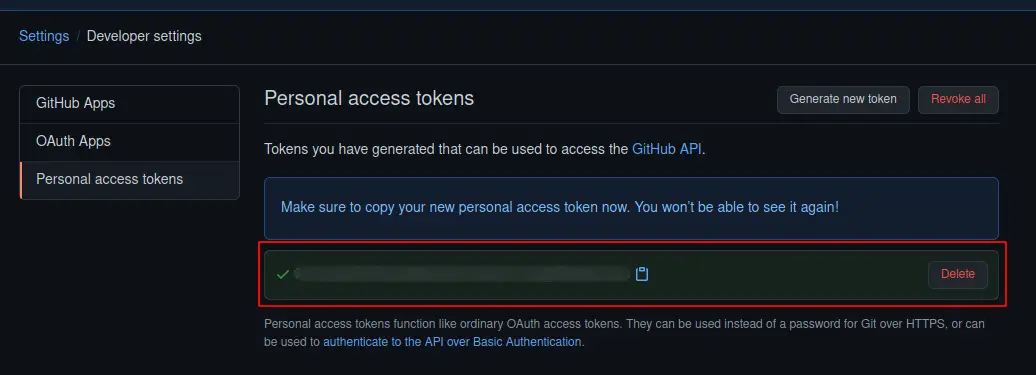
Give this token a name and finally click on "Generate token". Once you're able to see the key, copy it. Remember, you won't be able to see this again, either save it in a safe place or create a new one if needed later.
Next you need to add this token as a repository secret.
GitHub secrets are encrypted environment variables available to various GitHub action workflows. In easier terms these environment variables are available to the processes being run under GitHub actions.
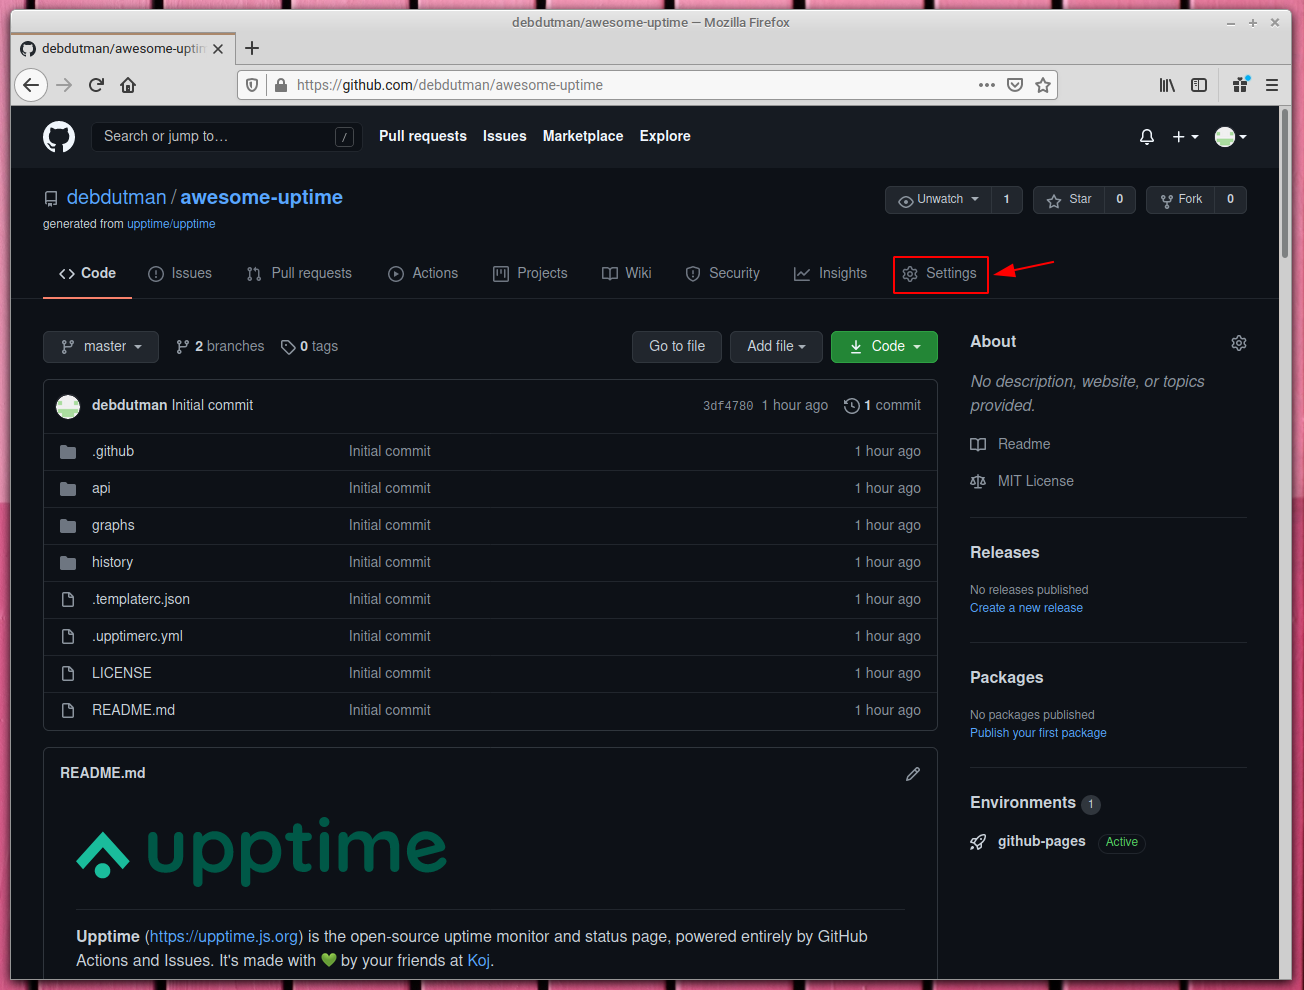
Go to your version of the Upptime repository's settings.
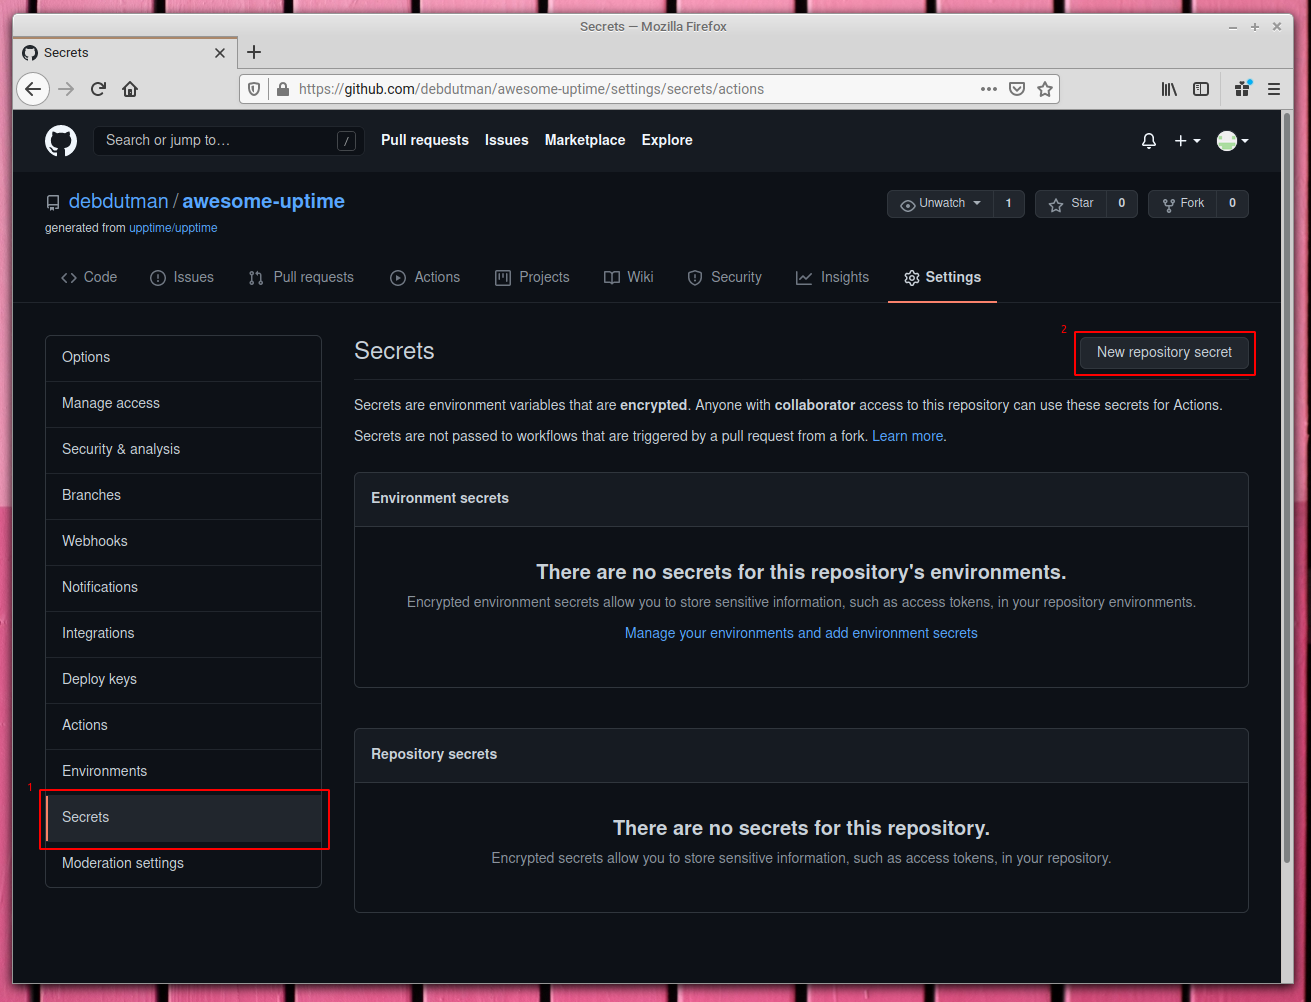
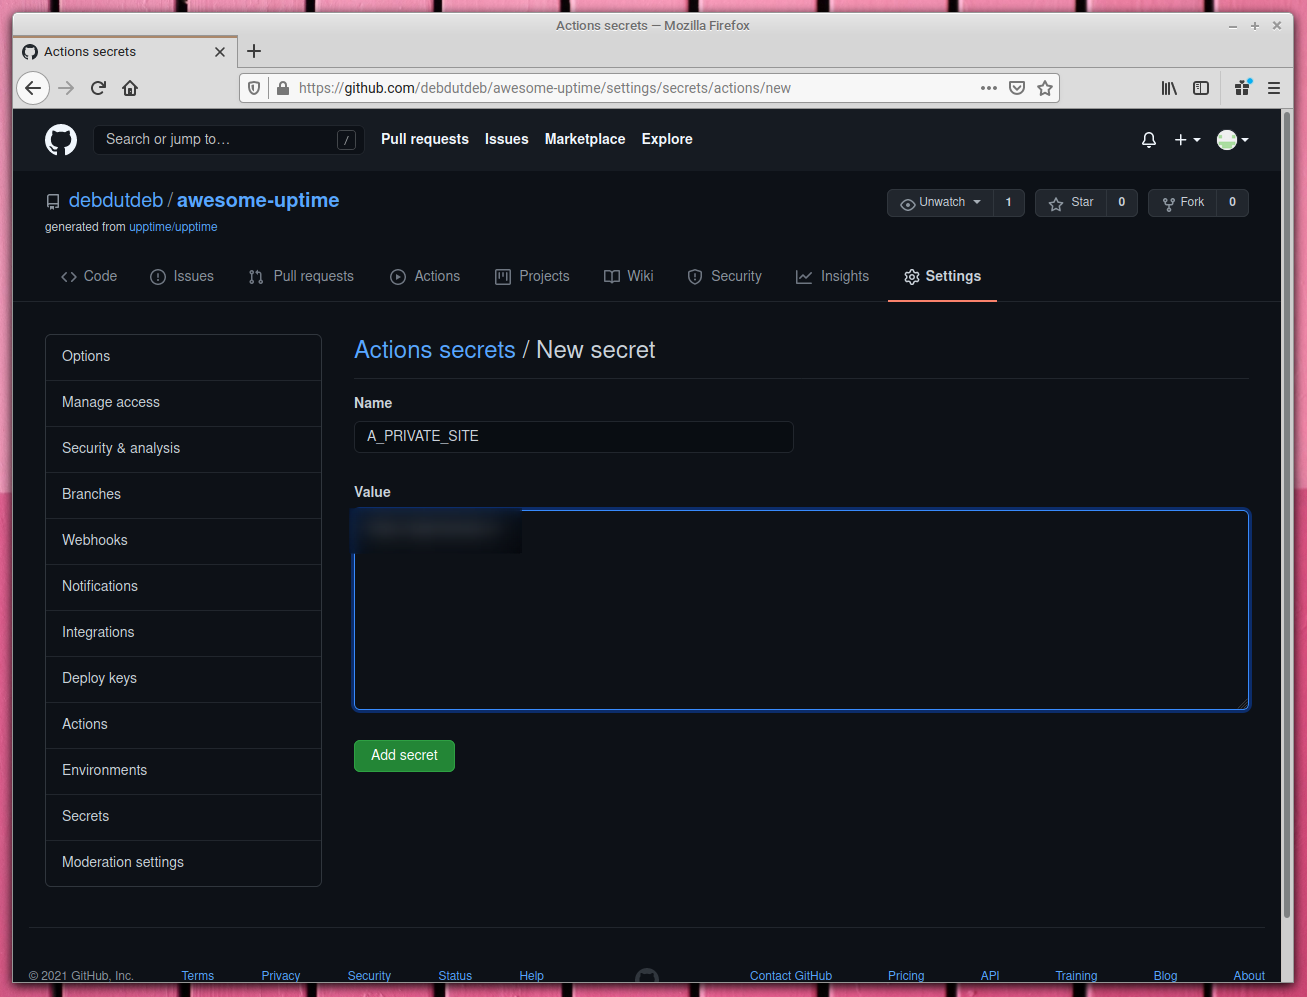
Select "secrets" on the left sidebar and then click the "New repository secret" button.
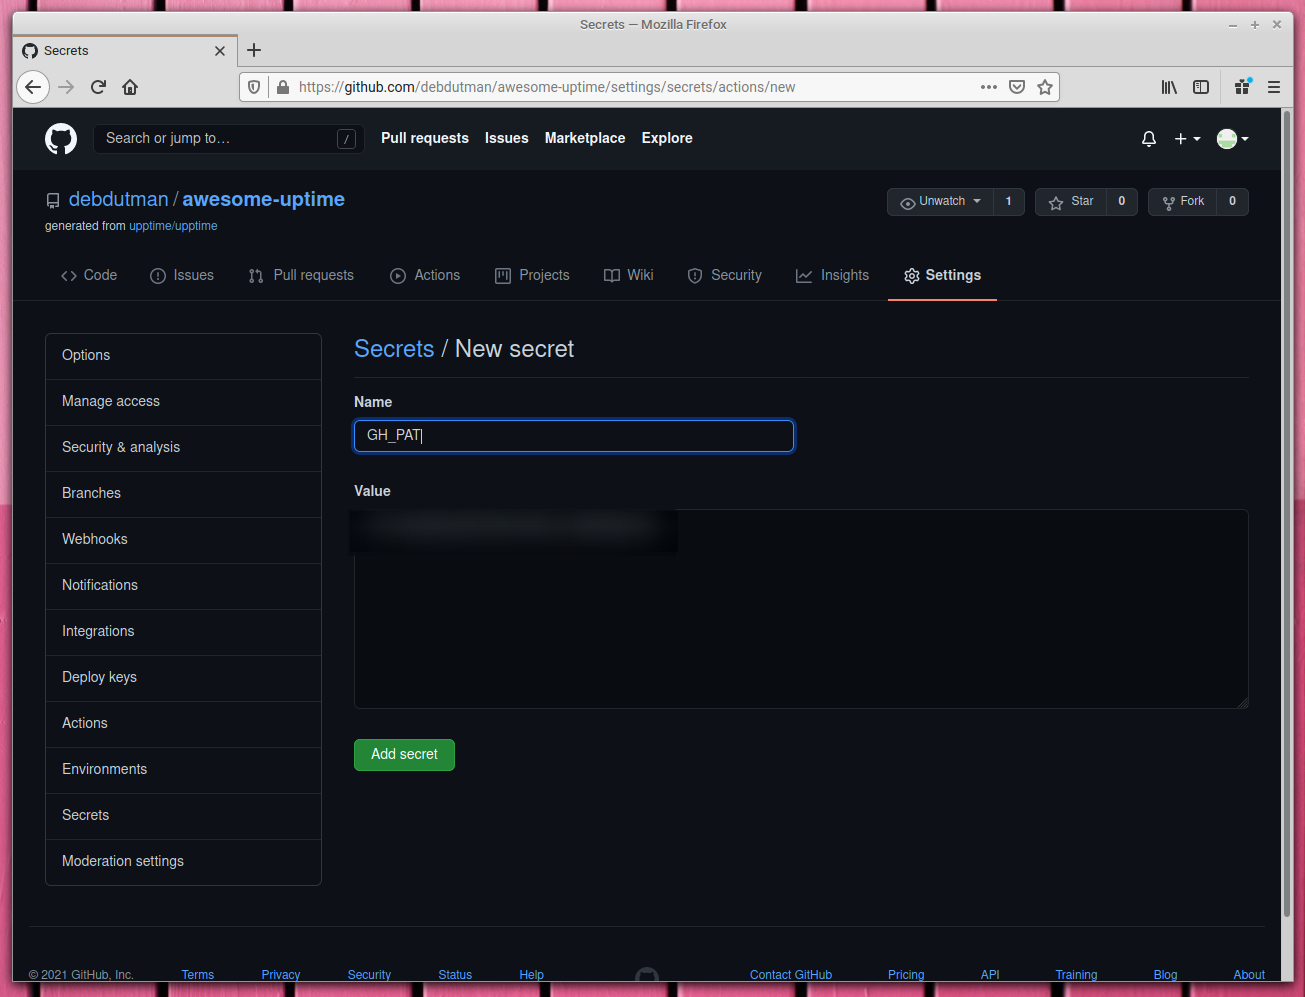
Here for the name, enter GH_PAT and in the value field, paste the token. Finally, click on the "Add secret" button.
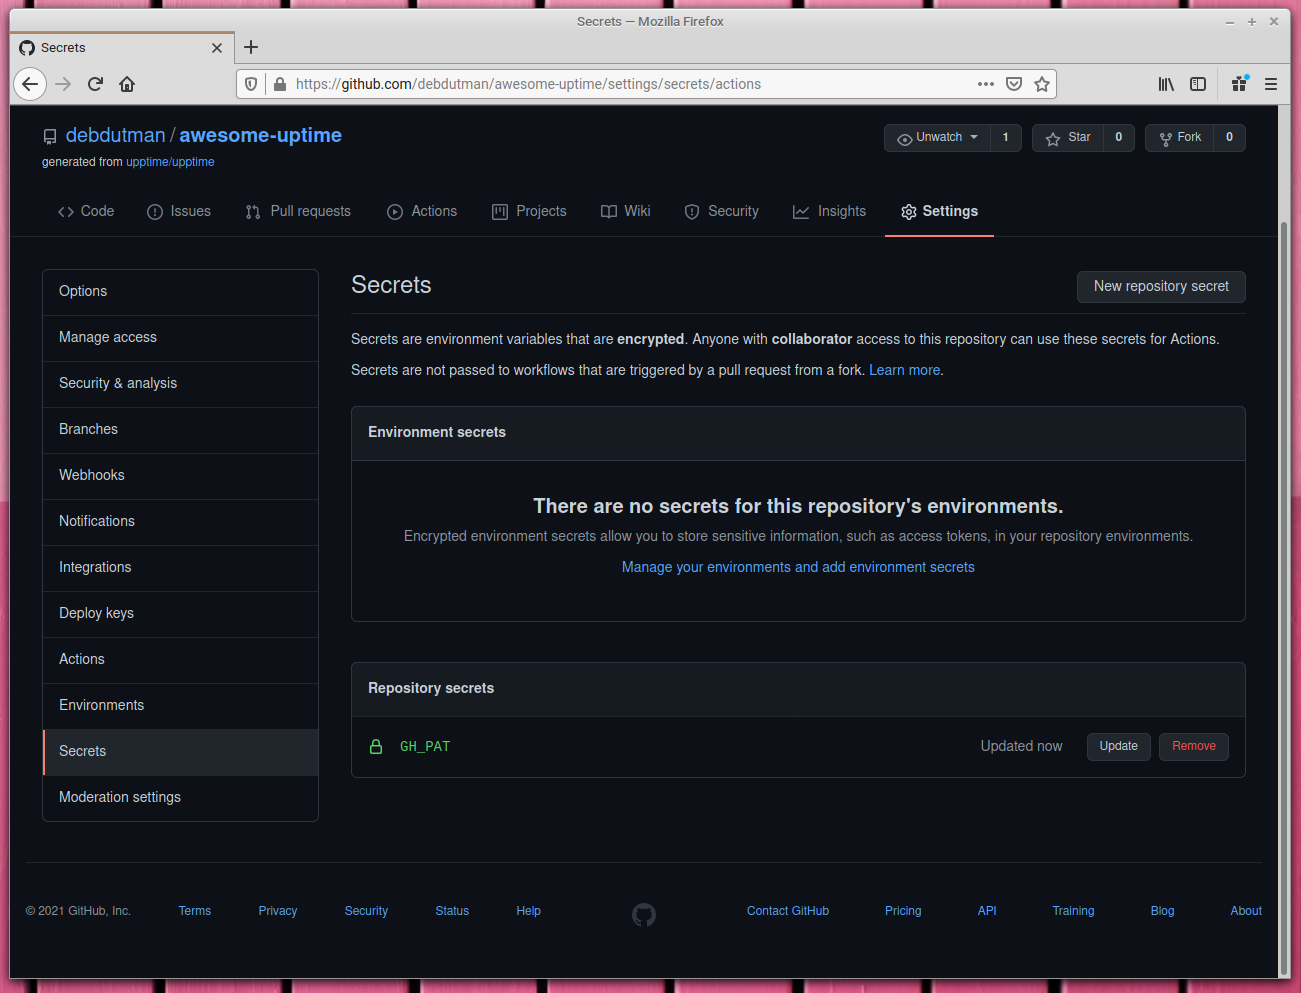
You should see a screen like this at the end:
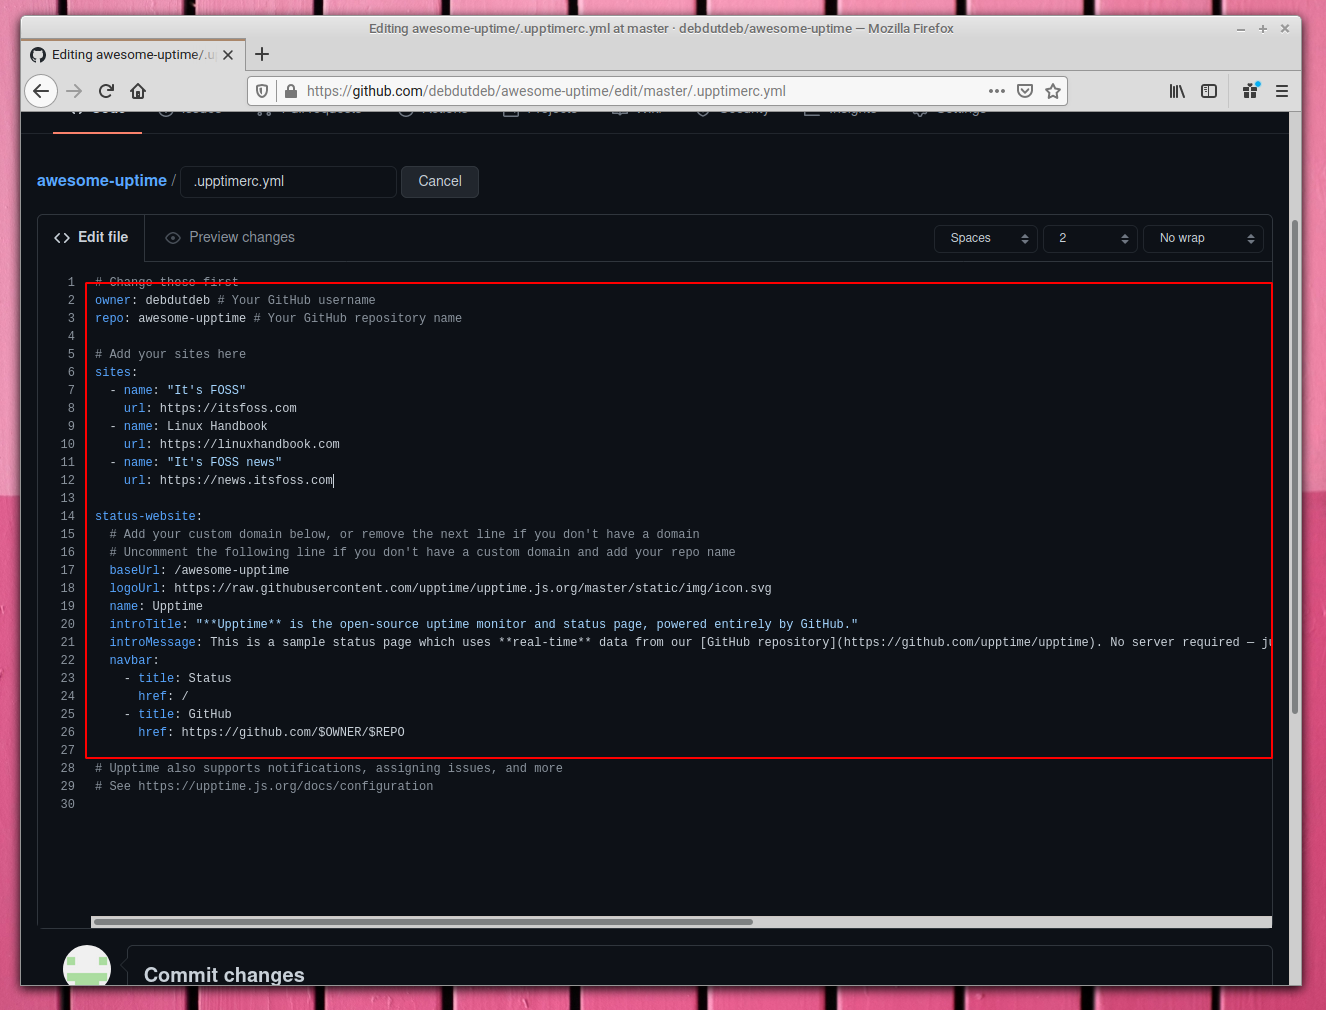
II. Update .upptimerc.yml
The main configuration file is located at the root of the project (master/main branch) and is named .upptimerc.yml. Now it's time to edit this.
- Change the value of
ownerto your GitHub username. - Change the value of
repoto your repository name. The above options are necessary for Upptime to be able to push commits and open issues. - If you have a custom domain, add that to the
cnamevariable. If not, like me, remove the line altogether. - If you did not have a custom domain, uncomment the
baseUrlline, and change the value to your GitHub repository name. - Change the
sitesarray according to your needs. I changed it to monitor https://itsfoss.com, https://linuxhandbook.com and https://news.itsfoss.com.
Optionally, you can also keep a site private by using GitHub secrets. For the sake of completion I'm going to add one myself.
- Open your repository settings and navigate over to
secrets. - Here add a new secret, name it anything you want, and for the value use the domain you want to secretly monitor.
- Click on
Add secret.
Once the secret creation is complete, edit the .upptimerc.yml file again and add the new site, give it a name and for the URL value, use $YOUR_SECRET_NAME.
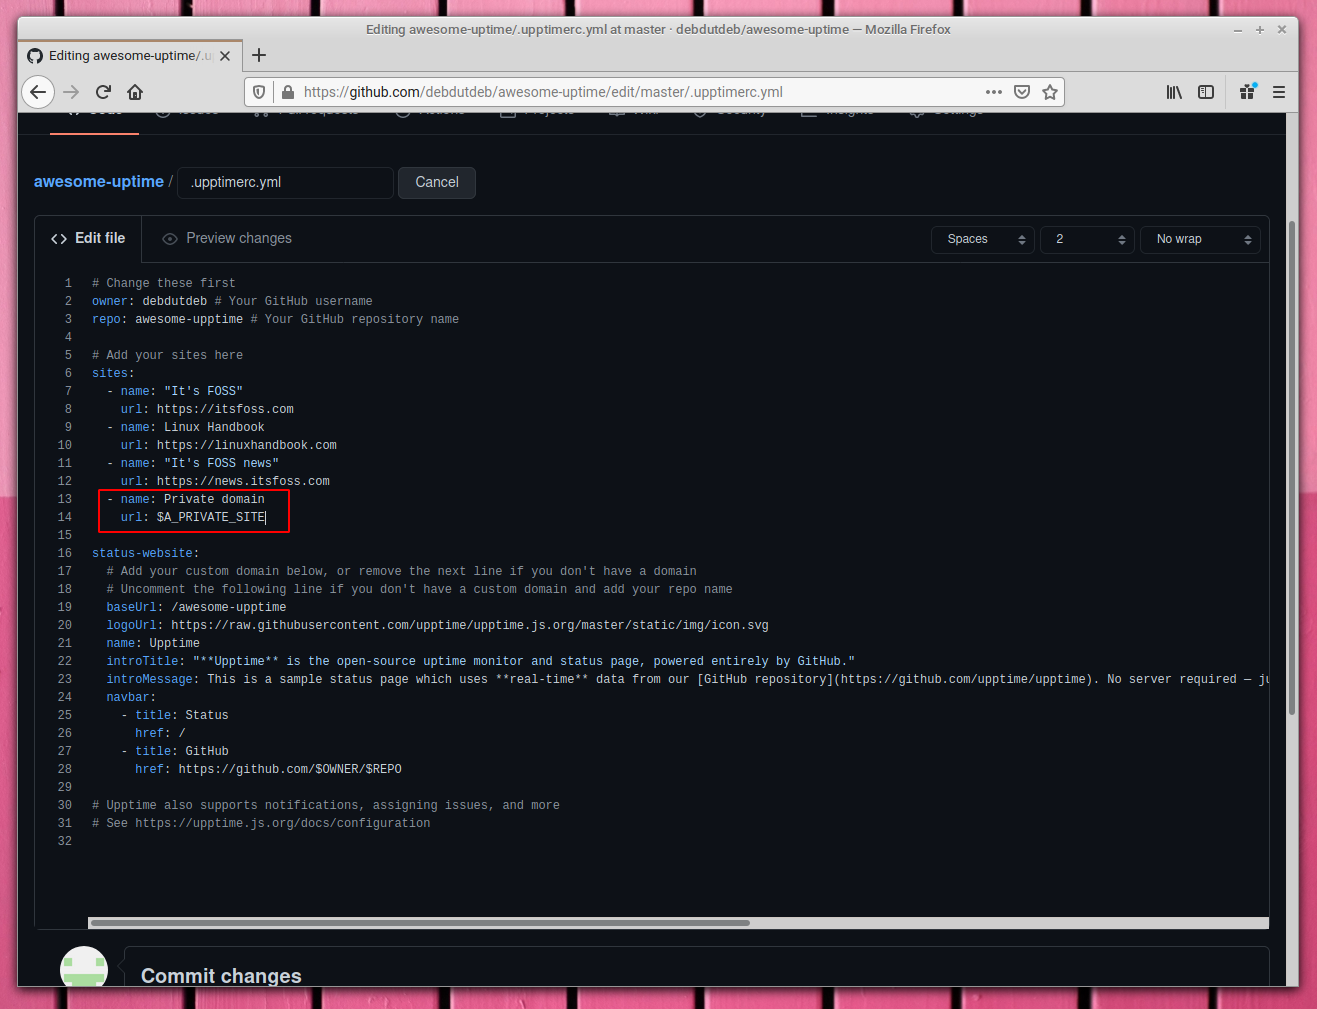
Save the file and push to master/main.
There are lots of other configurable parameters in .upptimerc.yml, refer to this article for more details.
Step 3. Publish the page [optional]
If you want to have a status showing frontend, this section is for you.
Head over to your repository settings. On the Options list of configurable options, find the section that's titled GitHub Pages.
From the branch dropdown menu, select the branch named gh-pages and choose root for web root directory. Click Save.
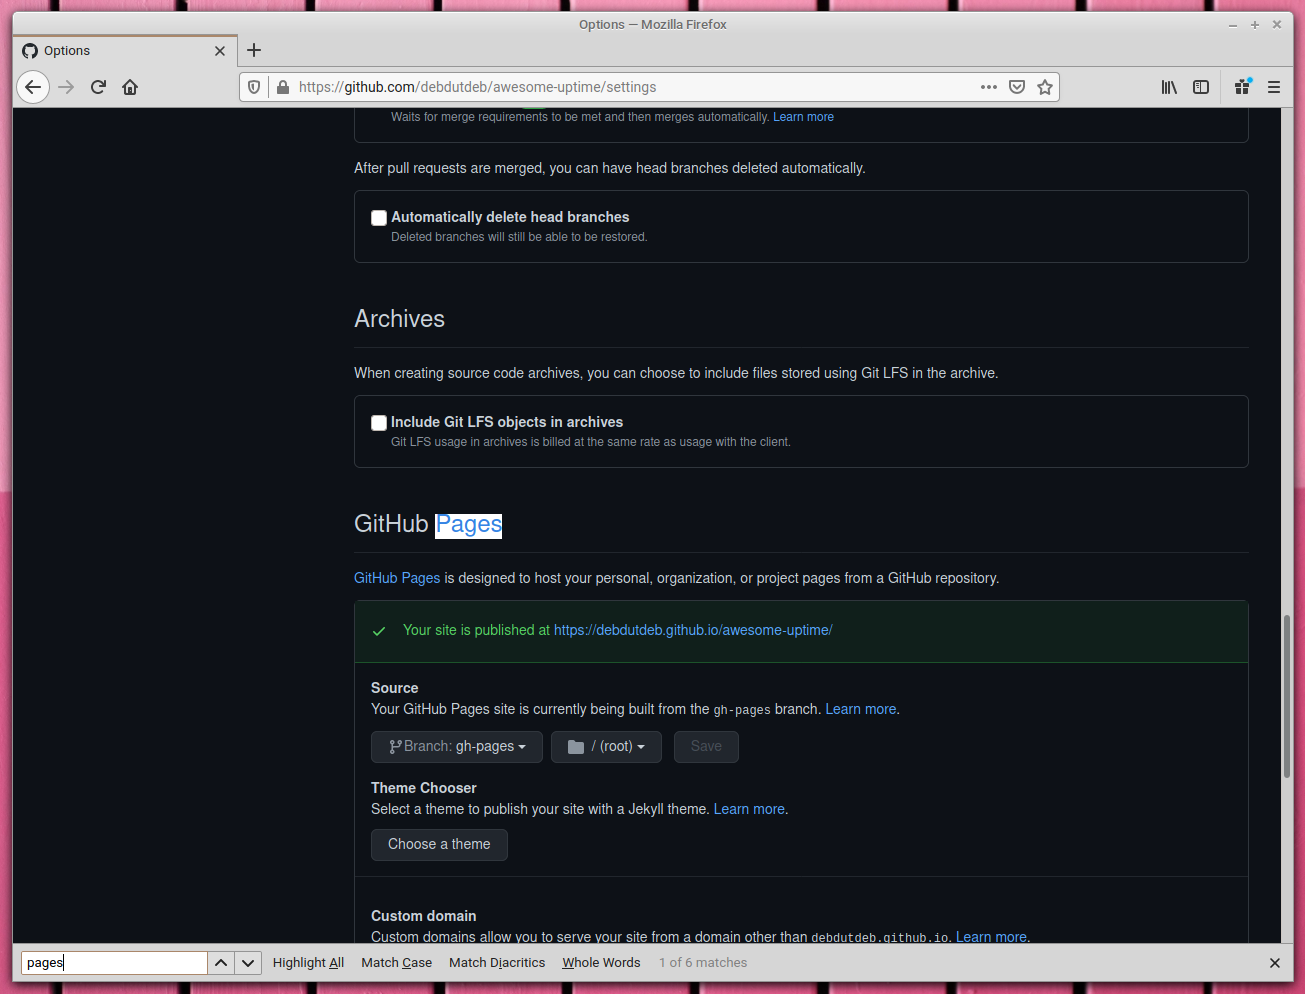
Finally, wait a few moments for the actions to complete. You can check the progress in the Actions menu found on the repository page.
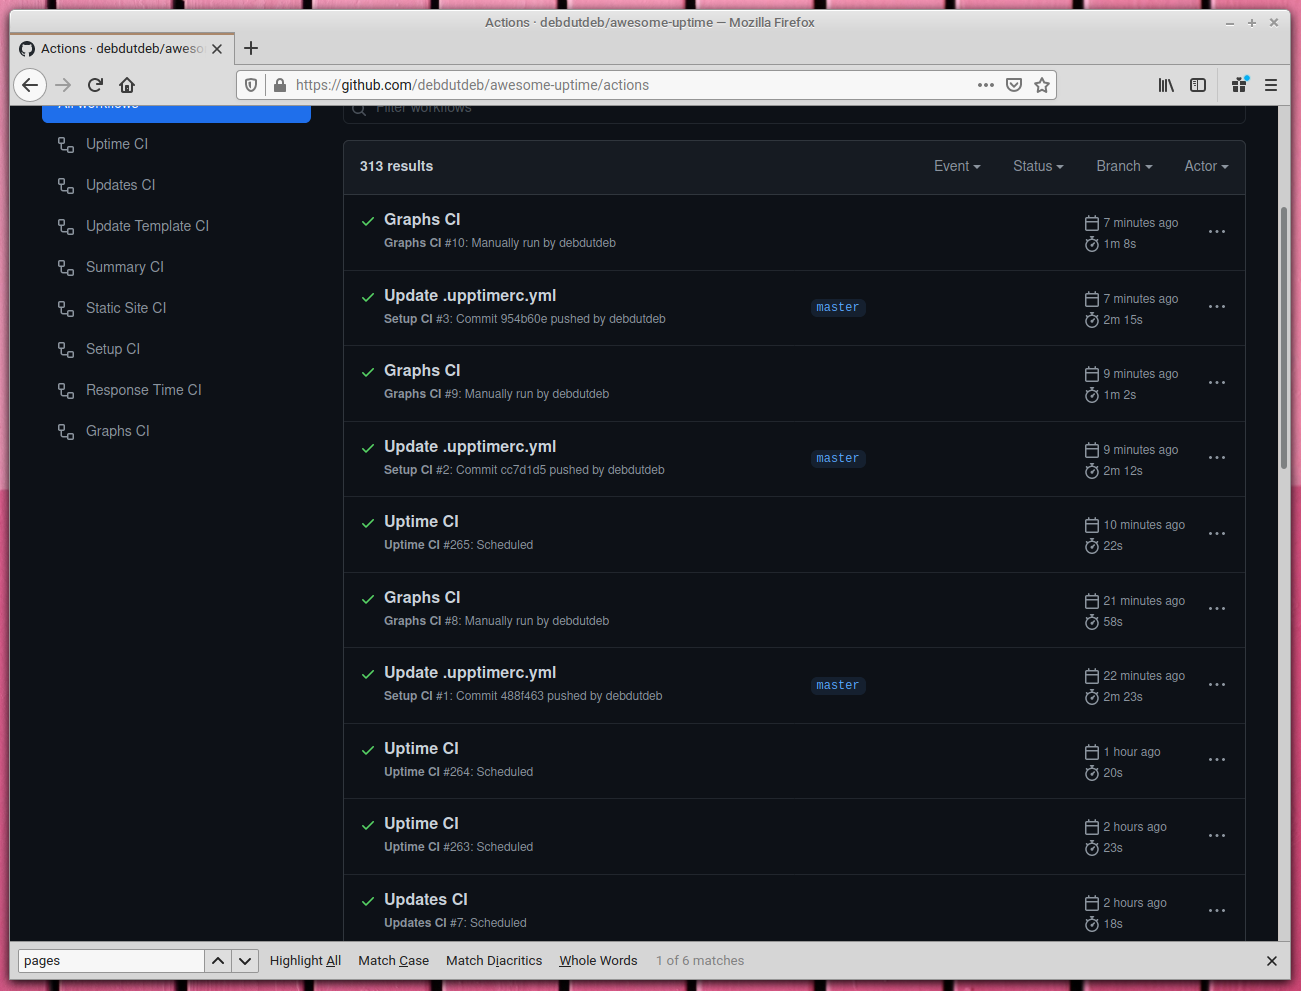
In my case, the required settings were already in place, which is why I experienced some failed action notifications in my mail inbox. If you see a similar situation, ignore it. Once everything before this step is correctly completed, you'll stop receiving such notifications.

That should get you going. For further configuration changes, like notification settings, please refer to the Upptime documentation.
Moreover you may want to try other tools for infrastructure and server monitoring.

I hope this article was helpful, if you have any questions make sure you comment down below or reach me at Twitter @debdutdeb.