

It doesn't matter if you run an online shop, a company website, or a travel blog: You need to trust that a website is safe to use and visit. Thus, HTTPS has become a standard for the world wide web and if your website is not secure, most browsers will block access to it, and your SEO ranking will also suffer. An important task for any web server administrator is therefore to manage SSL/TLS certificates and update them before they expire.
In this tutorial, I want to show you how to use Checkmk, the monitoring tool from tribe29, for monitoring your SSL/TLS certificates. Checkmk keeps an eye on your certificates and lets you know when you should replace them. Using a monitoring tool is a lot more reliable than just using Excel sheets or other mechanisms, allowing you to focus on other things.
This tutorial works for any kind of website and web server application. Admin access to the web server is not required, because I am using an active HTTPS check. You do need a Checkmk site up and running and the host for the monitoring site needs a working internet connection. You can follow this tutorial on how to get started with Checkmk.
In my example, I am using the Checkmk Free Edition version 2.0.0.p20, but the steps are the same for the Checkmk Raw Edition, which is completely open source. You can use both editions fully at no cost. As an example website, I am using ‘www.checkmk.com’.
Step 1: Add your website as a host in Checkmk
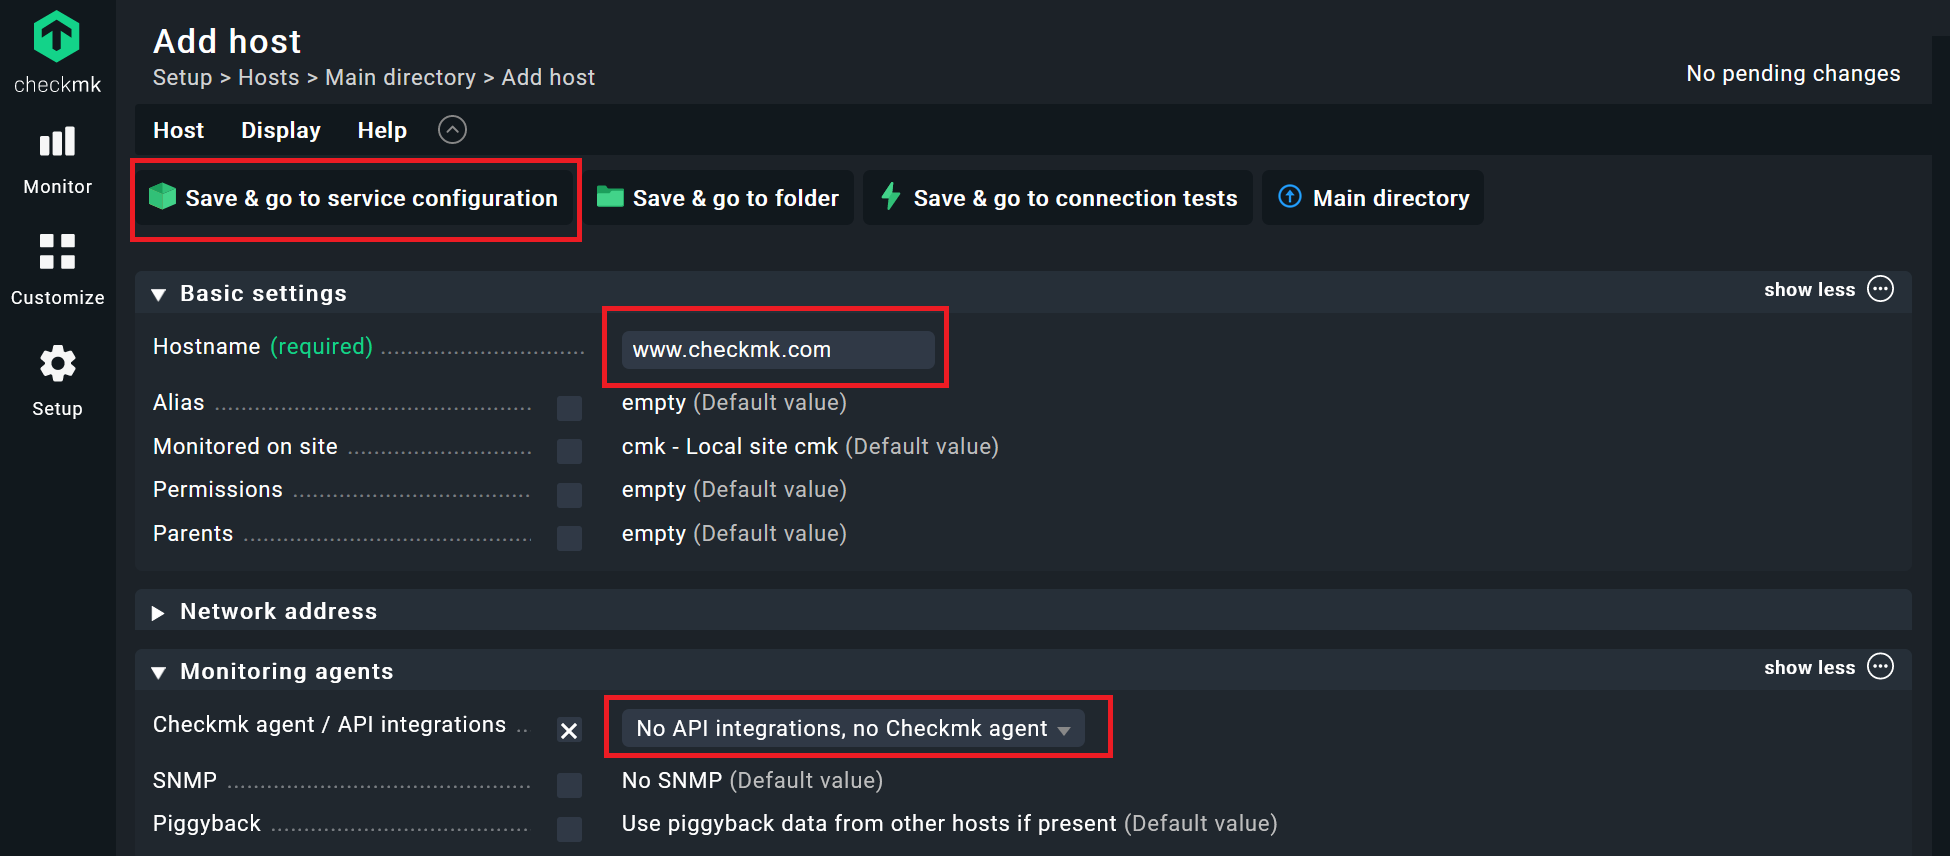
- Open Checkmk and go to Setup -> Hosts and click on ‘Add host’.
- As the Hostname, add the website you want to monitor. In my example, ‘www.checkmk.com’.
- Tick the box at Checkmk agent / API integrations and switch to ‘No API integration, No agent’.
- Click on Save & go to service configuration.
The service discovery in the following screen will not discover any services, because there is no agent or an API that provides data. Because you are not using any agents, Checkmk will now just ping your website. You have created one host with one service.
Step 2: Add the HTTPS check to your host
Now you will use ‘check_http’ to scan the SSL/TLS certificate for your website.
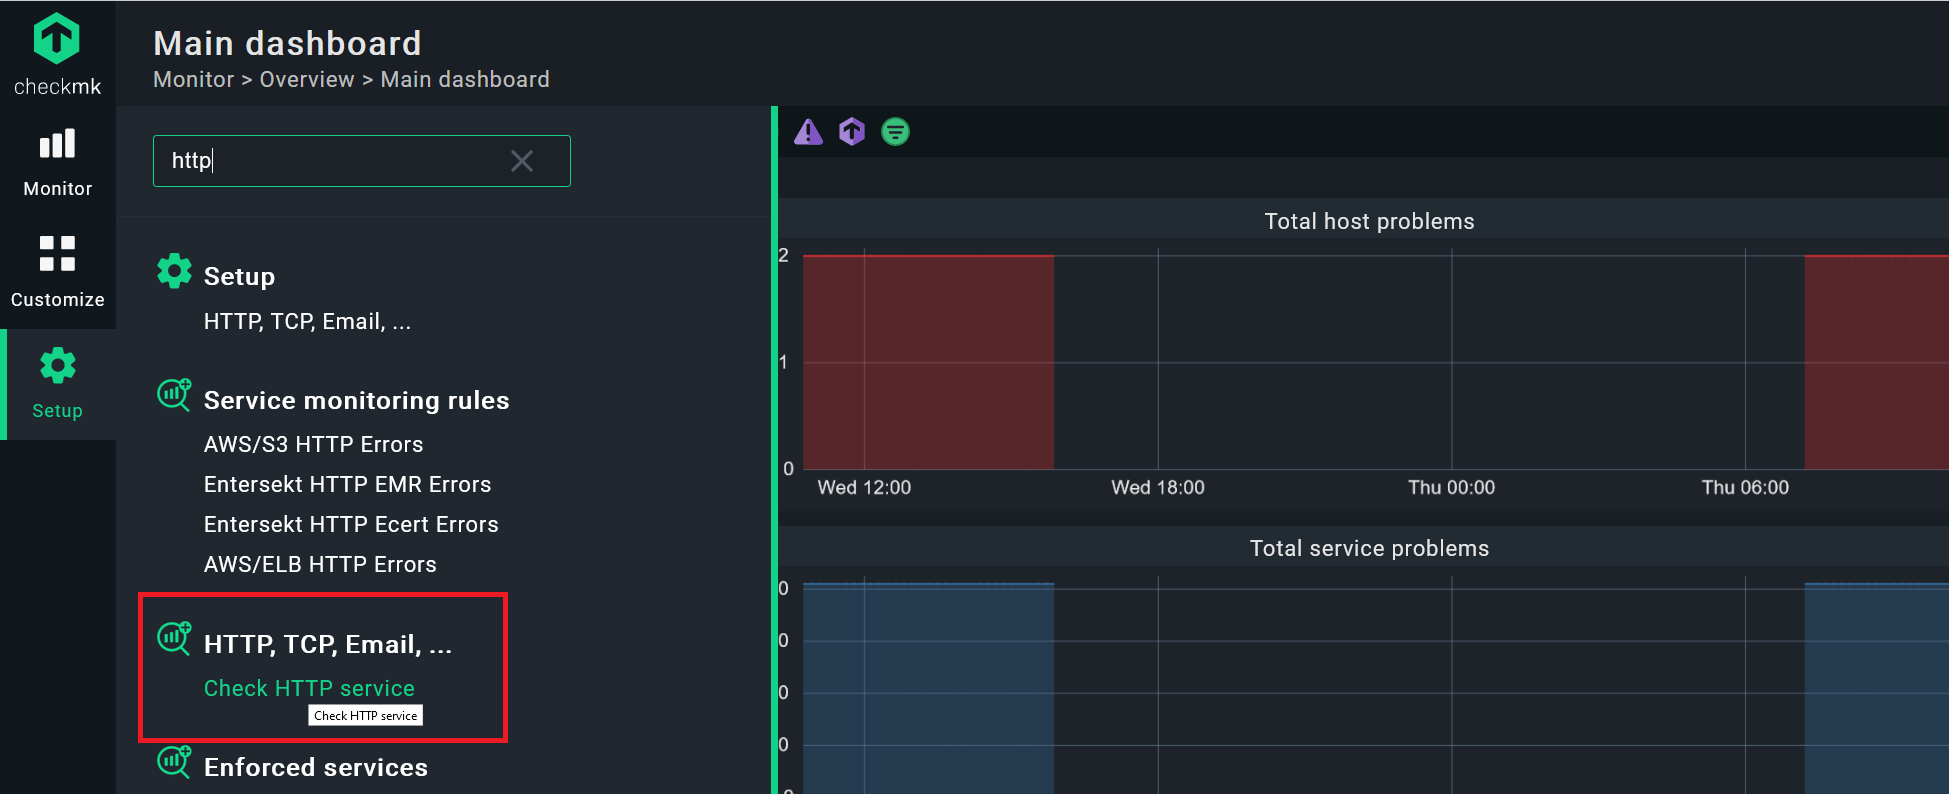
- Click again on Setup, and search ‘http’ in the search bar.
- You should find the Check HTTP service. Click on it.
Checkmk uses rule-based monitoring and will now ask you in which folder you want to create your monitoring rule. You can leave the ‘Main directory’ under Create rule in folder, and click on that button.
- Under Rule Properties, you can add details if you want, but this is not a must. I decided not to add a description and left this area empty.
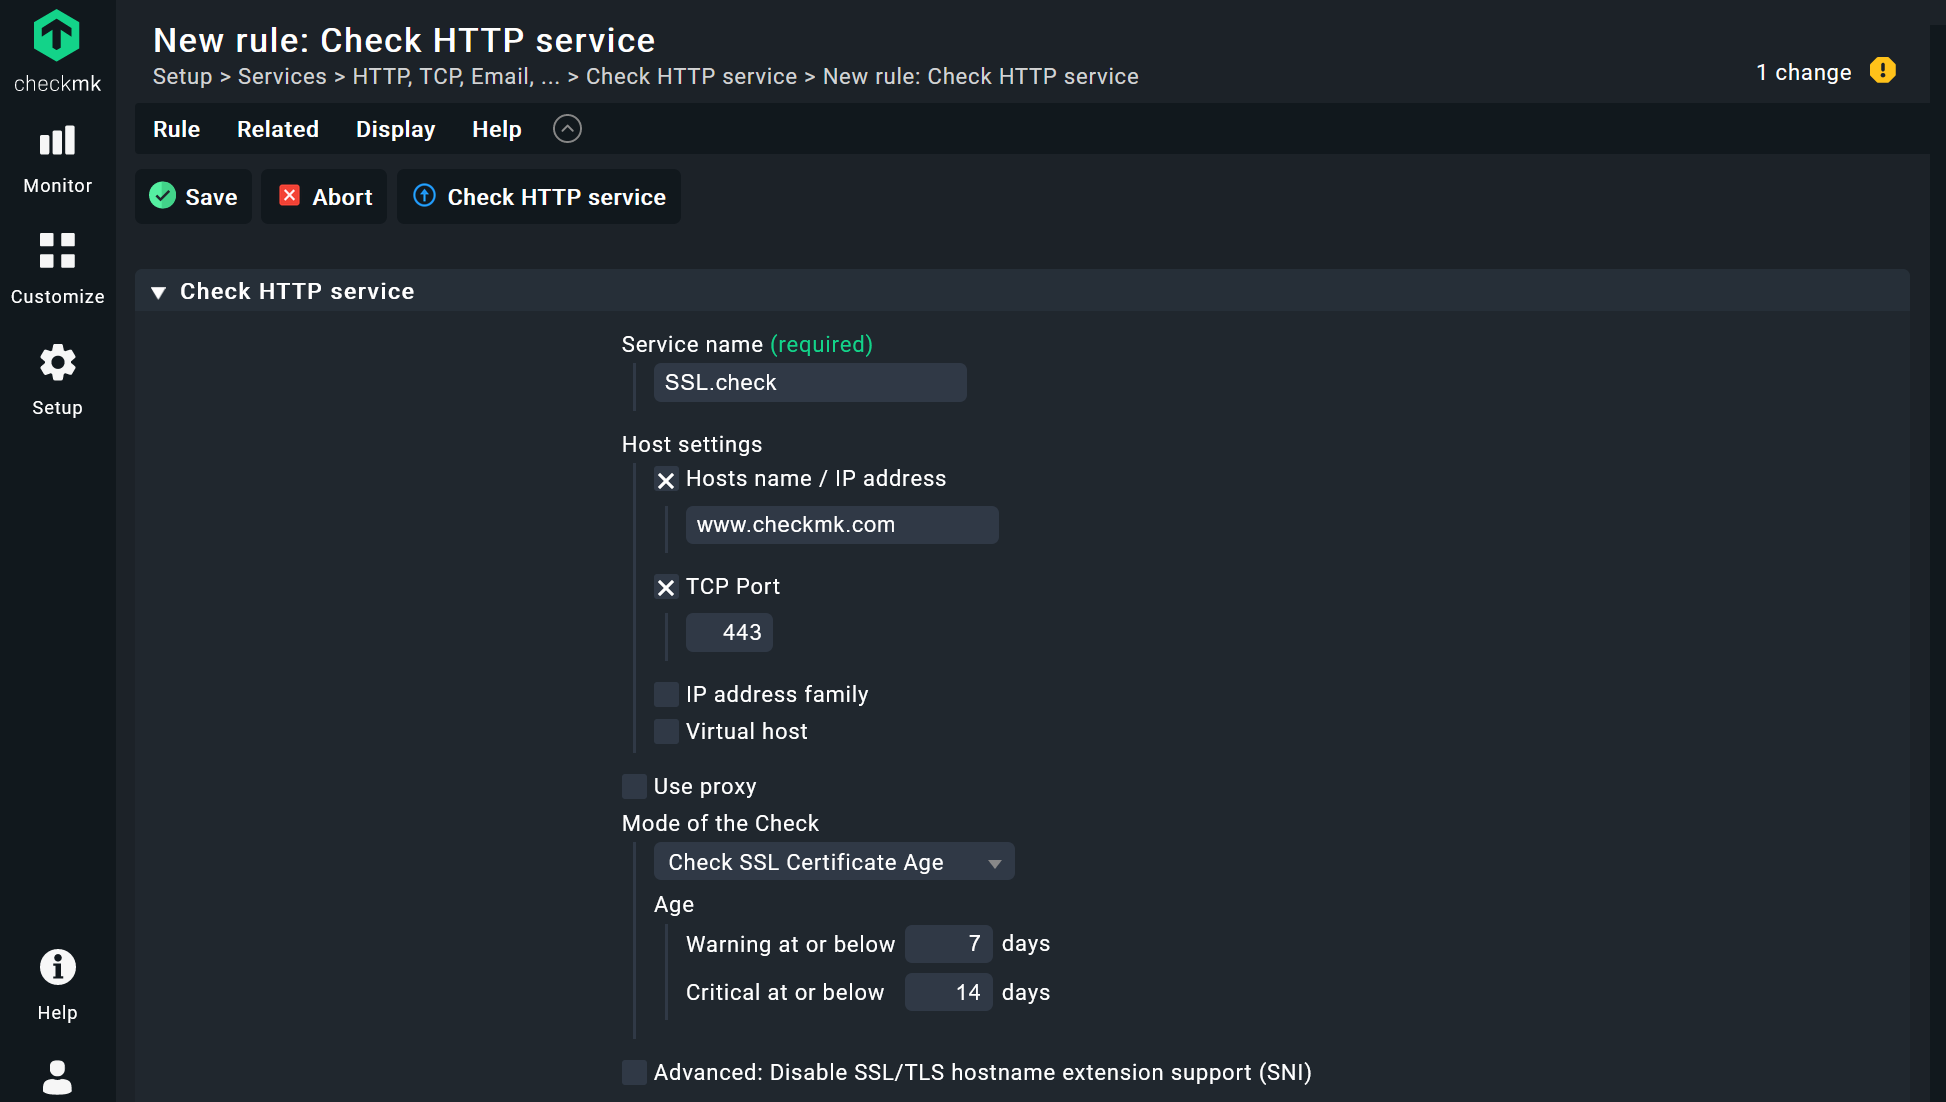
- Under Check HTTP service, you need to add a unique service name. I went for ‘SSL.check’.
- Under Host settings tick the box before Host name / IP address and add your website. In my case ‘www.checkmk.com’.
- Tick the box at TCP port to use the port for SSL/TLS. The default port is 443 (HTTPS), you can customize the port and other details depending on your IT environment, of course.
- Adapt Mode of the Check to Check SSL Certificate age and add the thresholds for when Checkmk should change the service status from OK to Warning and Critical. I used 14 and 7 days. Do not click on Save yet.
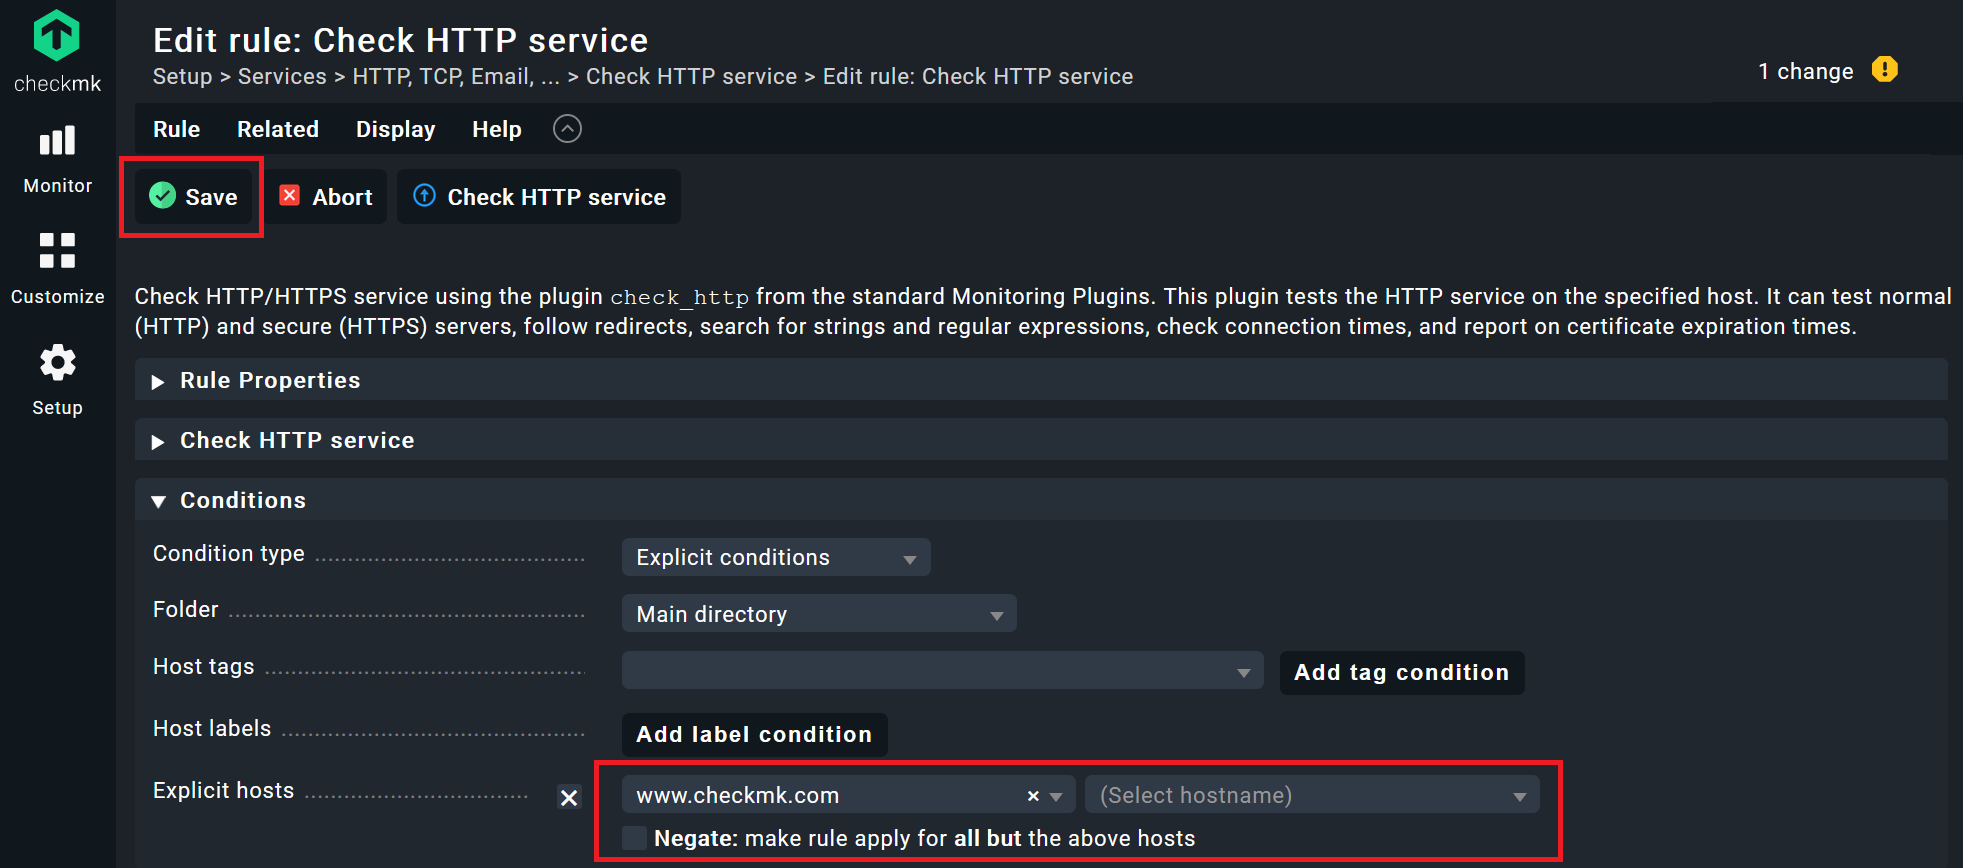
- Under Conditions click on Explicit hosts and tie this rule to the host monitoring your website. In my case that is ‘www.checkmk.com’, because I used that as the hostname in the preceding step.
- Now click on Save.
If Checkmk can resolve a hostname via DNS, you do not need to add the IP address. Thus, I can always simply go for the domain name. If you are monitoring your web server with the Checkmk agent, you can also attach the HTTPS check to your web server host in your monitoring. Additionally, if you manage a larger group of hosts, the rule-based approach is very powerful, because you can not only attach a configuration to specific folders, but you can also use tags and host groups, but that goes beyond the scope of this tutorial.
After clicking on Save, you should see the rule you have just created. You now have to accept the changes.
- Click on the field showing ‘2 changes’ with the yellow exclamation point (!) in the top right corner to see the pending changes.
- Click on Activate on selected sites.
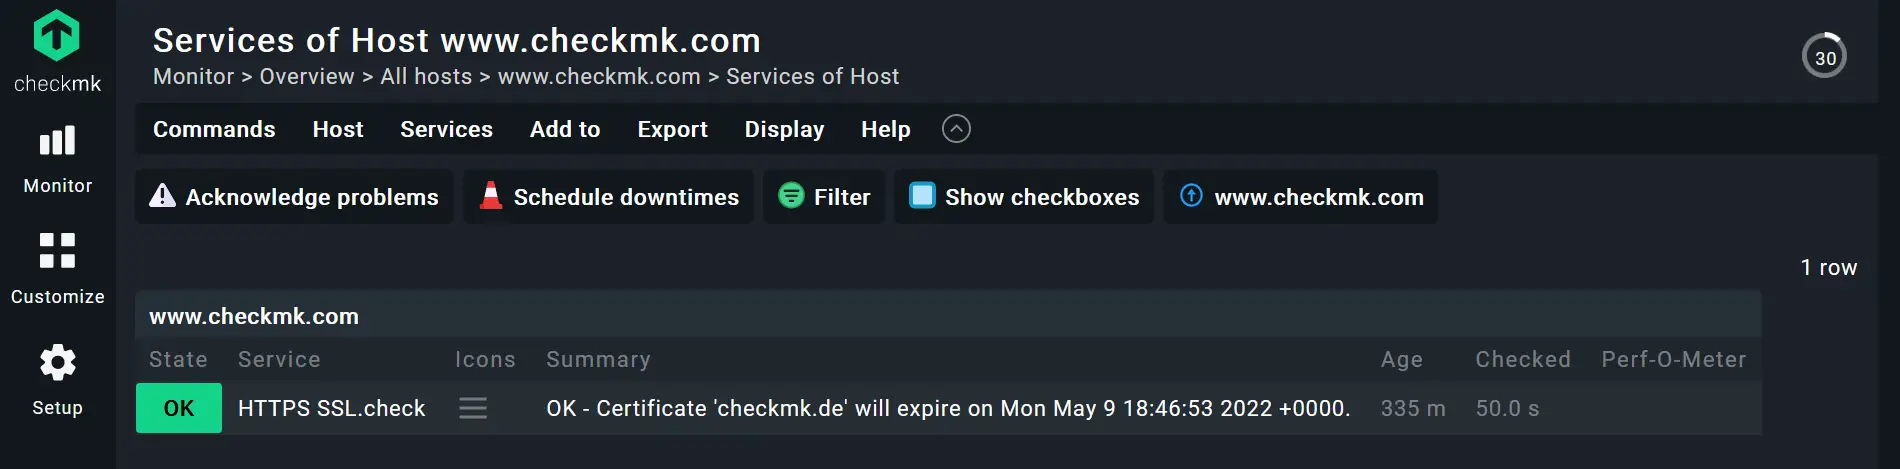
And with this you are now done. Go to Monitor -> All hosts and click on your website host. You should see one service. In my example, the certificate looks good, and the host is OK. If the certificate runs out in 14 days, the state would switch to WARN, and in 7 days or less it would turn red and become CRIT.
Next step: Web server monitoring beyond SSL/TLS
This tutorial showed you how to monitor SSL/TLS certificates with Checkmk by using an active check. You can monitor more than just a date that is going to expire. The HTTPS check can track response times against a given threshold, the response page to match or not to match certain strings or regular expressions, the maximum age of a result page and other details. However, the check does not validate the chain of trust.
While checking on your SSL/TLS certificates is an essential part of any web server monitoring, there is a lot more to that than this tutorial. If you want to have a holistic monitoring of a web server and your website, you can also do that with Checkmk. You can follow this blog on how to set up a web server monitoring. It explains how to monitor all aspects that are necessary for hosting a website: Your web server application, databases, the server hardware, the operating system, and, of course, your certificates.
Author info: Thomas Wittmann, IT consultant at tribe29.
