How to Create a Repository in GitHub
In this primer on GitHub, learn to create new repositories. It also answers a few common doubts that arise while creating GitHub repositories.


GitHub is a nice place to store project code files. But let's see how to do so and become familiar with some basic terminologies.
What is a GitHub repository?
A repository (or repo in short) in GitHub is basically like a project Folder. It contains all the files & folders of that project with their revision history. It has a lot of other features and work but we won't go into that.
How to Create a GitHub Repository?
After logging in, you can go directly to github.com, or your GitHub profile, click on the + plus icon at the top right of the navigation bar (navbar) and click on the New Repository button in the dropdown, as shown in the image below 👇
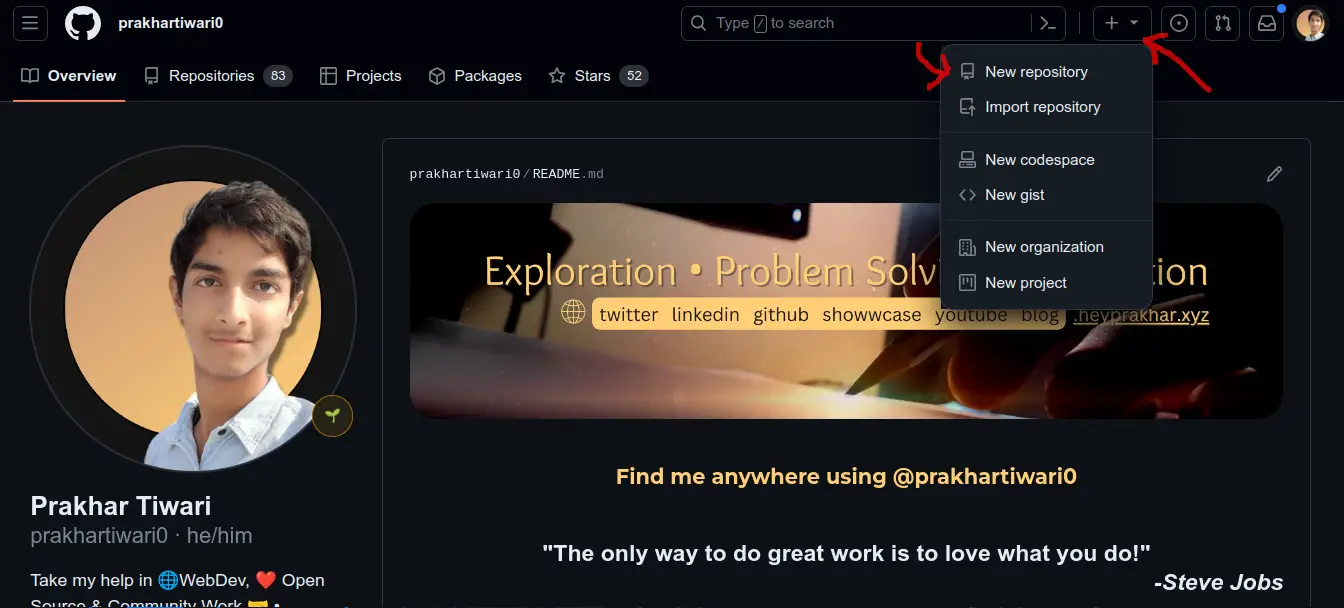
The navbar is present in almost all the GitHub pages, so the Add button is always available in the navbar.
But there are other places where this New Repository button is available, like in the Repositories Tab in your GitHub Profile, but I won't share more as the UI changes frequently which may cause confusion.
Fill in the details when creating a new repo
After you go to that page, you will see something like this 👇
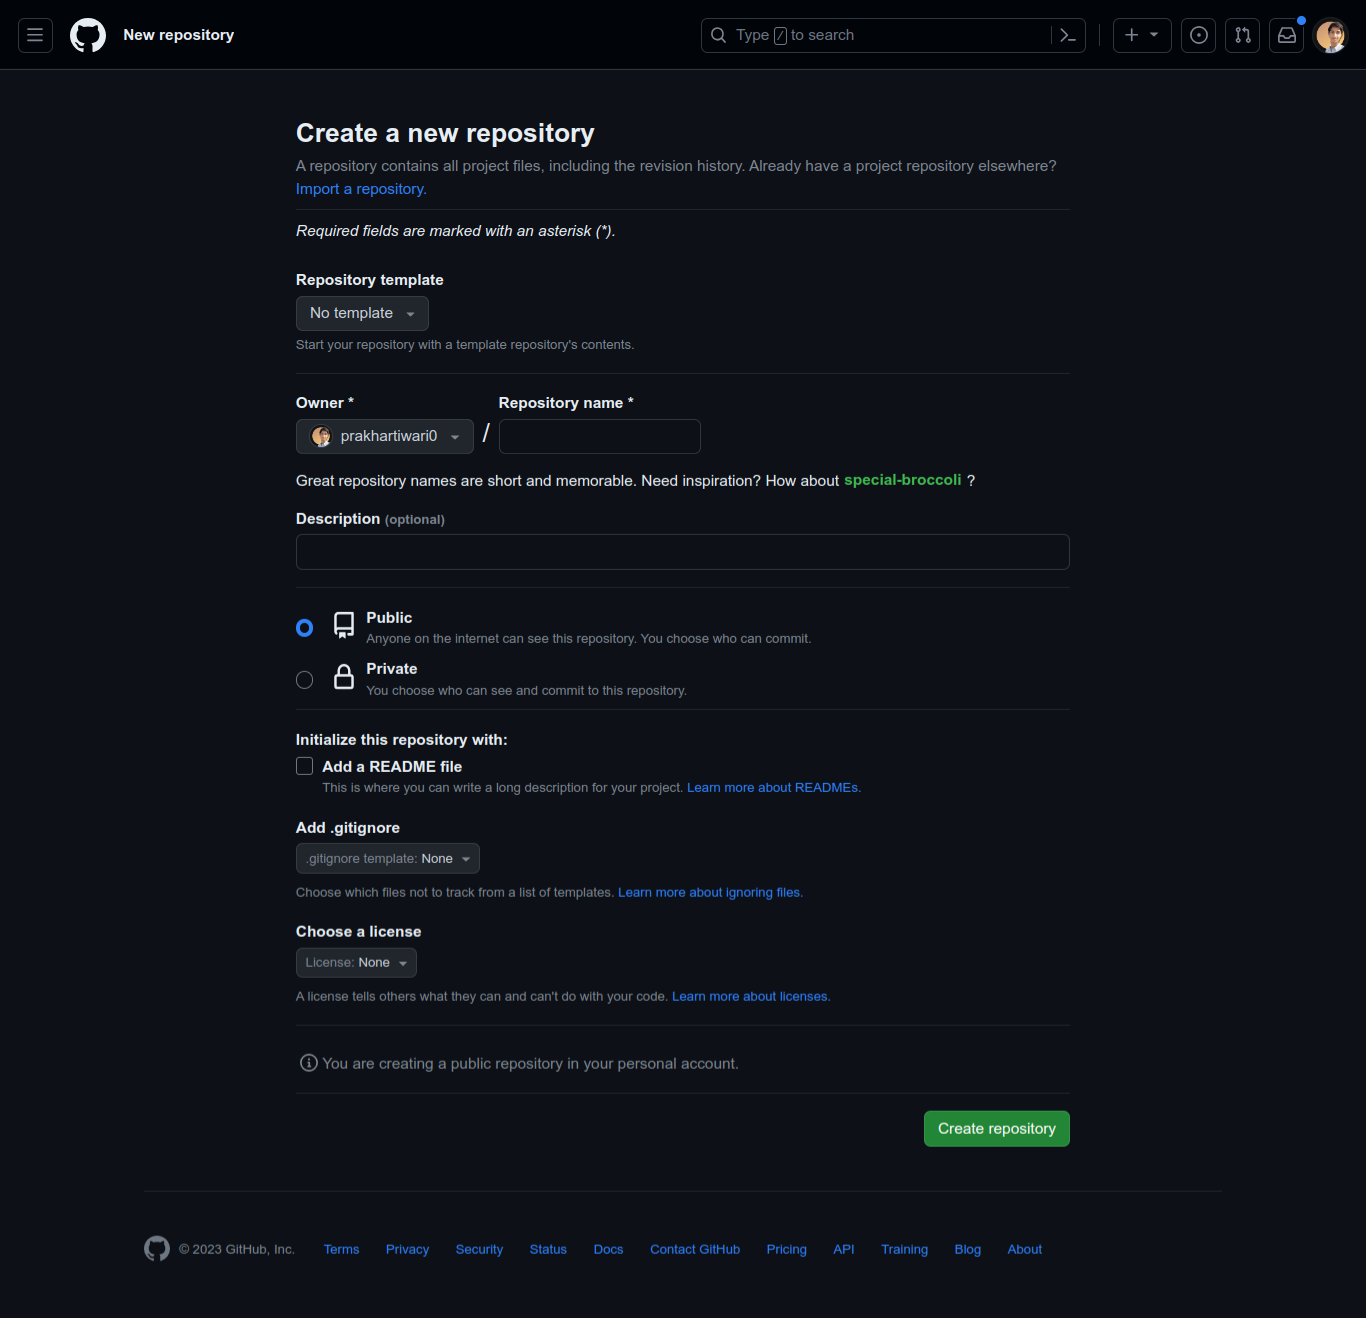
From here on, it depends on a few factors about your project and your needs, which will decide what to do.
Most of those things must be easy to fill, but some of them can be a bit confusing, so let me describe them a bit:-
What to do with template?
You can ignore templates for now.
Private or public repository?
If you want to keep the Repository only accessible and seen by you, then keep it private, but if you don't have any problem with letting everyone see the files, then you can keep it Public. Some functionalities are not available in a Private Repo, but you don't need to worry about that now.
What is this README file in GitHub?
The README file is a Markdown file that will be shown on the front page of the Repository. It's used by everyone to share all the necessary information about the project, like what it is about, how to install and use it, etc. I would suggest adding a ReadMe file as it's pretty important. You may choose not to and do it later, but it's a good practice to keep it.
Do you need to add .gitignore file?
.gitignore file contains a list of paths to files & folders that you don't want to be pushed in the GitHub repo from your offline Git repository. If you are getting confused then please leave it as it is (unchecked), you don't need to worry, it can be created anytime.
Which license to choose in GitHub?
Licensing Projects is a different game. It depends on project to project, and what the owner wants. You can ignore it for now and leave it as None, or you can simply set an MIT License if you want to create an open source project that others can use and contribute.
You can read more about choosing a license here.
With all this basic information, you can go ahead and create your New GitHub Repository.
Thanks for reading, I hope you got some help from this article, keep learning, keep GitHubing & take care 😄
