

Installing WordPress is not a big deal. You can install it using LAMP server for local development. You can also deploy it for the real world on a proper public facing Linux server.
Cloud servers like Linode, DigitalOcean etc also provide the option to deploy a brand-new Linux server preconfigured with WordPress. Even easier, right?
But what if you want to install more than one WordPress on a single server?
An easy way would be to use a service like ServerPilot. Not only it updates your server automatically, it also lets you easily deploy multiple WordPress instances on the same server.
That would cost you a bit more money and if you do not want that, you can use Docker to deploy multiple WordPress instances.
Through this guide, you'll learn how to easily set up a dual WordPress setup running from their individual containers and add more instances!
Prerequisites
It is not mandatory, but the tutorial will be much easier for you to follow if you have:
- Knowledge of basic Linux commands
- Some knowledge of Docker
- Understanding of Docker Compose
You'll be deploying WordPress behind a reverse proxy container, with SSL enabled domain and subdomains.
Apart from the aforementioned topical knowledge, you'll need the following infrastructure requirements:
- A public facing Ubuntu Linux server. You can use a cloud service provider like Linode. A Nano server with 1 GB RAM will be sufficient for this deployment. But if you plan to self-host more WordPress instances, do consider upgrading it.
- Access to your domains/subdomains and their DNS settings
- Docker and Docker Compose installed on your Linux server.
If you need help, you can follow our guides on:
In all our other tutorials based on self-hosting web applications with Docker, I've discussed deploying Nginx containers and Web App containers separately. This time, however, I'll be using Docker Compose for setting up multiple WordPress containers, all based on a single yml file.
So this is also an example to show you how you can integrate an Nginx configuration with a Web App you consider deploying, through a single Docker Compose file.
I'll be using domain.com as an example for the first WordPress blog and wordpress.domain.com as the second self-hosted blog. In the end, I'll also describe how to add more WordPress instances based on the configuration that I'm going to discuss here.


Set up a working directory for all WordPress related services
Create a directory and make it active. Let’s call it multi-wordpress.
mkdir multi-wordpress
And then switch to this newly created directory using the cd command:
cd multi-wordpress
Set WordPress file upload limit to 512 MB
Inside this directory, we’ll store our uploads.ini file that has the necessary upload configuration for uploading files up to 512 MB in size. Enter the following command on the terminal:
avimanyu@localhost:~/multi-wordpress$ printf "file_uploads = On\nmemory_limit = 512M\nupload_max_filesize = 512M\npost_max_size = 512M\nmax_execution_time = 600" > uploads.ini
Set a file upload limit for Nginx
As an additional measure, also create a file called client_max_upload_size.conf and save it in the same directory for mounting to the Nginx container. For the sake of it, I set it as 1 GB. This is helpful for configuring other apps in the future.
avimanyu@localhost:~/multi-wordpress$ printf "client_max_body_size 1G;" > client_max_upload_size.conf
WWW Redirection through Nginx (Updating CNAME not required)
If you want to use non-www to www redirection with WordPress, you can set the redirector with the cat command on your Linux server:
avimanyu@localhost:~/multi-wordpress$ cat >> domain.com
rewrite ^/(.*)$ https://www.domain.com/$1 permanent;
Press enter and then Ctrl+D to save it. We did not use printf here because $1 will not get saved in the file as shown above. This could lead to future issues with URLs, as we want redirection to work in all cases. For example, domain.com/test should always redirect to www.domain.com/test.
non-WWW Redirection through Nginx (Updating CNAME not required)
If you want to use www to non-www redirection repeat similar steps to do the opposite:
avimanyu@localhost:~/multi-wordpress$ cat >> www.domain.com
rewrite ^/(.*)$ https://domain.com/$1 permanent;
Create an external Docker network
I'll be using a network called net for this tutorial. Therefore, I create it with the following command:
docker network create net
Preparing a single Docker Compose file ready for deployment
With the following configuration within a single docker-compose.yml file, you can set up everything at one go with all six containers that serves your purpose, starting from the reverse proxy to the last WordPress container. Let us look at them service by service before finally merging all of them into one single file:
Nginx Reverse Proxy Container
Mount both the files client_max_upload_size.conf and www.domain.com in read only mode and specify the network net that was created manually.
  nginx-proxy:
    image: jwilder/nginx-proxy
    container_name: nginx-proxy
    ports:
      - "80:80"
      - "443:443"
    volumes:
      - html:/usr/share/nginx/html
      - dhparam:/etc/nginx/dhparam
      - vhost:/etc/nginx/vhost.d
      - certs:/etc/nginx/certs:ro
      - /var/run/docker.sock:/tmp/docker.sock:ro
      - ./client_max_upload_size.conf:/etc/nginx/conf.d/client_max_upload_size.conf:ro
      - ./www.domain.com:/etc/nginx/vhost.d/www.domain.com:ro
    labels:
      - "com.github.jrcs.letsencrypt_nginx_proxy_companion.nginx_proxy"
    restart: always
    networks:
      - net
Let’s Encrypt Container for SSL Certificates
Note that I use rw for the certs volume, unlike ro in the previous section. This is essential for creating the SSL certificates and updating the volume accordingly as they are generated. Also, set the default email for notifications from Let's Encrypt and specify the same “net” network.
  letsencrypt:
    image: jrcs/letsencrypt-nginx-proxy-companion
    container_name: lets-encrypt-proxy-companion
    depends_on:
      - "nginx-proxy"
    volumes:
      - certs:/etc/nginx/certs:rw
      - vhost:/etc/nginx/vhost.d
      - html:/usr/share/nginx/html
      - /var/run/docker.sock:/var/run/docker.sock:ro
    environment:
      DEFAULT_EMAIL: [email protected]
    restart: always
    networks:
      - net
Database container for first WordPress site
Based on the official WordPress Docker Compose configuration, set the necessary environment variables as shown below and specify an internal network (seen as mysqldb0 here, used for the service name and volume name as well).
This network will be visible only to the database container and its corresponding WordPress container. When you deploy it, a MySQL database will be created with credentials shown as under:
  mysqldb0:
    image: mysql:5.7
    environment:
      MYSQL_DATABASE: db0
      MYSQL_USER: db0user
      MYSQL_PASSWORD: secret
      MYSQL_RANDOM_ROOT_PASSWORD: '1'
    volumes:
      - 'mysqldb0:/var/lib/mysql'
    restart: always
    networks:
      - mysqldb0
First WordPress container
When you deploy the WordPress container, it will use the database configuration specified in the previous section above. Note that in addition to the same internal network seen by the database (mysqldb0), this WordPress service must also see the Nginx network called net since it is the frontend application for the outside world.
  wordpress0:
    image: wordpress:5.8.0-php8.0-apache
    environment:
      WORDPRESS_DB_HOST: mysqldb0
      WORDPRESS_DB_USER: db0user
      WORDPRESS_DB_PASSWORD: secret
      WORDPRESS_DB_NAME: db0
      WORDPRESS_CONFIG_EXTRA: |
        define('AUTOMATIC_UPDATER_DISABLED', true);
      VIRTUAL_HOST: domain.com,www.domain.com
      LETSENCRYPT_HOST: domain.com,www.domain.com
    volumes:
      - 'wordpress0:/var/www/html/wp-content'
      - './uploads.ini:/usr/local/etc/php/conf.d/uploads.ini'
    restart: always
    depends_on:
      - mysqldb0
    networks:
      - mysqldb0
      - net
At this point, you have the configuration for setting up a single WordPress Instance. To set up more, replicate step 3 and 4 with new names.
Here you go:
Database container for second WordPress site
  mysqldb1:
    image: mysql:5.7
    environment:
      MYSQL_DATABASE: db1
      MYSQL_USER: db1user
      MYSQL_PASSWORD: secret
      MYSQL_RANDOM_ROOT_PASSWORD: '1'
    volumes:
      - 'mysqldb1:/var/lib/mysql'
    restart: always
    networks:
      - mysqldb1
Second WordPress container
  wordpress1:
    image: wordpress:5.8.0-php8.0-apache
    environment:
      WORDPRESS_DB_HOST: mysqldb1
      WORDPRESS_DB_USER: db1user
      WORDPRESS_DB_PASSWORD: secret
      WORDPRESS_DB_NAME: db1
      WORDPRESS_CONFIG_EXTRA: |
        define('AUTOMATIC_UPDATER_DISABLED', true);
      VIRTUAL_HOST: wordpress.domain.com
      LETSENCRYPT_HOST: wordpress.domain.com
    volumes:
      - 'wordpress1:/var/www/html/wp-content'
      - './uploads.ini:/usr/local/etc/php/conf.d/uploads.ini'
    restart: always
    depends_on:
      - mysqldb1
    networks:
      - mysqldb1
      - net
With your favorite editor, create a docker-compose.yml file with all the content discussed till this point (additional parameters have been included below). You would require editing the domain names and other credential data accordingly. Here, I’ve used Nano.
nano docker-compose.yml
version: '3.7'
services:
  nginx-proxy:
    image: jwilder/nginx-proxy
    container_name: nginx-proxy
    ports:
      - "80:80"
      - "443:443"
    volumes:
      - html:/usr/share/nginx/html
      - dhparam:/etc/nginx/dhparam
      - vhost:/etc/nginx/vhost.d
      - certs:/etc/nginx/certs:ro
      - /var/run/docker.sock:/tmp/docker.sock:ro
      - ./client_max_upload_size.conf:/etc/nginx/conf.d/client_max_upload_size.conf
      - ./www.domain.com:/etc/nginx/vhost.d/www.domain.com
    labels:
      - "com.github.jrcs.letsencrypt_nginx_proxy_companion.nginx_proxy"
    restart: always
    networks:
      - net

  letsencrypt:
    image: jrcs/letsencrypt-nginx-proxy-companion
    container_name: lets-encrypt-proxy-companion
    depends_on:
      - "nginx-proxy"
    volumes:
      - certs:/etc/nginx/certs:rw
      - vhost:/etc/nginx/vhost.d
      - html:/usr/share/nginx/html
      - /var/run/docker.sock:/var/run/docker.sock:ro
    environment:
      DEFAULT_EMAIL: [email protected]
    restart: always
    networks:
      - net

  mysqldb0:
    image: mysql:5.7
    environment:
      MYSQL_DATABASE: db0
      MYSQL_USER: db0user
      MYSQL_PASSWORD: secret
      MYSQL_RANDOM_ROOT_PASSWORD: '1'
    volumes:
      - 'mysqldb0:/var/lib/mysql'
    restart: always
    networks:
      - mysqldb0


  wordpress0:
    image: wordpress:5.8.0-php8.0-apache
    environment:
      WORDPRESS_DB_HOST: mysqldb0
      WORDPRESS_DB_USER: db0user
      WORDPRESS_DB_PASSWORD: secret
      WORDPRESS_DB_NAME: db0
      WORDPRESS_CONFIG_EXTRA: |
        define('AUTOMATIC_UPDATER_DISABLED', true);
      VIRTUAL_HOST: domain.com,www.domain.com
      LETSENCRYPT_HOST: domain.com,www.domain.com
    volumes:
      - 'wordpress0:/var/www/html/wp-content'
      - './uploads.ini:/usr/local/etc/php/conf.d/uploads.ini'
    restart: always
    depends_on:
      - mysqldb0
    networks:
      - mysqldb0
      - net

  mysqldb1:
    image: mysql:5.7
    environment:
      MYSQL_DATABASE: db1
      MYSQL_USER: db1user
      MYSQL_PASSWORD: secret
      MYSQL_RANDOM_ROOT_PASSWORD: '1'
    volumes:
      - 'mysqldb1:/var/lib/mysql'
    restart: always
    networks:
      - mysqldb1


  wordpress1:
    image: wordpress:5.8.0-php8.0-apache
    environment:
      WORDPRESS_DB_HOST: mariadb1
      WORDPRESS_DB_USER: db1user
      WORDPRESS_DB_PASSWORD: secret
      WORDPRESS_DB_NAME: db1
      WORDPRESS_CONFIG_EXTRA: |
        define('AUTOMATIC_UPDATER_DISABLED', true);
      VIRTUAL_HOST: wordpress.linuxhindi.com
      LETSENCRYPT_HOST: wordpress.linuxhindi.com
    volumes:
      - 'wordpress1:/var/www/html/wp-content'
      - './uploads.ini:/usr/local/etc/php/conf.d/uploads.ini'
    restart: always
    depends_on:
      - mysqldb1
    networks:
      - mysqldb1
      - net

volumes:
  certs:
  html:
  vhost:
  dhparam:
  mysqldb0:
  wordpress0:
  mysqldb1:
  wordpress1:

networks:
  mysqldb0:
    internal: true
  mysqldb1:
    internal: true
  net:
    external: true
Note that I have assigned specific internal networks only for each database and its corresponding WordPress container. The database containers need not see the Nginx net network. net is required only for the frontend WordPress containers.
In our previous article on Discourse, I used the --volumes-from flag to use the nginx-proxy container’s volumes with letsencrypt. In the same manner, the equivalent for the same flag was volumes_from, removed by Docker quite some time ago. Therefore, I've explicitly specified the common volumes for the Nginx and Let's Encrypt containers inside the docker-compose.yml file – namely, certs, html, vhost and /var/run/docker.sock.
Now, deploy the setup with the following docker-compose command from the same multi-wordpress directory we created in the beginning:
docker-compose up -d
You will get the following confirmations:
Creating network "multi-wordpress_mysqldb0" with the default driver
Creating network "multi-wordpress_mysqldb1" with the default driver
Creating volume "multi-wordpress_certs" with default driver
Creating volume "multi-wordpress_html" with default driver
Creating volume "multi-wordpress_vhost" with default driver
Creating volume "multi-wordpress_dhparam" with default driver
Creating volume "multi-wordpress_mysqldb0" with default driver
Creating volume "multi-wordpress_wordpress0" with default driver
Creating volume "multi-wordpress_mysqldb1" with default driver
Creating volume "multi-wordpress_wordpress1" with default driver
Creating multi-wordpress_mysqldb0_1   ... done
Creating nginx-proxy                  ... done
Creating multi-wordpress_mysqldb1_1 ... done
Creating multi-wordpress_wordpress1_1 ... done
Creating multi-wordpress_wordpress0_1 ... done
Creating lets-encrypt-proxy-companion ... done
The first two are the internal networks, followed by the volumes and finally the containers. Our external network net already exists, as I created it manually at the beginning of this tutorial.
Wait for a few moments. Open your Internet browser and type www.domain.com. It will redirect to domain.com and you will see the WordPress setup wizard waiting for you:
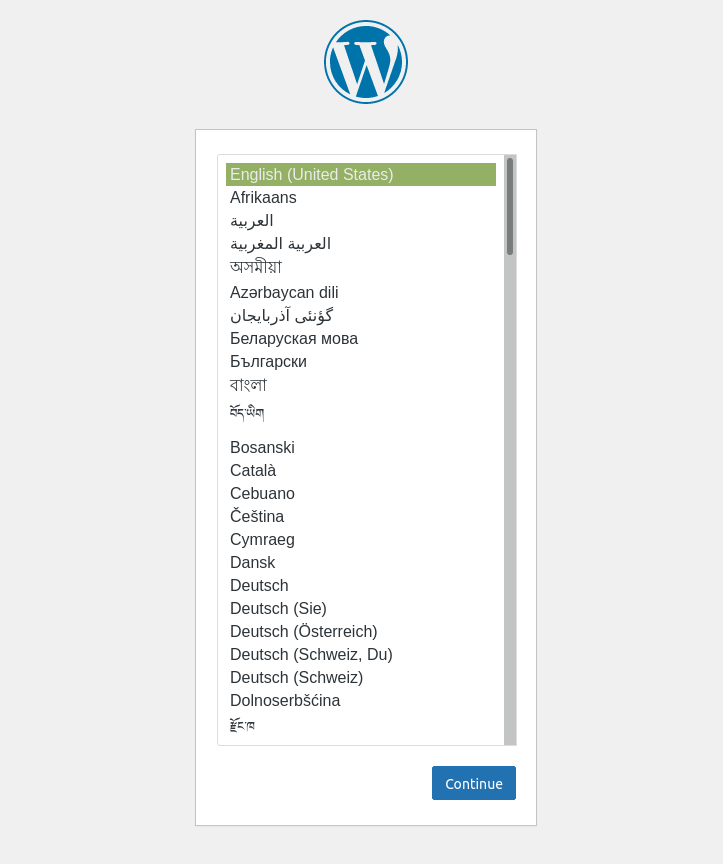
Select your preferred language, click on continue and proceed with claiming your site administration.
For wordpress.domain.com, you would get the same result. You can add more WordPress sites by repeating steps 5 (database service) and 6 (WordPress service), according to the similar syntax as shown for the existing containers. Also, please do not forget to revise the volumes and networks section in the YAML file accordingly.
For each new site, a new WordPress container and its corresponding MySQL database container would be created. If you want to know the command line equivalents of the above docker-compose.yml file, you can explore that here.
Tips for maintaining your self-hosted WordPress instances
Here are a few tips that will help you in maintaining your WordPress instances on the long run:
Monitor WordPress Logs in Real-time
If you want to check a WordPress container's logs(say the first one described in this tutorial) while it's deployed in real time, you can run:
docker logs -f multi-wordpress_wordpress0_1In case you want to troubleshoot or learn what is going on inside every other relevant container for this deployment, using Docker Logs efficiently can be crucial:
 Avimanyu Bandyopadhyay
Backup and Restore WordPress Volumes without Downtime
Using a cloud + local approach, you can backup and restore your WordPress volumes without downtime.
Avimanyu Bandyopadhyay
Update WordPress Containers without Downtime
With the --scale flag on Docker Compose, you can create a new container based on the latest version of WordPress. When it's done, you can remove the old one. This results in zero downtime.
Avimanyu Bandyopadhyay
While your server will be able to send emails, opting for an SMTP service will be better.

Hope you have found this article useful. If you have any thoughts, feedback, or suggestion to share, please let us know in the comments below.
