

Webmin is an open-source web-based control panel for system administration primarily for Unix-like systems.
Being a sysadmin means that you should have a good knowledge of Linux commands. But not everyone is comfortable with the terminal and the command line. This is why applications like Webmin and Cockpit project exist.
Through a simple interface, you can easily manage your system graphically and even remotely. You can perform operations like managing users, set up accounts, groups, manage disk quotas, update packages etc.
It also allows you to edit configuration files of different services like web, FTP, email and database servers.
In this tutorial, I’ll show you how to install Webmin and how to use it.
Install Webmin on Ubuntu Linux

You need to install Webmin on the system that you want to manage.
There are several ways to install the Webmin on Ubuntu-based distributions. If you need to install it on any other Linux distribution, you should check out the official installation instructions for more info.
You can download the .deb file from SourceForge or use the apt command to install it.
I’ll recommend using the apt command method so that you get Webmin updates along with your system updates.
To install Webmin via apt package manager, you add the GPG key of its repository by using a combination wget command and apt-key n the following way:
wget -q http://www.webmin.com/jcameron-key.asc -O- | sudo apt-key add -Once you do that, you can simply enter the following command to add the repository in your sources.list.d directory:
echo "deb https://download.webmin.com/download/repository sarge contrib" | sudo tee /etc/apt/sources.list.d/webmin.listFinally, you just need to enter the following command to proceed with the installation.
sudo apt update && sudo apt install webminNow that you have successfully installed Webmin on your Ubuntu-based distribution,
Congratulations, you have finally installed Webmin on your system. If you need to install it using any other method on any other Linux distribution, you should check out the official installation instructions for more info.
Accessing Webmin
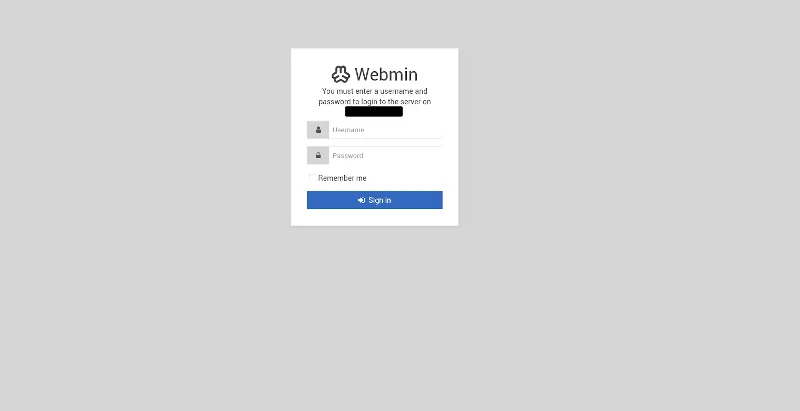
After the installation has completed, Webmin is now ready for use. You don’t need to configure anything manually. Webmin is available on the port 10000 of the installed system.
If you are on the same system where Webmin is installed you can use it via the localhost like this:
https://localhost:10000/To access Webmin on a remote system (where you have installed it already), you can use the IP address of the remote system:
https://your_server_ip:10000/Note: The default username and password are the same as your root user or administrative user.
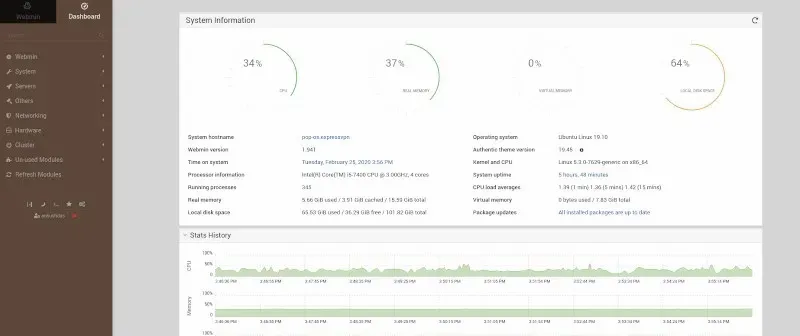
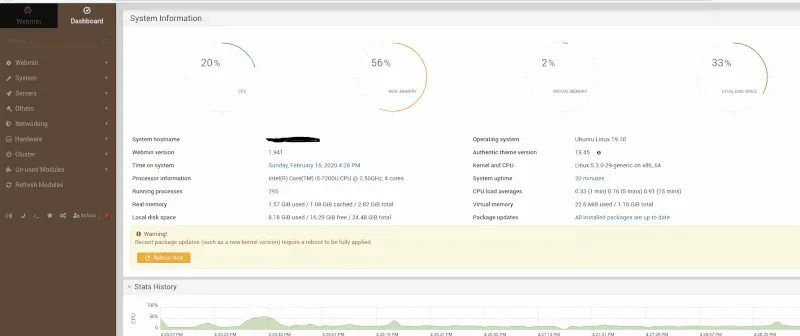
Once you are logged in, the Webmin interface is as shown below:
Using Webmin to perform admin tasks
You have now set up a working instance of Webmin. Let’s have a look at it.
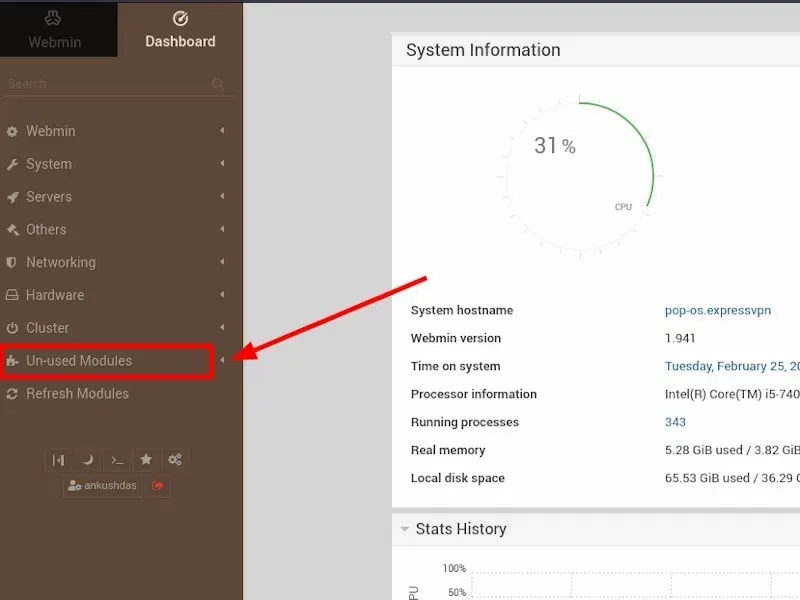
Webmin has more than 110+ standard modules and other third-party modules which helps users to perform specific actions. These modules are grouped into various categories.
To see different modules categories, just click on module and start exploring.
Changing User Password
What if you need to change the user password?
Let’s dive into how to change the passwords of existing users on your server.
First, click on the System tab, and then click on Change Passwords button. Then you will see list of existing users as shown below:
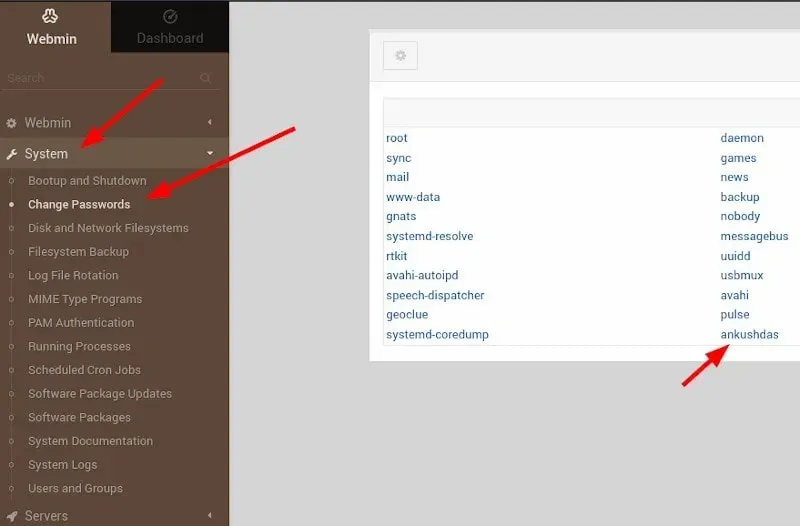
From here, click on the user of which you want to change the password. Then type your new password in New password and New password (again).
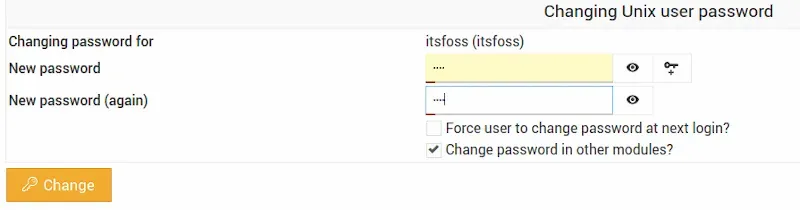
Click on the Change button and your password has changed successfully.
Updating Packages
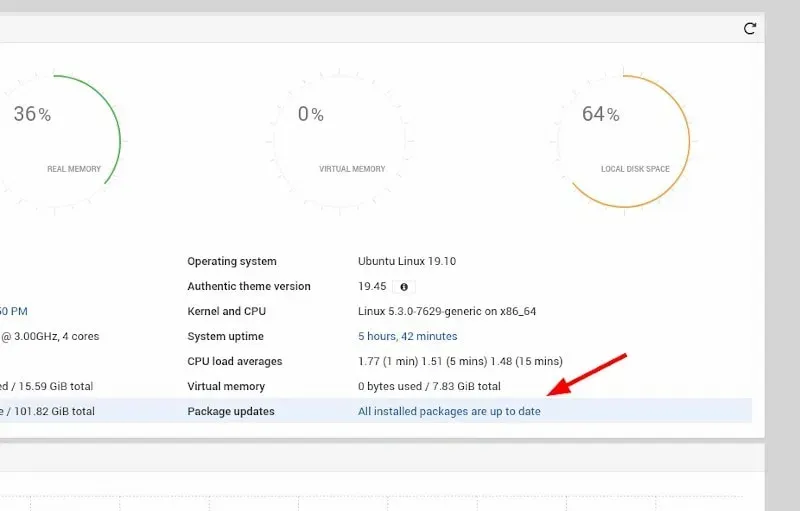
Webmin also provides a feature of updating all of your packages through its interface. To update, first go to the Dashboard link, and then locate the Package updates field. If there are updates available on your system, you’ll be able to see a link that states the number of available updates.
Click this link, and then press Update selected packages to start updating your packages. You may be asked to reboot the server, which you can do easily through the Webmin interface.
It’ll show you that the packages are up-to-date if you don’t need anything to update.
You can keep on exploring Webmin to do more tasks such as editing the iptables or nftables, managing cron jobs etc.
Conclusion
You can also manage more than one Linux system with Webmin cluster feature. Basically, install Webmin on each Linux system and then add each of these systems to the cluster.
Webmin used to be a popular application among the new sysadmins who were afraid of the command line.
These days, there are better tools available like Puppet, Chef, Ansible to configure, deploy and manage multiple Linux servers easier. While there is a learning curve involved for these automation tools, Webmin is straightforward to use.

Have you ever used Webmin before? What tools do you prefer to use for managing Linux servers remotely?
