

Are you looking for a complete LOMP stack guide? This tutorial will show you how to install a LOMP stack on an Ubuntu 22.04 server.
What is a LOMP Stack?
LOMP stands for Linux, OpenLiteSpeed, MariaDB, and PHP. A LOMP stack is a group of open-source software that is typically installed together to enable a server to host dynamic websites and web applications.
OpenLiteSpeed is a high-performance, lightweight, open-source HTTP server. Its speed and low resource consumption make it a great choice for hosting high-traffic websites.
MariaDB is a drop-in replacement for the MySQL database server. It is fast, stable, and scalable.
PHP is a popular scripting language that is widely used for developing dynamic web applications. Most of your favorite websites run on PHP.
Prerequisite
Before starting this guide, you will need the following:
- A server running Ubuntu, preferably version 22.04. Try a free cloud server if you don't have a VM or server. That's the L of LOMP done.
- Root user or a user with sudo privileges
- Familiarity with the Linux command line
- Time and patience


Step 1: Installing OpenLiteSpeed
Let's move to the O in LOMP i.e. OpenLiteSpeed.
Run the below command to add the OpenLiteSpeed repository to your server. This command downloads and runs a script that will add the OpenLiteSpeed repository to your server.
sudo wget -O - https://repo.litespeed.sh | sudo bashUpdate your server's package index again to reflect the changes made by the OpenLiteSpeed repository script.
sudo apt update -yThen, install OpenLiteSpeed and the required dependencies.
sudo apt install openlitespeed -yOnce the installation is complete, start the OpenLiteSpeed service.
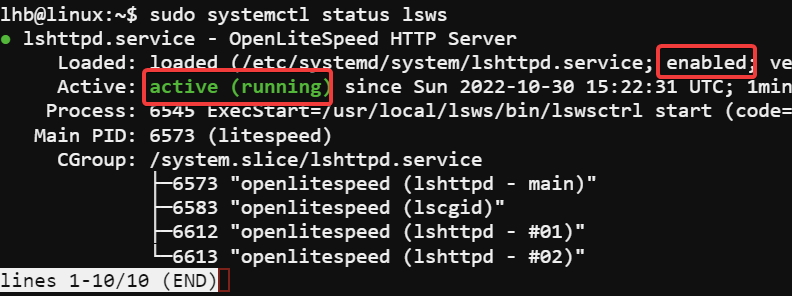
sudo systemctl start lswsFinally, check the status of the OpenLiteSpeed service to confirm that it is running.
sudo systemctl status lswsYou will see the following output.
Step 2: Accessing the OpenLiteSpeed Web Interface
OpenLiteSpeed comes with a web-based administration interface that you can use to manage your server.
Before you access the web interface, it would be wise to check and allow the required TCP ports through the UFW firewall.
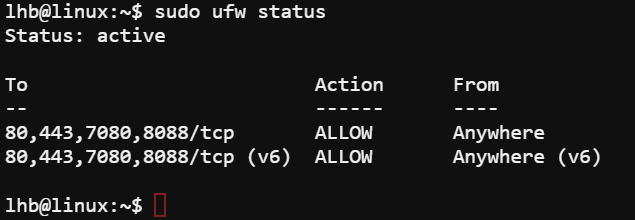
Run the following commands to allow traffic on common TCP ports 80, 443, 7080, and 8088.
sudo ufw allow 7080,80,443,8088/tcpThen, verify the changes by running the following command.
sudo ufw statusYou will see the following output.
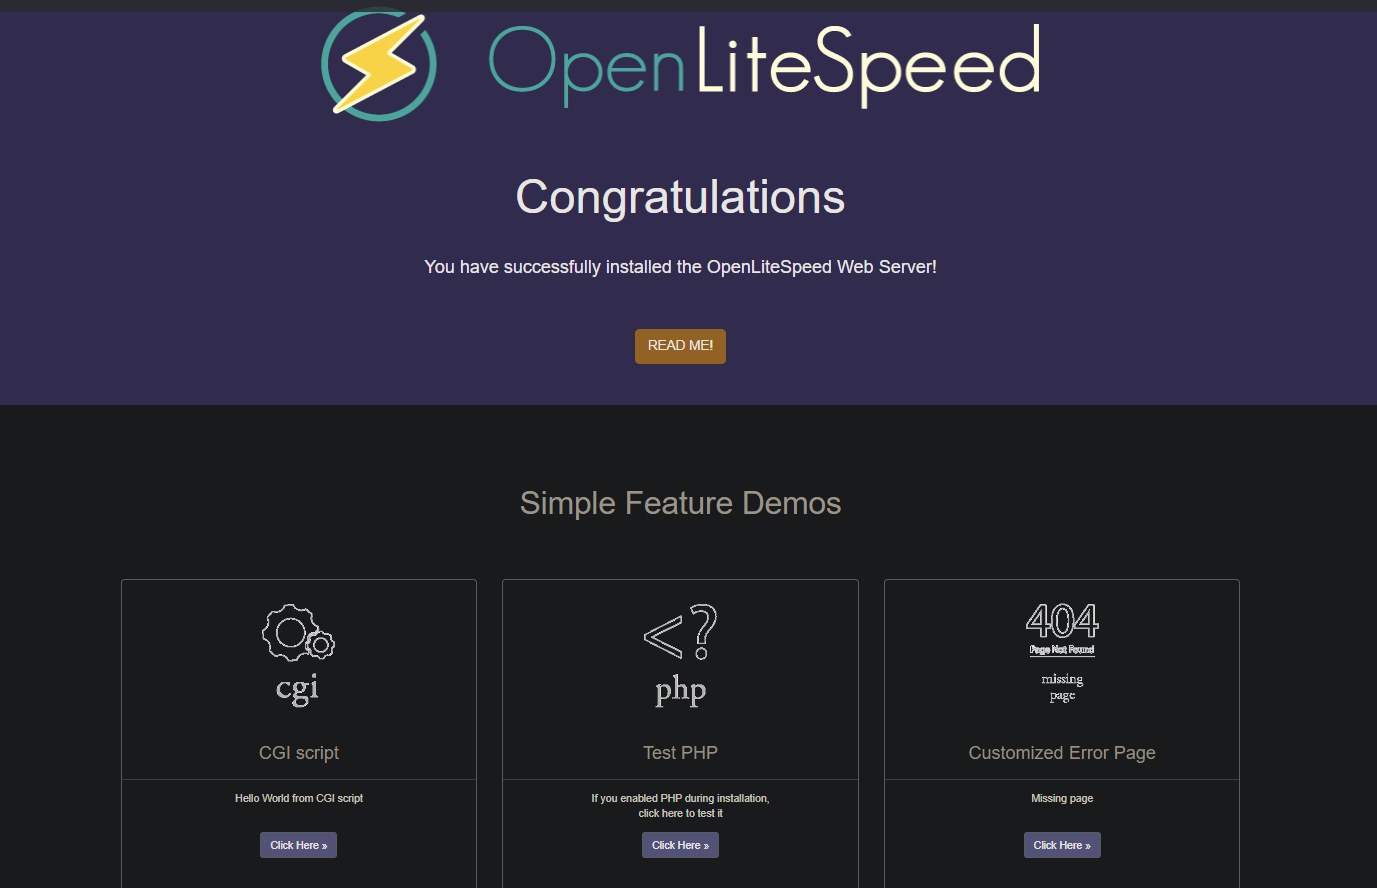
With the firewall taken care of, visit the following URL in your web browser. Replace IP_ADDRESS with your server's IP address.
http://IP_ADDRESS:8088You will see the following page. This page contains several examples of what you can do with OpenLiteSpeed.
For example, if you click on the Test PHP button, you will see the following output. This confirms that PHP is working correctly with OpenLiteSpeed.
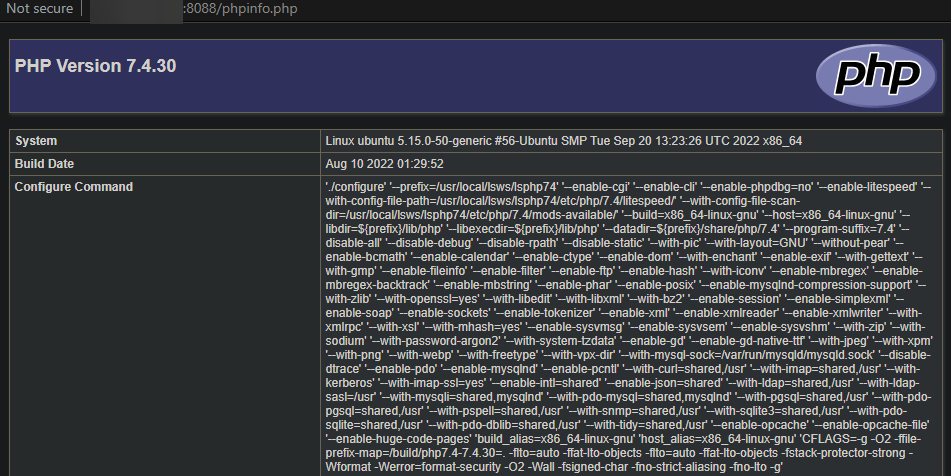
But if you haven't installed PHP yet, then how come it shows a PHP version? It's because the OpenLiteSpeed server comes with a PHP version itself.
As you can see in the screenshot above, the PHP version being used is 7.4.30 but you can change it to the one you need in your application. You will learn to change this later in this tutorial.
Step 3: Installing MariaDB
The next component of the LOMP stack that you will install is MariaDB. MariaDB is a drop-in replacement for the MySQL database server. It is fast, stable, and scalable. MariaDB is also widely used with PHP applications.
Run the below command to install MariaDB.
sudo apt install mariadb-server -yOnce the installation is complete, start the MariaDB service and enable it to start on boot.
sudo systemctl start mariadb

sudo systemctl enable
Check the status of the MariaDB service to confirm that it is running.
sudo systemctl status mariadb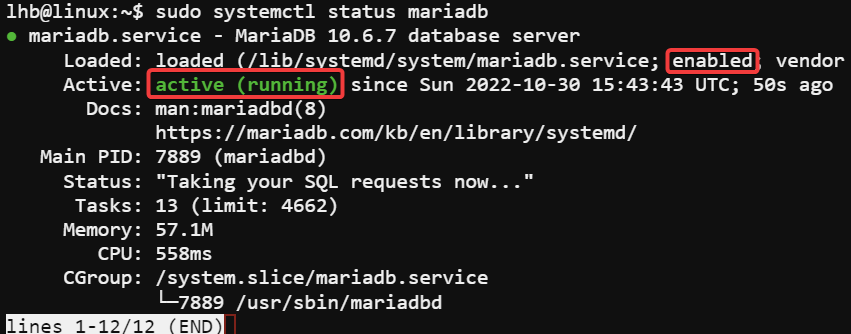
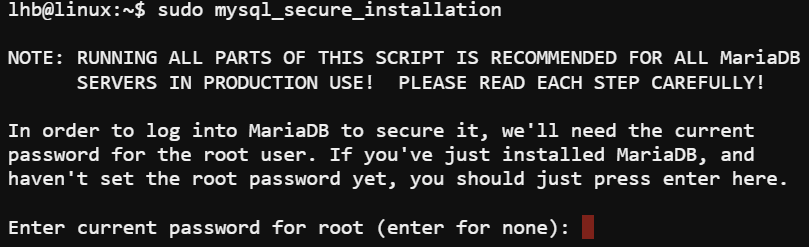
After the installation is complete, you should run a script that comes with MariaDB to set some basic security options for your database server.
sudo mysql_secure_installationYou will be prompted to enter the current password for the root user. Since you have just installed MariaDB, you can leave it blank and press ENTER to continue.
Next, you will be asked if you want to Switch to unix_socket authentication. Press Y and ENTER to continue.

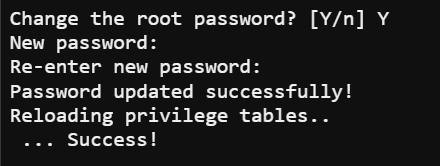
MariaDB will then ask you to change the root password. Type Y and provide a strong password for the root user when prompted.
Re-enter the password to confirm it and press ENTER.
For the remaining options, you can press Y and ENTER to continue. These options include removing anonymous users, disallowing remote root login, and removing the test databases, etc.

Step 4: Installing PHP
You already have a PHP version installed with OpenLiteSpeed server. However, if you need a newer or specific PHP version for your application, here's what you need to do.
Run this command to see a list of available PHP versions.
sudo apt-cache search lsphpYou will see the following output.
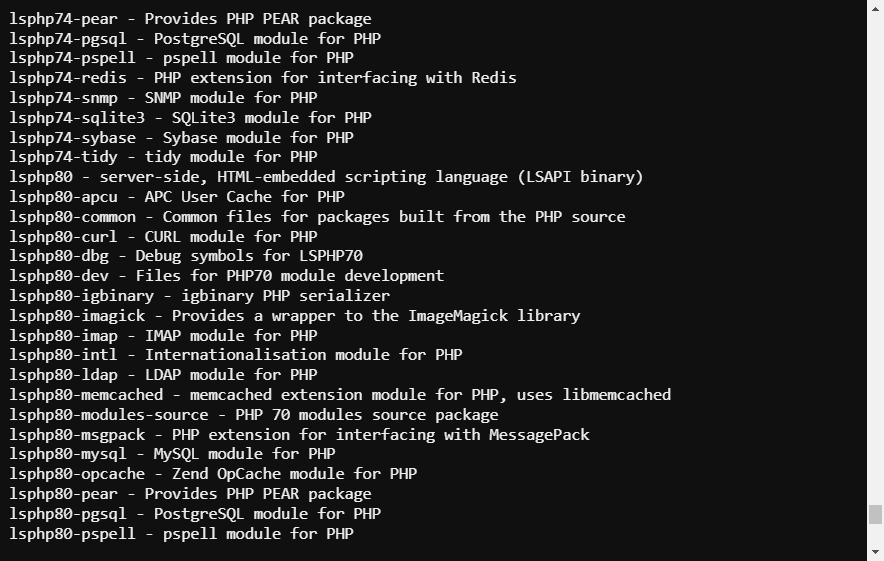
As you can see, several different versions of PHP are available for installation. I will install version 8.1 in this tutorial, which is the latest version at the time of this writing.
The command below installs PHP 8.1, as well as the common PHP modules and the MySQL module.
sudo apt install lsphp81 lsphp81-common lsphp81-mysql -yStep 5: Configuring OpenLiteSpeed to use the latest PHP Version
Now that you have PHP 8.1 installed let's configure OpenLiteSpeed to use it.
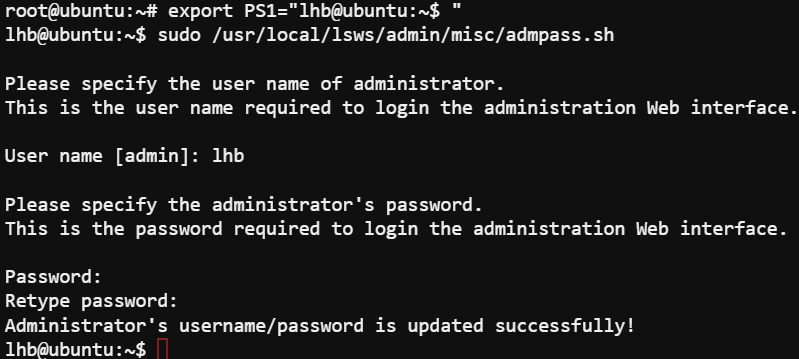
Run the below command to create an admin user and set a password for the OpenLiteSpeed admin panel.
sudo /usr/local/lsws/admin/misc/admpass.shProvide a username and a strong password when prompted. Remember this information, as you will need it to log in to the admin panel later.
Next, open the OpenLiteSpeed admin web interface in your web browser. The URL for the admin panel is http://your-server-ip:7080.
Provide your admin username and password and click Login.

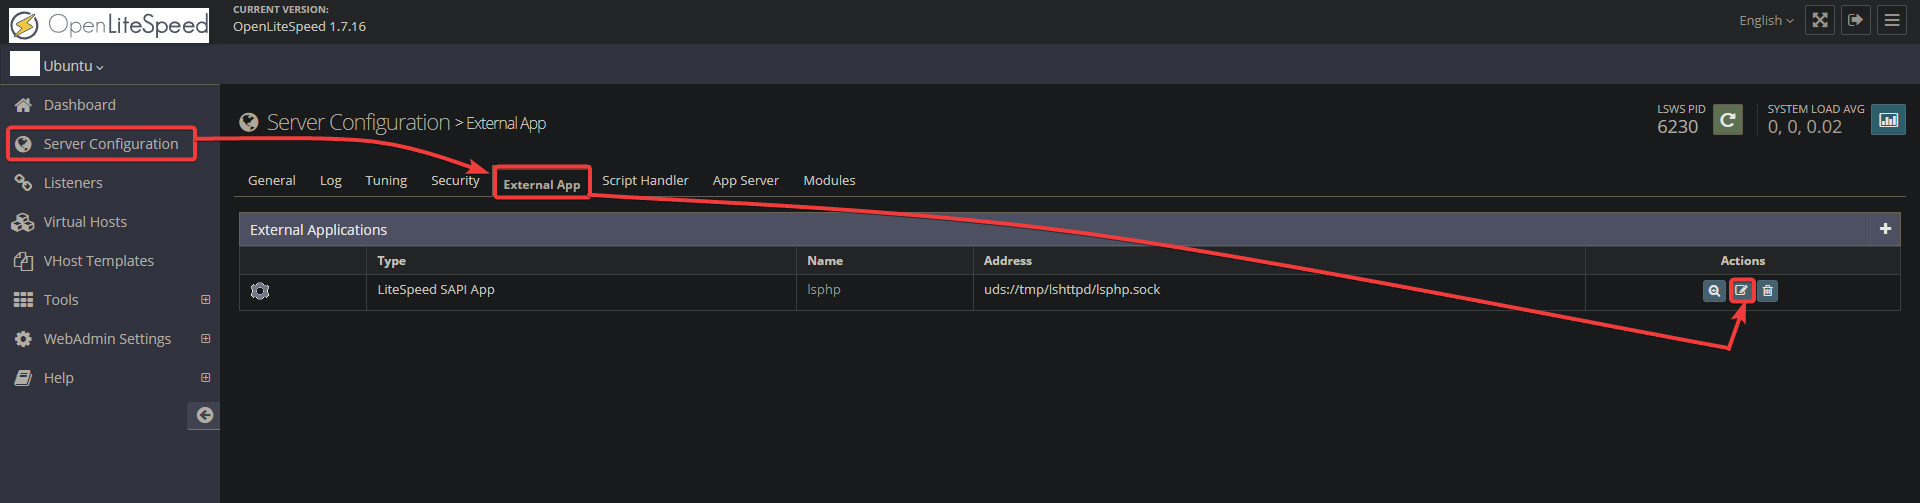
On the next screen, click Server Configuration on the left sidebar ---> External App ---> Click the Edit button in the LiteSpeed SAPI App row, as shown below.
On the next screen, scroll down and find the Command field. Enter lsphp81/bin/lsphp in this field. This action tells OpenLiteSpeed to use PHP 8.1 when processing PHP scripts.

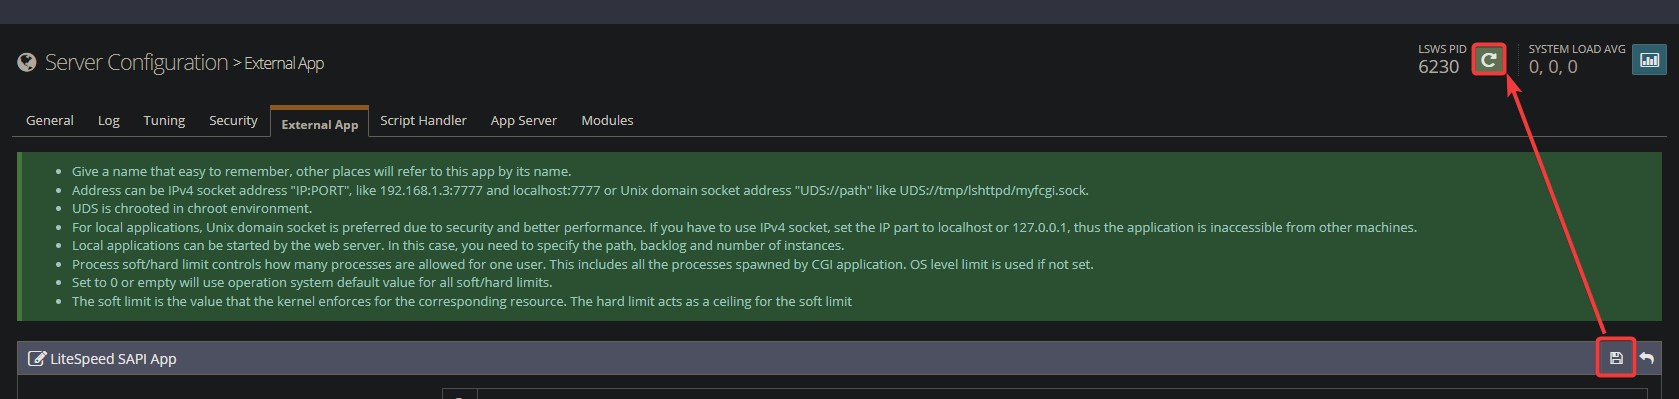
Scroll up and click the Save button to apply the changes. Click the restart button on the top bar to restart Open LiteSpeed as shown below. This action will perform a graceful restart.
At this point, your server is running the LOMP stack with PHP 8.1. To confirm, go to http://your-server-ip:8088/phpinfo.php.
As you can see below, PHP 8.1 is now the active PHP version on your server.

You can now install the latest WordPress or other applications on your Ubuntu 22.04 server.
If your purpose is to host WordPress websites with LOMP stack, try GridPane. It lets you easily deploy multiple WordPress websites with your chosen tech stack.

Conclusion
LAMP used to be the most popular stack until a few years ago. lately, the LOMP stack has gained popularity thanks to the lightweight LiteSpeed server that can be used to serve high-traffic websites.
This tutorial shows you how to properly install the LOMP stack on an Ubuntu server.
Don't stop here, though! There are many more things you can do with your new LOMP stack server. For example, you can secure your server with a free SSL certificate from Let's Encrypt.
Enjoy learning and exploring the server side of Linux.
