I hope you are acquainted with the basic Kubernetes terms like node, service, cluster because I am not going to explain those things here.
This is a step-by-step tutorial to show you how to deploy a production-ready Kubernetes cluster.
Production ready? Yes, the examples use a sample domain so if you own a domain, you may configure it on public facing infrastructure. You may also use it for local testing. It's really up to you.
I have used CentOS Linux in the examples but you should be able to use any other Linux distributions. Except for the installation commands, rest of the steps should be applicable to all.
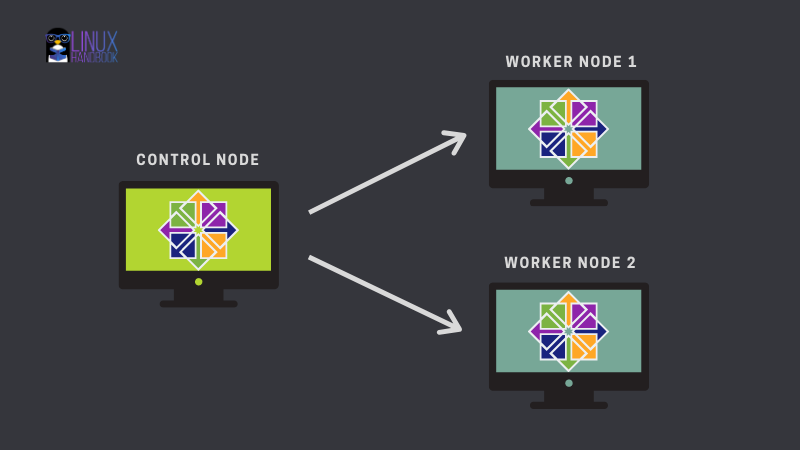
I am going to use this simple cluster of one master/control node and two worker nodes:
The tutorial is divided into two main parts.
The first part is basically prerequisite and deals with getting your machines ready by doing the following things:
- Configure hostnames correctly on all the hosts
- Turn the swap off on all the nodes
- Add firewall Rules
- Configure IPtables
- Disable SELinux
The second part is the actual Kubernetes cluster deployment and it consists of the following steps:
- Configure Kubernetes Repository
- Install kubelet, kubeadm, kubectl and docker
- Enable and start the kubelet and docker service
- Enable bash completions
- Create Cluster with kubeadm
- Setup Pod network
- Join Worker Nodes
- Test the cluster by creating a test pod
Part 1: Preparing your systems for Kubernetes cluster deployment
You need 3 servers running on virtual machines or bare metal or a cloud platform like Linode, DigitalOcean or Azure.
I have 3 CentOS VM's running with following details:
- Kubernetes master node - 172.42.42.230 kmaster-centos7.example.com/kmaster-centos7
- Kubernetes worker node 1 - 172.42.42.231 kworker-centos71.example.com/kworker-centos71
- Kubernetes worker node 2 - 172.42.42.232 kworker-centos72.example.com/kworker-centos72
Please check the IP addresses of your machines and change it accordingly.
Step 1. Configure hostnames correctly on all the systems
You can add the IP and corresponding subdomain information by changing the DNS records of your domain.
In case you don’t have access to the DNS, update /etc/hosts file on master and worker nodes with the following information:
[root@kmaster-centos7 ~]# cat /etc/hosts
127.0.0.1       kmaster-centos7.example.com     kmaster-centos7
127.0.0.1   localhost localhost.localdomain localhost4 localhost4.localdomain4
::1         localhost localhost.localdomain localhost6 localhost6.localdomain6
172.42.42.230 kmaster-centos7.example.com   kmaster-centos7
172.42.42.231 kworker-centos71.example.com  kworker-centos71
172.42.42.232 kworker-centos72.example.com  kworker-centos72
[root@kmaster-centos7 ~]#
Ping the worker nodes to verify that the hostfile changes are working fine.
Step 2. Turn the swap off (for performance reason)
The Kubernetes scheduler determines the best available node on which to deploy newly created pods. If memory swapping is allowed to occur on a host system, this can lead to performance and stability issues within Kubernetes.
For this reason, Kubernetes requires that you disable swap on all the nodes:
swapoff -aStep 3. Add firewall rules
The nodes, containers, and pods need to be able to communicate across the cluster to perform their functions. Firewalld is enabled in CentOS by default so it would be wise to open the required ports.
On master node, you need these ports:
- 6443 : Kubernetes API server : Used by All
- 2379–2380 : etcd server client API : used by kube-apiserver, etcd
- 10250 : Kubelet API : Used by Self, Control plane
- 10251 : kube-scheduler : used by self
- 10252 : kube-controller-manager : used by self
On worker nodes, these ports are required:
- 10250 : Kubelet API : Used by Self, Control plane
- 30000–32767 : NodePort Services : used by All
firewall-cmd command opens port 6443 in this fashion:
firewall-cmd --permanent --add-port=6443/tcpOn the master and the worker nodes, use the above command to open the required ports that have been mentioned in this section.
For the range of ports, you can replace the port number with the range like firewall-cmd --permanent --add-port=2379-2380/tcp.
Once you added the new firewall rules on each machine, reload the firewall:
firewall-cmd --reloadStep 4. Configure iptables
On master and worker nodes, make sure that the br_netfilter kernel module is loaded. This can be done by running lsmod | grep br_netfilter. To load it explicitly call sudo modprobe br_netfilter.
Set the net.bridge.bridge-nf-call-iptables to ‘1’ in your sysctl config file. This ensures that packets are properly processed by IP tables during filtering and port forwarding.
[root@kmaster-centos7 ~]# cat <<EOF > /etc/sysctl.d/k8s.conf
> net.bridge.bridge-nf-call-ip6tables = 1
> net.bridge.bridge-nf-call-iptables = 1
> EOF
Run this command so that changes take into effect:
sysctl --systemStep 5. Disable SELinux (for Red Hat and CentOS)
The underlying containers would be required to access the host filesystem. CentOS comes with SELinux (security enhanced Linux) enabled in enforcing mode. This might block the access to host filesystem.
You may either disable SELinux or set it in permissive mode, which effectively disables its security functions.
[root@kmaster-centos7 ~]# setenforce 0
[root@kmaster-centos7 ~]# sed -i 's/^SELINUX=enforcing$/SELINUX=permissive/' /etc/selinux/config
[root@kmaster-centos7 ~]#
Part 2: Deploying Kubernetes Cluster
Now that you have configured the correct settings on your master and worker nodes, it is time to start the cluster deployment.
Step 1. Configure Kubernetes repository
Kubernetes packages are not available from official CentOS 7 repositories. This step needs to be performed on the master node, and each worker node.
Enter the following and verify it once content added.
[root@kmaster-centos7 ~]# cat <<EOF > /etc/yum.repos.d/kubernetes.repo
[kubernetes]
name=Kubernetes
baseurl=https://packages.cloud.google.com/yum/repos/kubernetes-el7-x86_64
enabled=1
gpgcheck=1
repo_gpgcheck=1
gpgkey=https://packages.cloud.google.com/yum/doc/yum-key.gpg https://packages.cloud.google.com/yum/doc/rpm-package-key.gpg
EOF
Update and verify that the Kubernetes repo is added to the repository list:
[root@kmaster-centos7 ~]# yum update -y
[root@kmaster-centos7 ~]# yum repolist | grep -i kubernetes
!kubernetes                         Kubernetes                               570
Step 2. Install kubelet, kubeadm, kubectl and Docker
kubelet, kubeadm, kubectl three basic packages along with container runtime (which is docker here) are required in order to use Kubernetes.
Install these packages on each node:
yum install -y kubelet kubeadm kubectl docker
Step 3. Enable and start the kubelet and docker services
Now that you have installed the required packages, enable (so that it starts automatically at each boot) kubelet and docker on each nodes.
Enable kubelet on each node:
[root@kmaster-centos7 ~]# systemctl enable kubelet
Created symlink from /etc/systemd/system/multi-user.target.wants/kubelet.service to /usr/lib/systemd/system/kubelet.service.
Enable docker on each node:
[root@kmaster-centos7 ~]# systemctl enable docker.service
Created symlink from /etc/systemd/system/multi-user.target.wants/docker.service to /usr/lib/systemd/system/docker.service.
You should also start these services so that they can be used immediately:
[root@kmaster-centos7 ~]# systemctl start kubelet
[root@kmaster-centos7 ~]# systemctl start docker.service
Step 4. Enable bash completion (for an easier life with Kubernetes)
Enable bash completions on all the nodes so you don't need to manually type all the commands entirely. The tab would do that for you.
[root@kmaster-centos7 ~]# echo "source <(kubectl completion bash)" >> ~/.bashrc
[root@kmaster-centos7 ~]# echo "source <(kubeadm completion bash)" >> ~/.bashrc
[root@kmaster-centos7 ~]# echo "source <(docker completion bash)" >> ~/.bashrc
Step 5. Create cluster with kubeadm
Initialize a cluster by executing the following command:
kubeadm init --apiserver-advertise-address=172.42.42.230 --pod-network-cidr=10.244.0.0/16Note: It's always good to set --apiserver-advertise-address specifically while starting the Kubernetes cluster using kubeadm. The IP address the API Server will advertise it’s listening on. If not set the default network interface will be used.
Same with --pod-network-cidr. Specify range of IP addresses for the pod network. If set, the control plane will automatically allocate CIDRs for every node.
For more options please refer to this link.
At the end of the kube-init command output, you can see the steps to run the cluster:
...
You should now deploy a pod network to the cluster.
Run "kubectl apply -f [podnetwork].yaml" with one of the options listed at:
  https://kubernetes.io/docs/concepts/cluster-administration/addons/

Then you can join any number of worker nodes by running the following on each as root:
kubeadm join 172.42.42.230:6443 --token 22m8k4.kajx812tg74199x3 \
    --discovery-token-ca-cert-hash sha256:03baa45e2b2bb74afddc5241da8e84d16856f57b151e450bc9d52e6b35ad8d22
```

**Manage cluster as regular user:
**In the above kube-init command output you can clearly see that to start using your cluster, you need to run the following commands as a regular user:

```bash
[root@kmaster-centos7 ~]# mkdir -p $HOME/.kube
[root@kmaster-centos7 ~]# cp -i /etc/kubernetes/admin.conf $HOME/.kube/config
[root@kmaster-centos7 ~]# chown $(id -u):$(id -g) $HOME/.kube/config
[root@kmaster-centos7 ~]#
You should run those commands one by one to start the Kubernetes cluster:
[root@kmaster-centos7 ~]# mkdir -p $HOME/.kube
[root@kmaster-centos7 ~]# cp -i /etc/kubernetes/admin.conf $HOME/.kube/config
[root@kmaster-centos7 ~]# chown $(id -u):$(id -g) $HOME/.kube/config
Step 6. Setup pod network
The pod network is the overlay network between the worker nodes. With the pod network, the containers on different nodes communicate each other.
There are several available Kubernetes networking options. Use the following command to install the flannel pod network add-on:
[root@kmaster-centos7 ~]# kubectl apply -f https://raw.githubusercontent.com/coreos/flannel/master/Documentation/kube-flannel.yml
podsecuritypolicy.policy/psp.flannel.unprivileged created
Warning: rbac.authorization.k8s.io/v1beta1 ClusterRole is deprecated in v1.17+, unavailable in v1.22+; use rbac.authorization.k8s.io/v1 ClusterRole
clusterrole.rbac.authorization.k8s.io/flannel created
Warning: rbac.authorization.k8s.io/v1beta1 ClusterRoleBinding is deprecated in v1.17+, unavailable in v1.22+; use rbac.authorization.k8s.io/v1 ClusterRoleBinding
clusterrolebinding.rbac.authorization.k8s.io/flannel created
serviceaccount/flannel created
configmap/kube-flannel-cfg created
daemonset.apps/kube-flannel-ds created
[root@kmaster-centos7 ~]#
Check the cluster status and verify that master (control plane) node is in ready state.
[root@kmaster-centos7 ~]# kubectl get nodes
NAME                          STATUS   ROLES    AGE   VERSION
kmaster-centos7.example.com   Ready    master   2m    v1.19.2
Also check all pods running across all namespaces.
kubectl get pods --all-namespaces
Step 7. Join worker nodes to cluster
Refer to the output you got in the step 5 and copy the recommended commands. Run it on each worker node to connect it to the cluster:
kubeadm join 172.42.42.230:6443 --token 22m8k4.kajx812tg74199x3 \
>     --discovery-token-ca-cert-hash sha256:03baa45e2b2bb74afddc5241da8e84d16856f57b151e450bc9d52e6b35ad8d22
Check the cluster status again to see all the worker nodes has successfully joined the cluster and are ready to serve workloads.
[root@kmaster-centos7 ~]# kubectl get nodes -o wide
NAME                           STATUS   ROLES    AGE     VERSION   INTERNAL-IP     EXTERNAL-IP   OS-IMAGE                KERNEL-VERSION                CONTAINER-RUNTIME
kmaster-centos7.example.com    Ready    master   9m17s   v1.19.2   172.42.42.230   <none>        CentOS Linux 7 (Core)   3.10.0-1127.19.1.el7.x86_64   docker://1.13.1
kworker-centos71.example.com   Ready    <none>   7m10s   v1.19.2   172.42.42.231   <none>        CentOS Linux 7 (Core)   3.10.0-1127.19.1.el7.x86_64   docker://1.13.1
kworker-centos72.example.com   Ready    <none>   7m8s    v1.19.2   172.42.42.232   <none>        CentOS Linux 7 (Core)   3.10.0-1127.19.1.el7.x86_64   docker://1.13.1
Verify all the pods running in all namespaces:
kubectl get pods -o wide --all-namespacesStep 8. Test the cluster by creating a test pod
Now that you have everything in place, it's time to test the cluster. Create a pod:
[root@kmaster-centos7 ~]# kubectl run mypod1 --image=httpd --namespace=default --port=80 --labels app=fronend
pod/mypod1 created
Now, verify the pod status:
[root@kmaster-centos7 ~]# kubectl get pods  -o wide
NAME     READY   STATUS    RESTARTS   AGE   IP           NODE                           NOMINATED NODE   READINESS GATES
mypod1   1/1     Running   0          29s   10.244.1.2   kworker-centos71.example.com   <none>           <none>
[root@kmaster-centos7 ~]#
Now you have a fully functional Kubernetes cluster up and running on CentOS!
Hope you like the tutorial. If you have questions or suggestions, please leave a comment and I'll be happy to help.
And do become a Linux Handbook member to enjoy exclusive members-only content.