

This tutorial is about continuous integration between GitLab, Jenkins and SonarQube. At the end of this tutorial, you will be able to view the quality reports of GitLab repository codes at SonarQube by using Jenkins as a Continuous Integrator and sonar-scanner as code analyzer.
Continuous Integration Setup with GitLab, Jenkins and SonarQube
Before we see how to setup the continuous integration (CI), let’s first see the involved components and what roles do they play in our setup here.
GitLab
GitLab is an open-source code hosting platform for collaboration and version control. It can be installed on your servers to host your codes privately. GitLab provides Source Code Management (SCM) functionality similar to GitHub and BitBucket.
Jenkins
Jenkins is an open-source Continuous Integration server. It is an automation tool that can be used to test and compile your codes, and deploy it to production if build succeeds.
Jenkins here is used to pull the codes from GitLab (in real time, when the code is pushed or merged), build the project codes and push the result to SonarQube for visual interpretation.
SonarQube
SonarQube is an open-source Continuous Inspection server. It is a tool used as quality gate for code review. It provides automatic reports of analysis of codes, detects bugs, security vulnerabilities, duplicated codes, comments, code smells and many more for varieties of programming languages.
Prerequisites
This tutorial assumes that GitLab, Jenkins and SonarQube has already been installed on your Linux system. Installation of these tools is not our focus here.
Now that you know the tools involved and their roles, let’s see how to setup our continuous integration
Step 1. Configurations at Sonarqube
We require server authentication token from SonarQube, that we later pass to Jenkins. This token gives access to Jenkins, to push Jenkins builds at SonarQube for code anaylsis.
- Go to My Account > Security
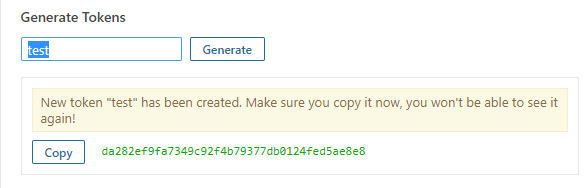
- At Tokens block, enter any text to generate a token.
- Keep the copy of the token
Here’s the review of SonarQube generating user’s token:
Now, we will create a Project where all the code analysis reports are published.
- Go to Administration > Projects > Management
- Click on Create Project
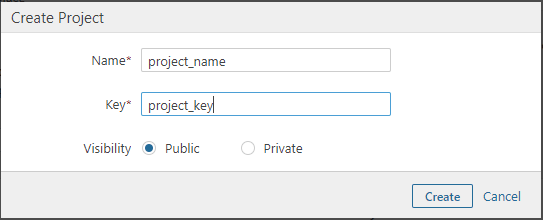
- Create the project with your Project_name and Project_key. Copy the project name and key. We will pass this credentials at Jenkins configuration later on.
Preview of creating a project:
Step 2. Configuration at GitLab
We also need GitLab user’s Access Tokens that we later pass at Jenkins. This is used to authenticate GitLab user’s repository url, from where Jenkins pull the codes from.
- Go to User Settings form Settings menu.
- Go to Access Tokens
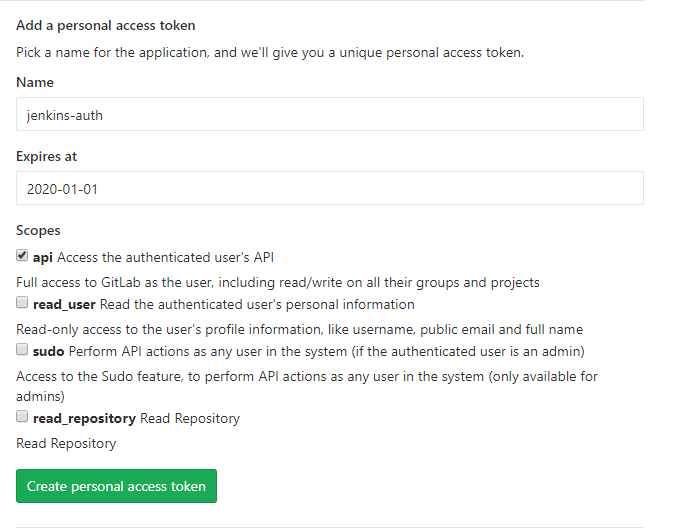
- Create a personal access token by adding any unique name(Name) and token expiry date(Expires at). Also set the Scopes to api- Full access.
Preview of generating User’s Access Tokens:
Step 3. Configuration at Jenkins
We need to configure GitLab and SonarQube at Jenkins web panel. For this, we need to install some necessary plugins.
- Login to Jenkins
- Go to Manage Jenkins > Manage Plugins
- At Available tab, search for GitLab and SonarQube and install the following plugins:
- GitLab Hook Plugin
- GitLab Plugin
- Git
- SonarQube Scanner for Jenkins
We require SonarQube Scanner to be installed at “Jenkins server” which actually starts code analysis and publish the reports to project at SonarQube.
To install SonarQube Scanner, you can use the following commands:
$ wget https://binaries.sonarsource.com/Distribution/sonar-scanner-cli/sonar-scanner-cli-3.3.0.1492-linux.zip
$ unzip sonar-scanner-cli-3.3.0.1492-linux.zip
$ cd sonar-scanner-3.3.0.1492-linux $ pwd
Copy the location. We will need to add this location (as SonarQube Scanner Installation Home Folder) at Jenkins Configuration.
We will also configure sonar-scanner properties file at add SonarQube server:
$ cd conf
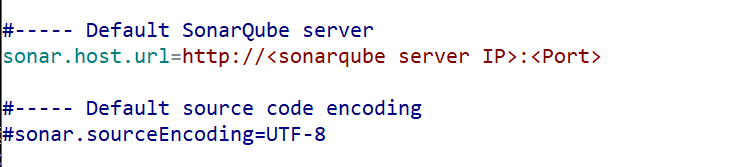
$ vi sonar-scanner.propertiesUncomment “sonar.host.url” and add your SonarQube server URL

Now we will configure GitLab and SonarQube at Jenkins.
- Go to Manage Jenkins > Configure System
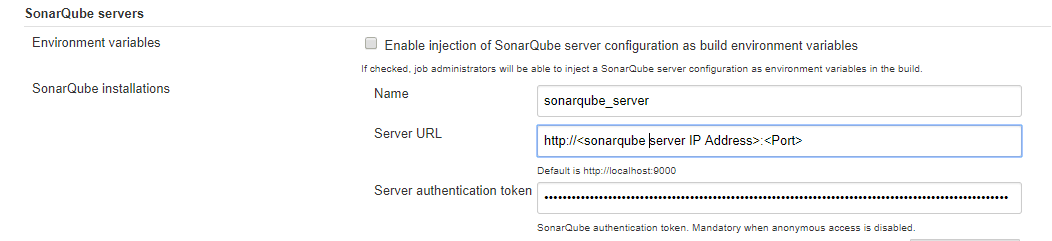
- At SonarQube servers tab, enter your SonarQube server URL and the Server authentication token generated at SonarQube before.
Preview of adding SonarQube at Jenkins:
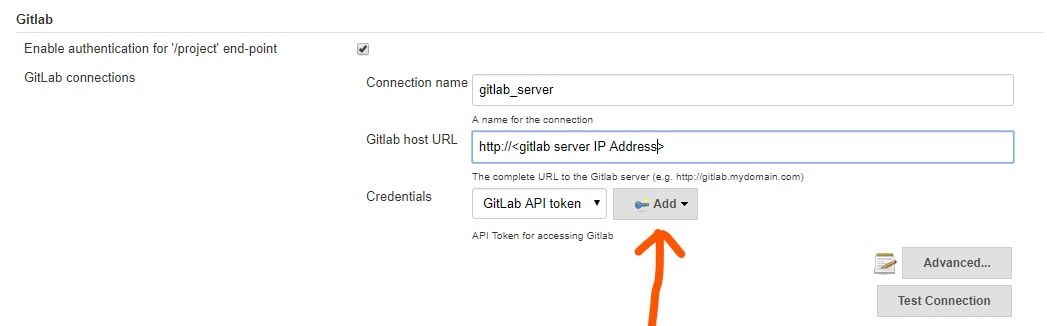
Now, go to GitLab tab and add your GitLab Server URL at GitLab host URL
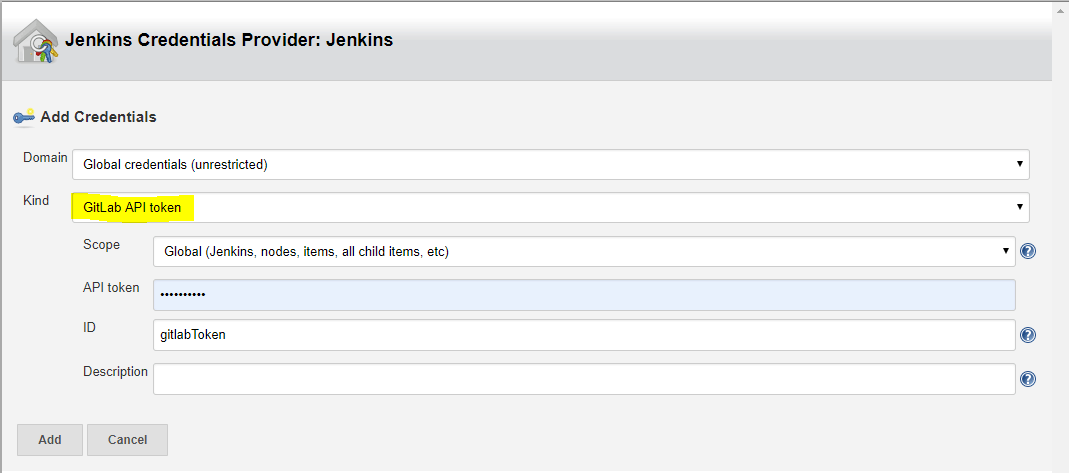
At Credentials, we need GitLab API token for accessing GitLab. Click on Add and select Jenkins: Jenkins Credentials Provider
At Kind, select GitLab API Token from drop down list. Enter your API Token generated at GitLab before. Add the Token with a unique ID.
Also, Ensure that you have correct Jenkins Location at Jenkins Location tab.

After added GitLab and SonarQube succesfully, we also need to add SonarQube Scanner configurations.
- Go to Manage Jenkins > Global Tool Configuration
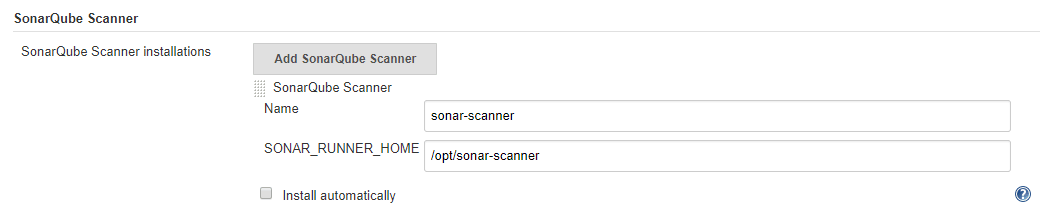
- At SonarQube Scanner tab, click on SonarQube Scanner Installations
- Untick Install automatically, and add your SonarQube Installation Home Folder.
Step 4: Adding a project to Jenkins for continuous integration and continuous inspection
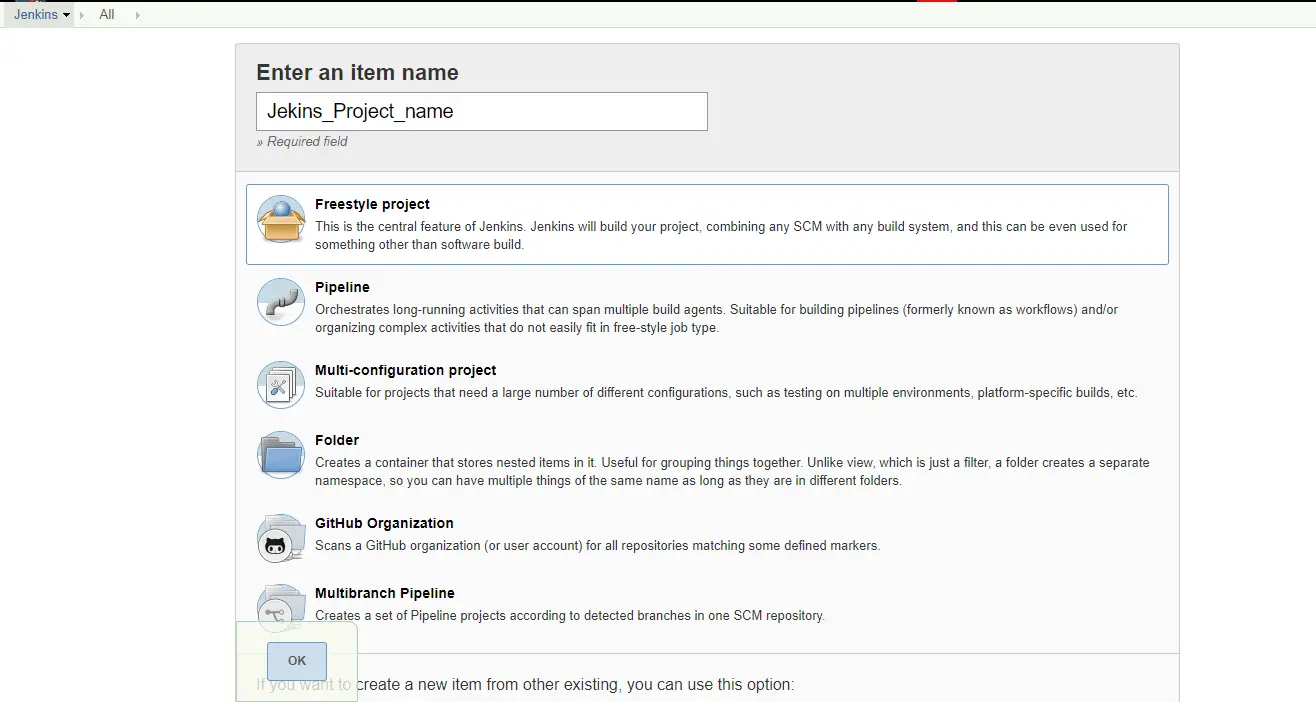
After all configurations are done, we will now create a Project on Jenkins.
Go to Jenkins Dashboard -> New Item > Select Freestyle Project. Create project with a unique project name
At Jenkins Dashboard, Select your Project and Click on Configure.
Scroll to General tab, Select the GitLab Connection from drop down list. You will see the GitLab connection name that we have added before, at Manage Jenkins > Configure System.
Scroll to Source Code Management tab, select Git. Add your GitLab project http URL (This uses the same syntax as git clone command). You can get the URL at your GitLab Project Page.

Also specify the authentication for the GitLab URL.
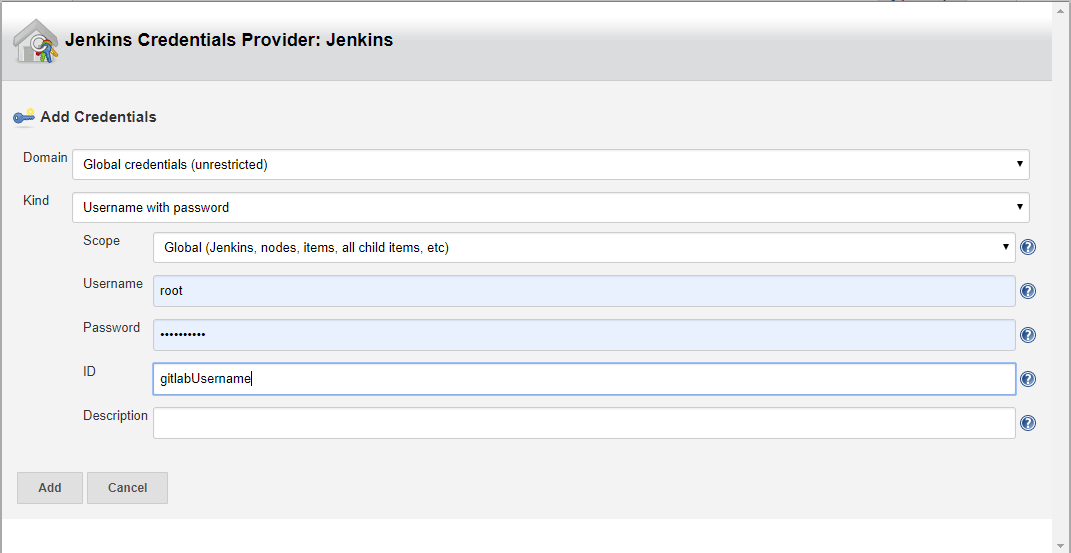
- At Crendentials , click on Add and select Jenkins: Jenkins Credentials Provider
- at Kind, select Username with password from drop down list.
- Enter your GitLab login Username and password.
- Add the key with a unique ID.
You also need to specify the branches to build. If left blank, all branches will be examined for changes and built.
Adding branches can be done like: */<branch_name>

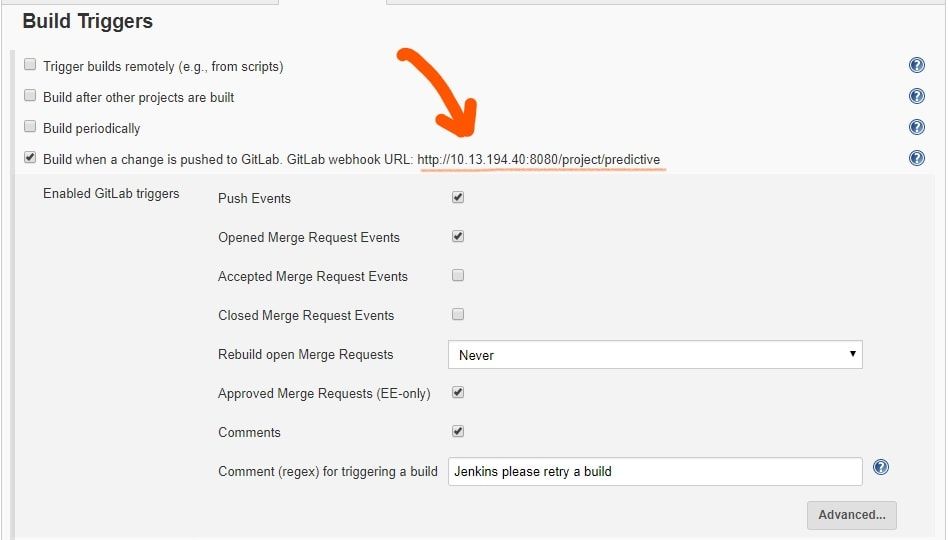
Now, scroll to Build Triggers, select the GitLab webhook URL checkbox.
- Copy the GitLab webhook URL. We need to setup webhook at GitLab again, using this url.
- Click on Advanced
- Generate as Secret Token. Copy this token, this is used to set webhook at GitLab later on.
Preview of creating Build Triggers

At last, scroll to the Build tab, at Execute SonarQube Scanner, add the SonarQube configuration parameters that is used by SonarQube scanner. It might include SonarQube ProjectName, ProjectKey, SonarQube Scanner installation location, etc.

After all configurations are done, we need to lastly setup webhook at GitLab.
Webhook is a method to push the data to other applications in real-time.
We are using webhook at GitLab to automate the delivery of GitLab codes during push events or merge events, as specified.
- Login to your Gilab Account.
- goto Your Projects at Project menu.
- Select your Project
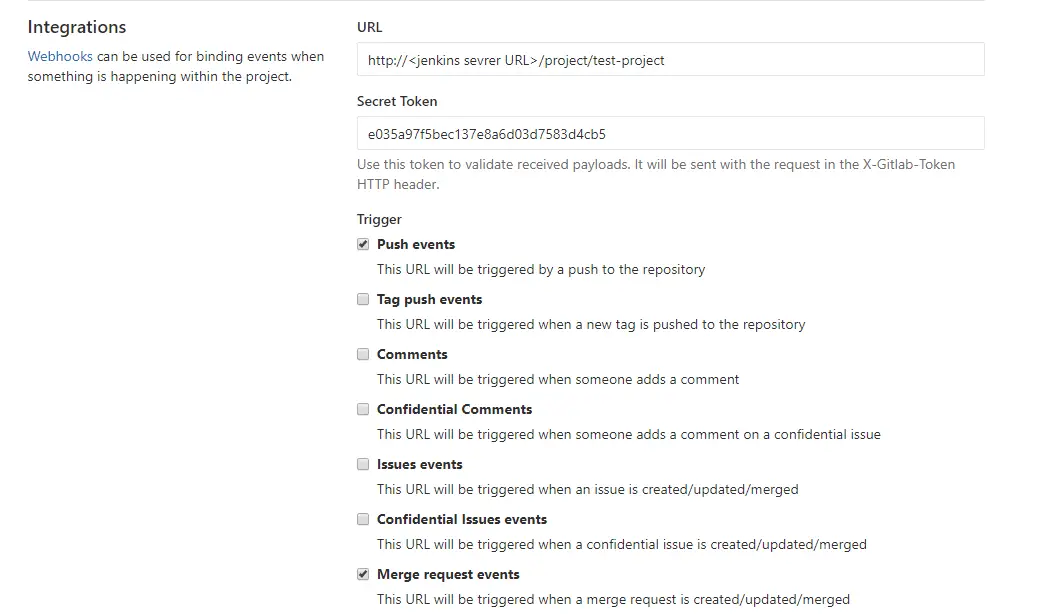
- goto Settings > Integrations
- Add the webhook URL and Secret Token that we copied from Jenkins Build Triggers tab.
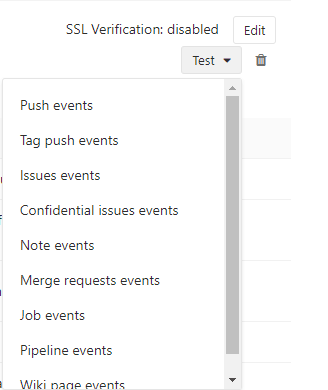
- Select the triggers you want, and deselect SSL Verification.
- Create webhook
Preview of creating GitLab webhook:

Test the webhook with Push events.

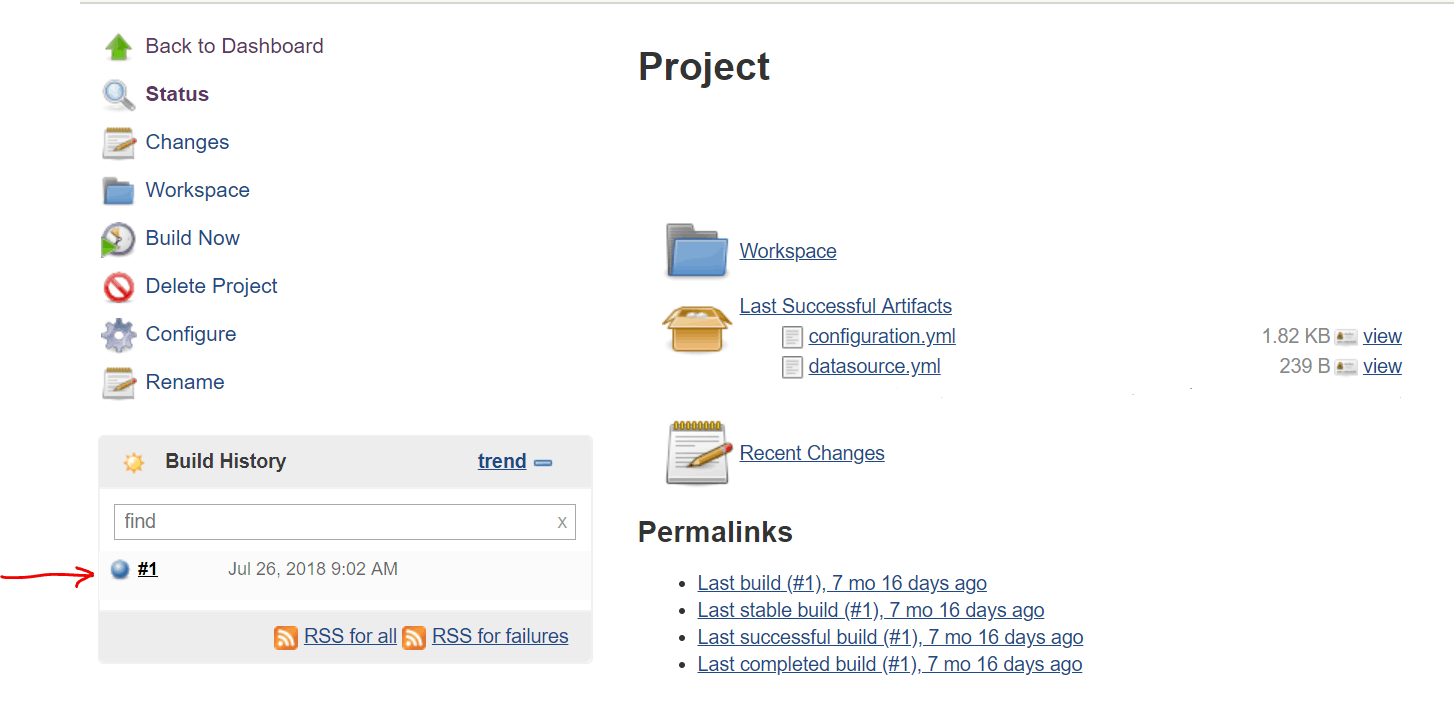
After test is successful, Project starts building at Jenkins. Login to Jenkins and verify the Project builds. You can see the GitLab codes at Jenkins Workspaces.
Also, you can see the project code reports at SonarQube.
That’s it! We have successfully integrated GitLab, Jenkins and SonarQube. Now for every push events or merge events to our GitLab repository, Jenkins will build the project and show the code quality at SonarQube.
I hope this tutorial was easy for you to follow. Please let me know if you any questions or suggestions.
Author: Rishi Raj Gautam is a Linux lover and an open-source activist.
