Want a Hexadecimal dump (a hexadecimal view) of your data? The xxd command can do that for you.
Like any other normal command, it takes data from the standard input or file and gives hexadecimal output. It can also do the opposite and convert hex to normal characters.
And in this tutorial, I will walk you through different examples of how to use the xxd command in Linux.
Install XXD on your Linux system
The xxd utility is not pre-installed in most Linux distributions but can easily be installed with the default package manager.
For Ubuntu/Debian base:
sudo apt install xxdFor Fedora/RHEL base:
sudo dnf install vim-commonFor Arch-based distros:
sudo pacman -S xxdHow to use the XXD command in Linux
Once you are done with the installation, you have to follow the given command syntax to use the xxd command:
xxd [options] [file]To make things easy to understand, I will be using the file named Sample.txt throughout the tutorial, which contains the following:
Which Linux distro is your daily driver?
1. Ubuntu
2. Debian
3. RHEL
4. Fedora
5. Arch
6. Gentoo
7. LFS (The GOAT)
To create a hex dump of the Sample.txt file, I will be using the following command:
xxd Sample.txt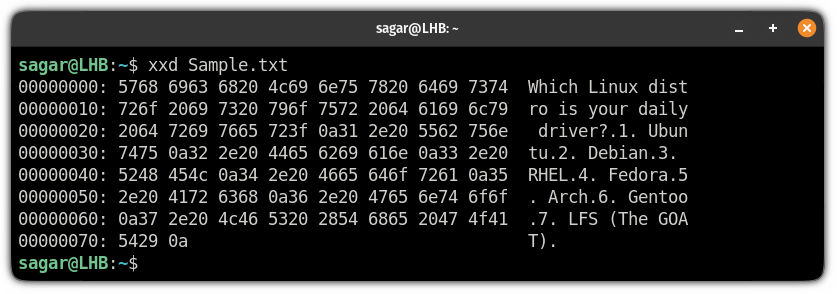
Sure, you can use different options to tweak the default behavior of the xxd command. Let me show you how.
Trim lines in xxd output
The xxd command allows you to trim down lines from your output.
To do so, you will have to use the -s flag and append how many initial lines you want to skip:
xxd -s [lines_to_skip] FilenameSo let's say you want to start the hex dumping from the 5th line, which means you need to trim down the first 4 lines:
xxd -s 0x40 Sample.txt
And as you can see, it trimmed the first 4 lines and gave me the hex dump starting from the 5th line.
But if you want to get the hex dump of the last few lines, you can do that too!
To get the hex dump of the last n number of the lines, you will have to execute the xxd command in the following manner:
xxd -s -[Last_n_lines] FilenameSo let's say I want to get the hex dump of the last 3 lines, then, I will be using the following:
xxd -s -0x30 Sample.txt
Specify the column length
You may want to specify how many columns should be shown instead of what xxd gets you by default (10).
To do so, you will need to use the -c flag and append how many columns should be displayed on the output:
xxd -c [No_of_columns] FilenameLet's say I want the output in 4 columns, then I will be using the following:
xxd -c 4 Sample.txt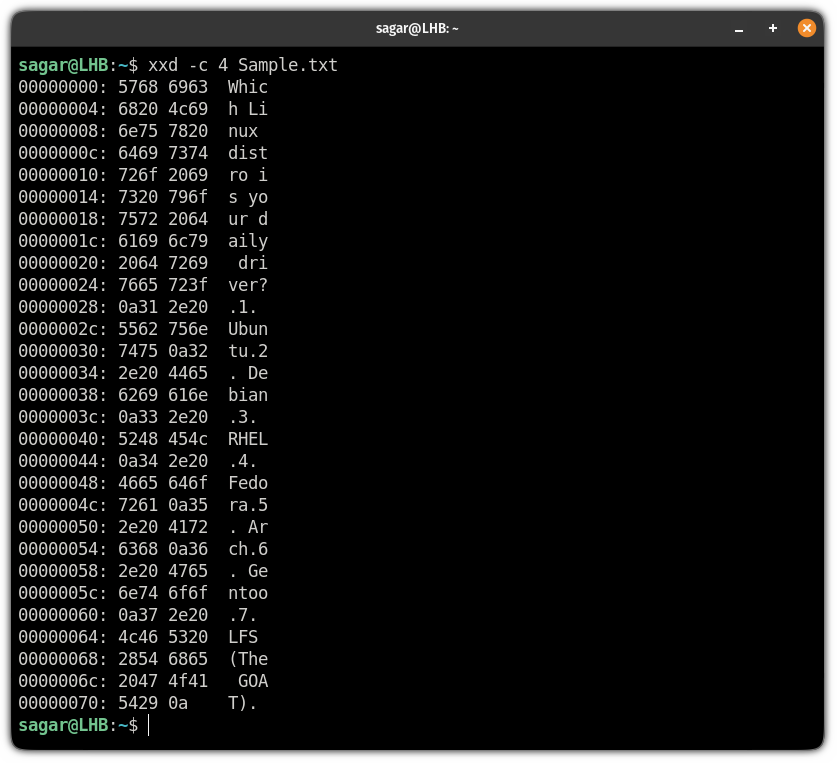
Specify the output length
It is similar to what I explained in how you can trim the output but here, you can specify how many lines of the output you want from the first line.
To specify the output length, all you have to do is use the -l flag and specify how many lines of output you want:
xxd -l [Output_length_in_lines] FilenameSo let's say I only want the first 5 lines of the hex dump, then I will be using the following:
xxd -l 0x50 Sample.txt
Get binary output instead of hexadecimal
The xxd command also allows you to get output in binary instead of hexadecimal!
It is quite simple and the binary output can be achieved using the -b flag:
xxd -b FilenameHere, I converted my text file Sample.txt to binary:
xxd -b Sample.txt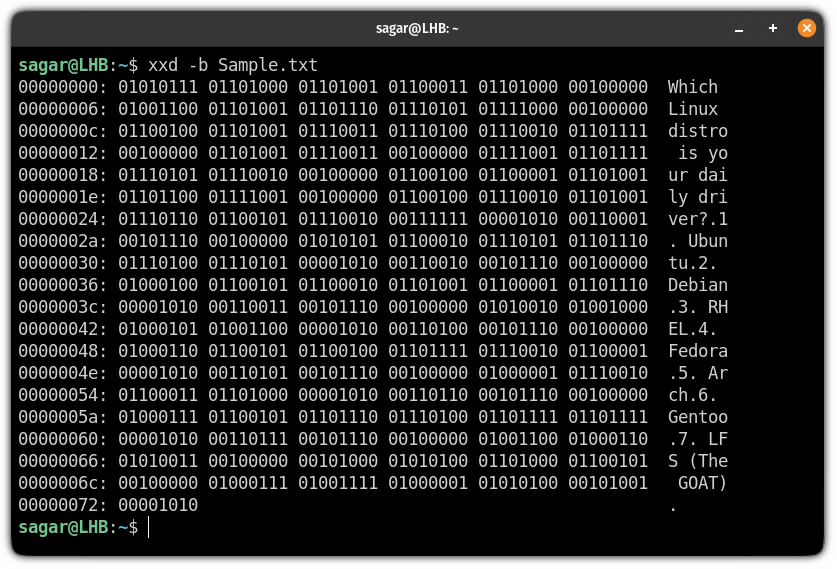
Get hex output in capital letters
You may find situations where you want the output in capital letters.
And you can easily get the hex output in capital letters using the -u flag as shown:
xxd -u Filename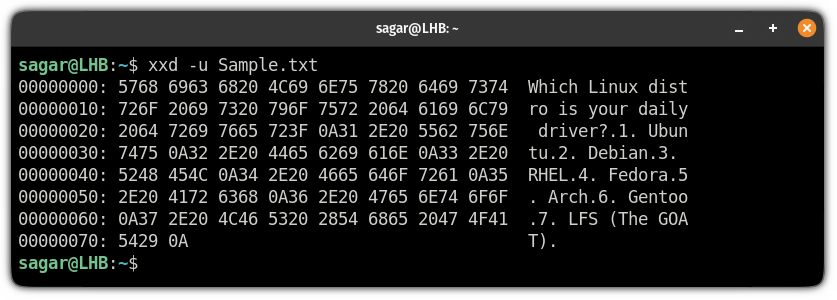
Convert hex to the normal text again
So if you redirected the output of the hex to a file, there is a way to get back to normal quite easily.
For your reference, I'm redoing the whole process of how you can redirect the output of the hex dump to the text file first:
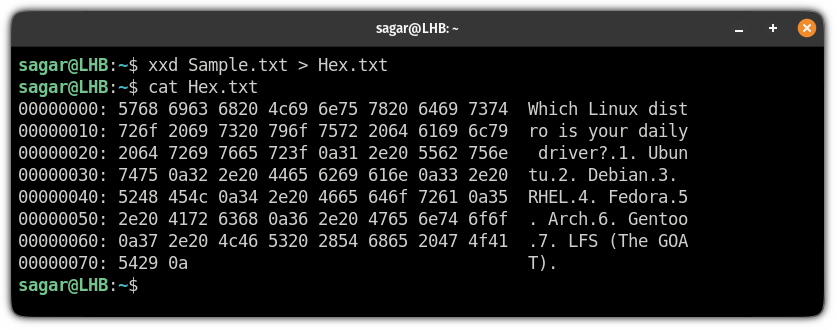
So I saved the hex dump output to the Hex.txt.
Now, if I want to read the content of the Hex.txt, I will have to perform the conversion. Otherwise, it is just a pain in the head.
To reverse this effect, you will have to use the -r flag in shown manner:
xxd -r Filename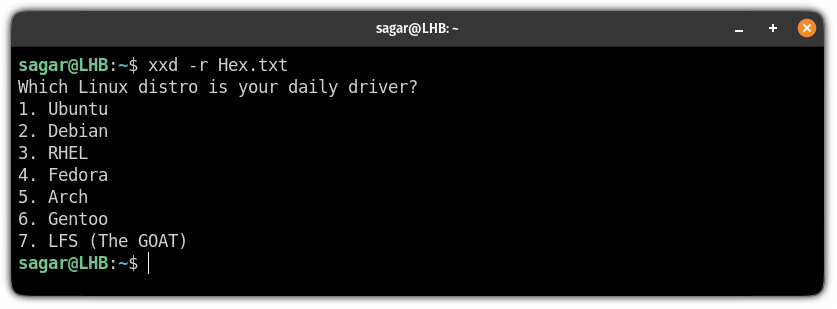
Want to convert Hexadecimal to ASCII? Here you go!
If you want to convert hex string to ASCII, we have a detailed guide for that purpose:

I hope you will find this guide helpful.
And if you have any queries, let me know in the comments.


