The traceroute is similar to the ping command but offers more detailed output. It traces the route from the origin to the target system.
If you didn't know, when you connect to a remote system, the data travels through several intermediate nodes (your router, your ISP's router, etc.).
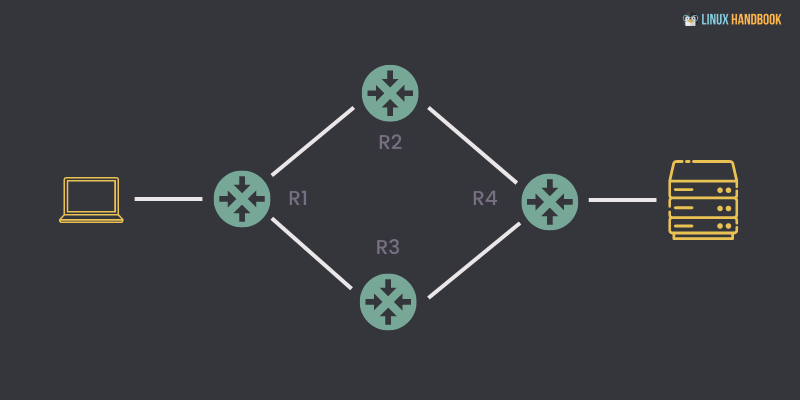
Traceroute is used by system admins and networking professionals to troubleshoot the network.
Install traceroute in Linux
The traceroute utility does not come pre-installed in most modern Linux distros.
If you are on an Ubuntu-based distro, the given command should get your job done:
sudo apt install tracerouteSimilarly, if you are on Fedora, you can benefit from the given command:
sudo yum install tracerouteNow, let's jump to the examples part.
Use the traceroute command in Linux
Let me start with the most basic one, where I will append the hostname to the traceroute command and it will show me the list of routers (with IP) it took to reach the destination:
traceroute google.com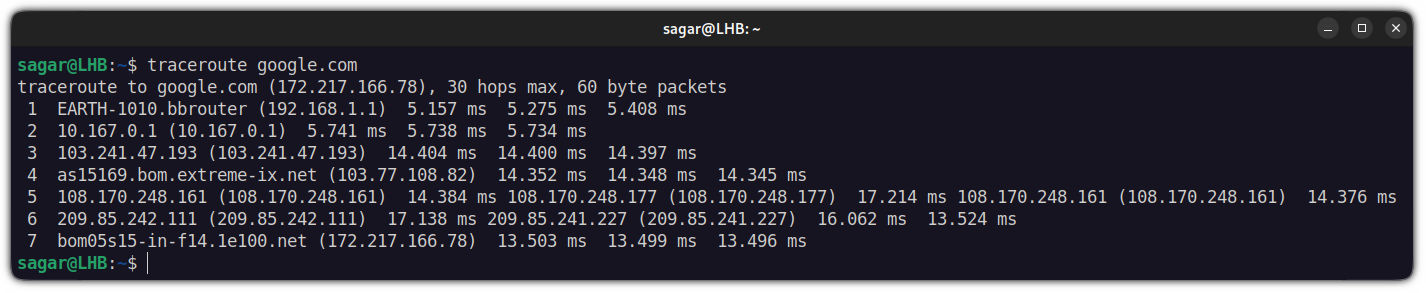
It took 7 routers to reach the destination and by default, it sent 3 packages to each one and returned the time it took to respond.
There are more ways of using the tarecroute command in Linux. Let's see the examples.
1. Configure wait time
The default wait time in traceroute is 3 seconds meaning it will wait for 5 seconds before jumping to the next one.
And if you want to change the defaults, you can append the number of seconds with the -w option:
For example, I changed the wait time to 1 second for google.com:
traceroute -w 1 google.com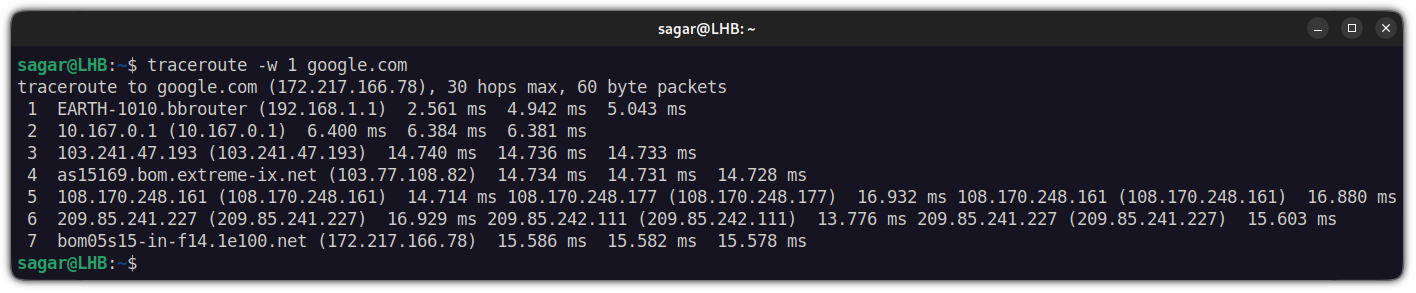
2. Change the number of packages sent/received
By default, traceroute sends 3 packages for a hop and if you want to change this behavior, you will have to use -q option.
For reference, I will send 4 packets per hop over the google domain:
traceroute -q 4 google.com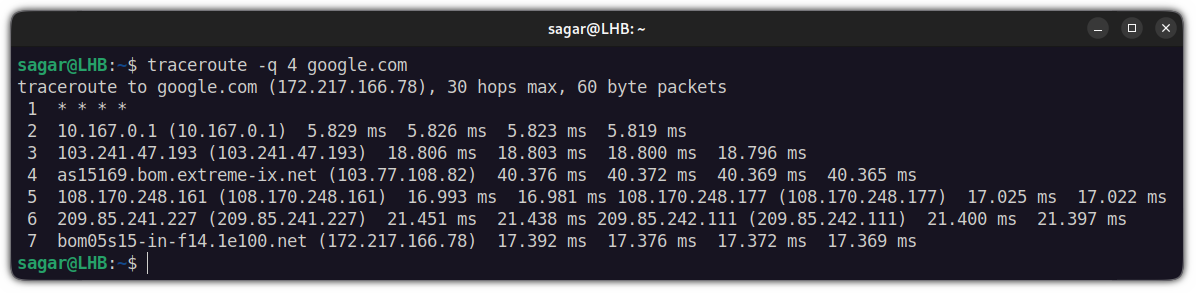
3. Specify the maximum number of hops
The default maximum number of hops for a single query is 30 in traceroute which can be extended to 255.
For that, you can append the max number of hope with -m option:
traceroute -m 4 google.com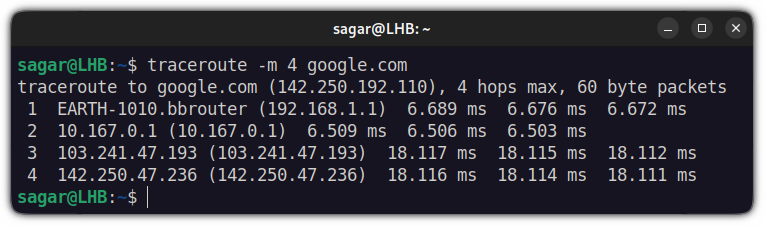
4. Specify with what TTL to start
By default, the traceroute will start with the first TTL but you can change this behavior using -f option.
For reference, I wanted to start tracerouting on google's domain from the 5th TTL so had to use the given command:]
traceroute -f 5 google.com
5. Add alternate source IP address for tracerouting
If you want to add an alternate source along with what you generally add for tracerouting, you will need to append the alternate IP with -s option.
For example, I have added an alternate source IP 192.168.1.7 alongside google.com:
traceroute -s 192.168.1.7 google.com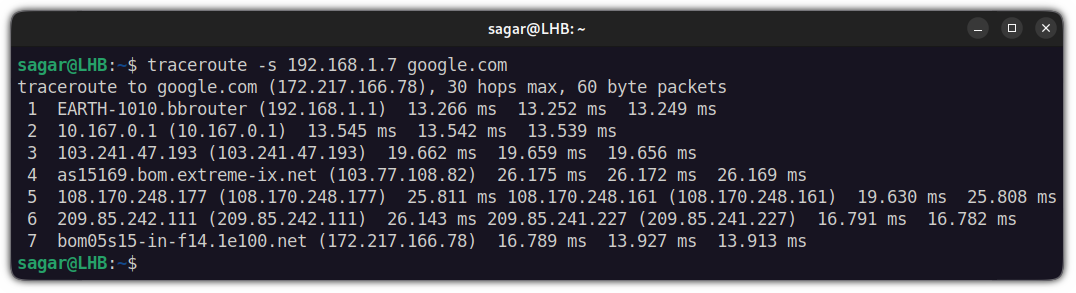
6. Disable hostname mapping to IP address while tracerouting
If you want to disable hostname mapping while tracerouting for some reason, you can use the -n option:
traceroute -n google.com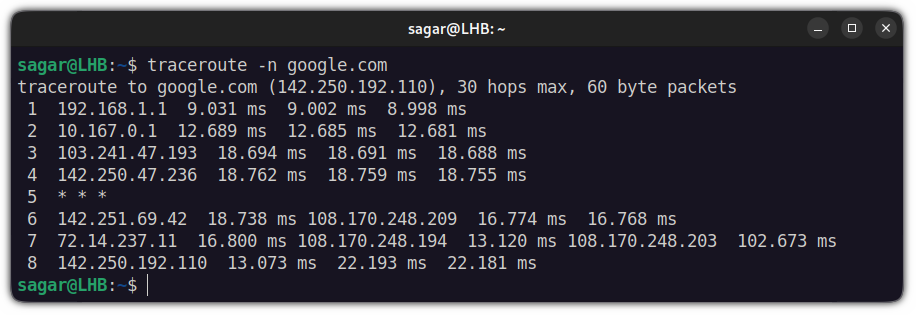
7. Route packages through the gateway using traceroute
You can specify the gateway address using -g option alongside the domain you want to traceroute.
For example, I have added 192.168.1.7 as a gateway address:
traceroute -g 192.168.1.7 google.com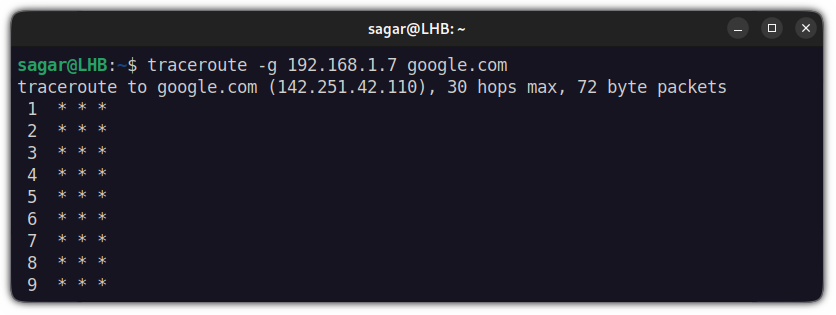
8. Change the destination port in traceroute
If you want to change the destination port of your source domain while tracerouting, you will have to use -p to specify the port.
For example, I have changed my destination port to 29879:
traceroute -p 29879 google.com
9. Set maximum packet length
By default, traceroute will use a packet length of 60 bytes and you can alter this behavior by just appending packet size to the source IP.
For example, I changed to 100 bytes of maximum packet length while tracerouting:
traceroute google.com 100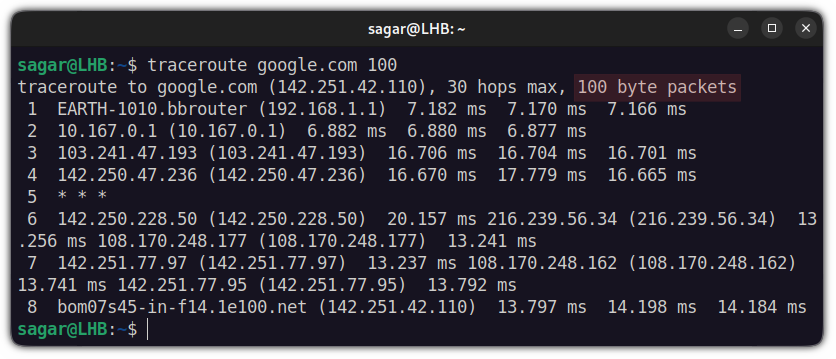
10. Disable probe packet fragmentation
If you don't want to allow probe packet fragmentation, there is a straightforward way to stop it.
You just have to use -F and there will be no probe packet fragmentation:
traceroute -F google.com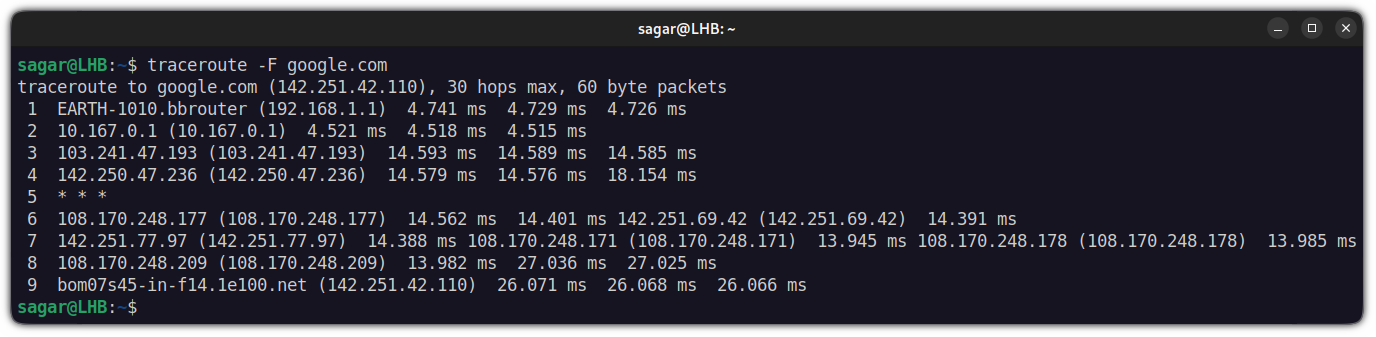
Wrapping Up
If you are curious to know how the traceroute works, you can refer to the other guide where I've explained the working of the traceroute.
I hope you will find this helpful and if you have any queries, let me know in the comments.