Email hosting is one of those sneaky expenses that often catches you off guard. You buy a domain, set up a few email addresses, and everything seems fine until the renewal period comes around.
Suddenly, you're faced with exorbitant fees, charged on a per-user basis. This got me thinking, if I host nearly every major service I use, why not host my own email server? 💭
Although, there are mixed opinions on the internet about the whole idea of hosting your own email server. Some people claimed it’s not a great idea, citing complexities and potential issues with email deliverability.
Others, mostly amateurs like myself, had set up their email servers and were happy with the results.
The logical side of me hesitated, but the curious kid inside wanted to try it anyway. After all, isn’t the best way to learn by making mistakes? So, here’s how I self-hosted an email server with Mailcow, with a fair share of trial and error.
Why Mailcow?
During my research, I stumbled upon Mailcow, an open-source project designed to simplify email hosting.
Think of it as a pre-configured email server toolkit, wrapped neatly in Docker containers.
Mailcow combines all the key components - Postfix, Dovecot, SOGo (webmail), and more and provides a clean web interface for managing users, domains, and mailboxes.
- Ease of Use: Dockerized setup means less tinkering with dependencies.
- Modern Interface: A web dashboard to manage everything (goodbye, terminal-heavy configs).
- Community Support: Tons of tutorials, forums, and Reddit discussions to fall back on.
Getting started: What you’ll need
Before we dive in, let’s ensure you’re equipped:
Hardware: You’ll need a server with enough resources for your email needs. For personal use or a small setup, something like 2 vCPUs, 4 GB RAM, and 60 GB storage should be enough.


Get started on DigitalOcean with a $100, 60-day credit for new users.

Get started on Linode with a $100, 60-day credit for new users.
A clean Linux installation (e.g., Ubuntu 20.04 or newer). Avoid running other services on the same server.
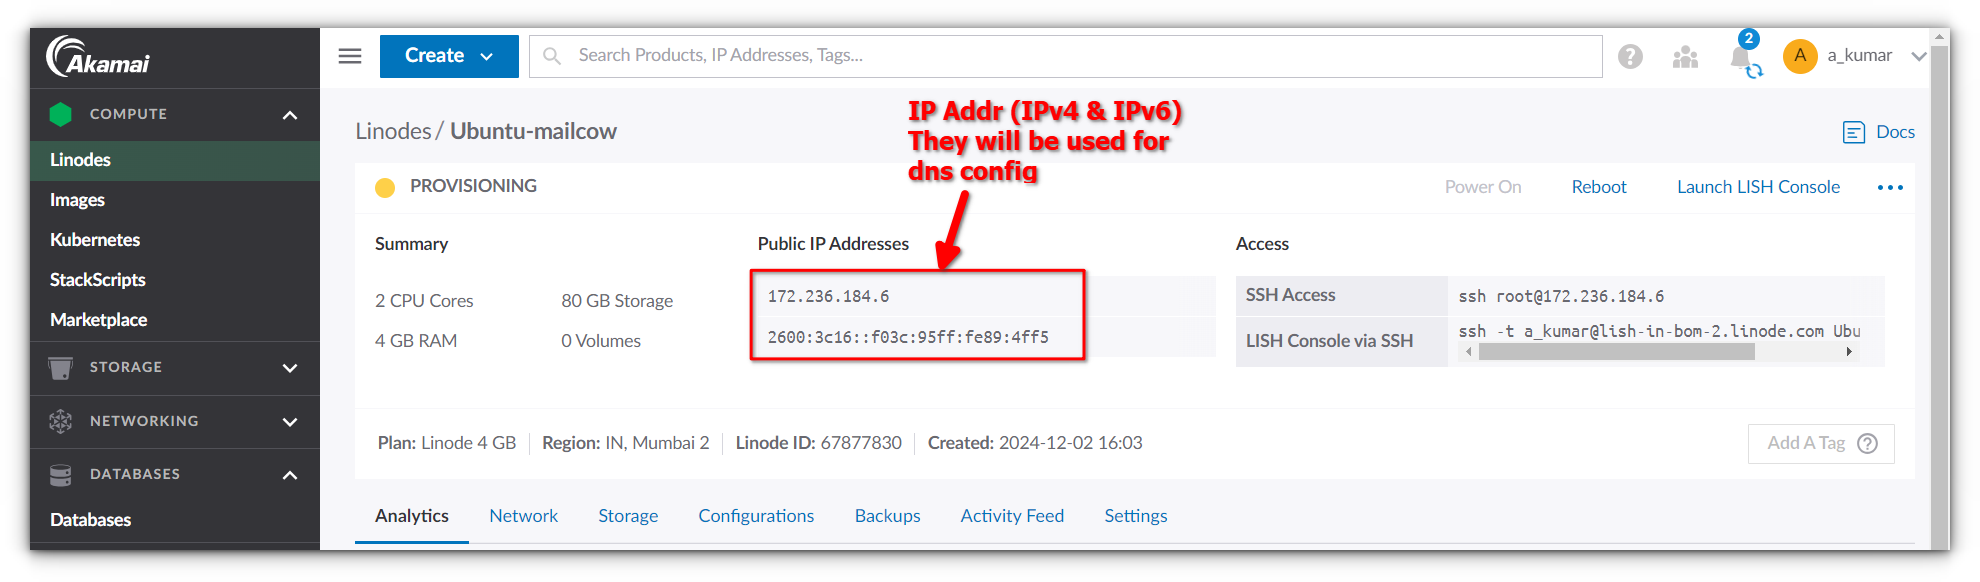
Static IP Address that isn’t blacklisted. Essential for smooth communication with other mail servers.
Domain Name: You’ll need a domain for your email addresses.
Basic understanding of email protocols like SMTP, IMAP, and POP3.
Familiarity with DNS records (MX, SPF, DKIM, DMARC).
Got all that? Great. Let’s get started!
Setting up the environment
For this guide, I set up a virtual private server (VPS) using Linode with the following specifications 4 GB RAM, 2 vCPUs, 80 GB storage.
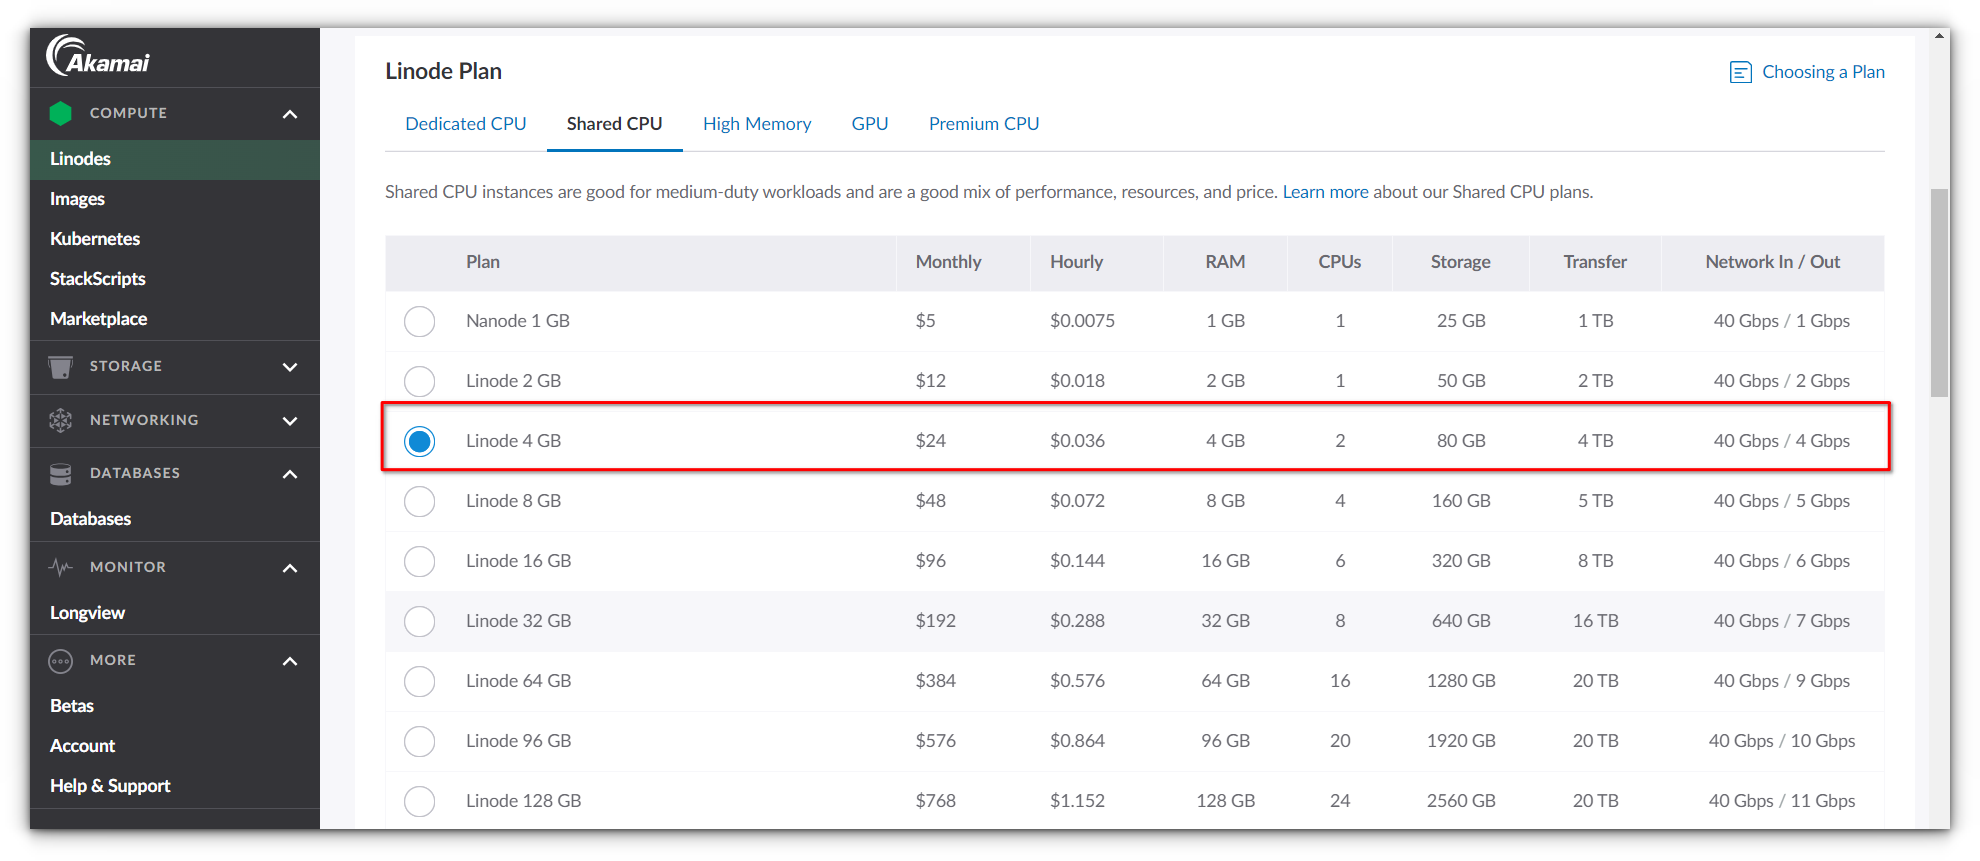
For the operating system, I used Ubuntu 22.04 LTS. Once the VPS was ready, I proceeded with the setup steps below.
Install docker
We’ve covered the steps to install Docker and Docker Compose multiple times in our previous articles, so I won’t repeat them here.
If you’re new to Docker or need a refresher, you can refer to our guide on how to install Docker on Ubuntu. It’s straightforward and will get you up and running in no time.

Open necessary ports
Email servers rely on specific ports for communication. Ensure your firewall allows the following:
- 25 (SMTP)
- 80 (HTTP)
- 443 (HTTPS)
- 587 (SMTP with authentication)
- 993 (IMAP)
Use this command to verify:
netstat -tulpn | grep -E '25|80|443|587|993'
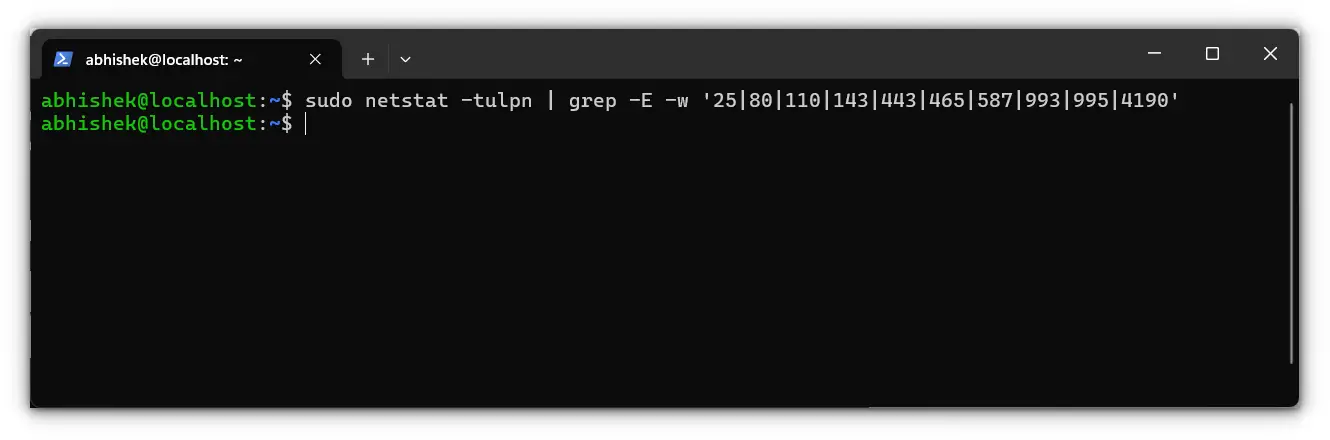
This ensures smooth communication for sending and receiving emails.
DNS configuration
Proper DNS setup is critical for email functionality. Your domain needs to know where to send email traffic. Here’s a quick guide:
- A Record: Maps mail.yourdomain.com to your server’s IP address
- MX Record: Directs incoming emails to mail.yourdomain.com
- SPF, DKIM, and DMARC: These records authenticate your emails and reduce the chances of them being flagged as spam
If you’re new to DNS, don’t worry, it’s mostly copy-paste.
For managing my DNS records, I’m using Cloudflare, it’s my go-to for all things DNS. Your setup might differ; you could be using your domain registrar’s DNS panel or another provider entirely.
Regardless of the platform, the steps remain similar, so just adapt them to your tool of choice.
A Record
Name: mail

Type: A

Value: Your server’s public IP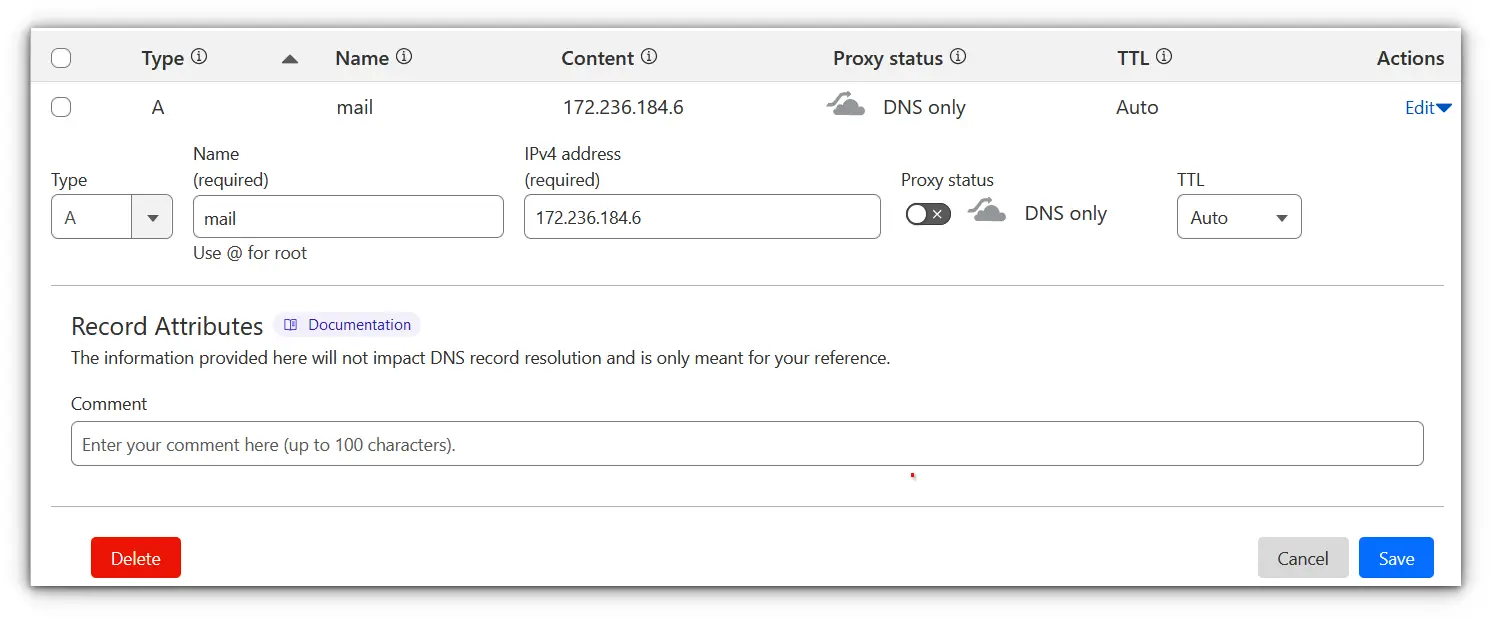
CNAME Records
- autoconfig
Name: autoconfig

Type: CNAME

Alias: mail.yourdomain.com
- autodiscover
Name: autodiscover

Type: CNAME

Alias: mail.yourdomain.com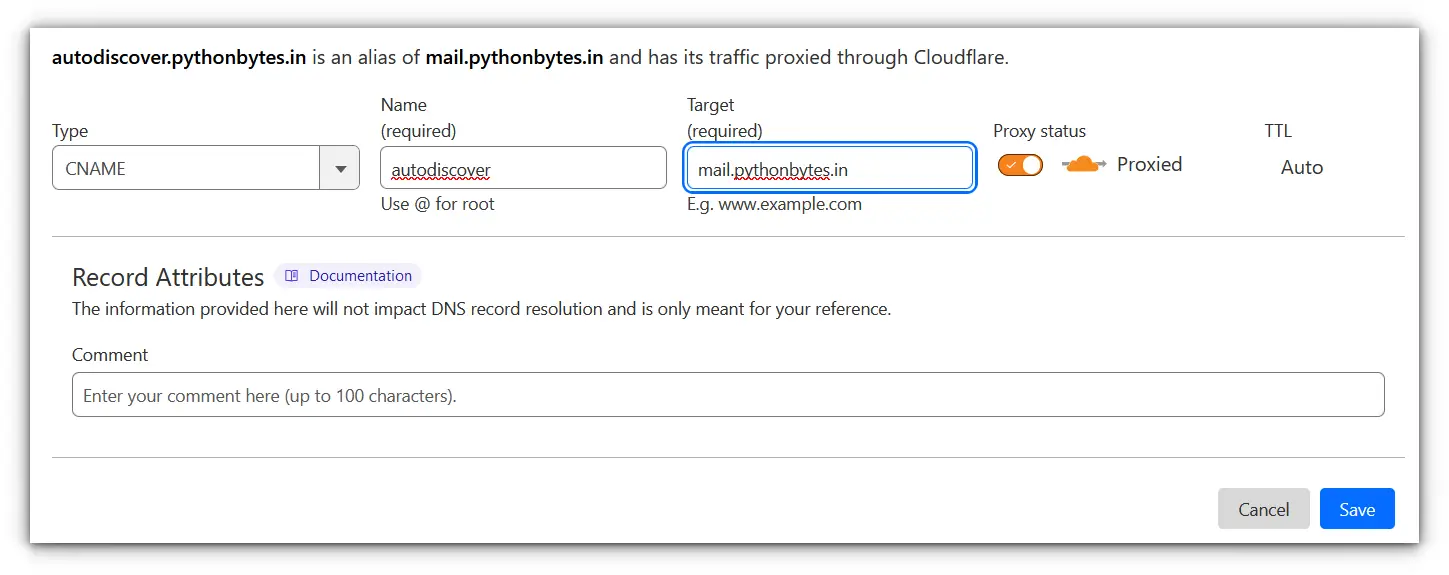
MX Record
Name: @

Type: MX

Priority: 10

Mail Exchange: mail.yourdomain.com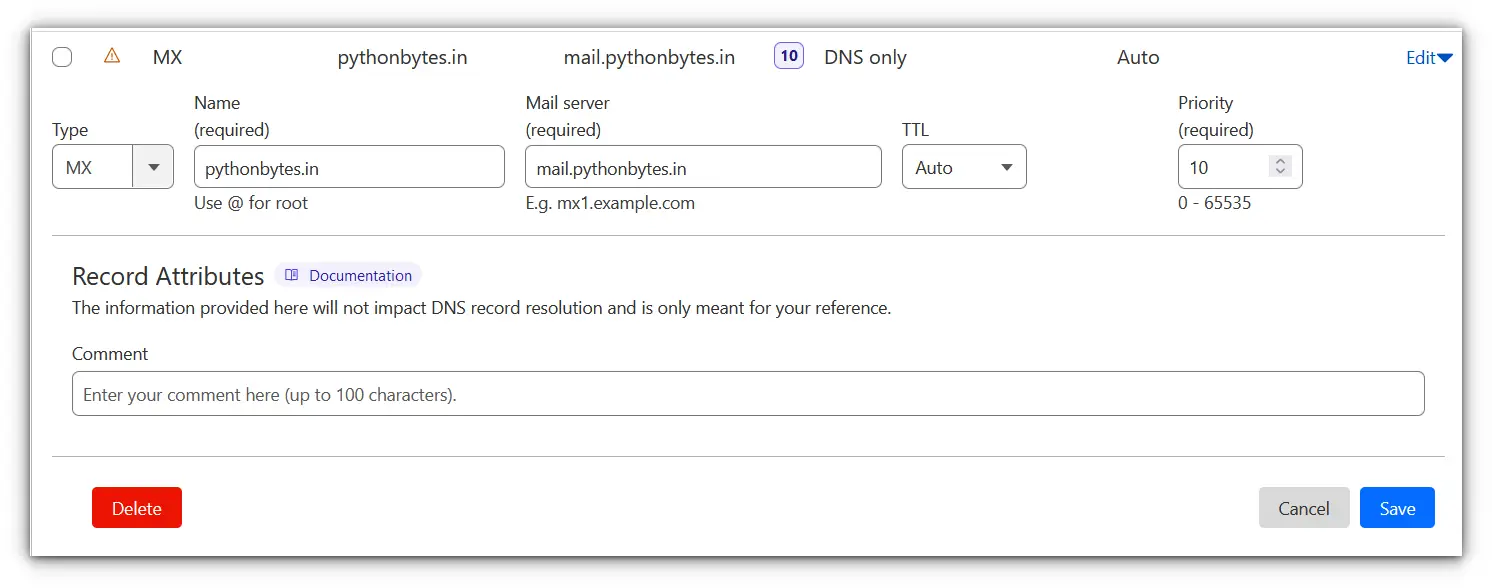
SPF Record
Name: @

Type: TXT

Value: v=spf1 ip4:your_server_ip -all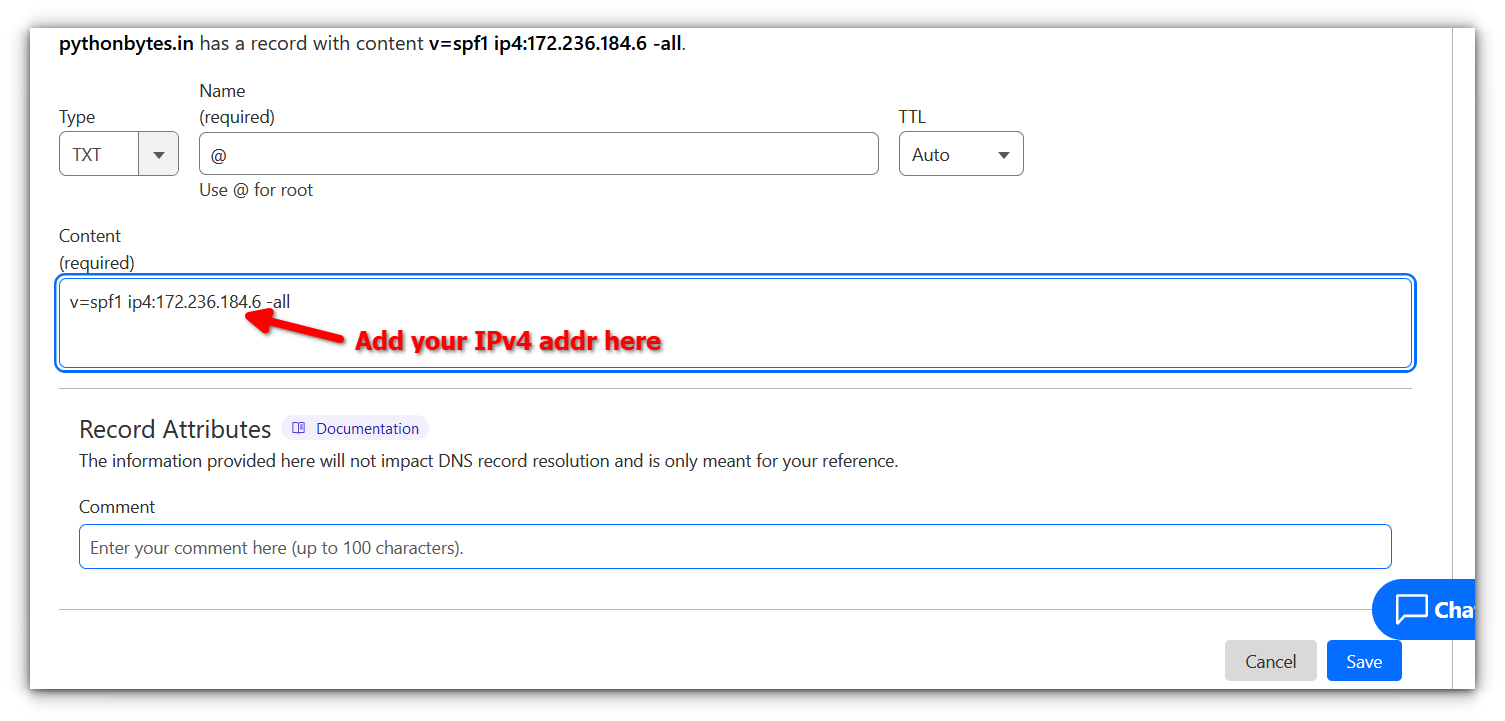
DKIM Record
We will generate a key later during Mailcow setup.
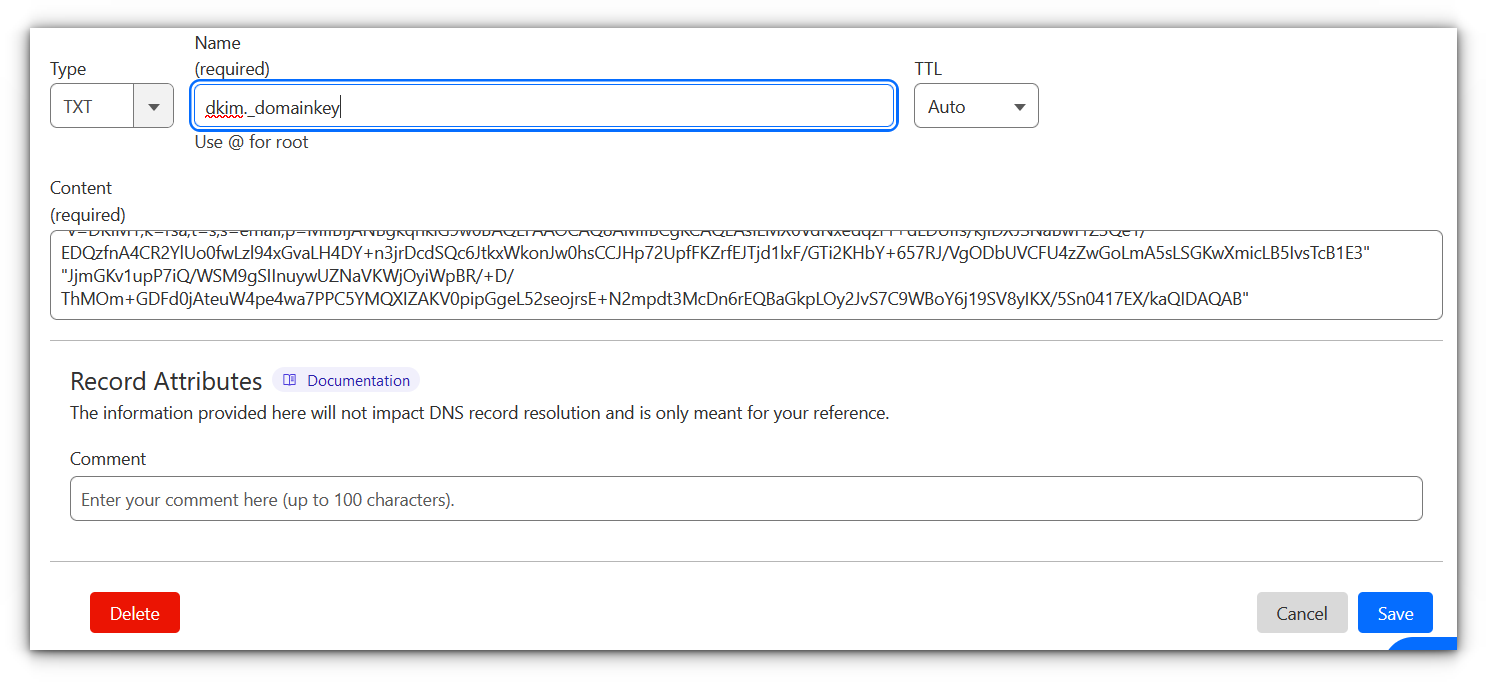
Name: dkim._domainkey

Type: TXT

Value: v=DKIM1;k=rsa;t=s;s=email;p=...
Installing mailcow
Now begins the fun part. First thing first, clone the mailcow repository to your server:
git clone https://github.com/mailcow/mailcow-dockerized
cd mailcow-dockerized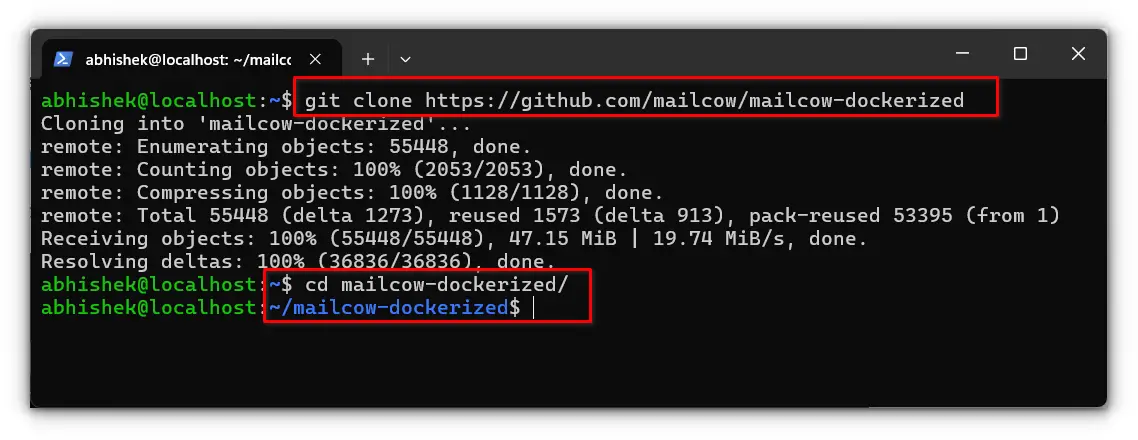
Generate the Configuration
Run this script to create your server’s configuration:
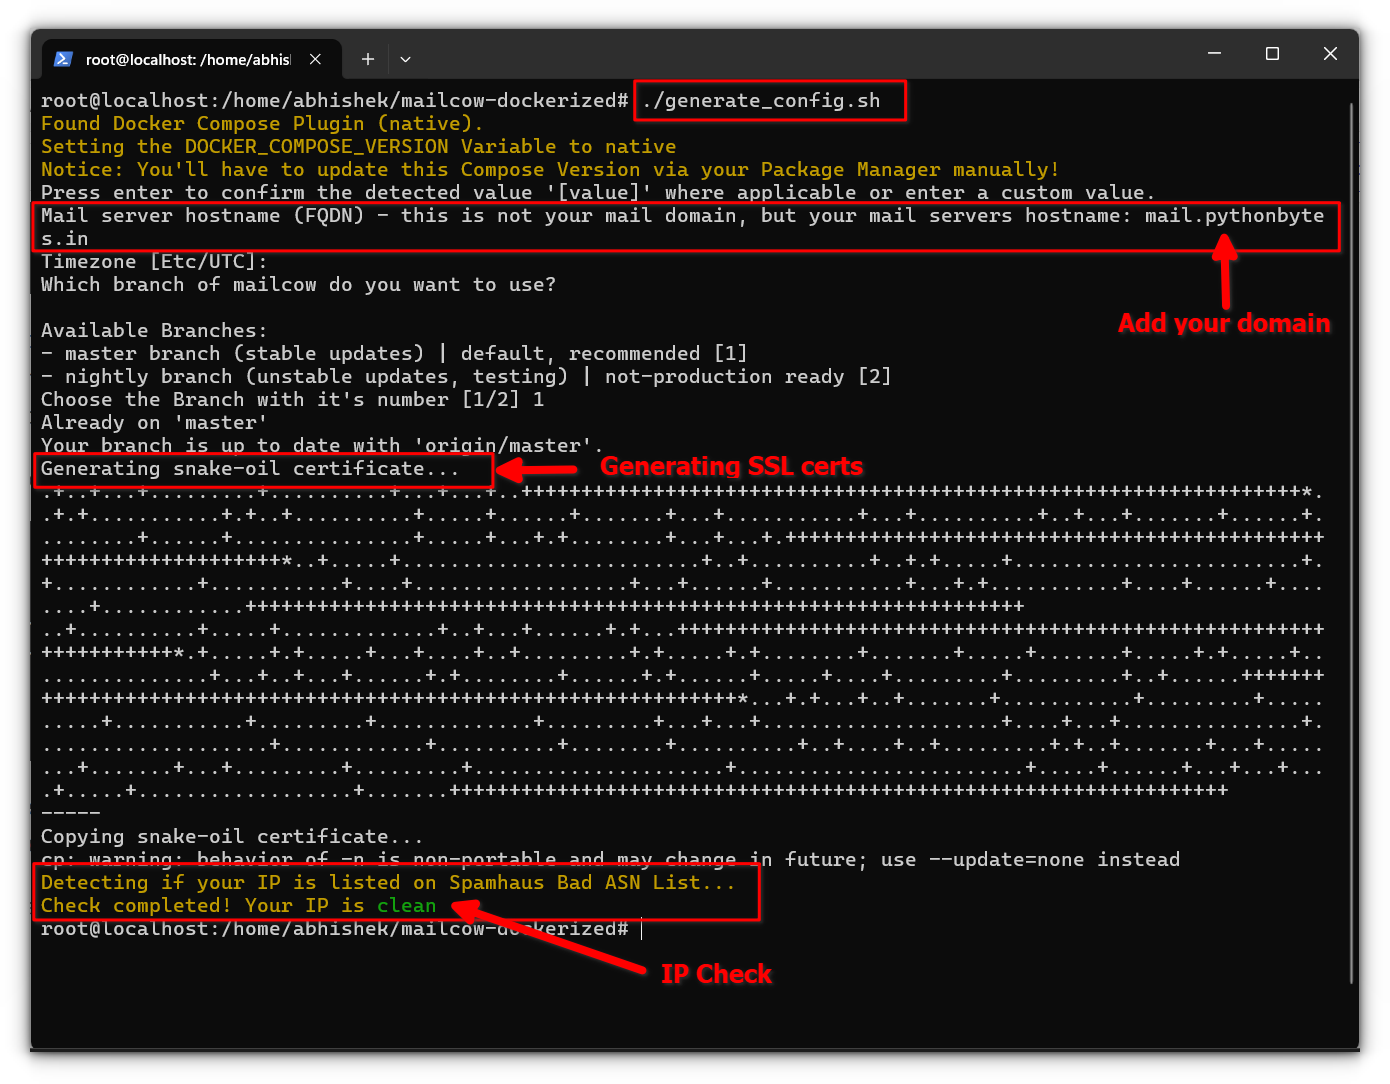
./generate_config.sh
It’ll ask for FQDN i.e. your domain. Use mail.yourdomain.com. This step also sets up SSL certificates using Let’s Encrypt.
Setting up the containers
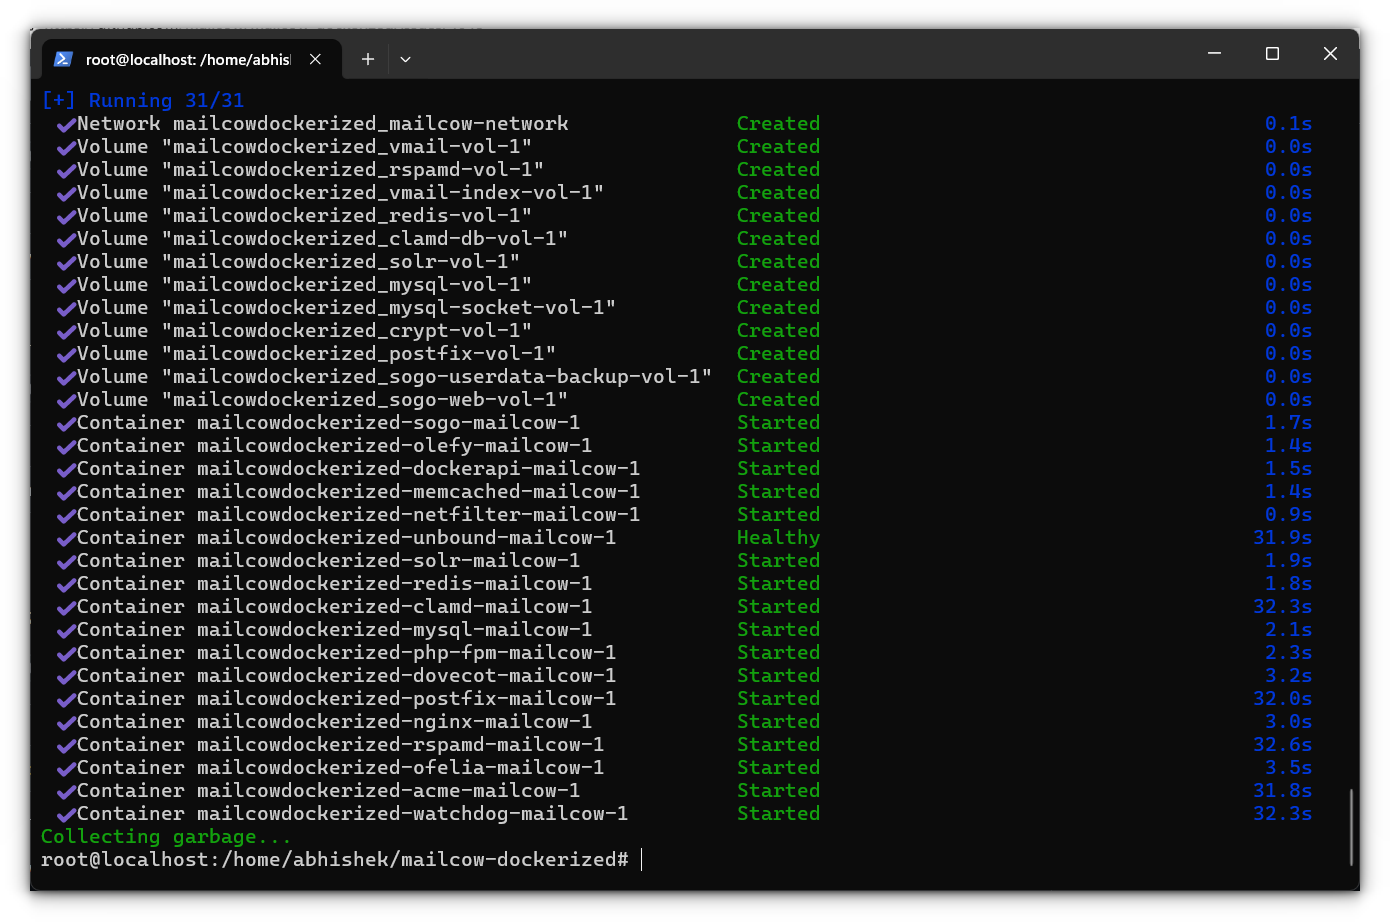
With all the groundwork laid, it’s time to bring your email server to life. To get everything running, use the following command:
docker-compose up -d Here’s what’s happening, Docker will automatically check for updates to the Mailcow containers (if needed) and then download and launch everything : your mail server, web interface, spam filters, and more, all in one go.
The -d flag stands for "detached," meaning the containers will run in the background, letting you carry on with other tasks while everything boots up.
Depending on your system and internet speed, this step might take a few minutes, so feel free to grab a coffee while your server springs to life.
Configuring Mailcow
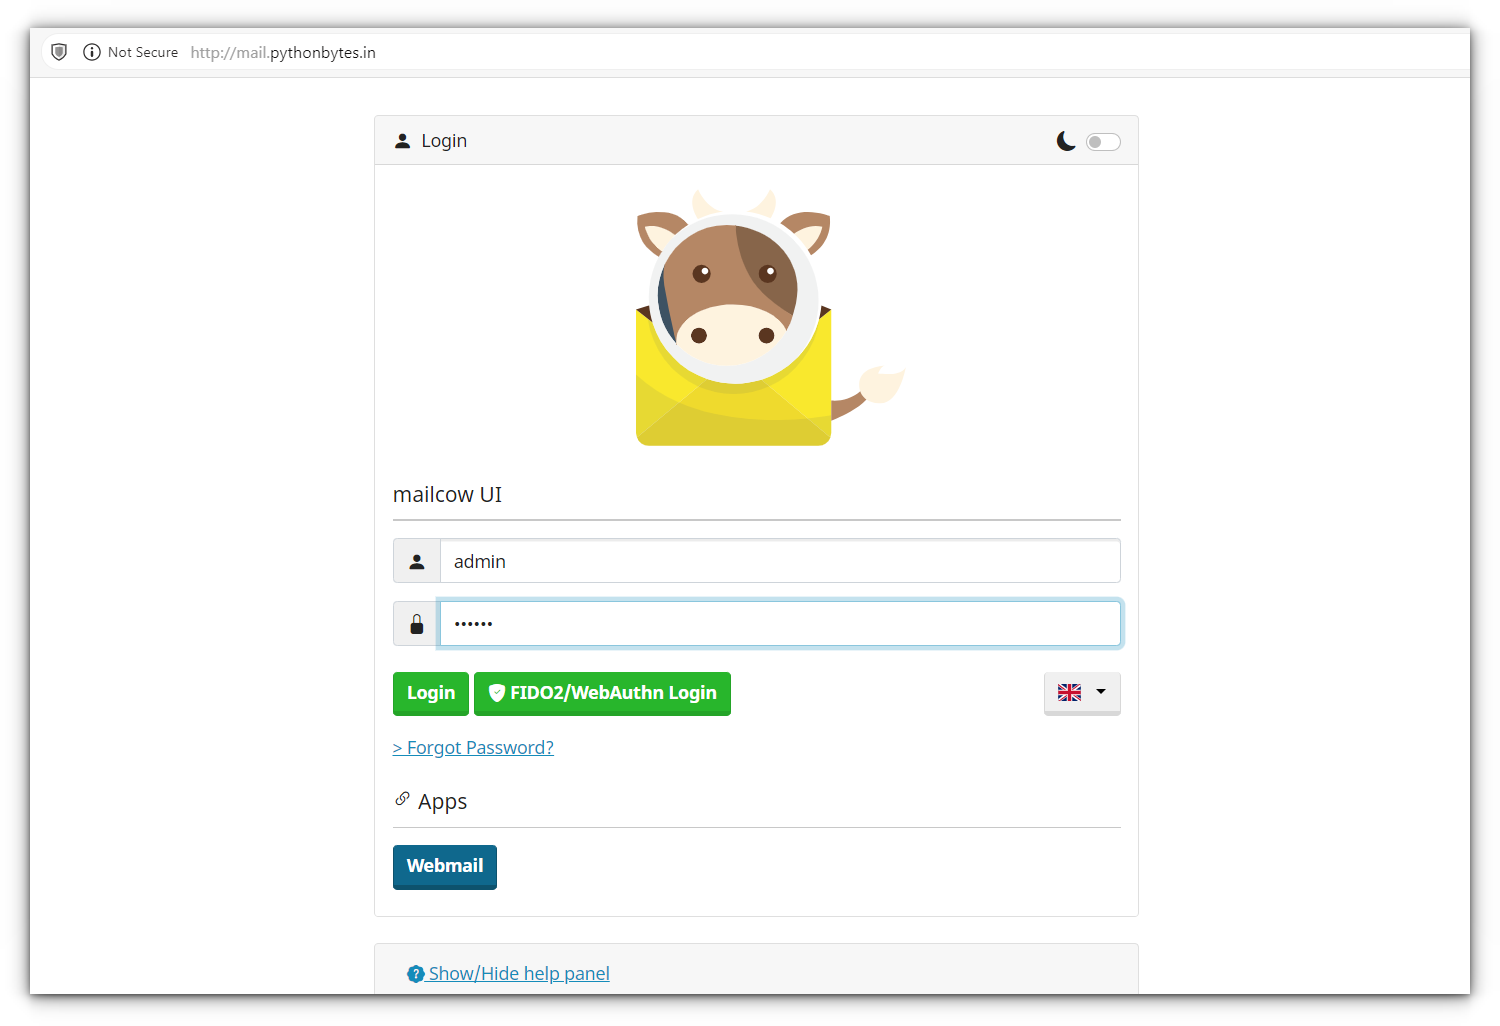
Now that your Mailcow server is up and running, it’s time to configure it to actually handle your emails. First things first, let’s log in to the Mailcow admin interface.
To do that, head over to https://mail.yourdomain.com , you’ll be prompted to log in using the default credentials:
- Username:
admin - Password:
moohoo
Adding domain
With your admin access secured, let’s add your domain. Head to the Configuration tab at the top of the dashboard under E-Mail.
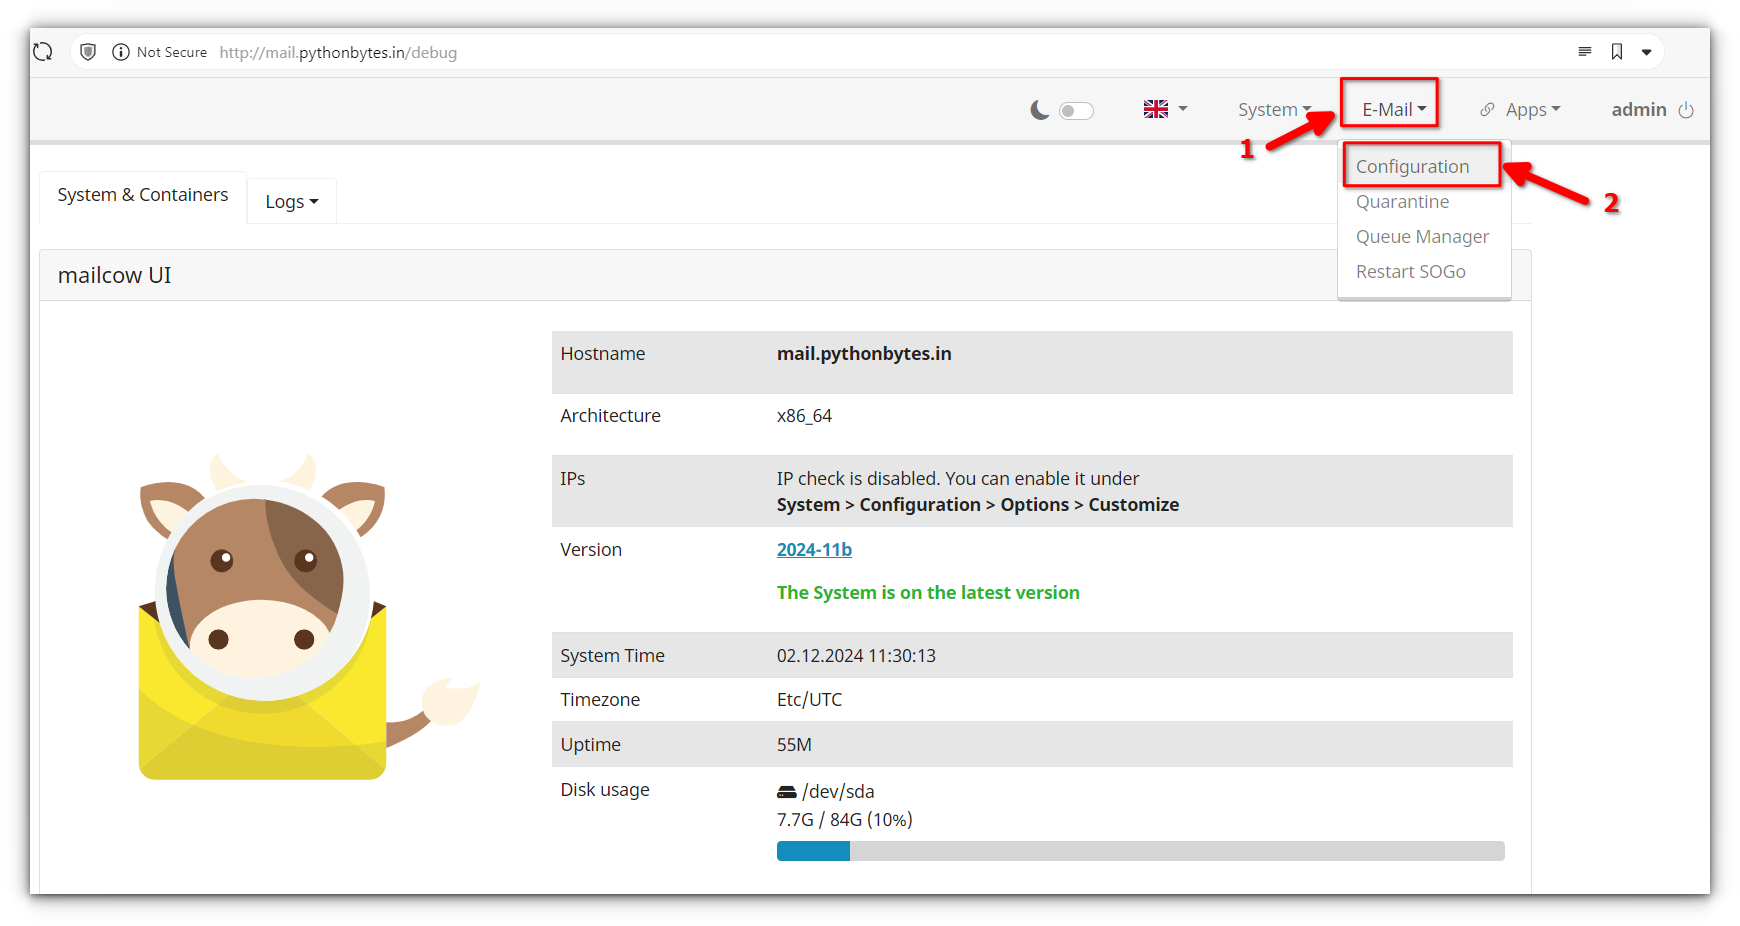
Here’s where you’ll add the domain name you’re using for your email (e.g., yourdomain.com).
In simple words, this step is essentially telling Mailcow, “Hey, this is the domain we’ll be using to send and receive emails,” so make sure it’s the right one.
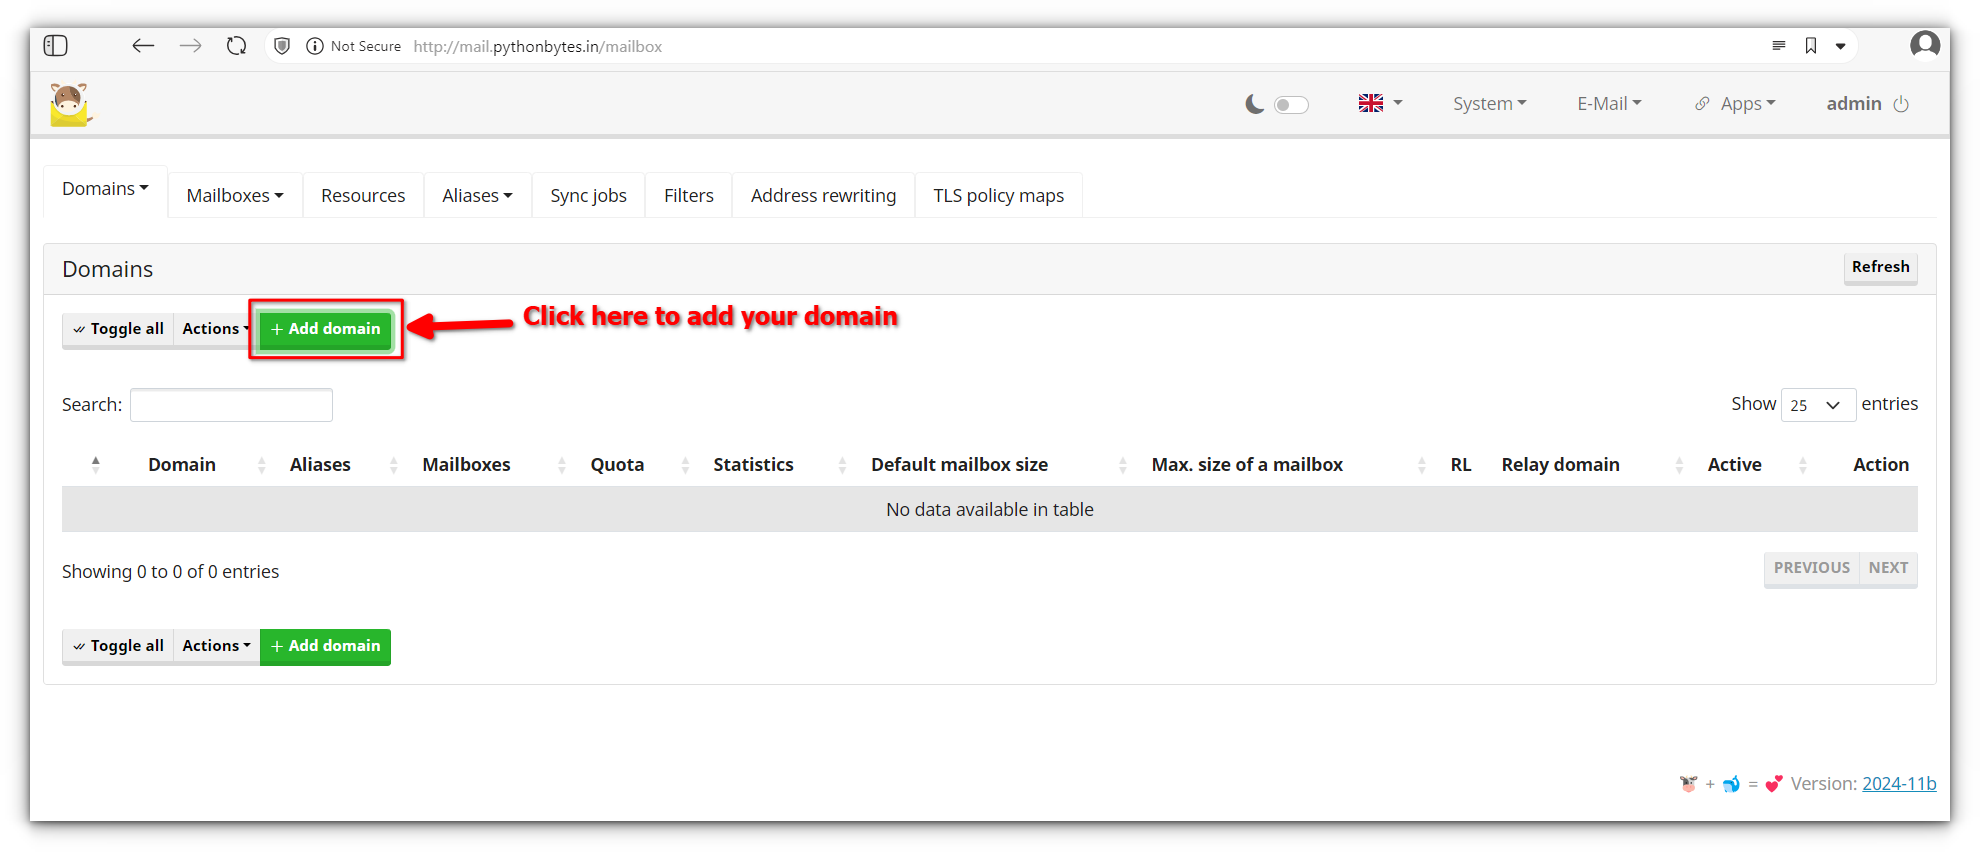
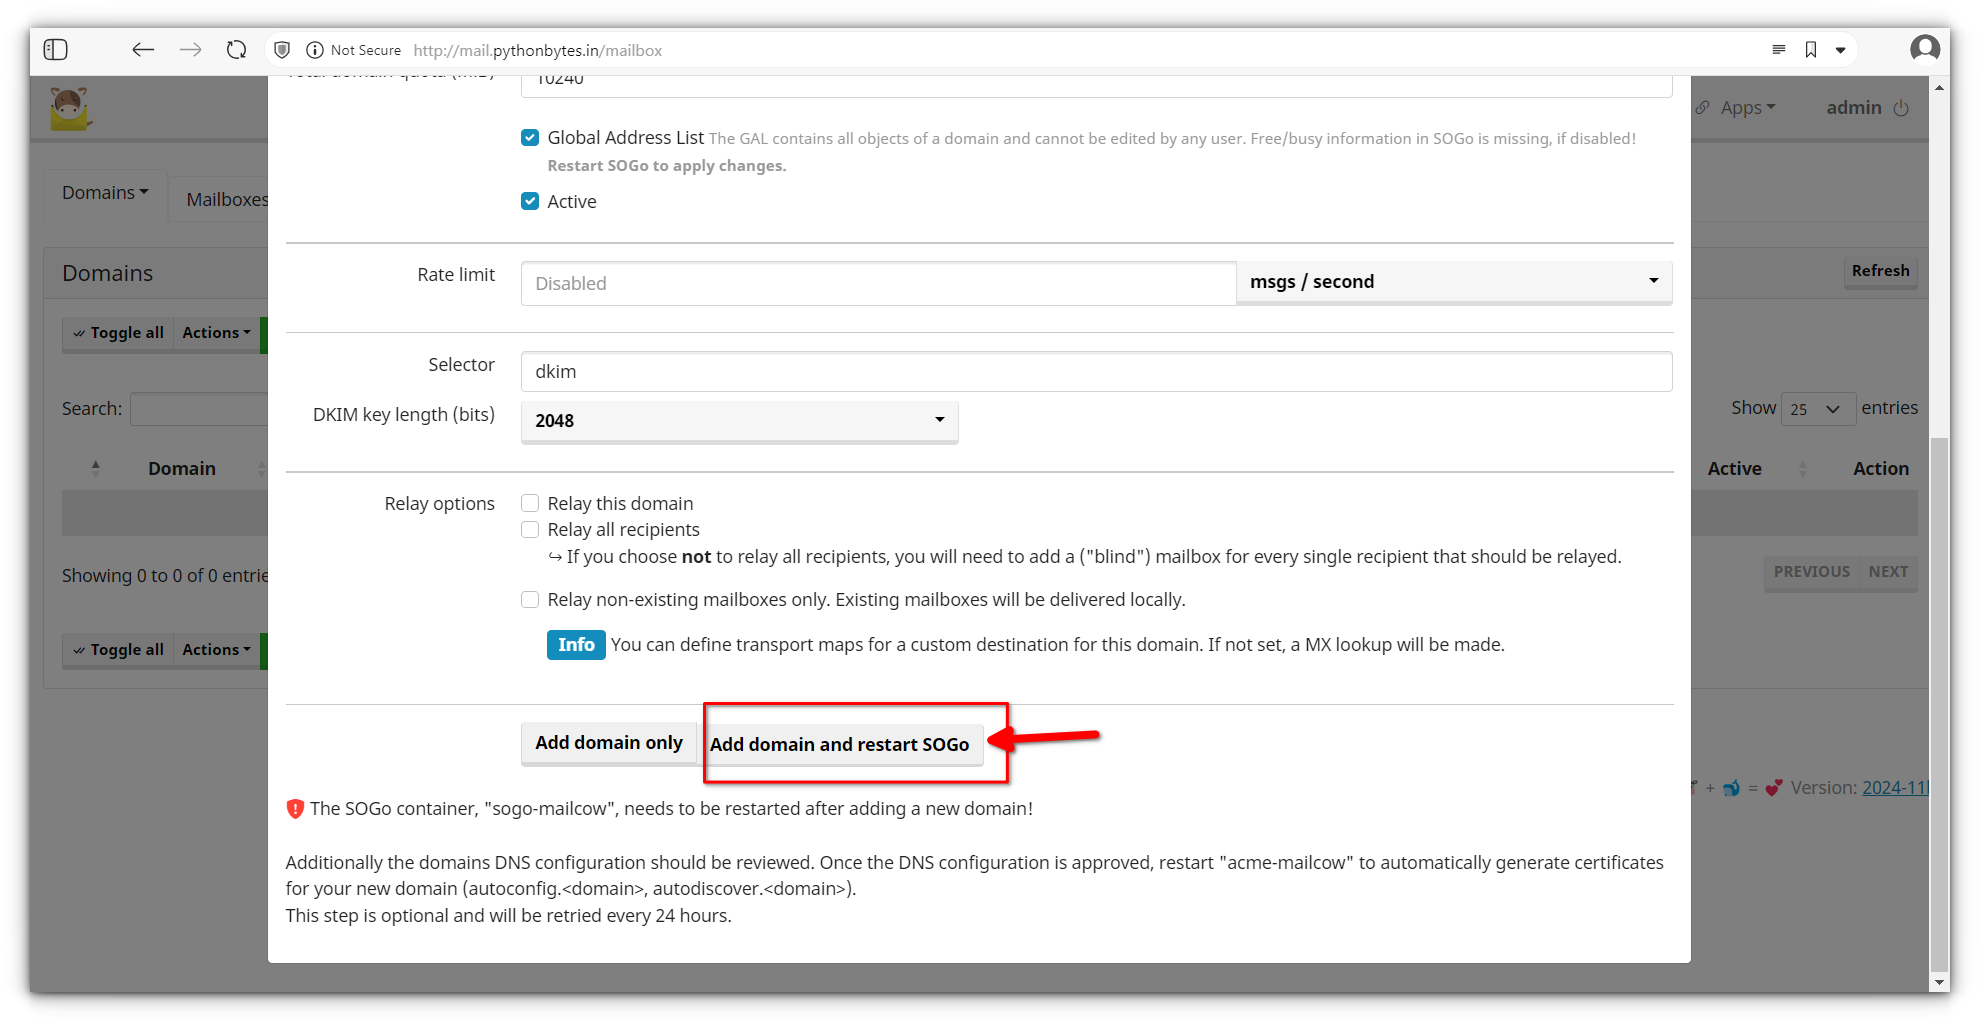
Once you’ve added it, click the Add Domain and restart SOGo button, and you’re all set for the next step.
Generate DKIM Keys
DKIM (DomainKeys Identified Mail) is a way to sign your emails so that receiving servers can verify they’re coming from you and haven’t been tampered with.
It’s an essential part of keeping your emails from ending up in the spam folder.
To generate DKIM keys for your domain, head to Configuration > ARC/DKIM Keys in Mailcow.
This section allows you to create a unique DKIM key for your domain.
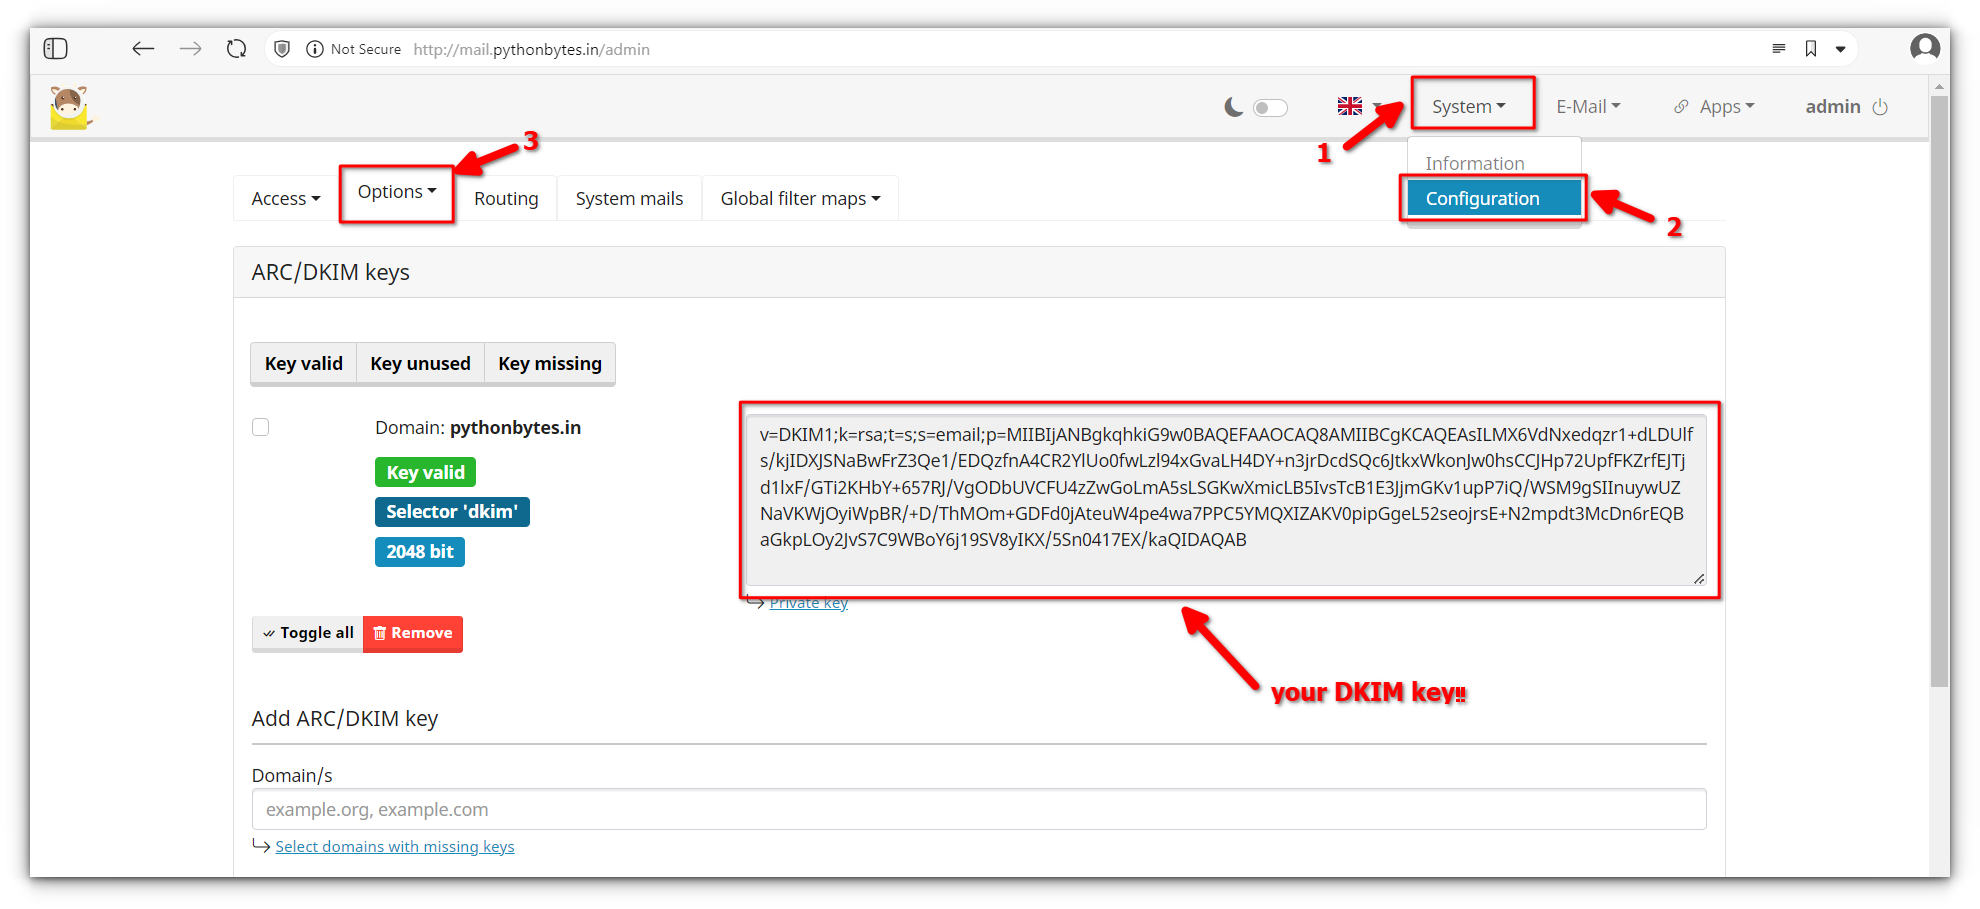
Once the key is generated, you’ll need to copy it and add it as a TXT record in your domain’s DNS settings (discussed above).
This step may take some time to propagate, but don’t worry once it’s done, your emails will be much more secure.
Create mailboxes
With your domain configured and your DKIM keys set up, you’re ready to start creating mailboxes.
This is where you’ll set up individual email accounts for yourself, your team, or anyone else who needs an email address under your domain.
Go to Mail Setup > Mailboxes in Mailcow’s dashboard. Here, you’ll see an option to Add Mailbox.
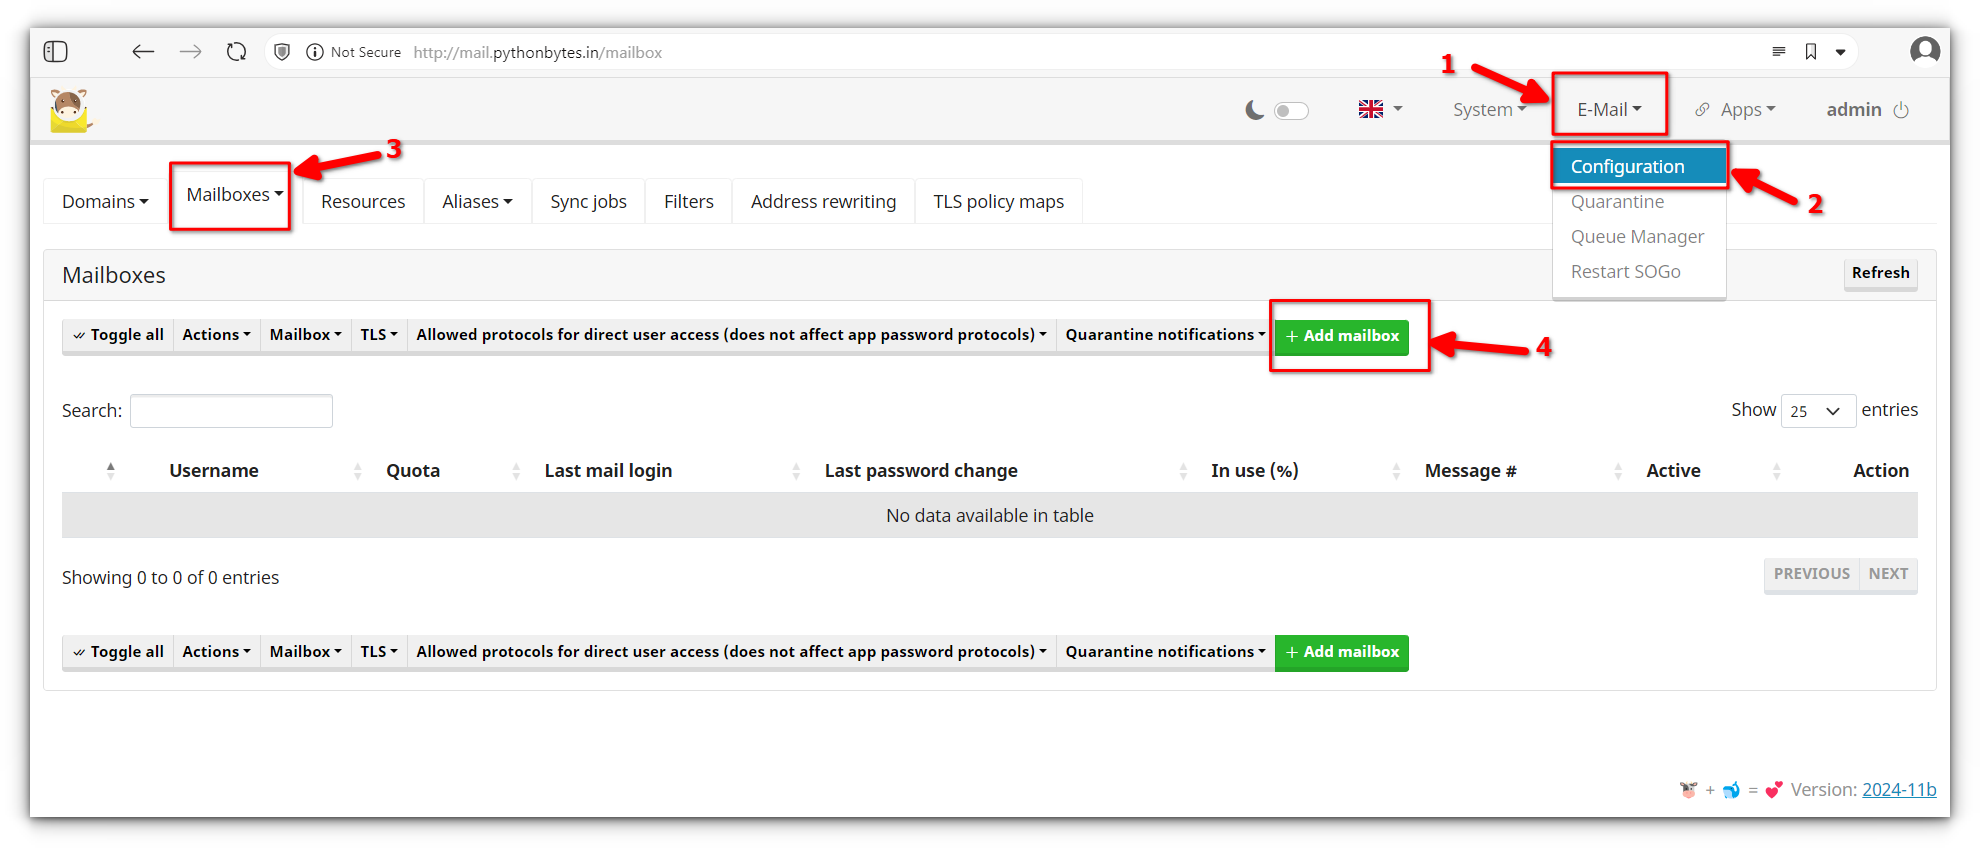
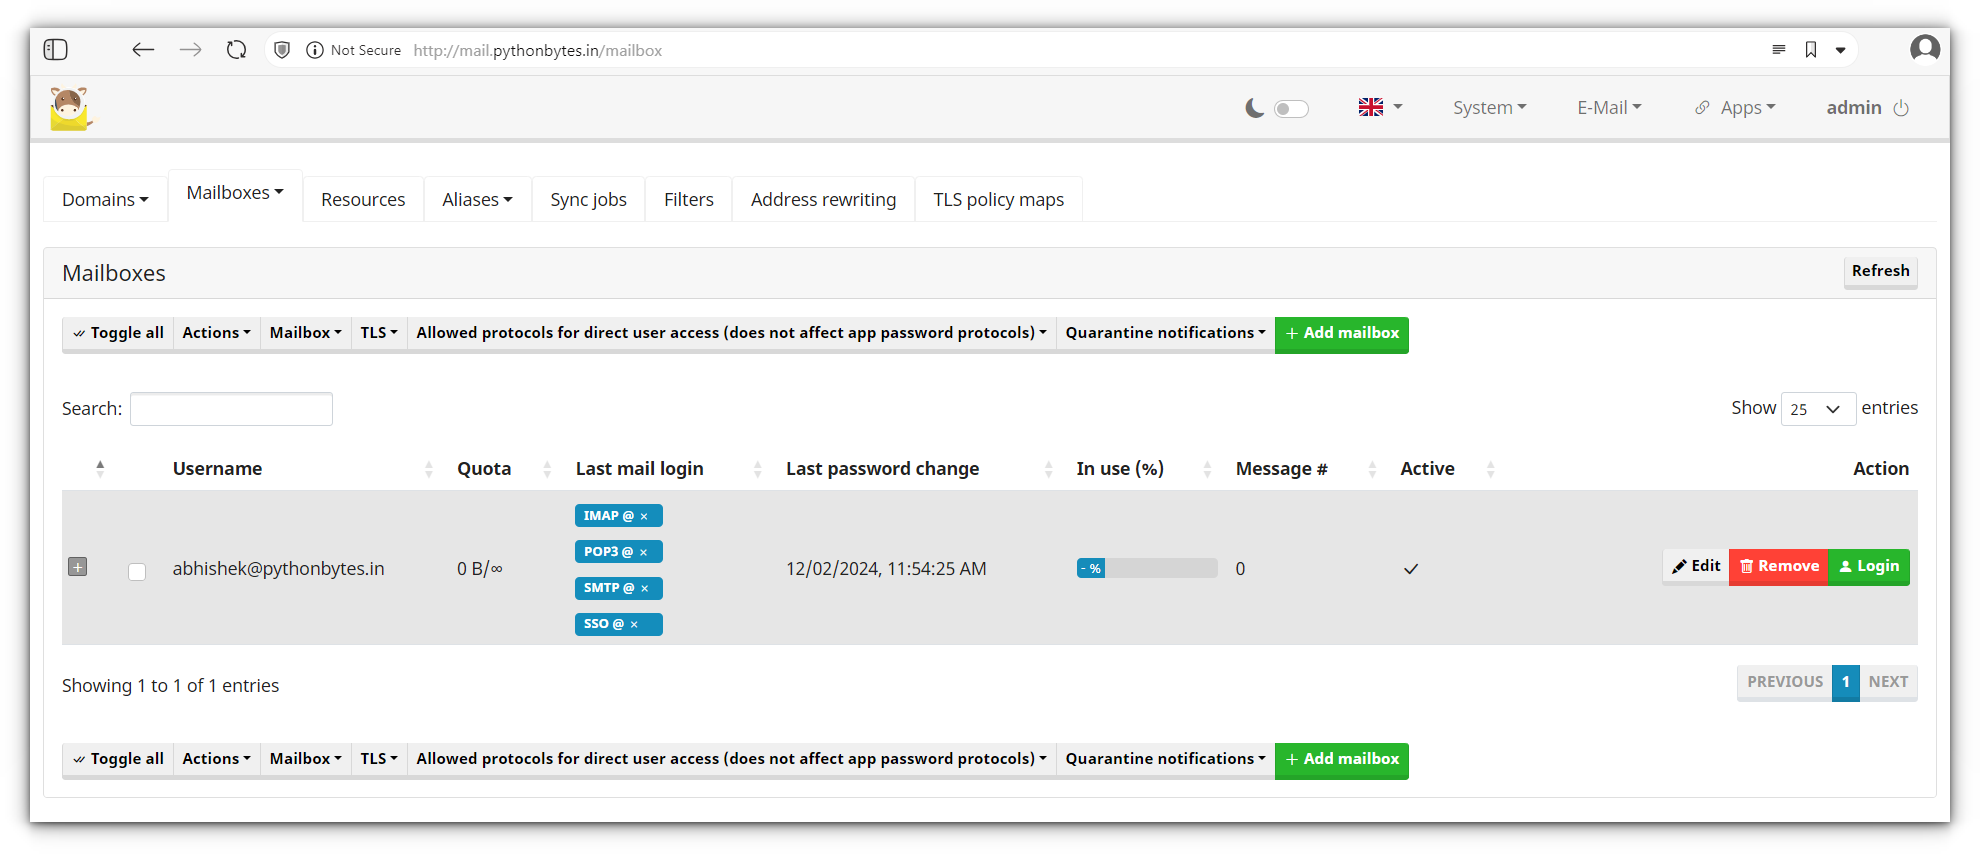
Simply choose a username, assign it to your domain, create a password, and hit Add Mailbox.
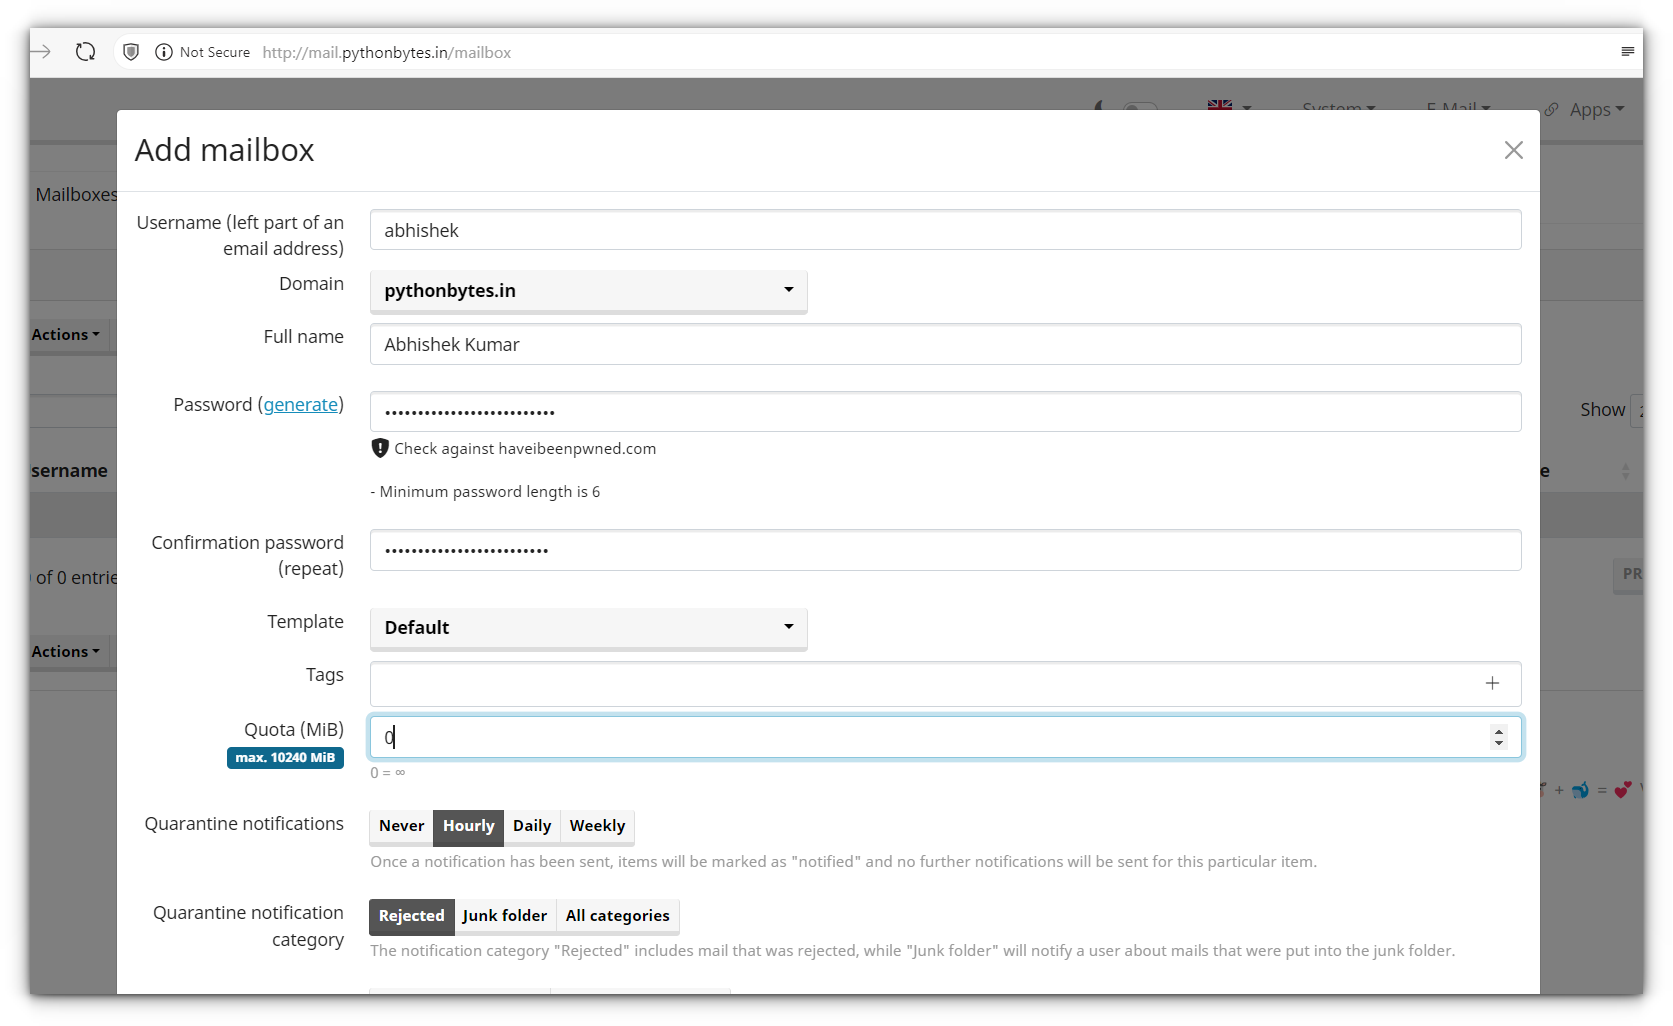
You can add as many mailboxes as you need, whether it's for yourself or your colleagues.
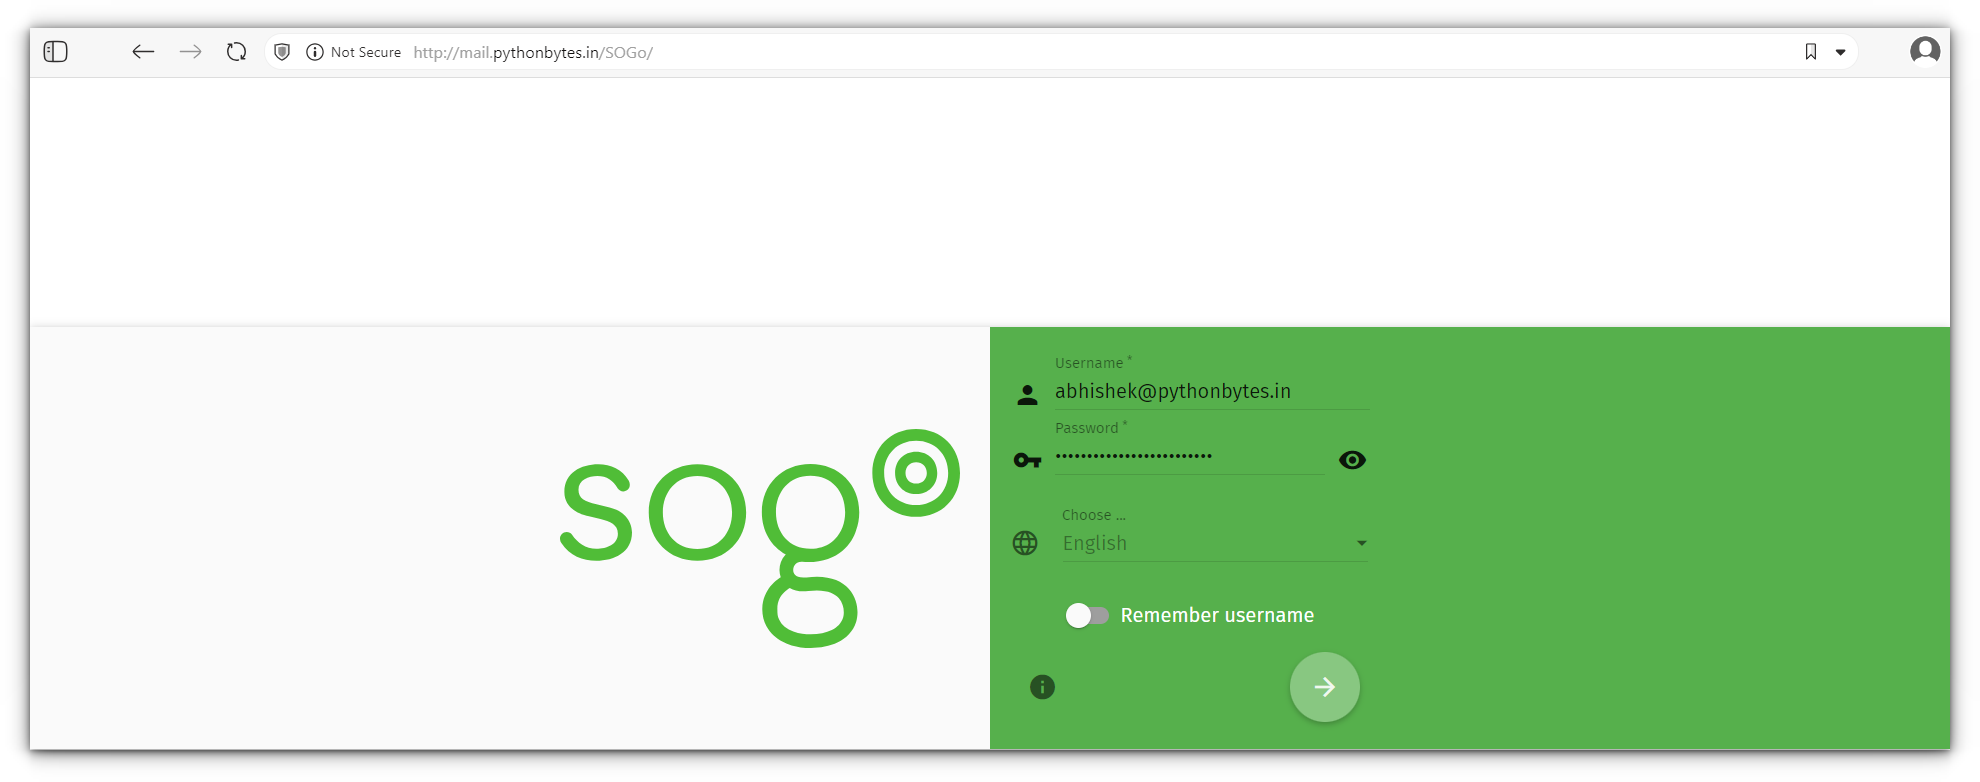
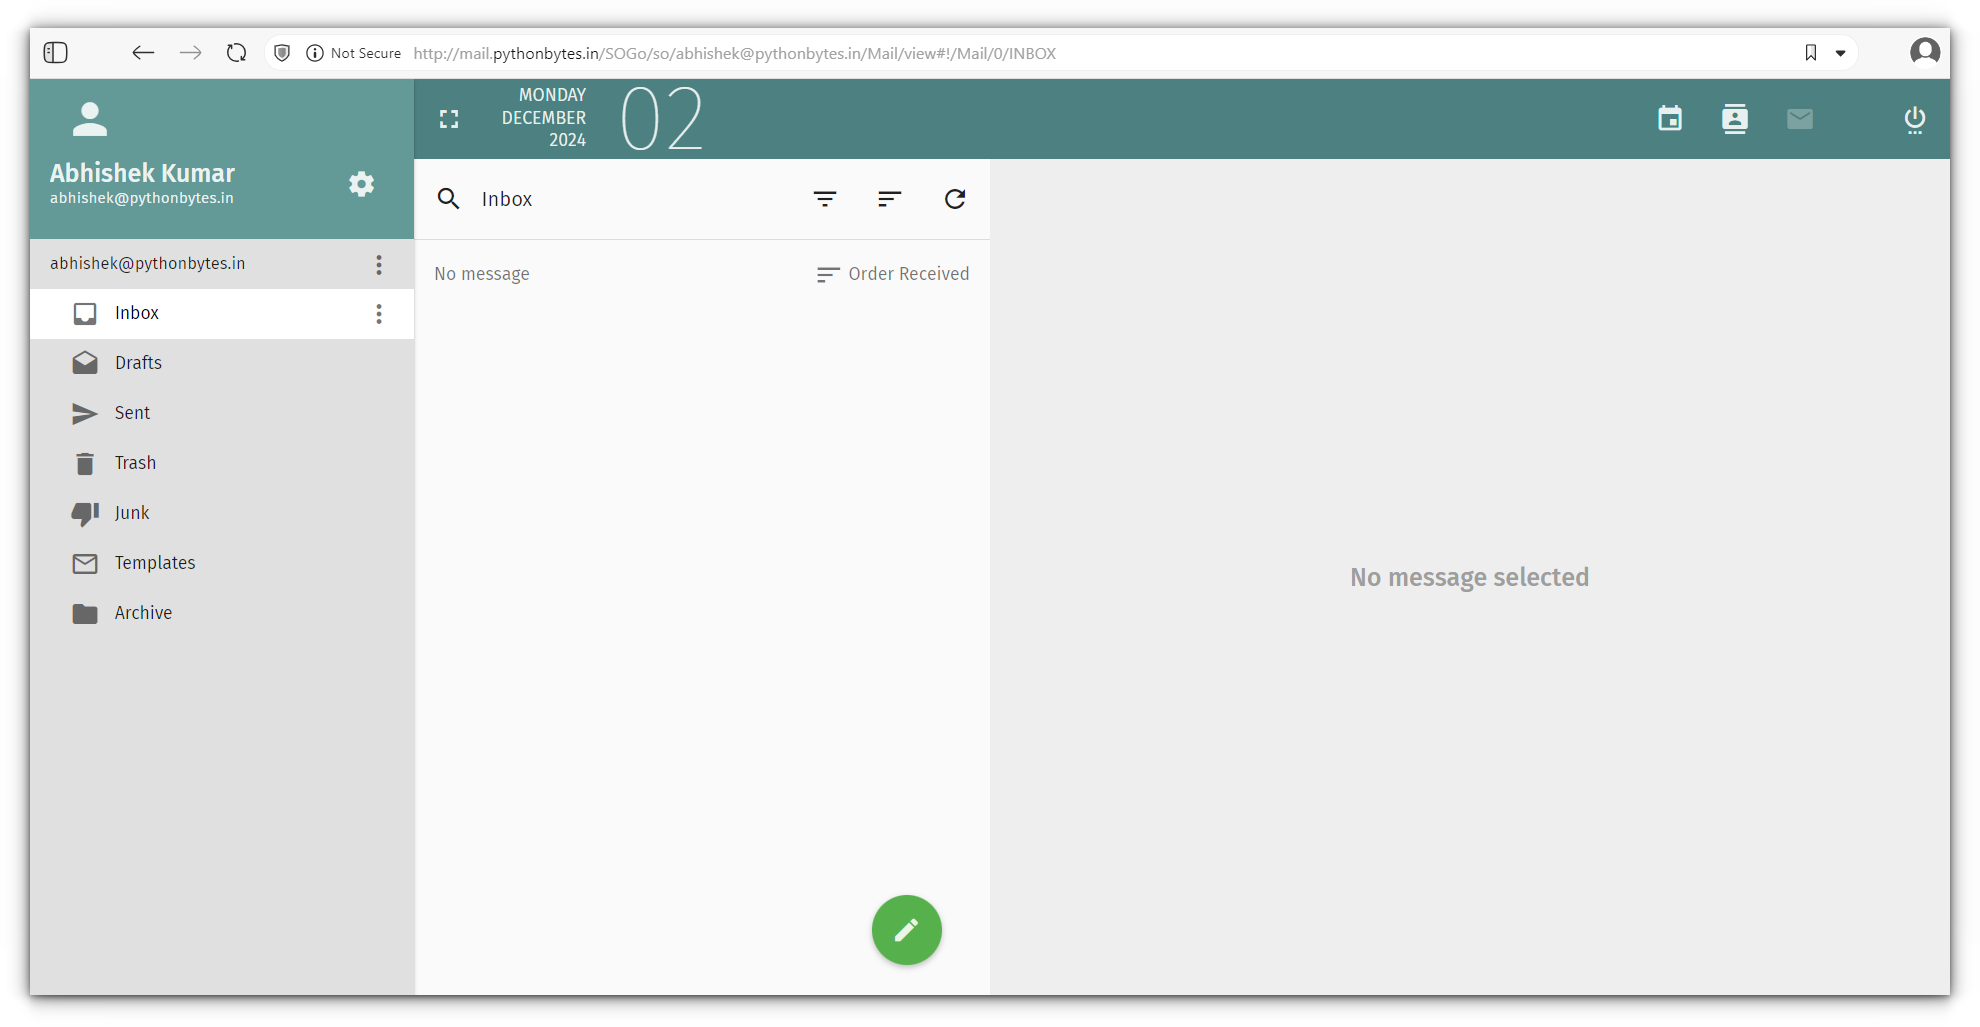
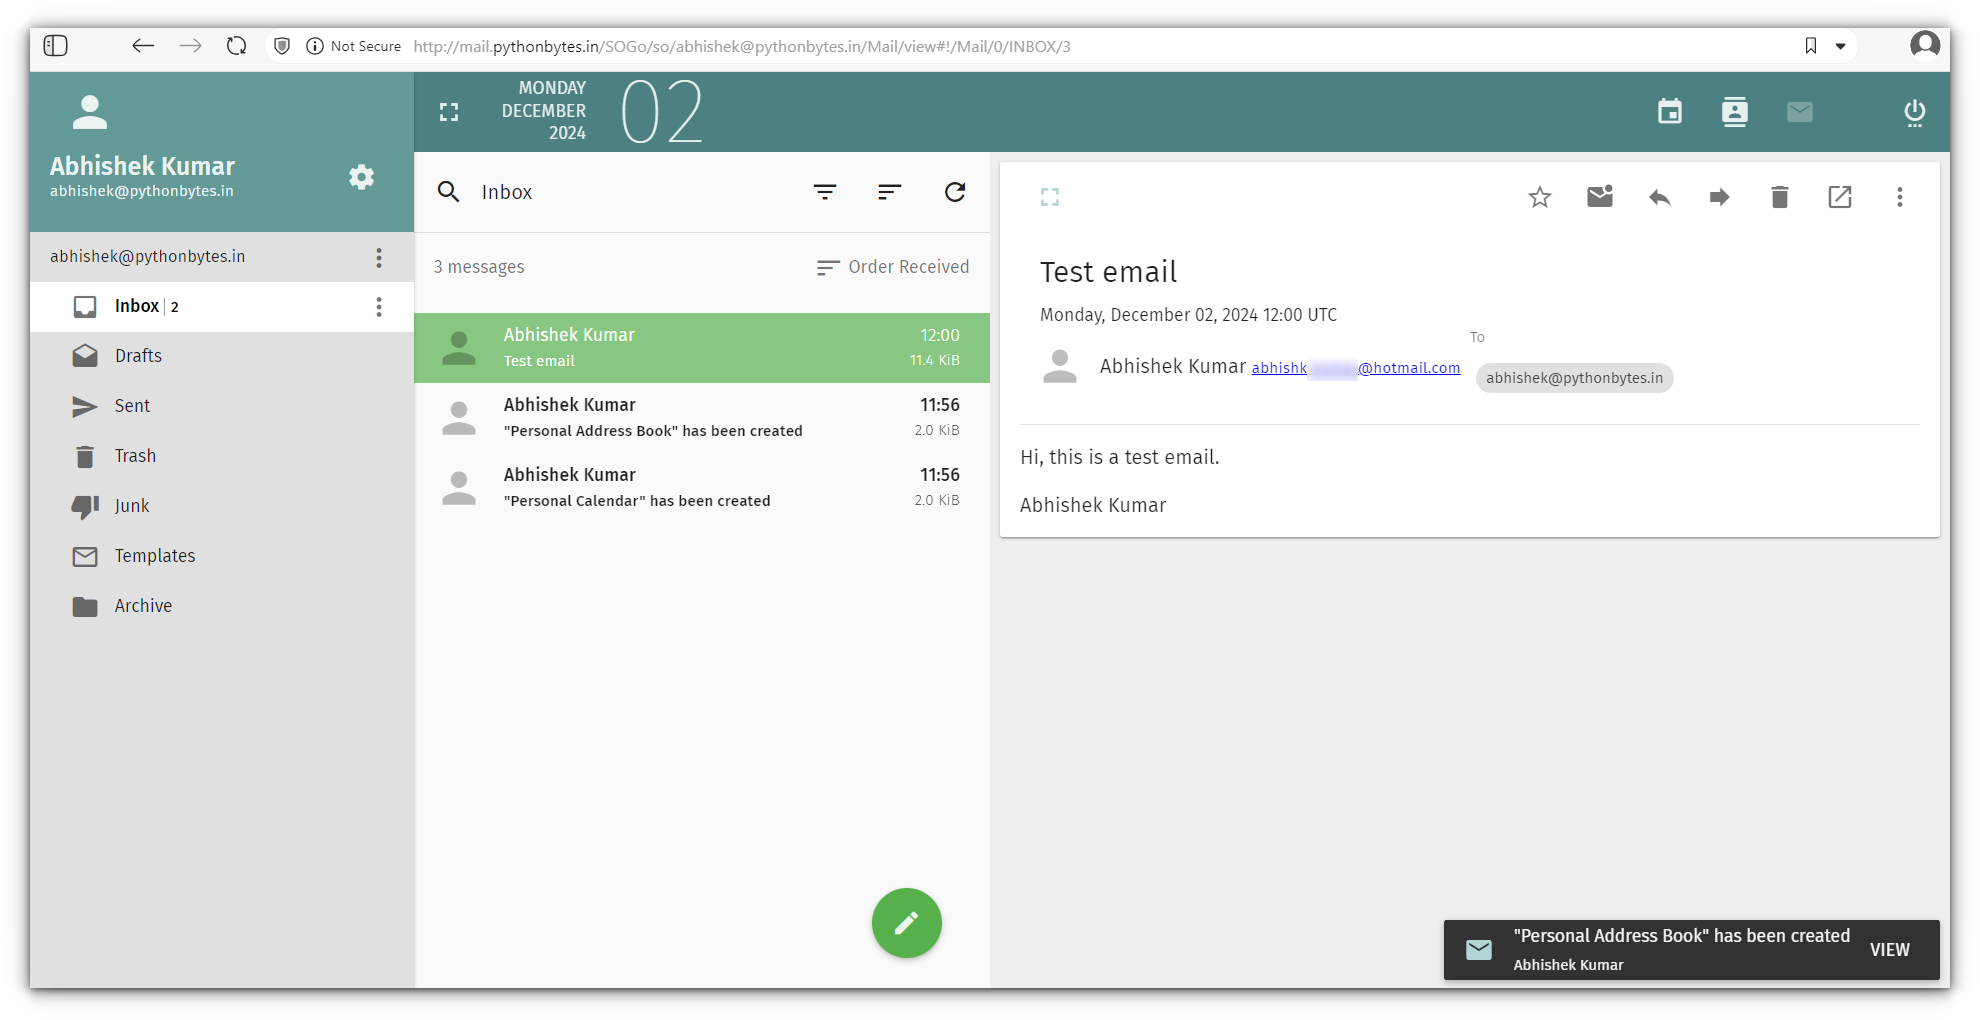
After you’ve created your mailboxes, you can test them by logging into the webmail interface. Just head over to Apps > Webmail.
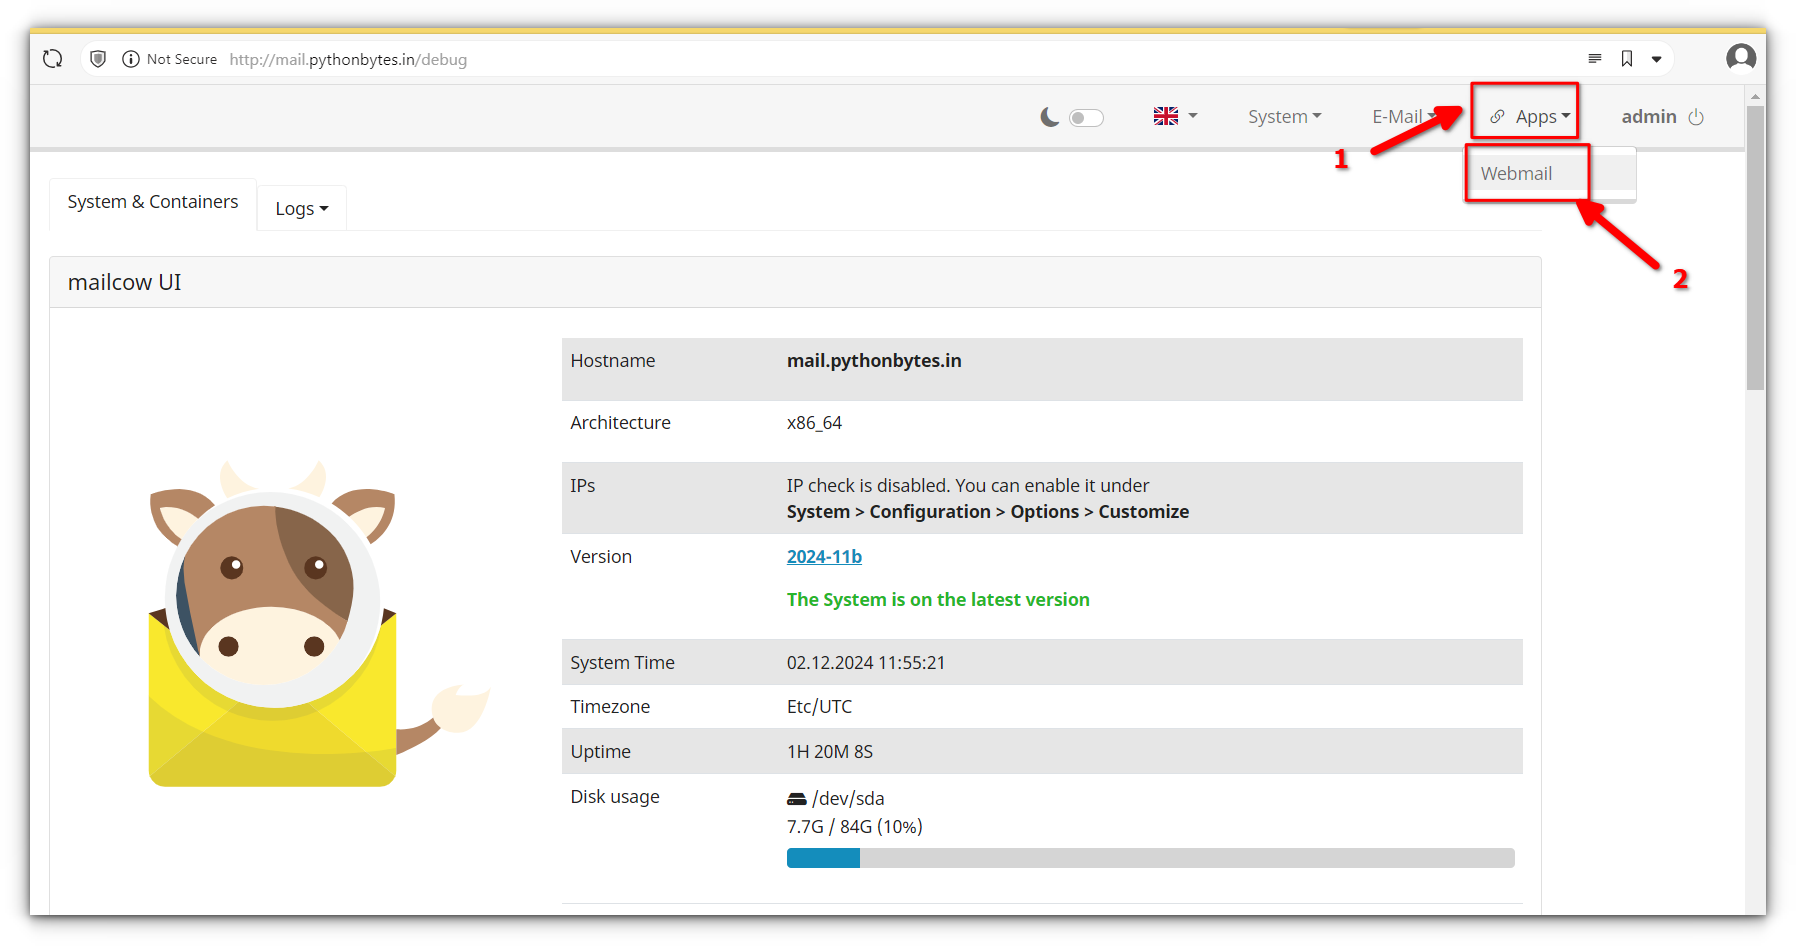
and log in using the email account you just created.
Once you’ve done this, your basic Mailcow setup is ready to go! You now have a fully functional mail server running on your domain, capable of sending and receiving emails. But hold on, this is where things get interesting.
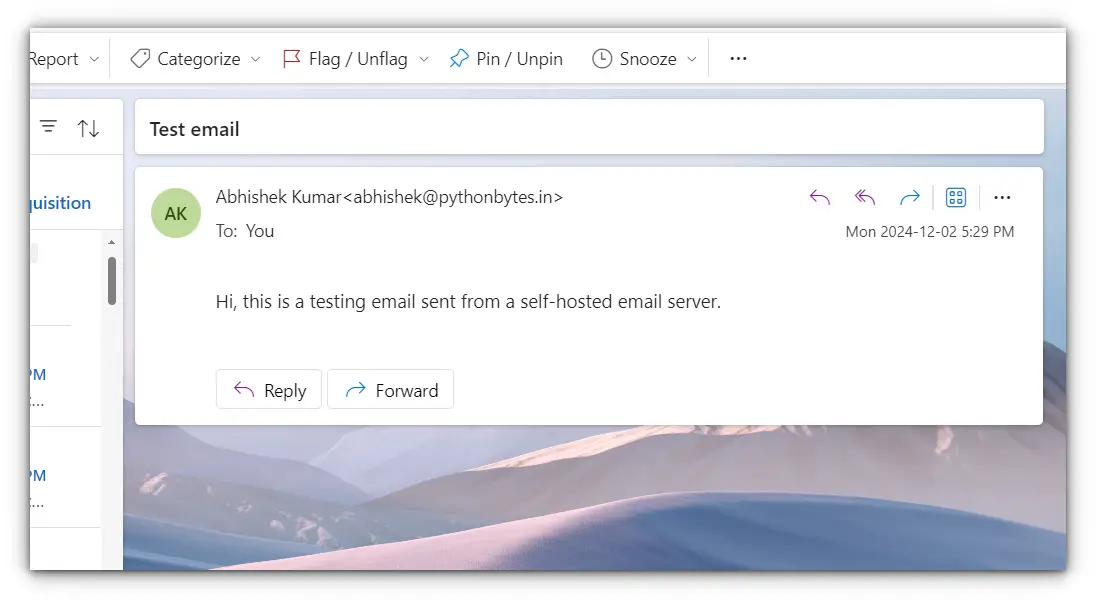
During my testing, I sent two emails: one to my Microsoft Outlook account
and another to my domain account hosted on ProtonMail.
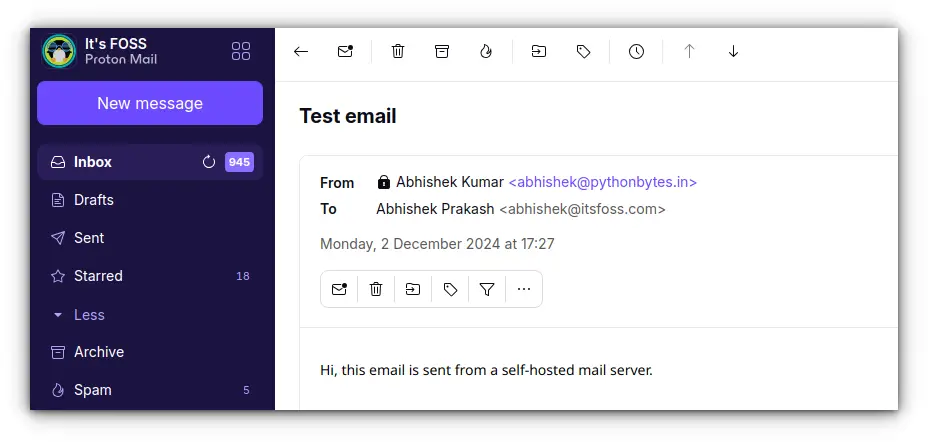
To my dismay, both emails went straight to the Junk/Spam folder!
After a bit of troubleshooting, I realized this was likely because I hadn’t set up a DMARC record yet.
Without DMARC, email providers often flag messages as suspicious, even if the server setup looks otherwise fine.
So while your Mailcow setup might technically be complete at this stage, there’s still important work ahead.
Fine-tuning these configurations and conducting more tests are essential to making your mail server truly robust.
Final thoughts
When I first started setting up my email server, I was amazed at how Mailcow made everything feel so accessible.
With its streamlined interface and pre-configured Docker containers, I couldn’t help but wonder, Why don’t more people use this? It seemed like the perfect solution until I dug deeper.
Running Mailcow isn’t just about spinning up some containers. It’s the whole other layer of responsibility that comes with managing your IP.
From ensuring your IP reputation stays clean to avoiding blacklists, to setting up a static IP, it can get overwhelming fast. These aren’t things Mailcow can solve for you, and they’re the very reasons managed services exist.
For most people, clicking “sign up” on a reliable hosting service is worth the price for peace of mind.
But for tinkerers like me? This is exactly the kind of challenge we love. Exploring, breaking things, and figuring them out is half the fun.
It’s not just about having your own mail server, it’s about knowing exactly how it works and the satisfaction of building it yourself.
If you’ve ever considered hosting your own email, I’d love to hear how it went or what’s holding you back.
Good luck, and may your emails always land in the inbox! 😅