You know that moment when you dive into a project, thinking, "This should be easy," and then hours later, you're buried under obscure errors, outdated forum posts, and conflicting advice?
Yeah, that was me while trying to package my Python app into a .deb file.
It all started with my attempt to revive an old project, which some of our long-time readers might remember - Compress PDF.
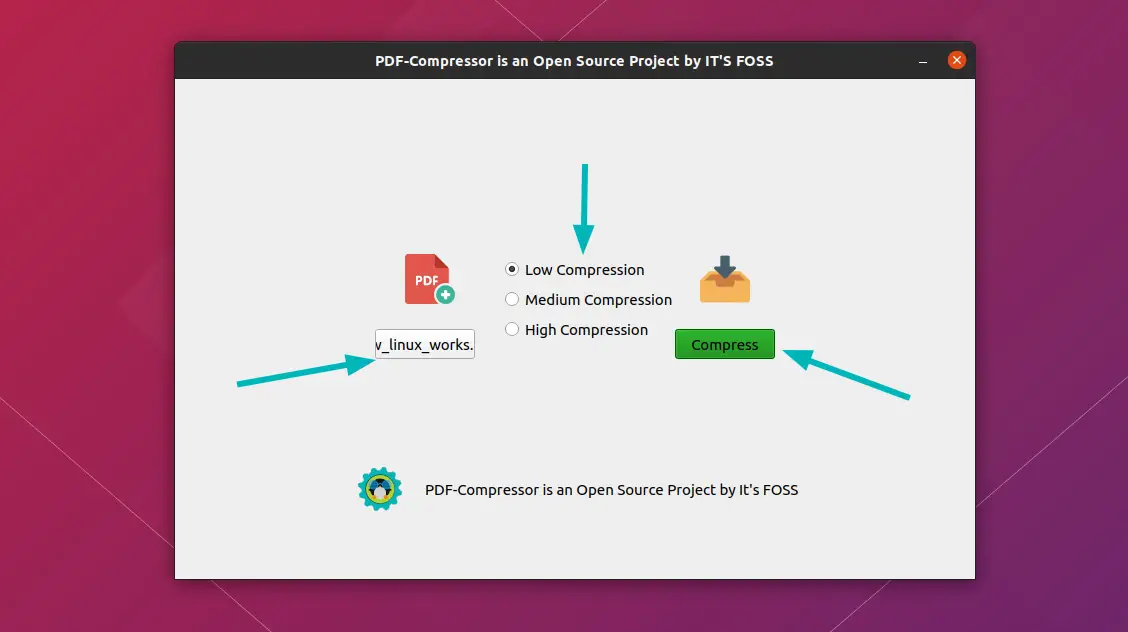
Since I’ve been learning Python these days, I thought, why not customize the UI, tweak the logic, and give it a fresh start?
The python app was working great when running inside a virtual environment but I was more interested in shipping this app as a .deb binary, making installation as simple as dpkg -i app.deb.
Every tutorial I read online, covered bits and pieces, but none walked me through the entire process. So here I am, documenting my experience while packaging my script into a .deb file.
Choosing the right packaging tool
For turning a Python script into an executable, I am using PyInstaller. Initially, I tried using py2deb, a tool specifically meant for creating .deb packages.
Bad idea. Turns out, py2deb hasn’t been maintained in years and doesn’t support newer Python versions.
PyInstaller takes a Python script and bundles it along with its dependencies into a single standalone executable. This means users don’t need to install Python separately, it just works out of the box.
Step 1: Install PyInstaller
First, make sure you have PyInstaller installed. If not, install it using pip:
pip install pyinstaller
Check if it's installed correctly:
pyinstaller --version
Step 2: Create the .deb package structure
To keep things clean and structured, .deb packages follows a specific folder structure.
compressor/
├── pdf-compressor/
│   ├── DEBIAN/
│   │   ├── control
│   │   ├── postinst
│   ├── usr/
│   │   ├── bin/
│   │   ├── share/
│   │   │   ├── applications/
│   │   │   ├── icons/
│   │   │   ├── pdf-compressor/
Let’s create it:
mkdir -p pdf-compressor/DEBIAN
mkdir -p pdf-compressor/usr/bin
mkdir -p pdf-compressor/usr/share/applications
mkdir -p pdf-compressor/usr/share/icons/
mkdir -p pdf-compressor/usr/share/pdf-compressor/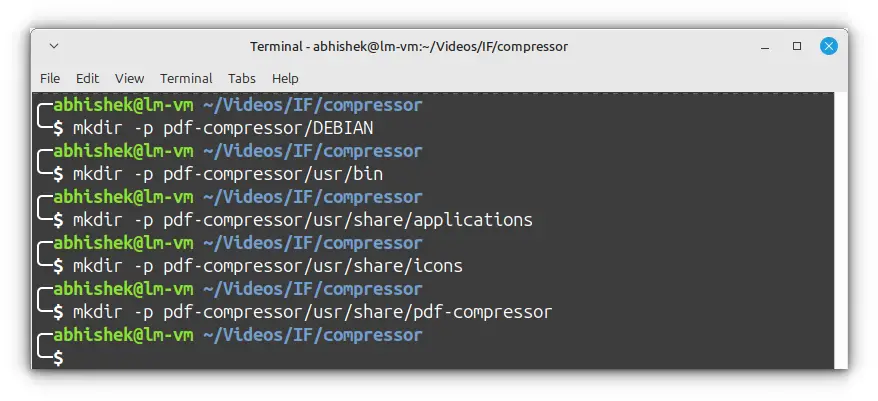
What each directory is for?
usr/bin/: Stores the executable file.usr/share/applications/: Contains the.desktopfile (so the app appears in the system menu).usr/share/icons/: Stores the app icon.DEBIAN/: Contains metadata like package info and dependencies.
Optional: Packaging dependencies
Before packaging the app, I wanted to ensure it loads assets and dependencies correctly whether it's run as a script or a standalone binary.
Initially, I ran into two major problems:
- The in-app logo wasn’t displaying properly because asset paths were incorrect when running as a packaged executable.
- Dependency errors occurred when running the app as an executable.
To keep everything self-contained and avoid conflicts with system packages, I created a virtual environment inside: pdf-compressor/usr/share/pdf-compressor
python3 -m venv venv
source venv/bin/activate
Then, I installed all the dependencies inside it:
pip install -r requirements.txt
deactivate
This ensures that dependencies are bundled properly and won’t interfere with system packages.
Now to ensure that the app correctly loads assets and dependencies, I modified the script as follows:
import sys
import os

# Ensure the virtual environment is used
venv_path = "/usr/share/pdf-compressor/venv"
if os.path.exists(venv_path):
    sys.path.insert(0, os.path.join(venv_path, "lib", "python3.10", "site-packages"))

# Detect if running as a standalone binary
if getattr(sys, 'frozen', False):
    app_dir = sys._MEIPASS  # PyInstaller's temp folder
else:
    app_dir = os.path.dirname(os.path.abspath(__file__))

# Set correct paths for assets
icon_path = os.path.join(app_dir, "assets", "icon.png")
logo_path = os.path.join(app_dir, "assets", "itsfoss-logo.webp")
pdf_icon_path = os.path.join(app_dir, "assets", "pdf.png")

print("PDF Compressor is running...")
What’s happening here?
sys._MEIPASS→ When the app is packaged with PyInstaller, assets are extracted to a temporary folder. This ensures they are accessible.- Virtual environment path (
/usr/share/pdf-compressor/venv) → If it exists, it is added tosys.path, so installed dependencies can be found. - Assets paths → Dynamically assigned so they work in both script and standalone modes.
After making these changes, my issue was mostly resolved.
Step 3: Compiling python script into executable binary
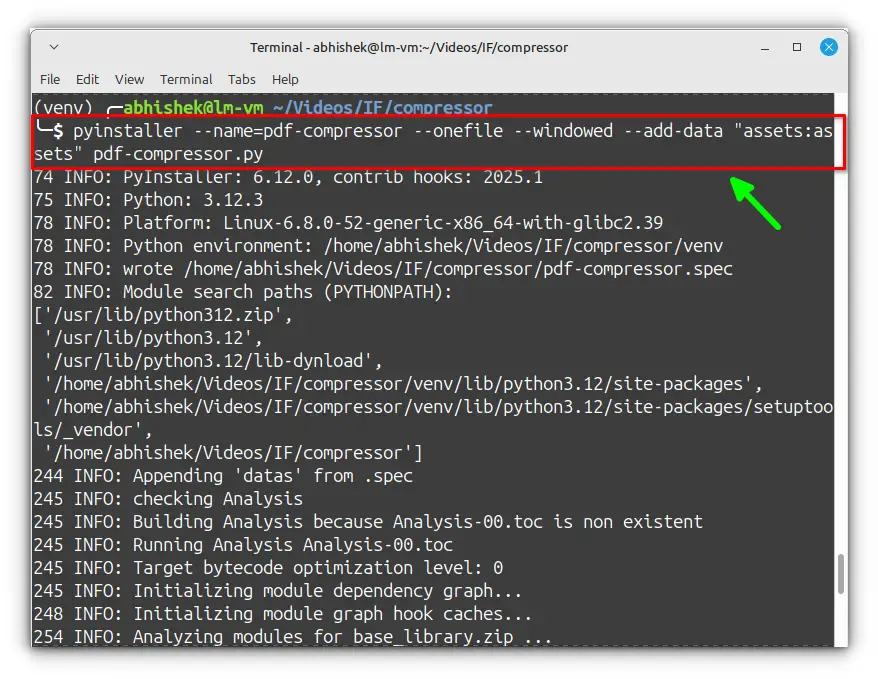
Now comes the exciting part, turning the Python script into a standalone executable. Navigate to the root directory where the main Python script is located. Then run:
pyinstaller --name=pdf-compressor --onefile --windowed --add-data "assets:assets" pdf-compressor.py
--onefile: Packages everything into a single executable file--windowed: Hides the terminal (useful for GUI apps)--name=compress-pdf: Sets the output filename--add-data "assets:assets"→ Ensures images/icons are included.
After this, PyInstaller will create a dist/ , inside, you'll find compress-pdf . This is the standalone app!
Try running it:
./dist/pdf-compressor
If everything works as expected, you’re ready to package it into a .deb file.
Step 4: Move the executable to the correct location
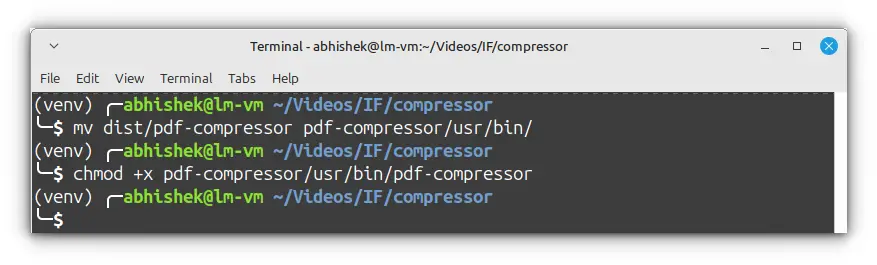
Now, move the standalone executable into the bin directory:
mv dist/compress-pdf pdf-compressor/usr/bin/pdf-compressor
Step 5: Add an application icon
I don't know about you but to me, an app without an icon or just generic gear icons feels incomplete. Icon gives the vibe to your app.
Let’s place the assets directory which contains the icon and logo files inside the right directory:
cp assets/ pdf-compressor/usr/share/pdf-compressor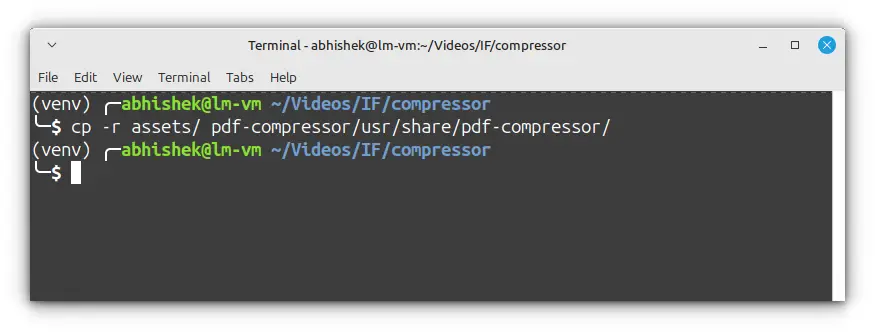
Step 6: Create a desktop file
To make the app appear in the system menu, we need a .desktop file. Open a new file:
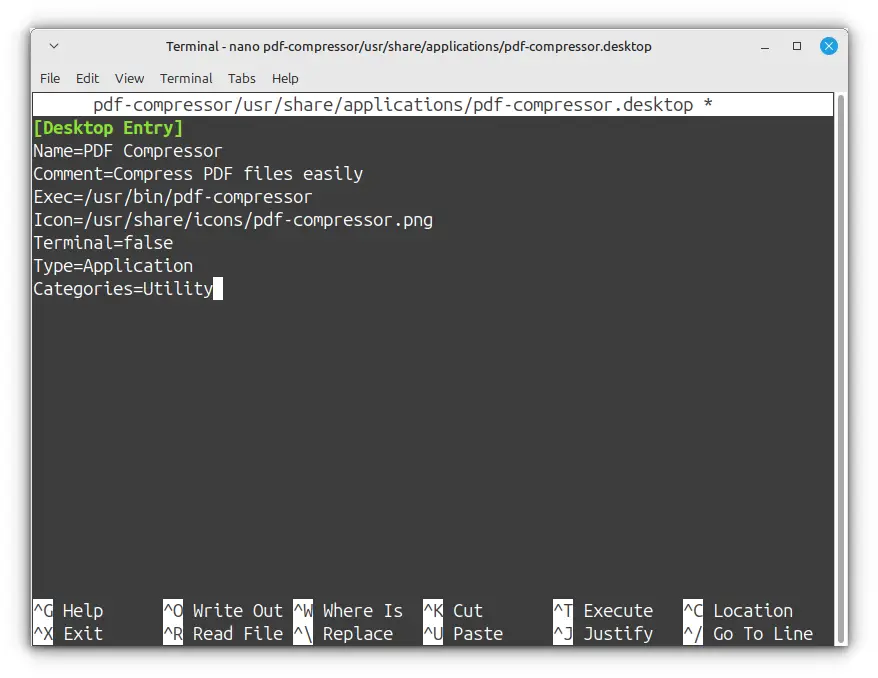
nano pdf-compressor/usr/share/applications/pdf-compressor.desktopPaste this content:
[Desktop Entry]
Name=PDF Compressor
Comment=Compress PDF files easily
Exec=/usr/bin/pdf-compressor
Icon=/usr/share/icons/pdf-compressor.png
Terminal=false
Type=Application
Categories=UtilityExec→ Path to the executable.Icon→ App icon location.Terminal=false→ Ensures it runs as a GUI application.
Save and exit (CTRL+X, then Y, then Enter).
Step 7: Create the control file
At the heart of every .deb package is a metadata file called control.
This file is what tells the Debian package manager (dpkg) what the package is, who maintains it, what dependencies it has, and a brief description of what it does.
That’s why defining them here ensures a smooth experience for users.
Inside the DEBIAN/ directory, create a control file:
nano pdf-compressor/DEBIAN/controlthen I added the following content in it:
Package: pdf-compressor
Version: 1.0
Section: utility
Priority: optional
Architecture: amd64
Depends: python3, ghostscript
Recommends: python3-pip, python3-venv
Maintainer: Your Name <[email protected]>
Description: A simple PDF compression tool.
 Compress PDF files easily using Ghostscript.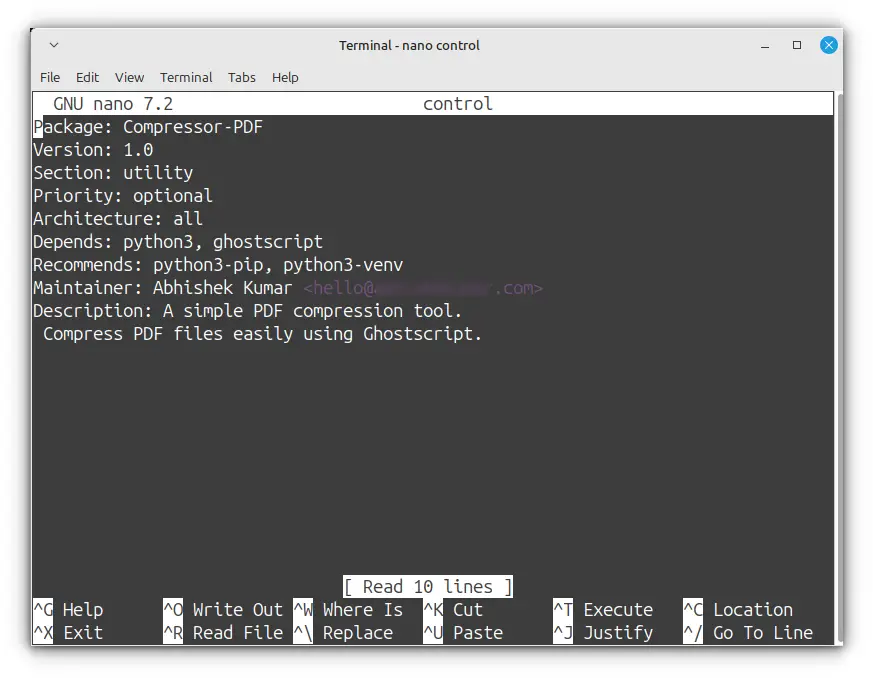
Step 8: Create the postinst script
The post-installation (postinst) script as the name suggests is executed after the package is installed. It ensures all dependencies are correctly set up.
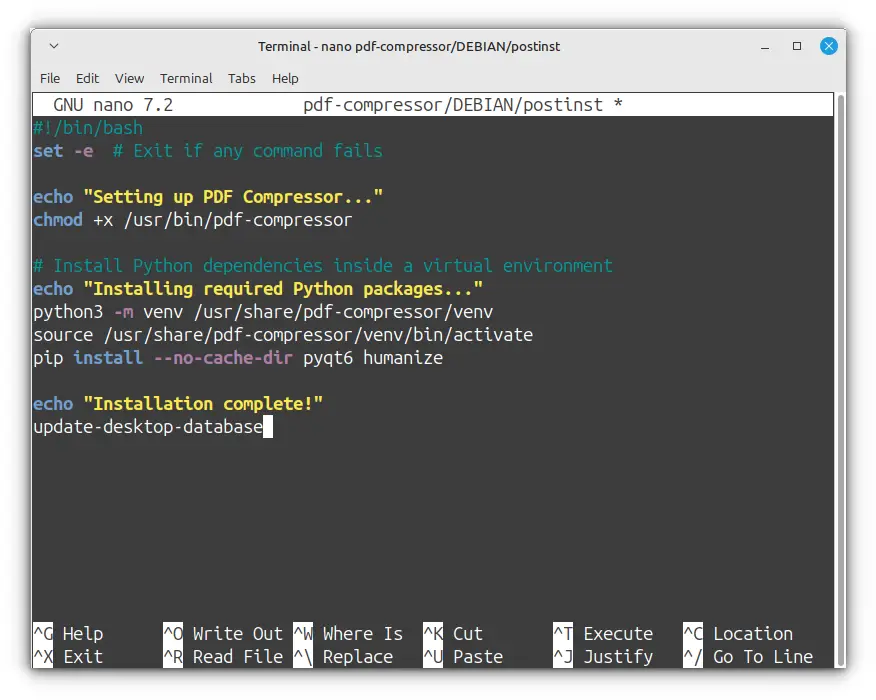
nano pdf-compressor/DEBIAN/postinstAdd this content:
#!/bin/bash
set -e  # Exit if any command fails

echo "Setting up PDF Compressor..."
chmod +x /usr/bin/pdf-compressor

# Install dependencies inside a virtual environment
python3 -m venv /usr/share/pdf-compressor/venv
source /usr/share/pdf-compressor/venv/bin/activate
pip install --no-cache-dir pyqt6 humanize

echo "Installation complete!"
update-desktop-database
What’s happening here?
set -e→ Ensures the script stops on failure.- Creates a virtual environment → This allows dependencies to be installed in an isolated way.
chmod +x /usr/bin/pdf-compressor→ Ensures the binary is executable.update-desktop-database→ Updates the system’s application database.
Setting up the correct permission for postinst is important:
chmod 755 pdf-compressor/DEBIAN/postinst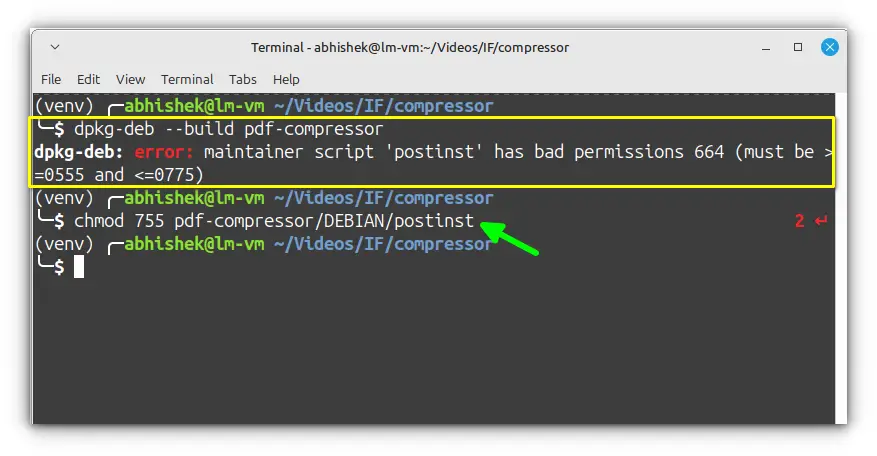
Step 9: Build & Install the deb package
After all the hard work, it's finally time to bring everything together. To build the package, we’ll use dpkg-deb --build, a built-in Debian packaging tool.
This command takes our structured pdf-compressor directory and turns it into a .deb package that can be installed on any Debian-based system.
dpkg-deb --build pdf-compressorIf everything goes well, you should see output like:
dpkg-deb: building package 'pdf-compressor' in 'pdf-compressor.deb'.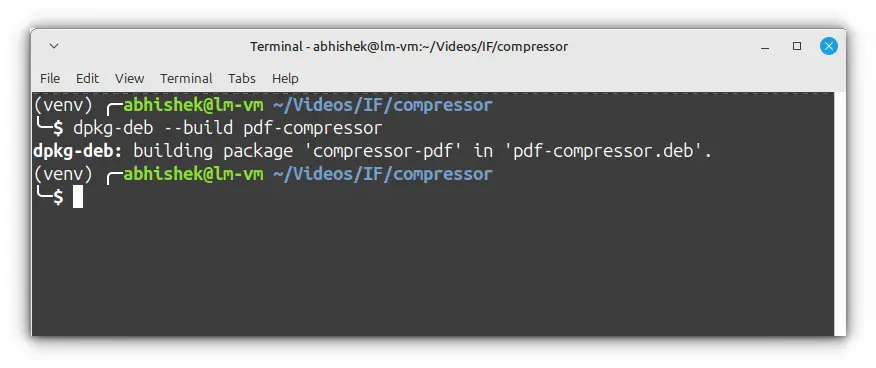
Now, let’s install it and see our application in action!
sudo dpkg -i pdf-compressor.deb
sudo apt install -fThis installs pdf-compressor onto your system just like any other Debian package. To verify, you can either launch it from the Applications menu or directly via terminal:
pdf-compressor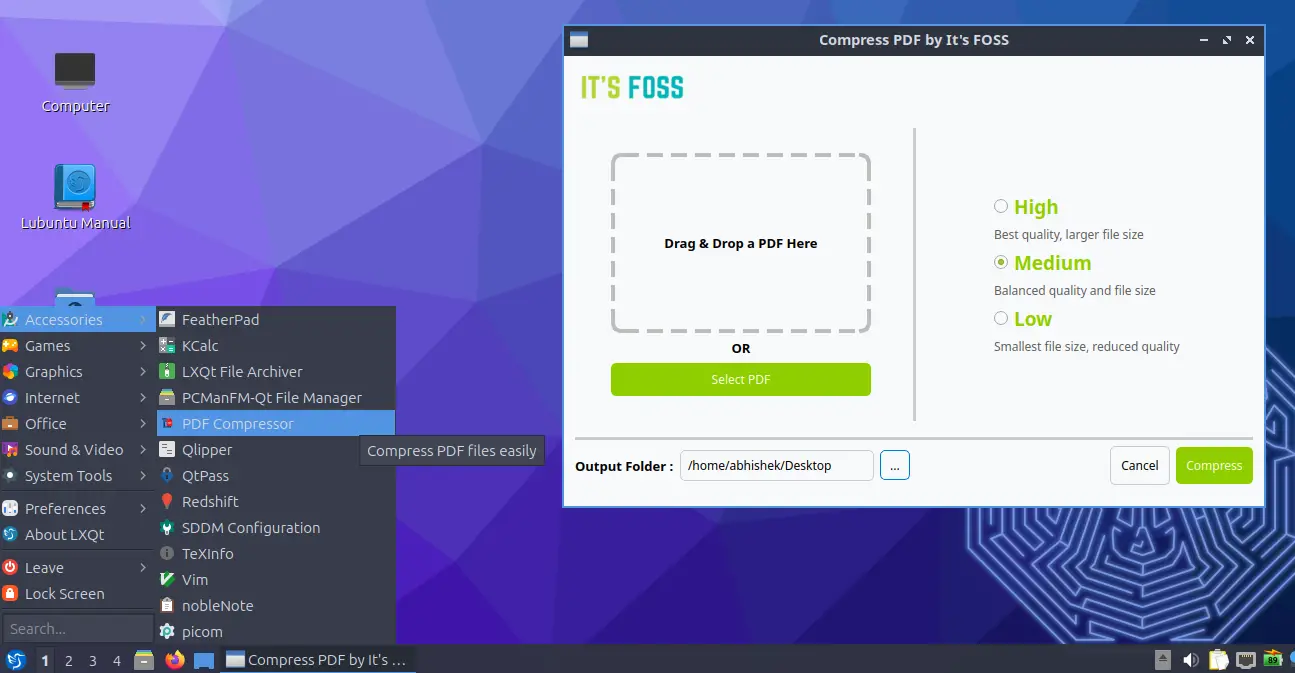
Final thoughts
Packaging a Python application isn’t as straightforward as I initially thought. During my research, I couldn't find any solid guide that walks you through the entire process from start to finish.
So, I had to experiment, fail, and learn, and that’s exactly what I’ve shared in this guide. Looking back, I realize that a lot of what I struggled with could have been simplified had I known better. But that’s what learning is all about, right?
I believe that this write-up will serve as a good starting point for new Python developers like me who are still struggling to package their projects.
That said, I know this isn’t the only way to package Python applications, there are probably better and more efficient approaches out there. So, I’d love to hear from you!
Also, if you found this guide helpful, be sure to check out our PDF Compressor project on GitHub. Your feedback, contributions, and suggestions are always welcome!
Happy coding! 😊