Find Subdomains Fast with OWASP Amass: Don't Miss Hidden Entry Points
In this lab, you'll practice asset discovery with OWASP Amass. Get a comprehensive list of subdomains you might not have even known existed.


Did you know that many security breaches happen through assets companies didn't even know they had? Subdomains like staging.company.com or test.api.company.com are frequently overlooked yet can expose your entire infrastructure.
OWASP Amass solves this by automatically discovering all your subdomains, giving you a complete picture of your attack surface. In this guide, we'll show you how to use it like a pro.
What is OWASP Amass?
OWASP Amass is an open-source tool designed for in-depth Attack Surface Mapping and Asset Discovery. In simpler terms, it's a subdomain enumeration powerhouse. It doesn't just use one method; it combines data from over 80 different sources, including:
- Certificate Transparency Logs: It looks at public records of SSL certificates issued for a domain.
- Search Engines: It scrapes results from Google, Bing, and others.
- DNS Databases: It queries massive DNS data archives.
- Brute Forcing: It intelligently guesses common subdomain names.
The result is a comprehensive list of subdomains you might not have even known existed.
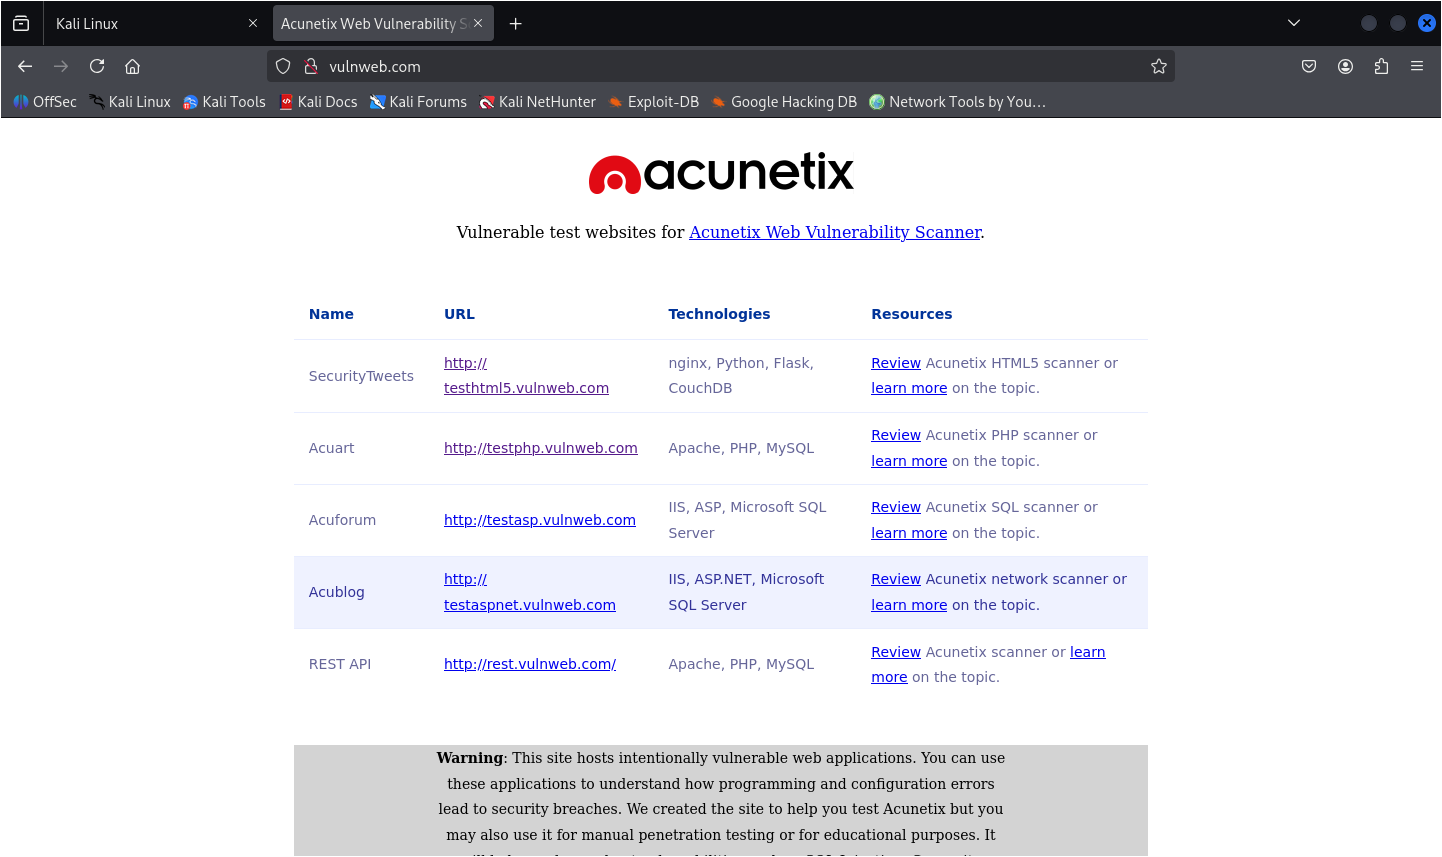
vulnweb.com is a safe and legal playground for this purpose.Step 1: Installing OWASP Amass
The easiest way to install Amass on most Linux distributions is via a package manager.
Amass is bundled with Kali, so you’re safe. Drop it in the terminal and let the enumeration do the work.
For Debian/Ubuntu-based systems:
sudo apt install amass
To verify your installation, run:
amass -version
If it returns a version number, you're all set!
Understanding the Basic Syntax of Amass
The amass command is powerful because of its various flags and options. Here's a quick reference table for the flags we'll use in this guide:
| Flag / Option | Description | Example |
|---|---|---|
enum |
The subcommand for subdomain enumeration. | amass enum |
-d |
Specifies the target domain. (Required) | -d vulnweb.com |
-passive |
Uses only passive data sources (no direct DNS queries). | -passive |
-brute |
Forces a brute-force attack using wordlists. | -brute |
-o |
Saves the results to a specified file. | -o results.txt |
-json |
Saves detailed results in JSON format. | -json output.json |
-list |
Shows the data sources used in enumeration. | amass enum -list |
-help |
Shows the help menu for the enum subcommand. |
amass enum -help |
Step 2: Your First Subdomain Hunt: A Passive Reconnaissance
Let's start with the safest and most common method: passive reconnaissance. This means Amass will only query its numerous data sources. It won't send any traffic directly to the target's servers, making it stealthy and non-intrusive.
For this tutorial, we'll use vulnweb.com, a site intentionally created for security testing.
Open your terminal and type:
amass enum -passive -d vulnweb.com
Let's break this down with our new syntax knowledge:
enum: This is the subcommand for enumeration (discovery).-passive: This flag tells Amass to stick to passive methods.-d vulnweb.com: Specifies our target domain.
Within seconds, you'll see a list of subdomains start to populate your terminal. For vulnweb.com, you should see entries like testphp.vulnweb.com, testasp.vulnweb.com, and testhtml5.vulnweb.com.
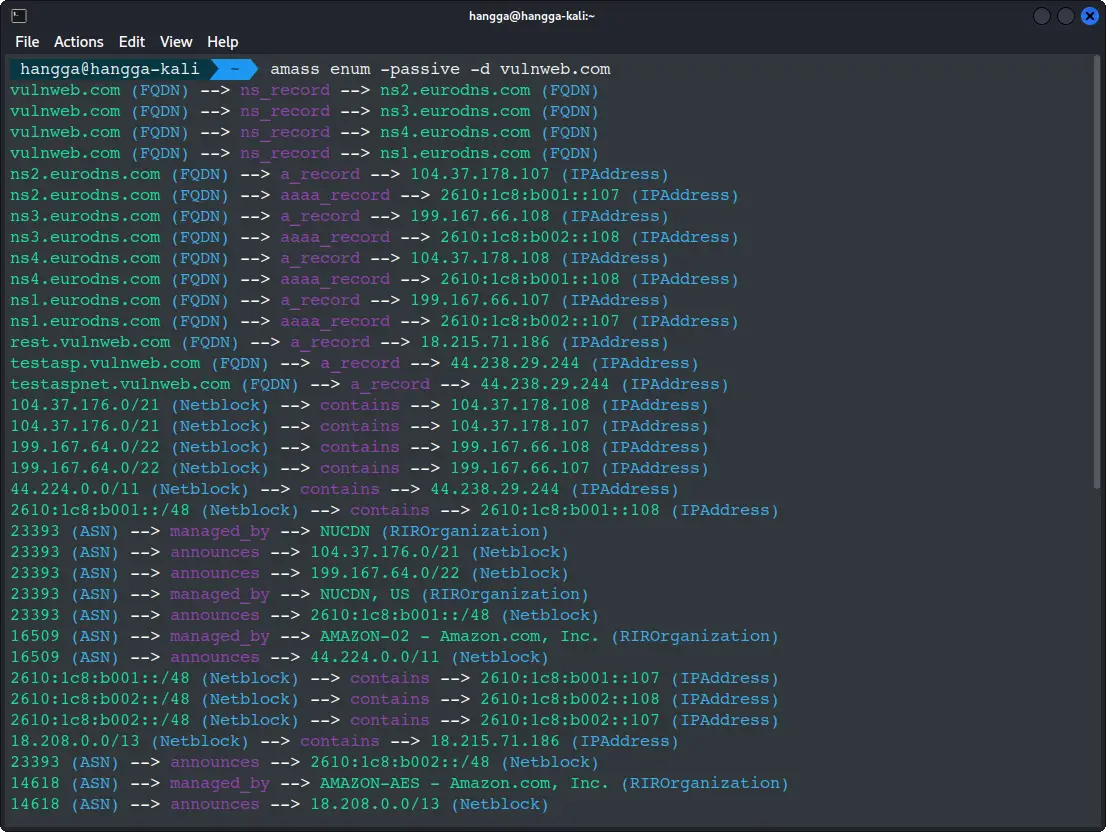
This is your initial map! You've just discovered multiple "entrances" to the vulnweb.com infrastructure.
Step 3: Digging Deeper: Active Reconnaissance and Brute Forcing
Passive mode is great, but sometimes you need to be more thorough. This is where active reconnaissance comes in. It involves directly interacting with the target's DNS servers. This method can be louder but often reveals subdomains that aren't listed in any public database.
To perform an active DNS enumeration, simply remove the -passive flag:
amass enum -d vulnweb.com
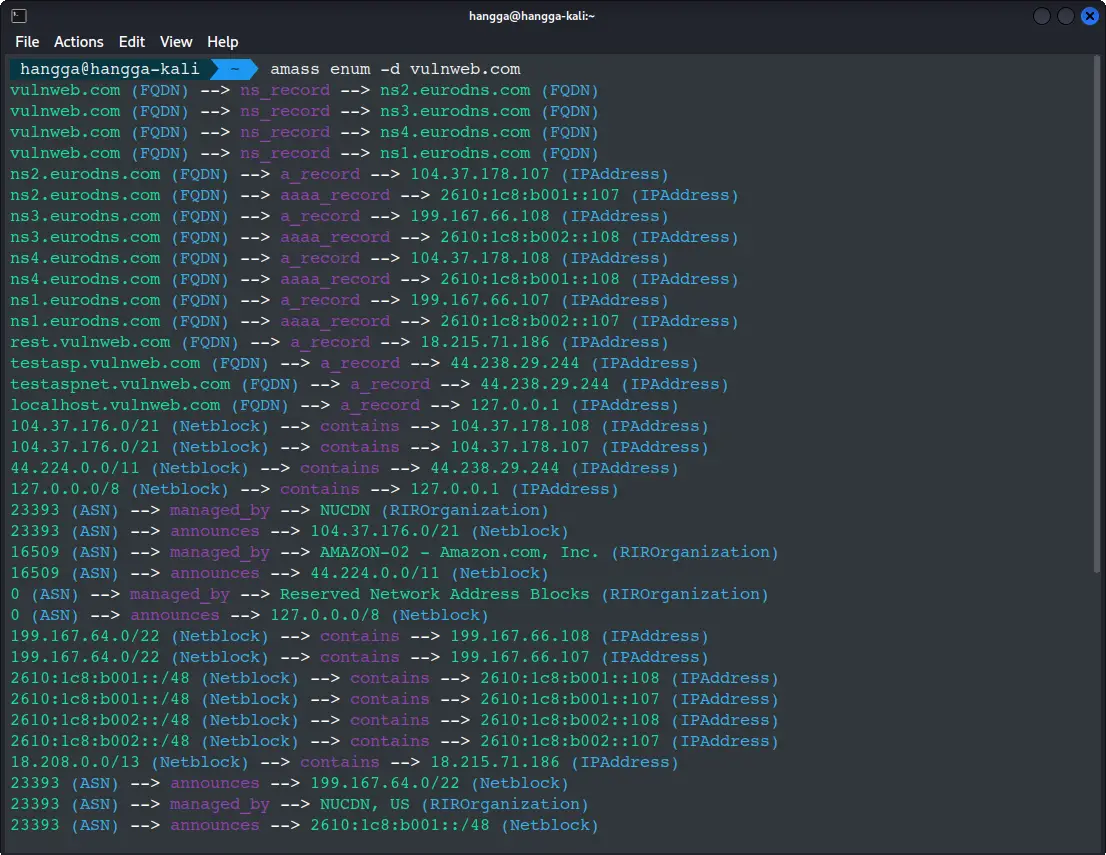
As I explained in the previous section about -passive, both amass runs found the same things — the only difference was the order the results were printed. -passive tells Amass to gather info quietly from public sources (certificate logs, public DNS, search engines) without touching the target, while running it without -passive allows noisier, active checks like brute force or direct DNS queries. In your case the public sources already contained everything, so the active run didn’t discover anything new — it just mixed the same entries in a different sequence.
Taking it Up a Notch: Brute Forcing
What about subdomains that are completely hidden? Think dev, staging, ftp, cpanel. Amass can perform a "brute force" attack by trying a massive list of common subdomain names.
We'll combine this with passive mode to be efficient and respectful.
amass enum -passive -brute -d vulnweb.com
Let Amass complete the enumeration...
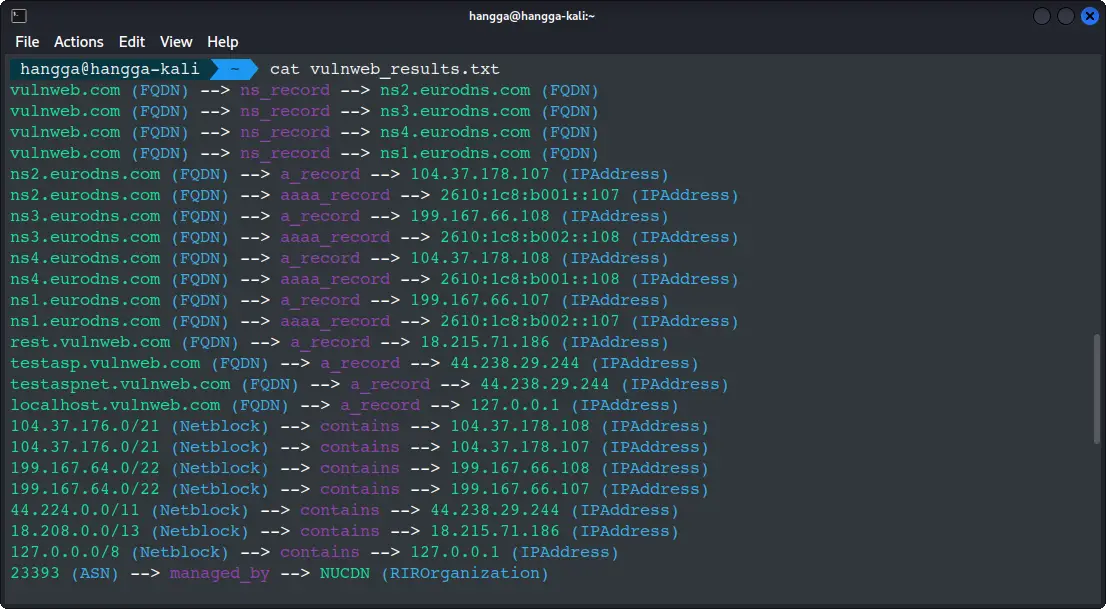
hangga@hangga-kali ~ amass enum -passive -brute -d vulnweb.com
vulnweb.com (FQDN) --> ns_record --> ns2.eurodns.com (FQDN)
vulnweb.com (FQDN) --> ns_record --> ns3.eurodns.com (FQDN)
vulnweb.com (FQDN) --> ns_record --> ns4.eurodns.com (FQDN)
vulnweb.com (FQDN) --> ns_record --> ns1.eurodns.com (FQDN)
ns2.eurodns.com (FQDN) --> a_record --> 104.37.178.107 (IPAddress)
ns2.eurodns.com (FQDN) --> aaaa_record --> 2610:1c8:b001::107 (IPAddress)
ns3.eurodns.com (FQDN) --> a_record --> 199.167.66.108 (IPAddress)
ns3.eurodns.com (FQDN) --> aaaa_record --> 2610:1c8:b002::108 (IPAddress)
ns4.eurodns.com (FQDN) --> a_record --> 104.37.178.108 (IPAddress)
ns4.eurodns.com (FQDN) --> aaaa_record --> 2610:1c8:b001::108 (IPAddress)
ns1.eurodns.com (FQDN) --> a_record --> 199.167.66.107 (IPAddress)
ns1.eurodns.com (FQDN) --> aaaa_record --> 2610:1c8:b002::107 (IPAddress)
rest.vulnweb.com (FQDN) --> a_record --> 18.215.71.186 (IPAddress)
testasp.vulnweb.com (FQDN) --> a_record --> 44.238.29.244 (IPAddress)
testaspnet.vulnweb.com (FQDN) --> a_record --> 44.238.29.244 (IPAddress)
localhost.vulnweb.com (FQDN) --> a_record --> 127.0.0.1 (IPAddress)
104.37.176.0/21 (Netblock) --> contains --> 104.37.178.108 (IPAddress)
104.37.176.0/21 (Netblock) --> contains --> 104.37.178.107 (IPAddress)
199.167.64.0/22 (Netblock) --> contains --> 199.167.66.108 (IPAddress)
199.167.64.0/22 (Netblock) --> contains --> 199.167.66.107 (IPAddress)
44.224.0.0/11 (Netblock) --> contains --> 44.238.29.244 (IPAddress)
2610:1c8:b001::/48 (Netblock) --> contains --> 2610:1c8:b001::108 (IPAddress)
2610:1c8:b001::/48 (Netblock) --> contains --> 2610:1c8:b001::107 (IPAddress)
127.0.0.0/8 (Netblock) --> contains --> 127.0.0.1 (IPAddress)
23393 (ASN) --> managed_by --> NUCDN (RIROrganization)
23393 (ASN) --> announces --> 104.37.176.0/21 (Netblock)
23393 (ASN) --> announces --> 199.167.64.0/22 (Netblock)
23393 (ASN) --> managed_by --> NUCDN, US (RIROrganization)
23393 (ASN) --> announces --> 2610:1c8:b001::/48 (Netblock)
16509 (ASN) --> managed_by --> AMAZON-02 - Amazon.com, Inc. (RIROrganization)
16509 (ASN) --> announces --> 44.224.0.0/11 (Netblock)
0 (ASN) --> managed_by --> Reserved Network Address Blocks (RIROrganization)
0 (ASN) --> announces --> 127.0.0.0/8 (Netblock)
2610:1c8:b002::/48 (Netblock) --> contains --> 2610:1c8:b002::108 (IPAddress)
2610:1c8:b002::/48 (Netblock) --> contains --> 2610:1c8:b002::107 (IPAddress)
18.208.0.0/13 (Netblock) --> contains --> 18.215.71.186 (IPAddress)
23393 (ASN) --> announces --> 2610:1c8:b002::/48 (Netblock)
14618 (ASN) --> managed_by --> AMAZON-AES - Amazon.com, Inc. (RIROrganization)
14618 (ASN) --> announces --> 18.208.0.0/13 (Netblock)
The enumeration has finished
Wow! Your Amass scan just uncovered the complete infrastructure blueprint of vulnweb.com!
The scan revealed not just the obvious subdomains like rest.vulnweb.com and testasp.vulnweb.com, but also uncovered that testaspnet.vulnweb.com shares the same IP address—suggesting shared hosting. Interestingly, it even found localhost.vulnweb.com pointing to 127.0.0.1, which might indicate some misconfiguration.
Beyond subdomains, Amass mapped out the entire network topology: EuroDNS handling nameservers, with actual services distributed across Amazon AWS and NUCDN cloud infrastructure. This level of detail gives you the complete attack surface in a single scan—perfect for both security assessment and documentation.
Ready to dive deeper into any of these findings? Next, to explore Amass's extensive data sources, run:
amass enum -list
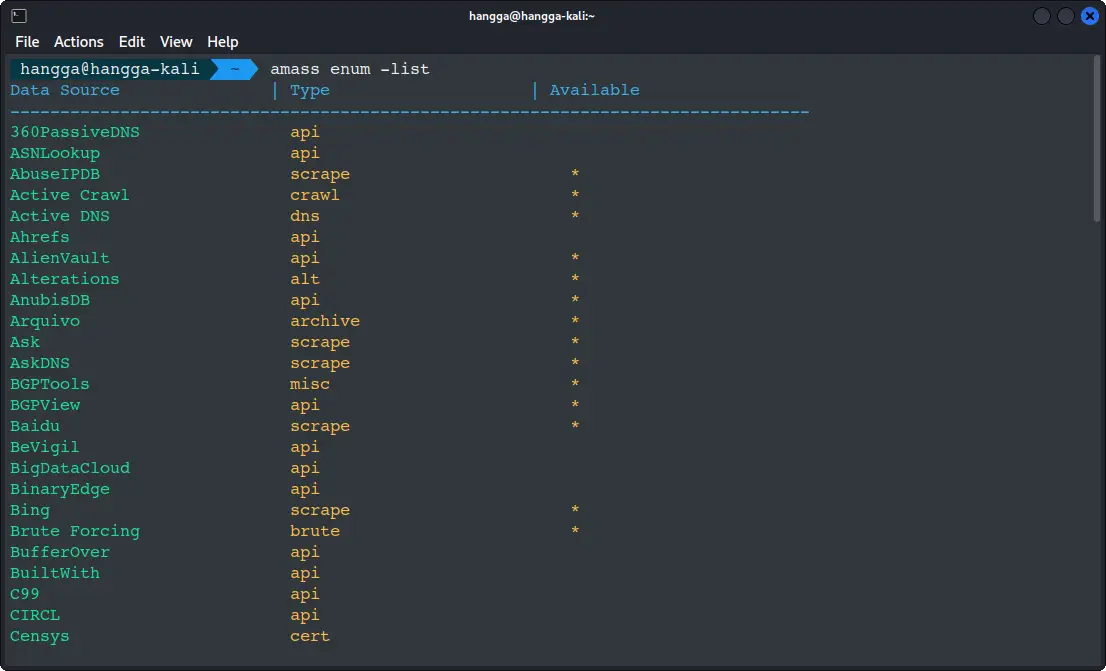
This shows you all the available data sources that Amass queries during enumeration.
Step 4: Getting Detailed Output and Understanding the Results
To get more detailed information about the discovered subdomains, save the results in text file:
amass enum -passive -d vulnweb.com -o vulnweb_subdomains.txt
Let's make sure the output is saved:
cat vulnweb_subdomains.txt
Final Thoughts
OWASP Amass is an indispensable tool in your Linux toolkit. It transforms the daunting task of asset discovery from a manual, error-prone process into an automated, comprehensive one. By knowing your entire attack surface—not just subdomains but also infrastructure relationships—you can patch vulnerabilities, close unused access points, and build a much more robust defense.
So go ahead, fire up that terminal, and start mapping. Your future, more secure self will thank you for it.
About the author
Software engineer since 2008, passionate about tech and security. Seasonal security researcher and pentester who enjoys sharing knowledge.