Note-taking has come a long way from crumpled sticky notes and scattered .txt files. Today, we want our notes to be searchable, linked, visualized, and ideally, available anywhere. That’s where Obsidian shines.
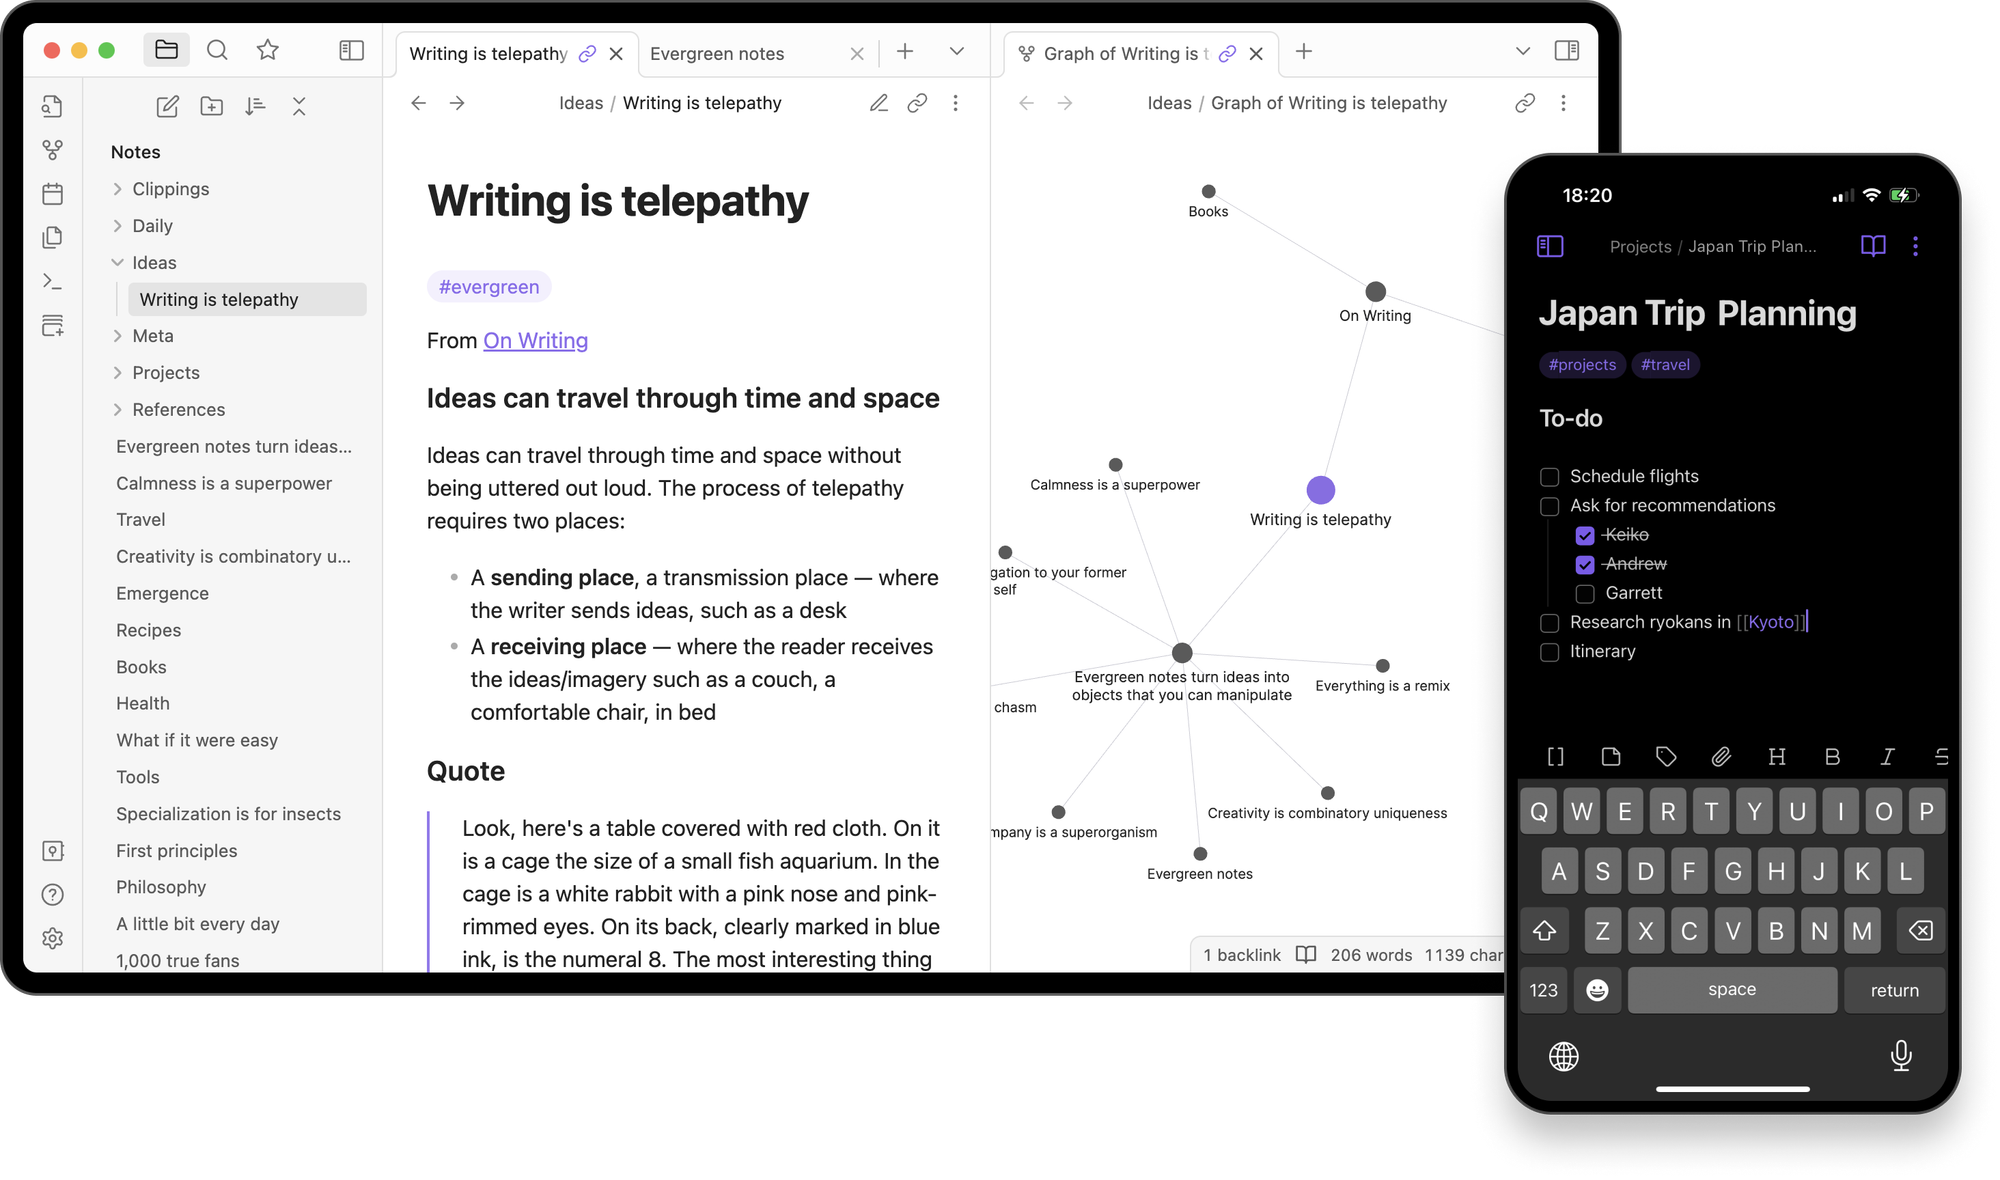
Built around plain-text Markdown files, Obsidian offers local-first knowledge management with powerful graph views, backlinks, and a thriving plugin ecosystem.
For many, it has become the go-to app for personal knowledge bases and second brains.
While Obsidian does offer Obsidian Sync, a proprietary syncing service that lets you keep your notes consistent across devices, it’s behind a paywall.
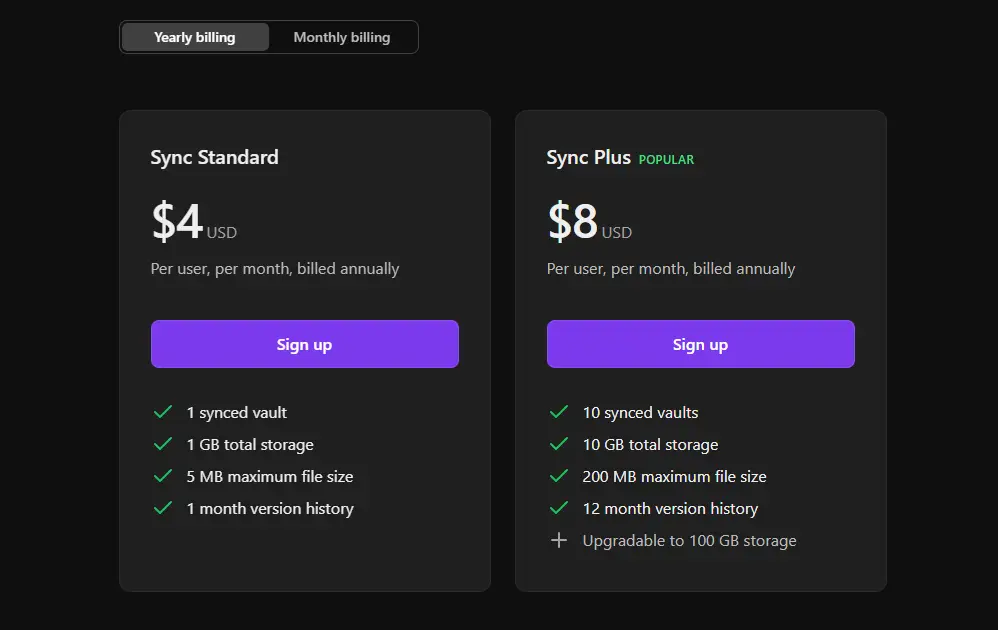
That’s fair for the convenience, but I wanted something different:
A central Obsidian server, running in my homelab, accessible via browser, no desktop clients, no mobile apps, just one self-hosted solution available from anywhere I go.
And yes, that’s entirely possible.
Thanks to LinuxServer.io, who maintain some of the most stable and well-documented Docker images out there, setting this up was a breeze.
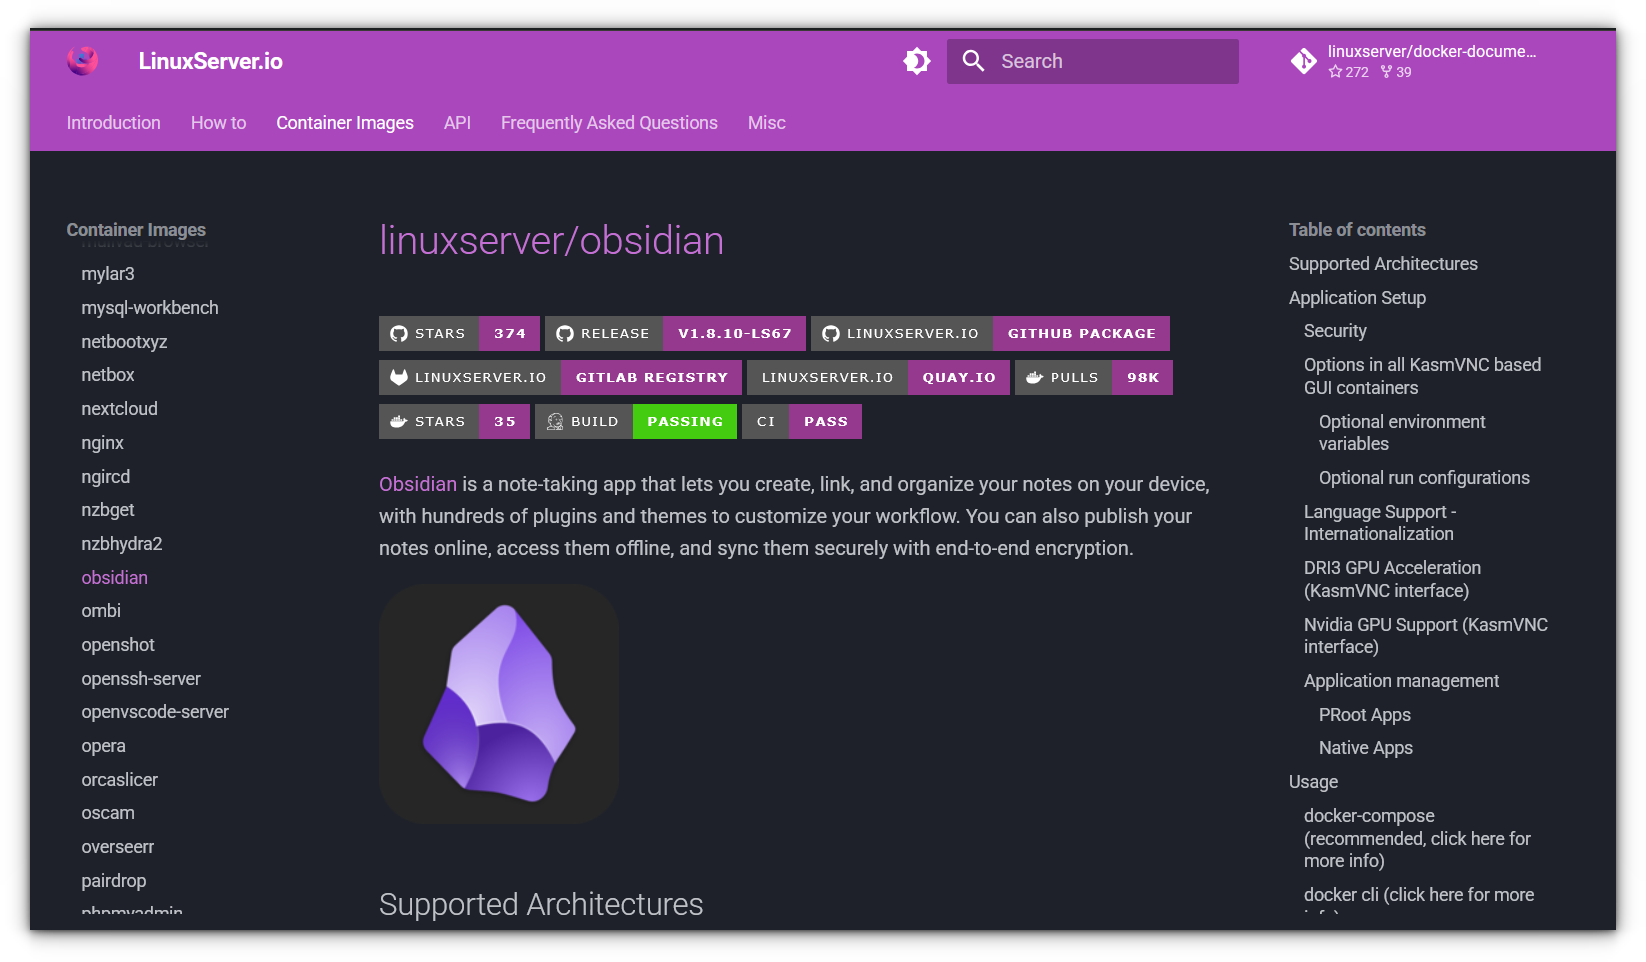
I’ve been using their containers for various services in my homelab, and they’ve always been rock solid.
Let me walk you through how I deployed Obsidian this way.
Prerequisites
We assume you have:
- A Linux system with Docker and Docker Compose installed.
- A basic understanding of terminal commands.
- Familiarity with editing YAML files.
Setting up Obsidian
If you prefer keeping your self-hosted apps neatly organized (like I do), it's a good idea to create separate folders for each container.
This not only helps with manageability, but also makes it easier to back up or migrate later.
1. Create a data directory for Obsidian
Let’s start by creating a folder for Obsidian data:
mkdir -p ~/docker/obsidian
cd ~/docker/obsidian
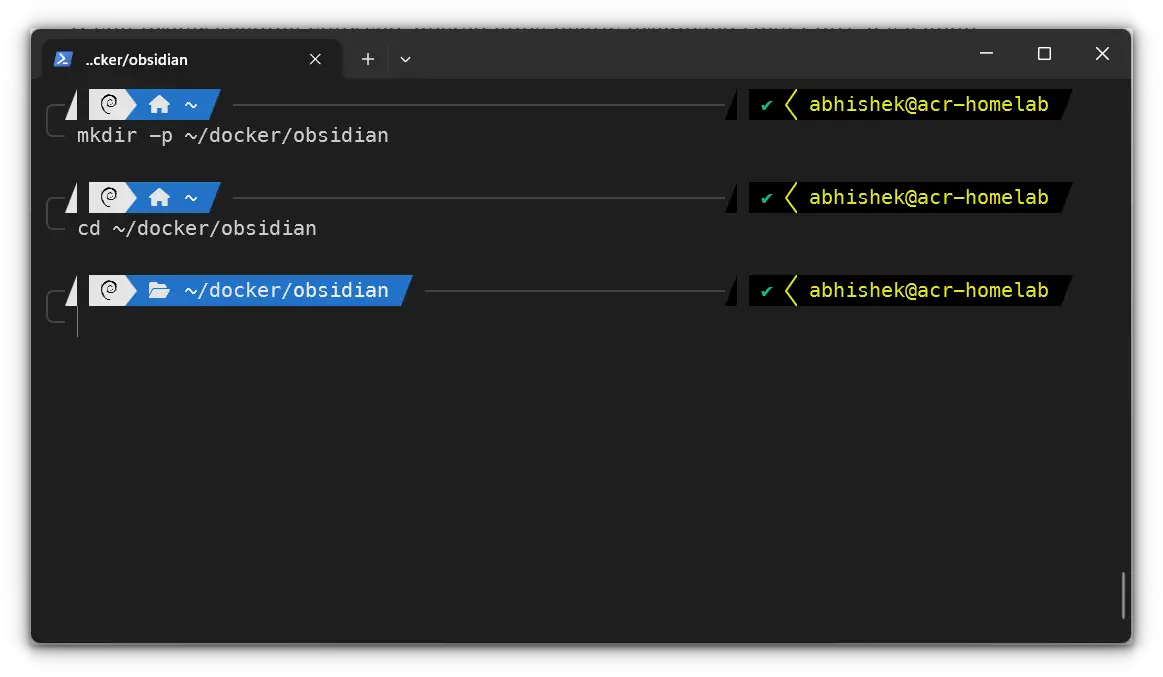
You can name it whatever you like, but I’m sticking with obsidian to keep things clear.
2. Create a docker-compose.yml File
Now, we’ll set up a Docker Compose file, this is the file that tells Docker how to run Obsidian, what image to use, which ports to open, and other important stuff.
You don’t need to write the whole thing from scratch. I’m using the official example from the LinuxServer.io image page, but with a few changes tailored to my system.
Just copy the following into a new file named docker-compose.yml:
version: "3.8"
services:
  obsidian:
    image: ghcr.io/linuxserver/obsidian:latest
    container_name: obsidian
    security_opt:
      - no-new-privileges:false
      - seccomp:unconfined
    healthcheck:
      test: timeout 10s bash -c ':> /dev/tcp/127.0.0.1/3000' || exit 1
      interval: 10s
      timeout: 5s
      retries: 3
      start_period: 90s
    ports:
      - "3000:3000"
    shm_size: "2gb"
    volumes:
      - ./config:/config:rw
    environment:
      CUSTOM_USER: yourusername
      PASSWORD: yourpassword
      PUID: 1000
      PGID: 1000
      TZ: Asia/Kolkata
    restart: unless-stopped
Let’s break down a few important parts of this:
image: We're using the latest Obsidian image provided by LinuxServer.io.volumes: Maps aconfigfolder in your current directory to Obsidian’s internal config directory, this is where all your Obsidian data and settings will live.ports: The app will be available on port 3000 of your machine. You can change this if you prefer a different port.shm_size: Allocates shared memory; useful for apps with a UI like Obsidian.environment: This is where you set up your user, password, timezone, and file ownership.
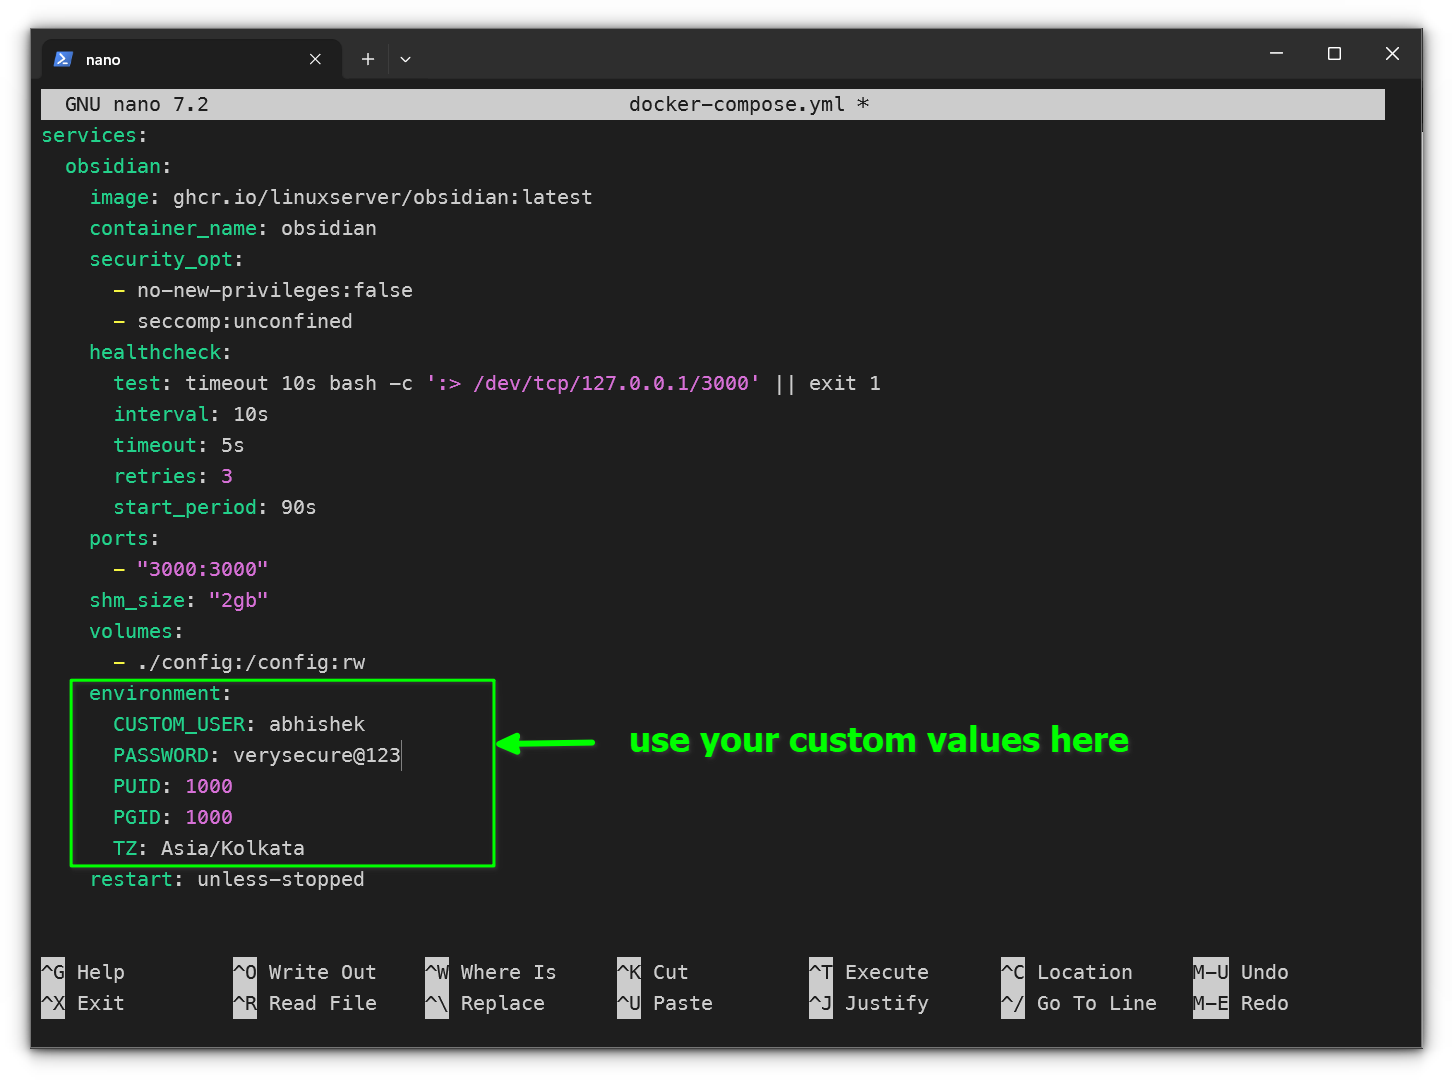
Make sure you replace the following placeholders with your own values:
yourusername: The username you'll use to log in to Obsidian.yourpassword: Choose a strong password.TZ: Use your local timezone. (Example:Asia/Kolkata)PUIDandPGID: These should match your user’s UID and GID on the host system. To find them, run:
id yourusername
You'll get something like this:
uid=1000(yourusername) gid=1000(yourusername) groups=1000(yourusername),27(sudo),...
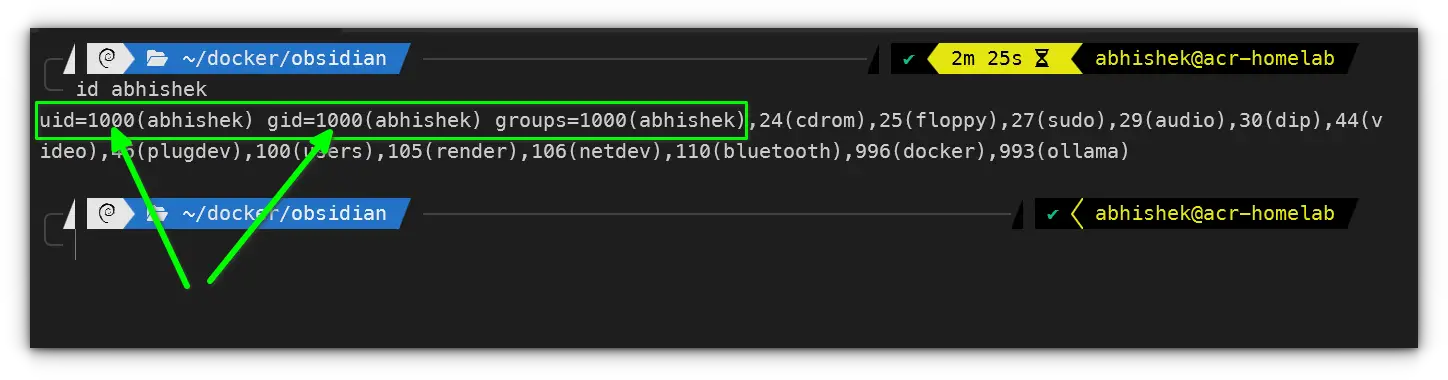
Use those values in your Compose file.
3. Deploy the Container
Once the docker-compose.yml file is ready and the values are customized, go ahead and start the container:
docker-compose up -d
This command tells Docker to:
- Pull the Obsidian image (if it’s not already downloaded)
- Create a container using the settings we defined
- Run it in detached mode (
-d), so it continues running in the background
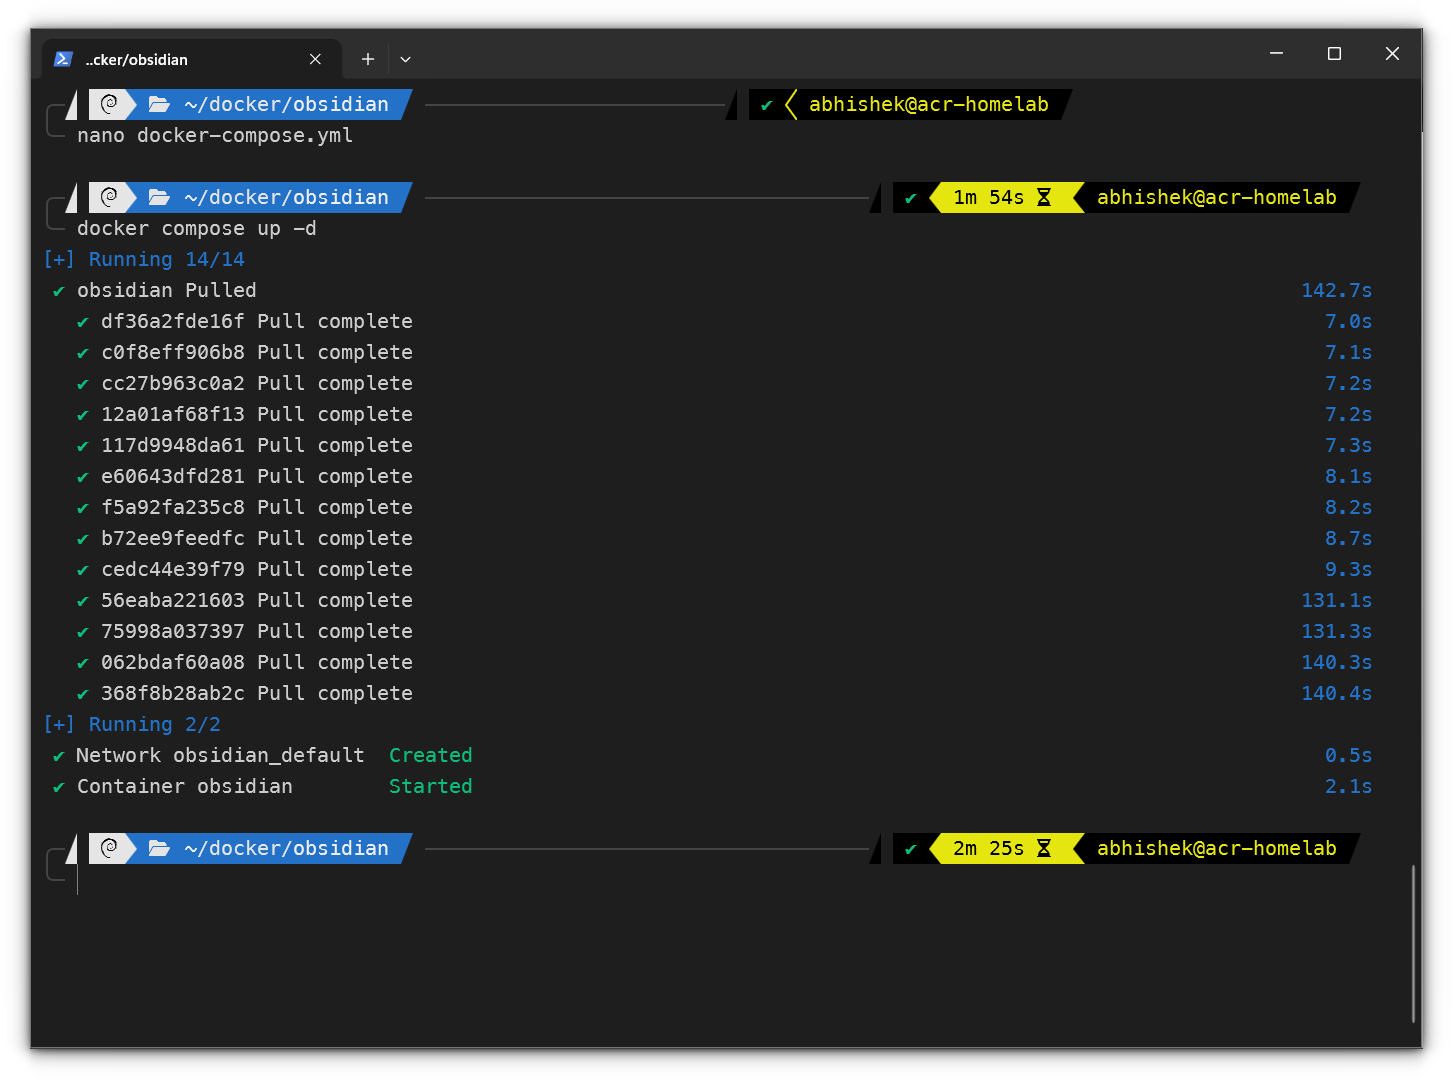
Give it a minute or two, the first time you run this, Docker needs to download the entire image and set everything up. After that, it’ll be much faster on subsequent restarts.
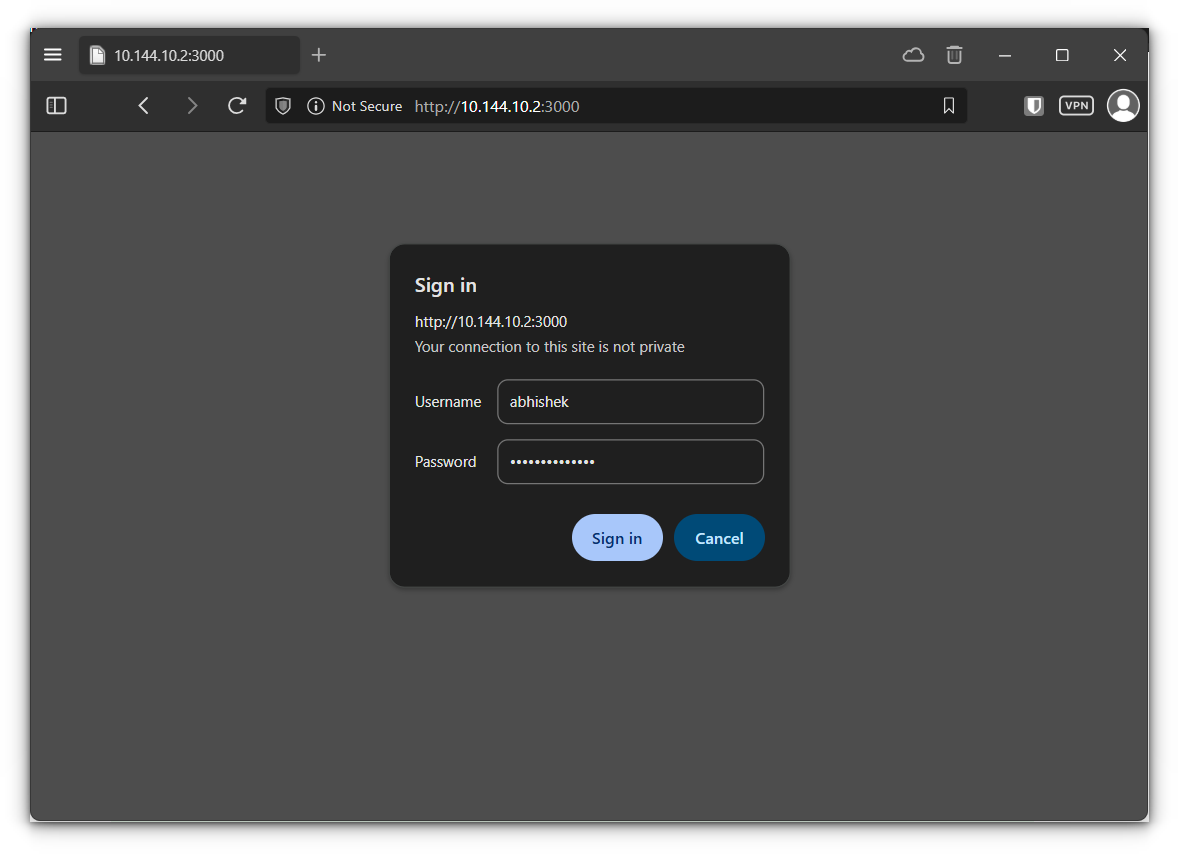
Accessing Obsidian in your browser
Once it's done, you should be able to open Obsidian in your browser at:
http://localhost:3000
Or replace localhost with your server's IP if you’re not running it locally.
Log in using the CUSTOM_USER and PASSWORD you set earlier.
Once inside, it will look like this:
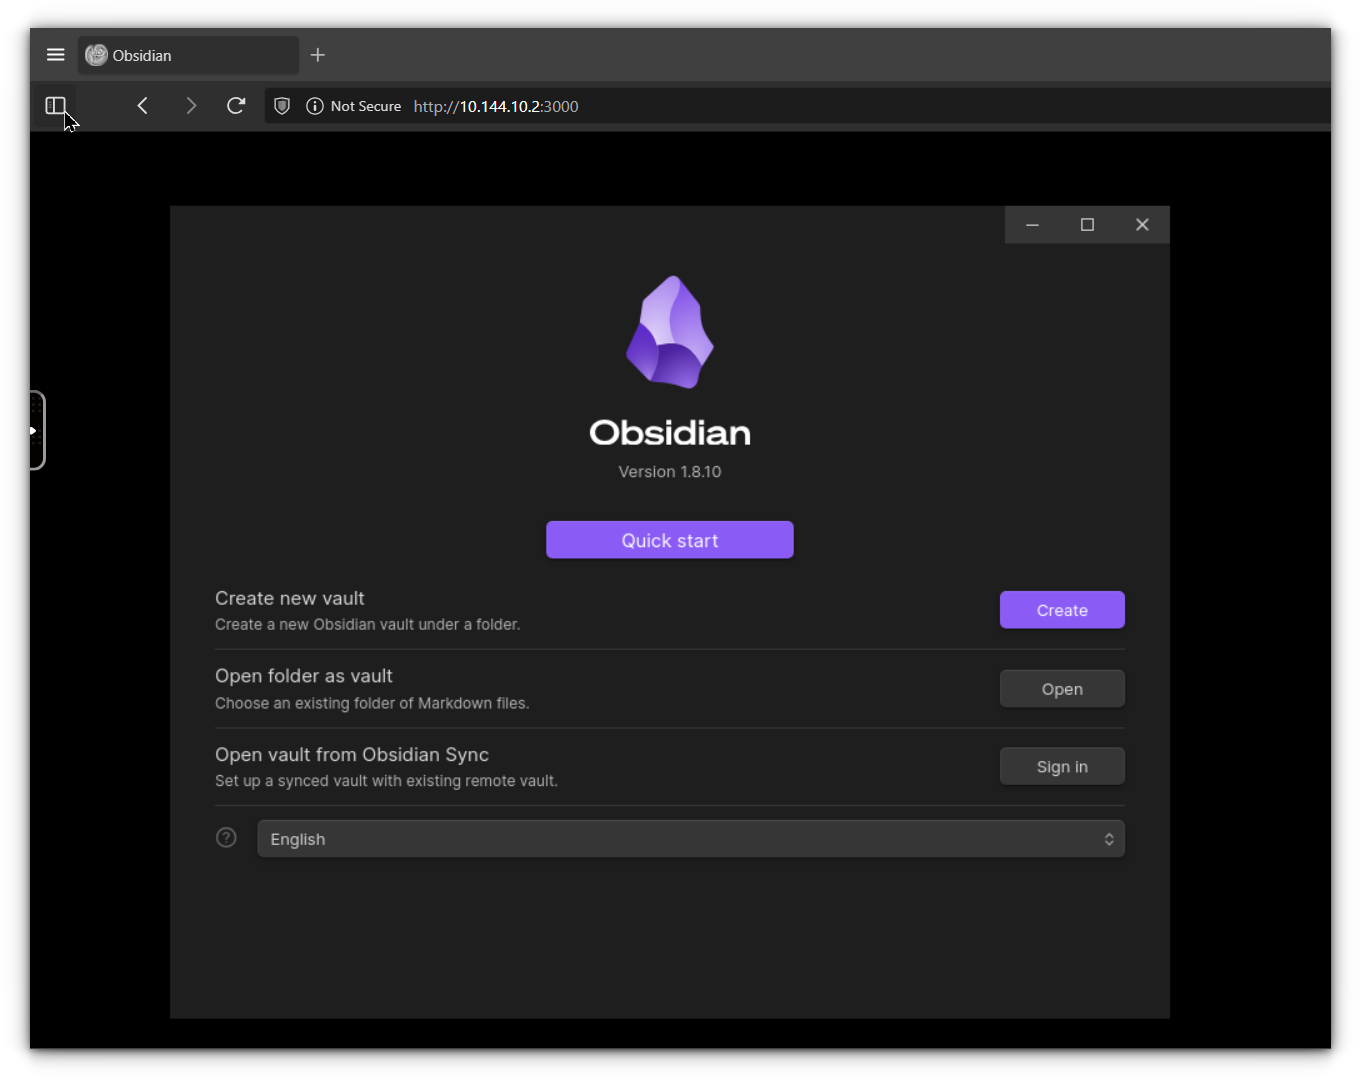
Here you can:
- Create a new vault.
- Open an existing vault in the
configvolume. - Explore the graph view, plugins, and everything else, right from the browser.
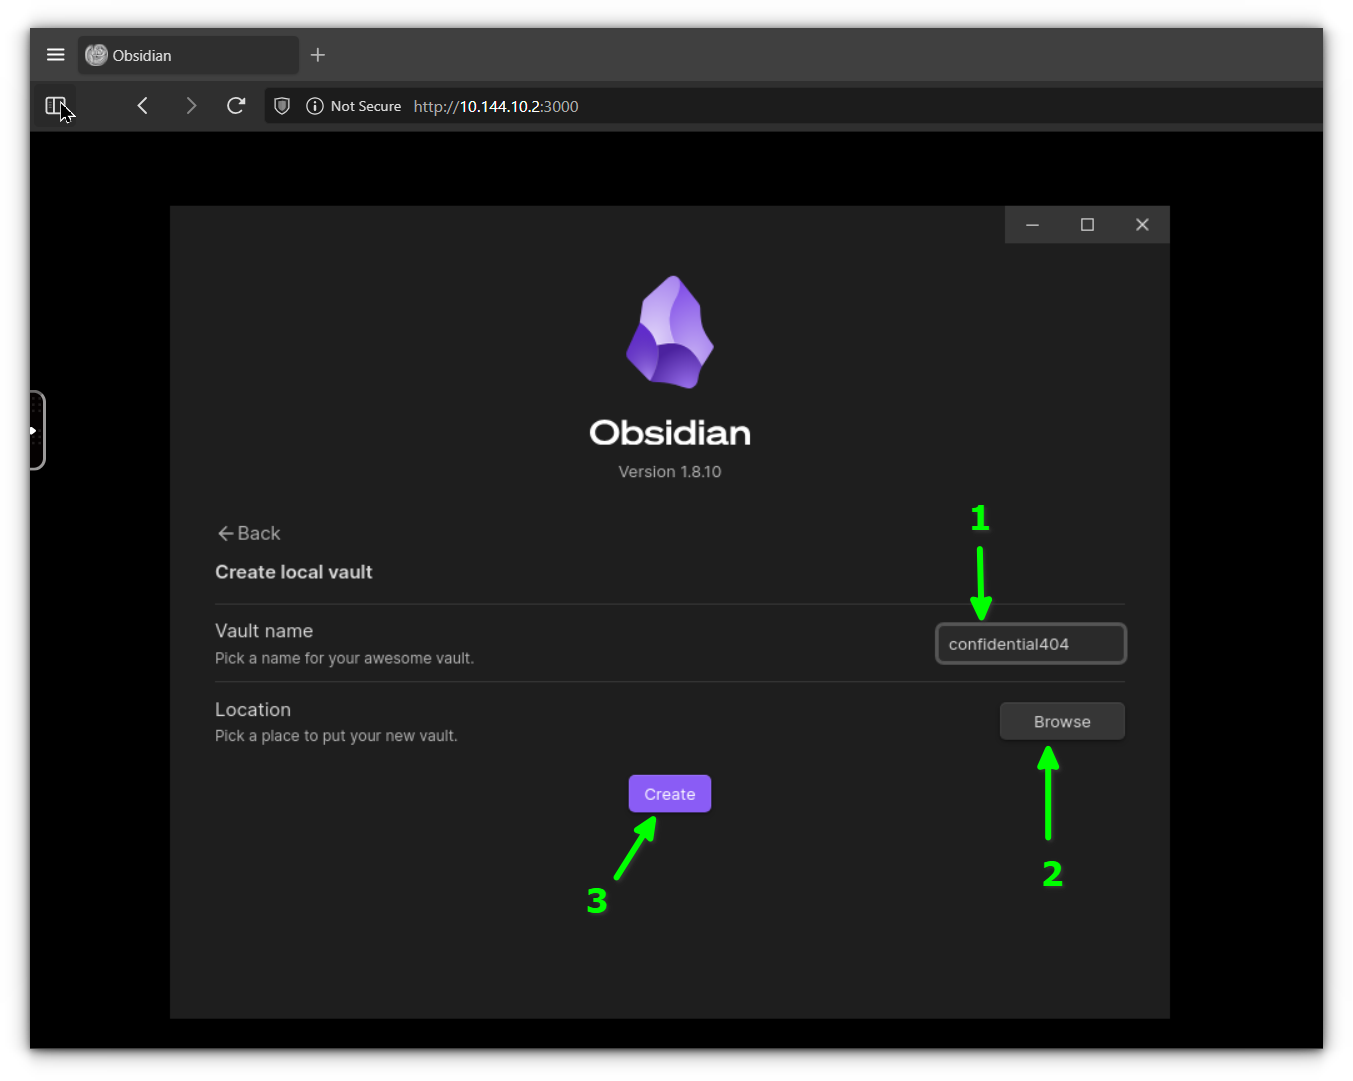
Creating new vault
For this tutorial, we’ll keep things simple, I’m just going to create a new vault to get started.
Click on "Create", give your vault a name (anything you like - "secondbrain", "mynotes", "vault", etc.), and Obsidian will take care of the rest.
It’ll create a new folder inside the mounted config directory we set up in Docker earlier. This means all your notes and settings will be saved persistently on your machine, even if the container is stopped or restarted.
After you name and create the vault, Obsidian will drop you straight into the note-taking interface. And that’s it, you’re in!
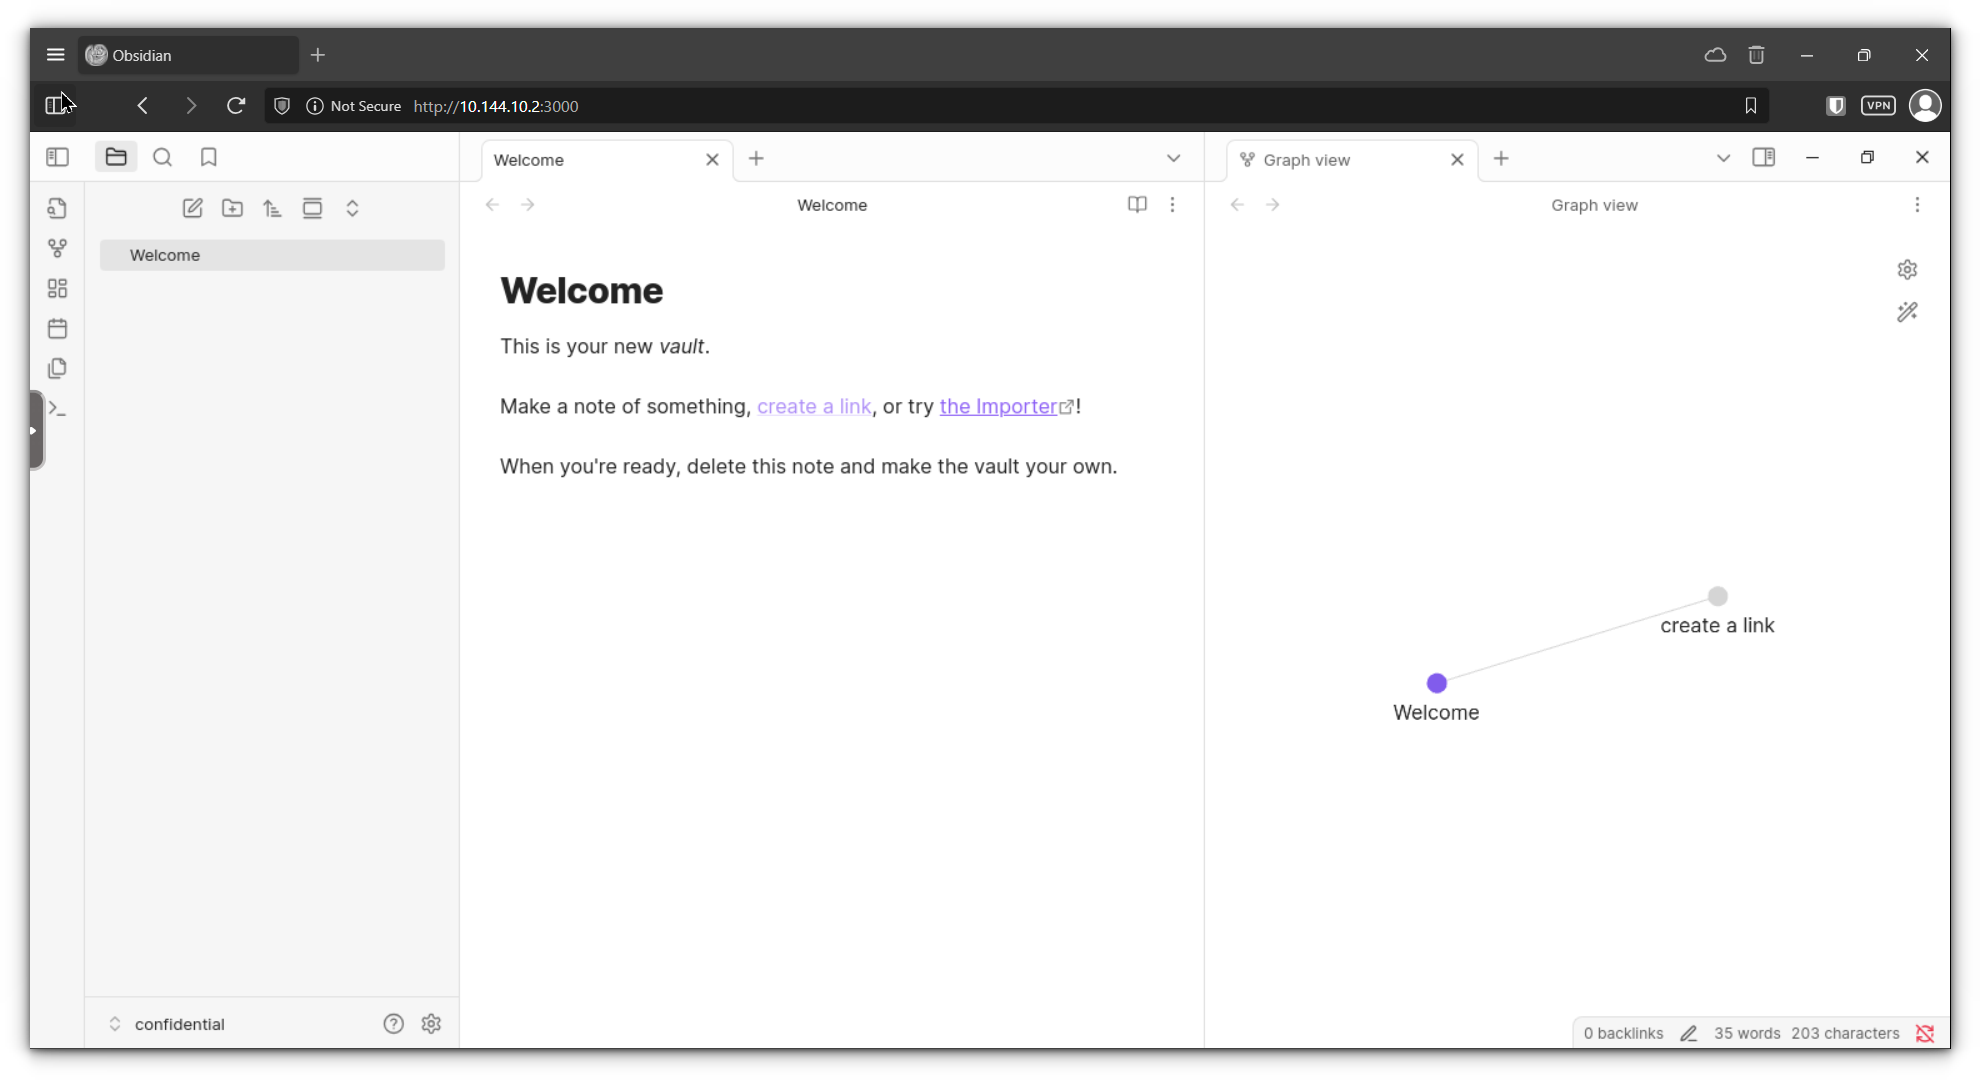
You can now start writing notes, creating folders, and playing around with features like:
- Graph view to visualize links between notes
- Command palette to quickly access features
- Themes and plugin settings to customize your environment
Everything is accessible from the left sidebar, just like in the desktop app. No extra setup needed, just start typing and let your ideas flow.
Final thoughts
Setting up Obsidian inside Docker was surprisingly easy, it didn’t take much time, and before I knew it, I had the full desktop-like experience running in my browser.
This setup is especially great for people on the go or students like me who love using Obsidian but can’t always afford the Sync feature just yet.
Now, I personally don’t mind paying for good software and I think Obsidian Sync is a solid service but those little costs start stacking up fast.
I’ve also seen quite a few Reddit threads where folks have built their own syncing setups using Syncthing to keep notes in sync across devices, and that seems like a solid workaround as well.
For me, this self-hosted browser version of Obsidian fits somewhere in the middle. It gives you the full experience without the limitations of a mobile app or the need to sync through someone else’s servers.
And if you're already in the self-hosting ecosystem, it’s just another powerful tool you can add to your stack.