Docker has changed the way we package and distribute applications, but I only truly appreciated its power when I needed to share a project with a friend.
Initially, we used docker save and docker load to transfer the image, which worked fine but was cumbersome.
Then, while browsing the Docker documentation, I discovered how easy it was to push images to Docker Hub.
That was a game-changer! Now, I push my final builds to Docker Hub the moment they're done, allowing my clients and collaborators to pull and run them effortlessly.
In this guide, I’ll walk you through building, tagging, pushing, and running a Docker image.
To keep things simple, we’ll create a minimal test image.
Writing a simple Dockerfile
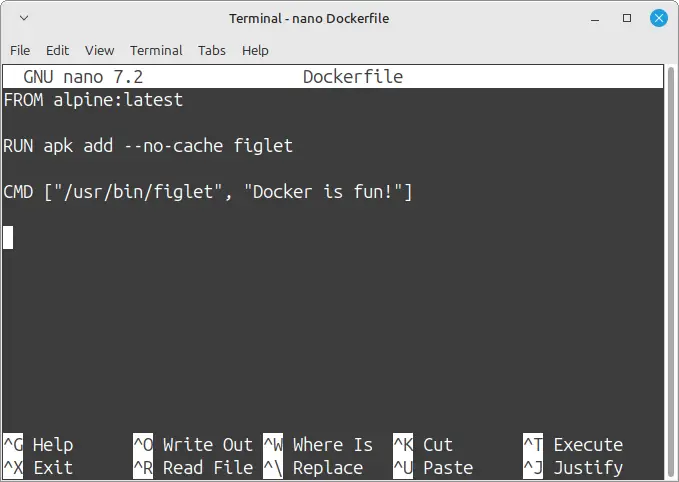
A Dockerfile defines how to build your image. It contains a series of instructions that tell Docker how to construct the image layer by layer.
Let’s create a minimal one:
# Use an official lightweight image
FROM alpine:latest

# Install a simple utility
RUN apk add --no-cache figlet

# Set the default command
CMD ["/usr/bin/figlet", "Docker is Fun!"]
FROM alpine:latest– This sets the base image to Alpine Linux, a minimal and lightweight distribution.RUN apk add --no-cache figlet– Installs thefigletpackage using Alpine's package manager (apk), with the--no-cacheoption to keep the image clean.CMD ["/usr/bin/figlet", "Docker is Fun!"]– Specifies the default command that will run when a container is started.
Save this file as Dockerfile in an empty directory.
Building the docker image
To build the image, navigate to the directory containing the Dockerfile and run:
docker build -t <cool-image-name> .docker build– The command to build an image.-t cool-image-name– The-tflag assigns a tag (cool-image-name) to the image, making it easier to reference later..– The dot tells Docker to look for theDockerfilein the current directory.

Once completed, list your images to confirm:
docker images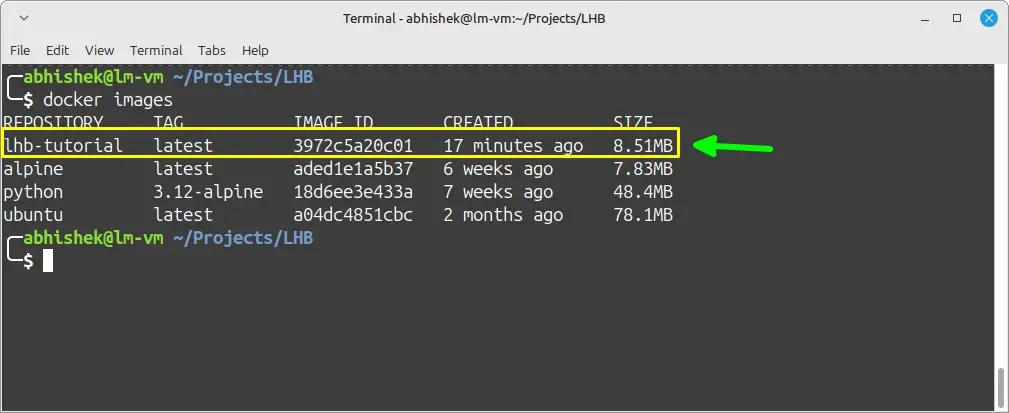
Running the docker image
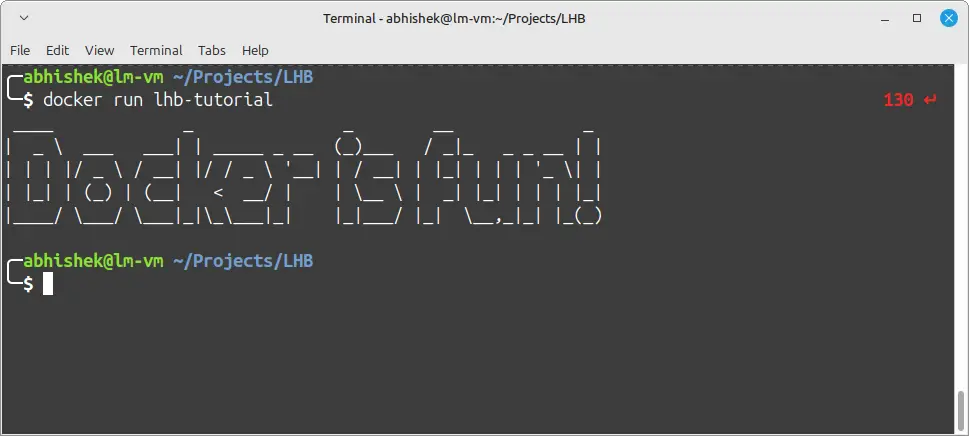
To run the container and see the output:
docker run <cool-image-name>You should see an ASCII text saying, “Docker is fun!”
Tagging the Image
Before pushing to a registry, we need to tag the image with our Docker Hub username:
docker tag <cool-image-name> your-dockerhub-username/cool-image-name:latestdocker tag– Creates an alias for the image.your-dockerhub-username/cool-image-name:latest– This follows the formatusername/repository-name:tag. Thelatesttag is used as a default version identifier.
List images again to see the updated tag:
docker images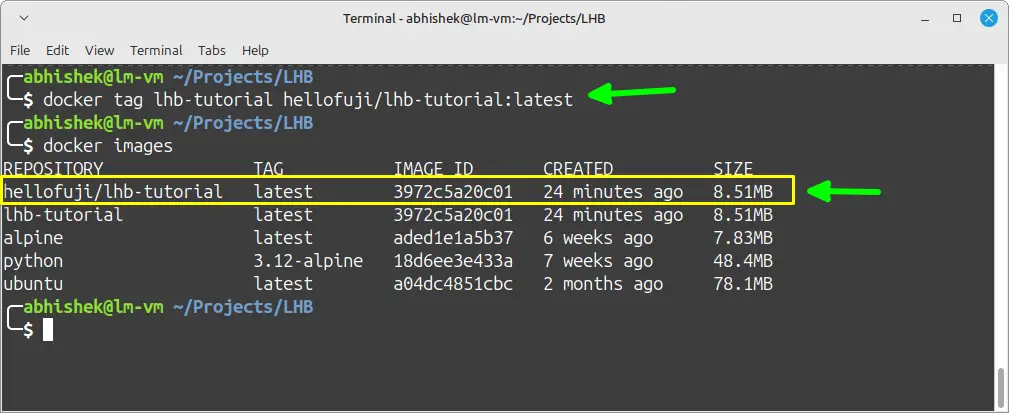
Pushing to Docker Hub
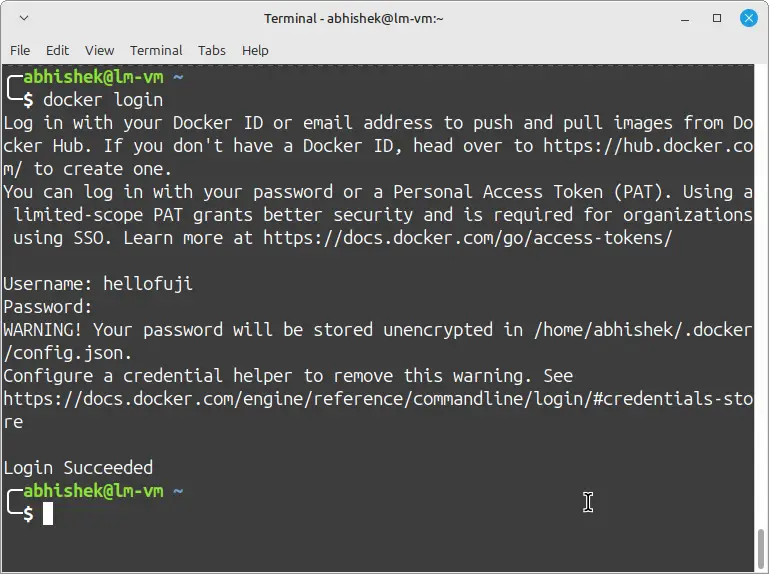
First, log in to Docker Hub:
docker loginYou will be prompted to enter your Docker Hub username and password.
Once authenticated, you can push the image:
docker push your-dockerhub-username/cool-image-name:latest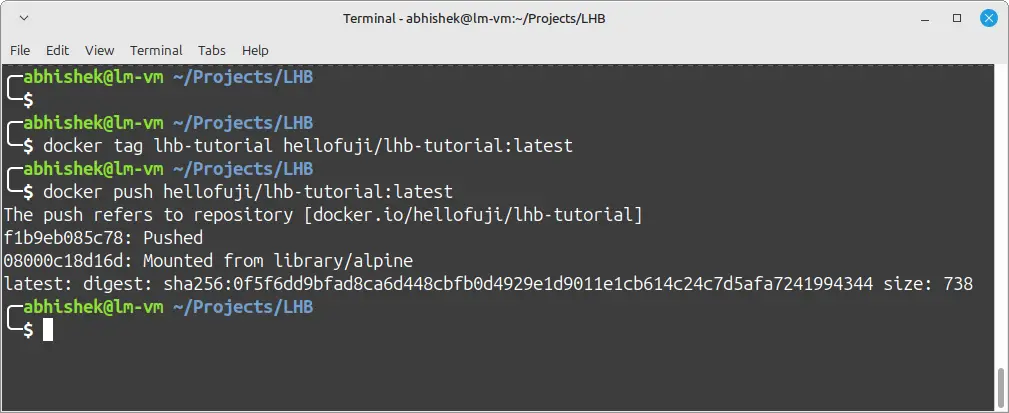
And that’s it! Your image is now live on Docker Hub.
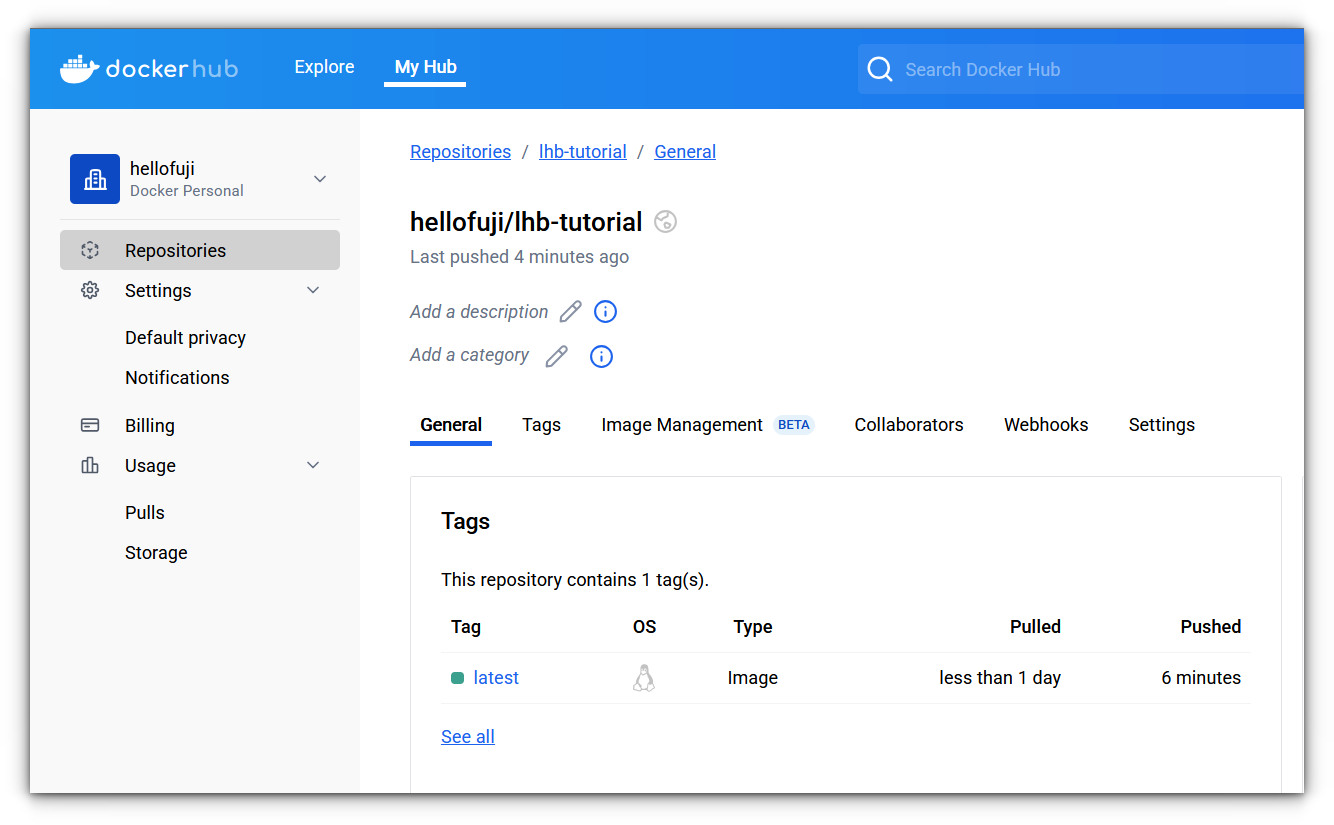
Anyone can pull and run it with:
docker pull your-dockerhub-username/cool-image-name:latest
docker run your-dockerhub-username/cool-image-name
Feels great, doesn’t it?
Alternatives to Docker Hub
Docker Hub is not the only place to store images. Here are some alternatives:
- GitHub Container Registry (GHCR.io) – If you already use GitHub, this is a great option as it integrates with GitHub Actions and repositories seamlessly.
- Google Container Registry (GCR.io) – Ideal for those using Google Cloud services. It allows private and public image hosting with tight integration into GCP workloads.
- Amazon Elastic Container Registry (ECR) – Part of AWS, ECR is an excellent option for those using AWS infrastructure, providing strong security and IAM-based authentication.
Self-hosted Docker Registry
If you need complete control over your images, you can set up your own registry by running:
docker run -d -p 5000:5000 --name registry registry:2This starts a private registry on port 5000, allowing you to store and retrieve images without relying on external providers.
You can read more about this in docker's official documentation to host your own docker registry.
Final thoughts
Building and pushing Docker images has completely streamlined how I distribute my projects.
What once felt like a tedious process is now as simple as writing a Dockerfile, tagging an image, and running a single push command.
No more manual file transfers or complex setup steps, it’s all automated and ready to be pulled anywhere.
However, Docker Hub's free tier limits private repositories to just one. For personal projects, that’s a bit restrictive, which is why I’m more inclined toward self-hosting my own Docker registry.
It gives me complete control, avoids limitations, and ensures I don’t have to worry about third-party policies.
What about you? Which container registry do you use for your projects? Have you considered self-hosting your own registry? Drop your thoughts in the comments.