

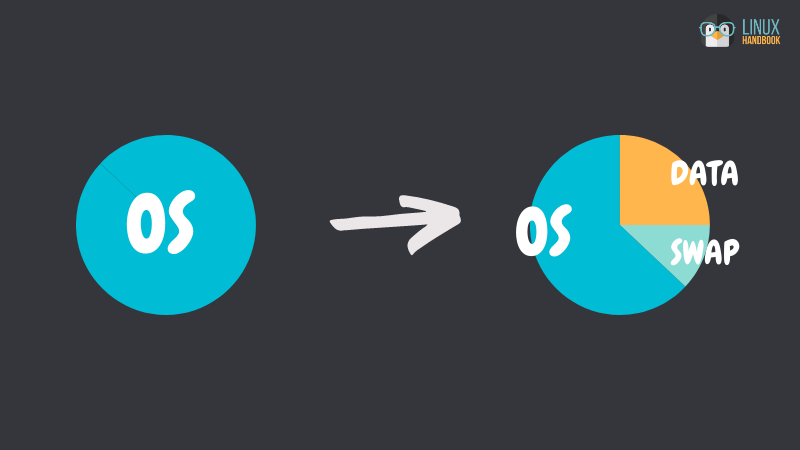
Once you get a VPS at a hosting provider like DigitalOcean or OVH, you might want to customize the partition layout. However, often you have no choice: you select the desired OS and then it gets installed on a single partition, taking all the available disk space.
Yet, VPS are not only for single-partitioned web servers! Depending on your needs, you may want to add a swap partition, another for your data…
Fortunately, most hosting providers offer a rescue mode, an alternate operating system on another hard drive, from which you can tweak the regular OS and the "normal" hard drive.
The rest of this guide assumes the only existing partition is of type Ext4 (or Ext2/3); it is the case if you installed Debian or Ubuntu.
Let's say you have to reduce the partition from 40 GiB to 2 GiB (starting at the beginning of disk), in order to create other partitions after it.
Step 1: Switch to the rescue mode and identify the disk
The first thing to do is to reboot to rescue mode, which is usually a Debian GNU/Linux system. You will be given a temporary root password for this temporary system, just SSH to it.

Then, identify the disk used by your normal system ; you can use fdisk -l.
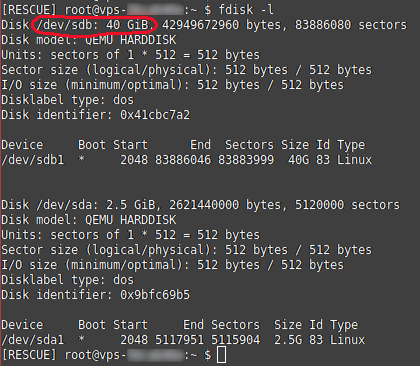
Here /dev/sdb is the disk on which we want to modify the partition scheme, and /dev/sdb1 the only partition for now. /dev/sda is the disk where the temporary rescue system resides. Of course, through the rest of this tutorial, replace sdb1 if it's not the right device name.

Step 2: Reduce the filesystem
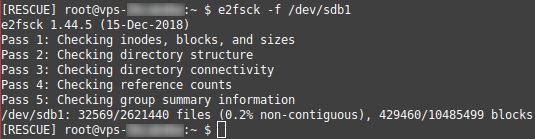
Check the filesystem with e2fsck -f /dev/sdb1 (otherwise the next command, resize2fs, may not work):
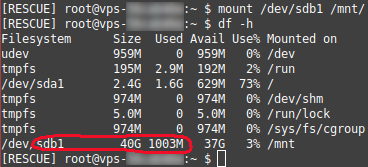
Also, be sure the size of the filesystem does not exceed 2 GiB. Providing /mnt is empty, mount the filesystem with mount /dev/sdb1 /mnt and check its size with df:
Unmount the filesystem: umount /dev/sdb1.
Let's go: run resize2fs /dev/sdb1 2G.
"2G" means 2 GiB, you can also write it "2048M". When I took the screenshot below, I wrongly thought resize2fs understood it as 2000M, so instead I provided a number of sectors (4194304 * 512 bytes per sector = 2GiB). The result is exactly the same.
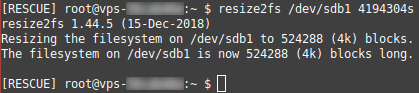
Here the program reports "524288 (4k) blocks". 524288 * 4096 B = 2 GiB, so it's OK.
4k is the unit (block) size at the filesystem level, whereas 512 is the unit (sector) size at the disk level. How do I know it's 512? Look at the "fdisk" screenshot above!
Step 3: Reduce the partition
So far, you have reduced the filesystem, meaning that you can't add data to it that do not fit into its logical size of 2 GiB. But the partition, on which the filesystem lies, still takes all the disk space.
I recommend parted for partition management in Linux. On Debian, get it with apt install parted. This tool can be used interactively. Launch it with /dev/sdb as argument:

Use unit s, so all sizes are displayed as numbers of sectors (instead of MiB, GiB, etc), which is useful to control things precisely. Otherwise, you could run into issues such as "The resulting partition is not properly aligned for best performance". The print free command lets you see the disk's state:
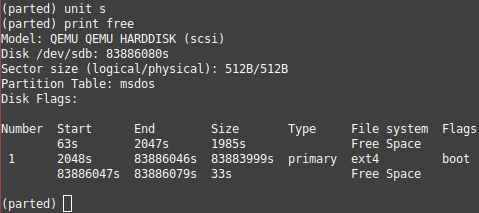
You want the partition 1 to be 2 GiB long, which equals to 2*1024*1024*1024/512 = 4194304 sectors.
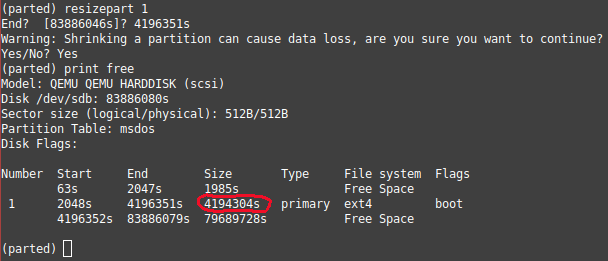
Run resizepart 1. You are then prompted for the location on disk, expressed in sectors from the beginning of the disk, where the partition must end. Since there is a reserved area, before the partition, that ends at sector 2047, you must enter 4194304 + 2047 = 4196351s.
Answer "Yes" after the warning message, then print free again to confirm the partition is resized.
From my experience, stopping here and rebooting might "restore" the partition layout in the previous state, that is, like you never reduced the partition!
To "validate" the changes, it's better to add at least one partition to the free space now.
Step 4: Add other partitions
Let's say you want to add a 12 GiB, Ext4 partition after the one taken by the OS.
First, you have to "declare" the partition so an entry is added to the partition table (somewhere in the reserved zone). Use mkpart primary ext4:
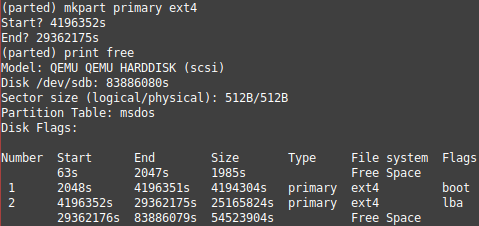
Like in this example, start your partition one sector after the end of the previous one, so there is no wasted space. Here it is 4196351 + 1 = 4196352s.
The end is at 12*1024*1024*1024/512 sectors (the size you want for this partition) + 4196351 sectors (the offset for being the 2nd partition) = 29362175s.
Then, quit parted (C^d) and effectively create an Ext4 filesystem on sdb2. To apply the default Ext4 settings, the command is:mkfs.ext4 /dev/sdb2
The End
This article was just an introduction on how to manipulate partitions and filesystems on the command line, focusing on the practical case of servers having one big partition by default (and where you may want to divide it). I hope it was useful.
Author info: Paul Desplanque is 100% self-taught in computers-related things. With 8 years of PHP development experience behind him, Paul is quite adept in self-hosting.
