In a world where authentication services charge per user and lock you into their ecosystem, Keycloak offers something rare: enterprise-grade identity management that you can run on your own infrastructure, completely free. No vendor lock-in, no monthly bills, no user limits.
After spending several days setting up Keycloak, integrating it with Portainer via OAuth, configuring social login with GitHub, and wrestling with the documentation gaps, here's what you need to know before diving in.
What is Keycloak?
Keycloak is an open-source Identity and Access Management (IAM) solution that handles authentication and authorization for modern applications. Think of it as a self-hosted alternative to Auth0, Okta, or AWS Cognito, but without the per-user pricing or vendor lock-in.
It's a CNCF (Cloud Native Computing Foundation) project under the Apache 2.0 license, which means it's backed by a strong community and actively developed. It includes featuers like Single Sign-On (SSO), Social login (GitHub, Google, Gitlab, etc.), OAuth 2.0 and OpenID Connect (OIDC) and many more.
The selling point isn't just the feature list - it's that you get all of this without paying per user or worrying about what happens if the vendor shuts down.
The Setup Challenge
Yes, I am mentioning it as a challenge because in the official documentation, there is no proper docker-compose file to set up the whole database with Keycloak. You're left piecing together environment variables from different documentation pages. After many trial-and-error attempts, here's my custom docker-compose.yml that actually works:
services:
  postgresql:
    image: postgres:16
    container_name: keycloak_db
    environment:
      POSTGRES_USER: keycloak
      POSTGRES_DB: keycloak
      POSTGRES_PASSWORD: SUPERsecret
    volumes:
      - ./postgres_data:/var/lib/postgresql/data
    networks:
      - keycloak

  keycloak:
    image: quay.io/keycloak/keycloak:26.5.3
    container_name: keycloak
    depends_on:
      - postgresql
    command: start-dev
    environment:
      - KC_BOOTSTRAP_ADMIN_USERNAME=admin
      - KC_BOOTSTRAP_ADMIN_PASSWORD=admin
      - KC_DB=postgres
      - KC_DB_URL=jdbc:postgresql://postgresql:5432/keycloak
      - KC_DB_USERNAME=keycloak
      - KC_DB_PASSWORD=SUPERsecret
    ports:
      - "8081:8080"
    networks:
      - keycloak

networks:
  keycloak:
In this, we have mentioned PostgreSQL container for the database, ./postgres_data ensures your users and configurations survive container restarts and stay persistent using volumes, KC_BOOTSTRAP_ADMIN_USERNAME and KC_BOOTSTRAP_ADMIN_PASSWORD create the initial admin account, port mapping is done as 8081:8080 because port 8080 is often already taken on development machines, a it, custom network keycloak ensures Keycloak and PostgreSQL can communicate by service name.
Save the above file as docker-compose.yml and run the following command:
mkdir -p keycloak && cd keycloak
# Save the compose file above
docker-compose up -d

Within 30-60 seconds, you'll have Keycloak running at http://localhost:8081.
Initial Configuration
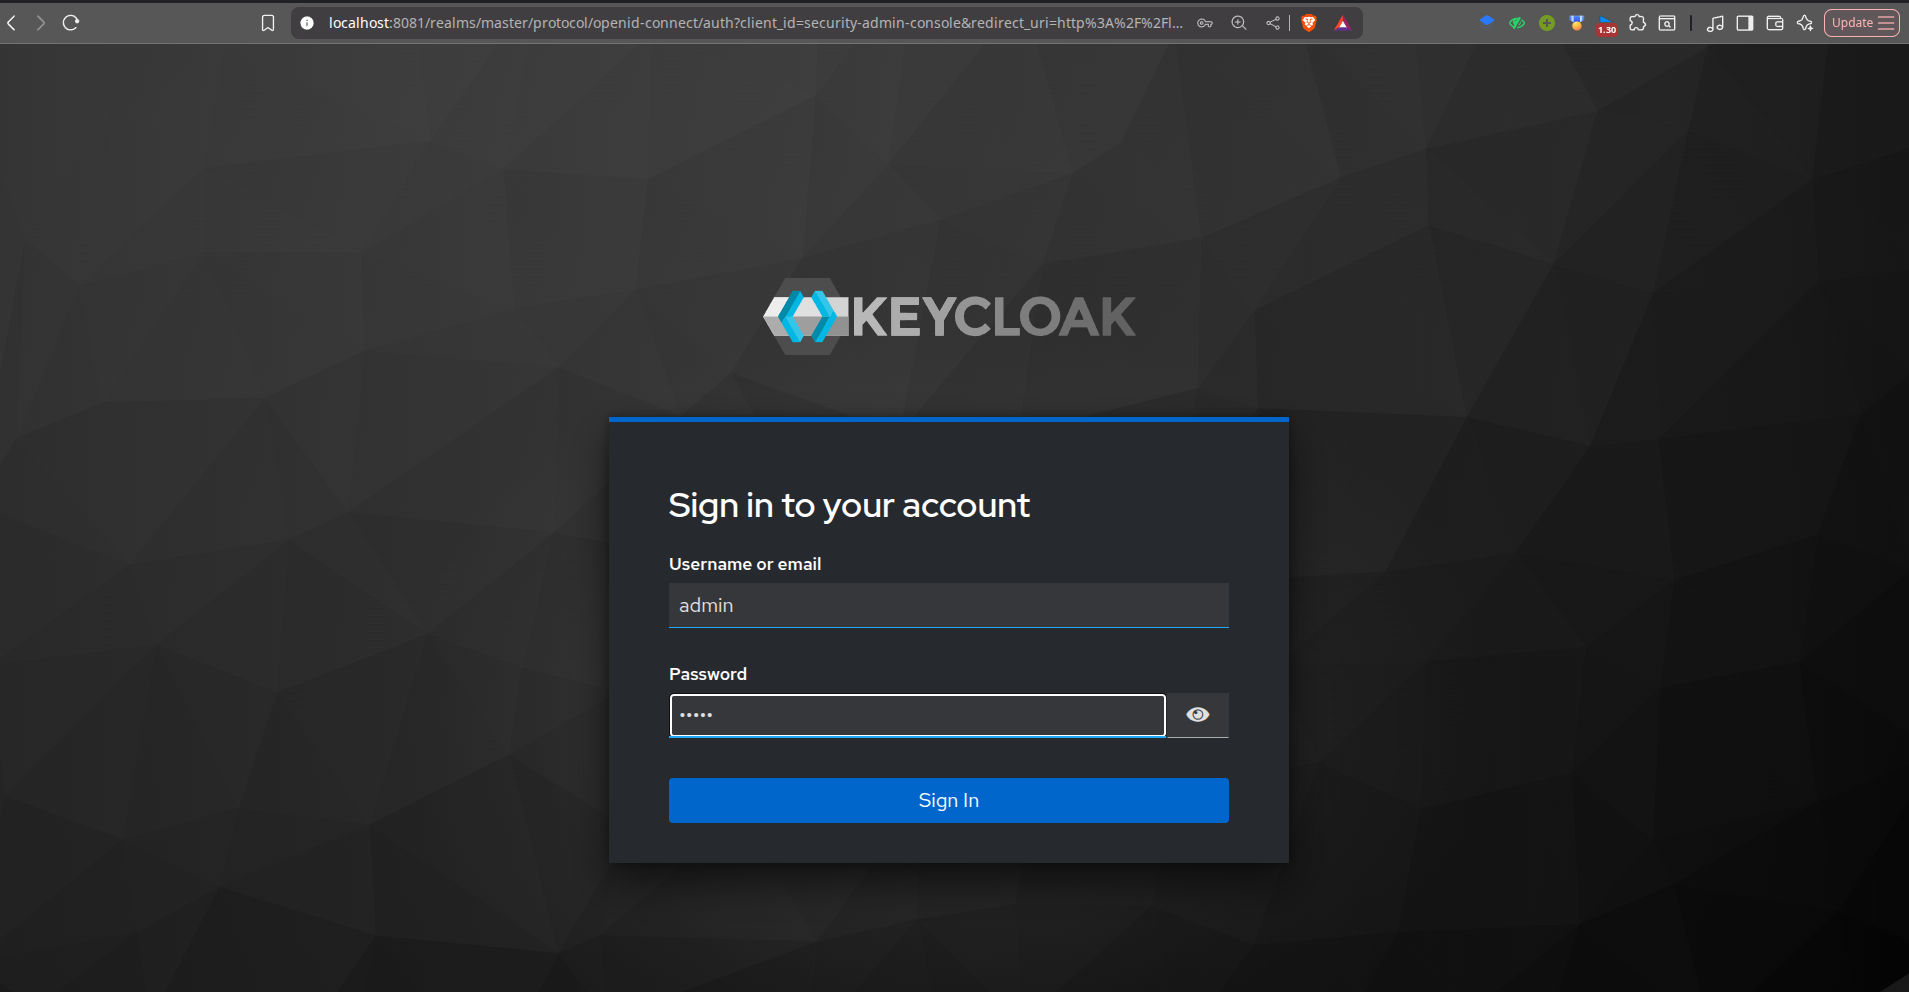
When you first access Keycloak, you'll land on the admin console login page. Use the credentials you set in username and password (in this case, admin / admin).
Once logged in, you'll see the master realm. Realms in Keycloak are isolated spaces for managing users, clients, and authentication policies. The master realm is for administrative purposes only - you can create a separate realm for different applications.
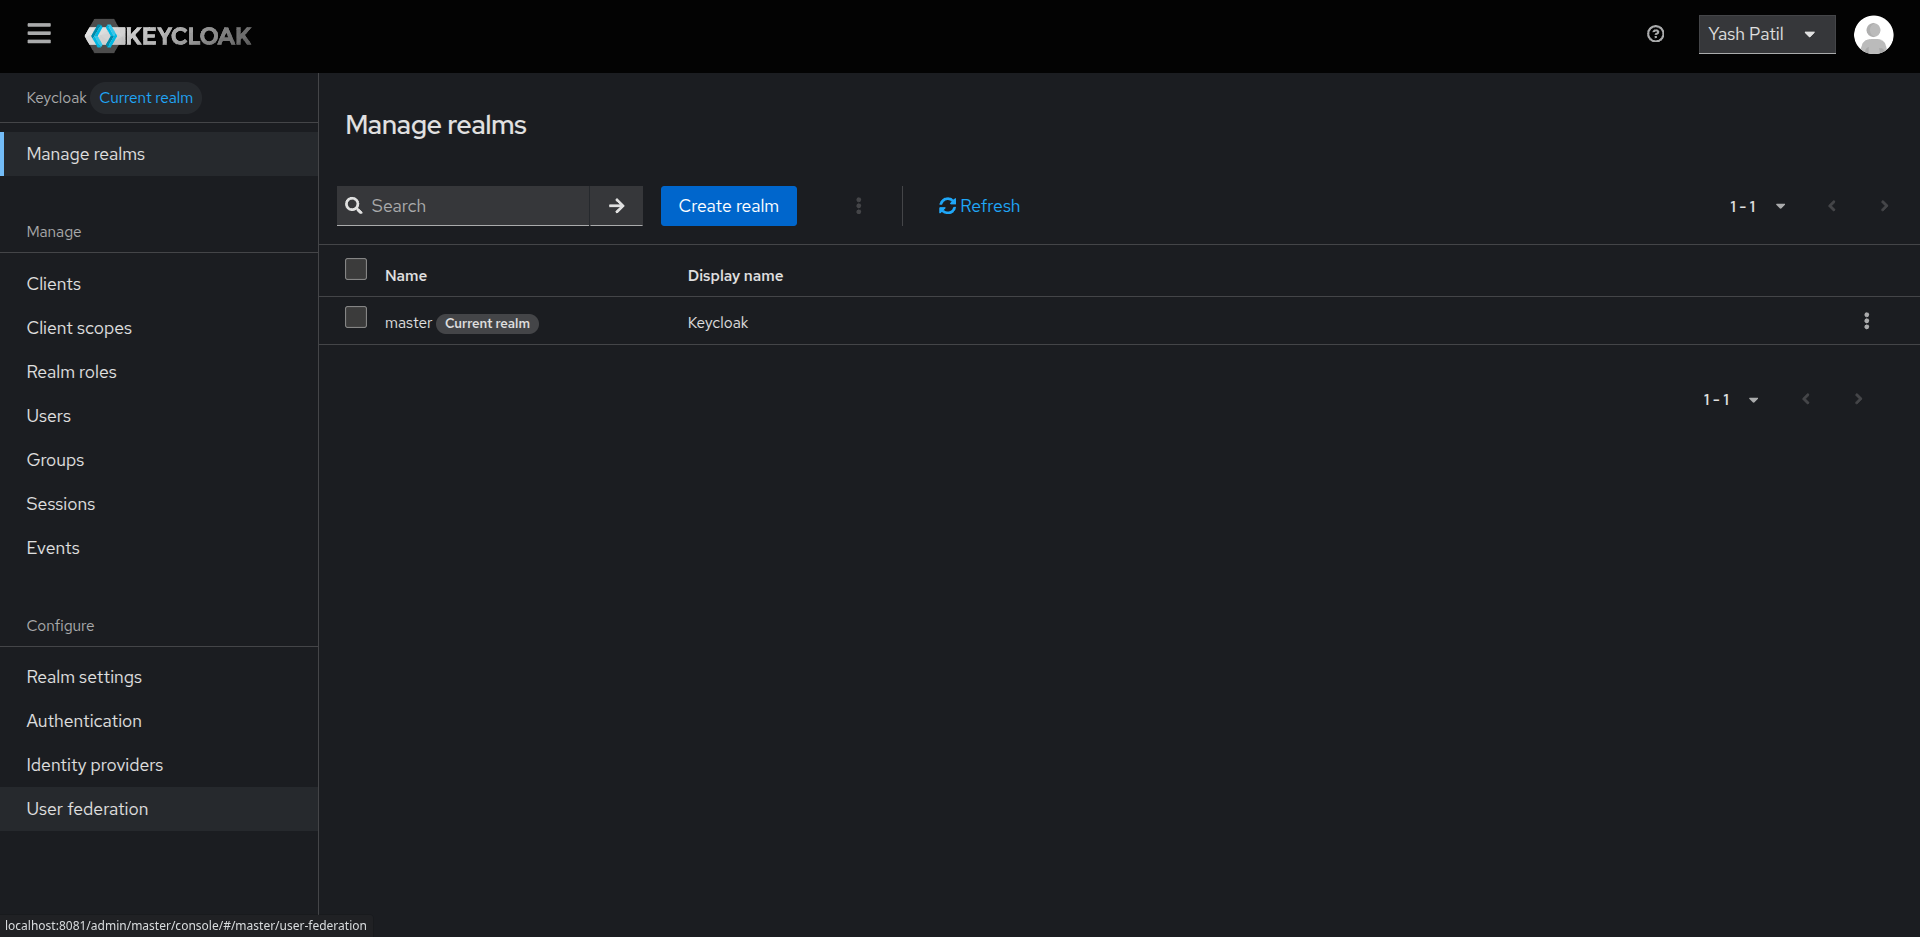
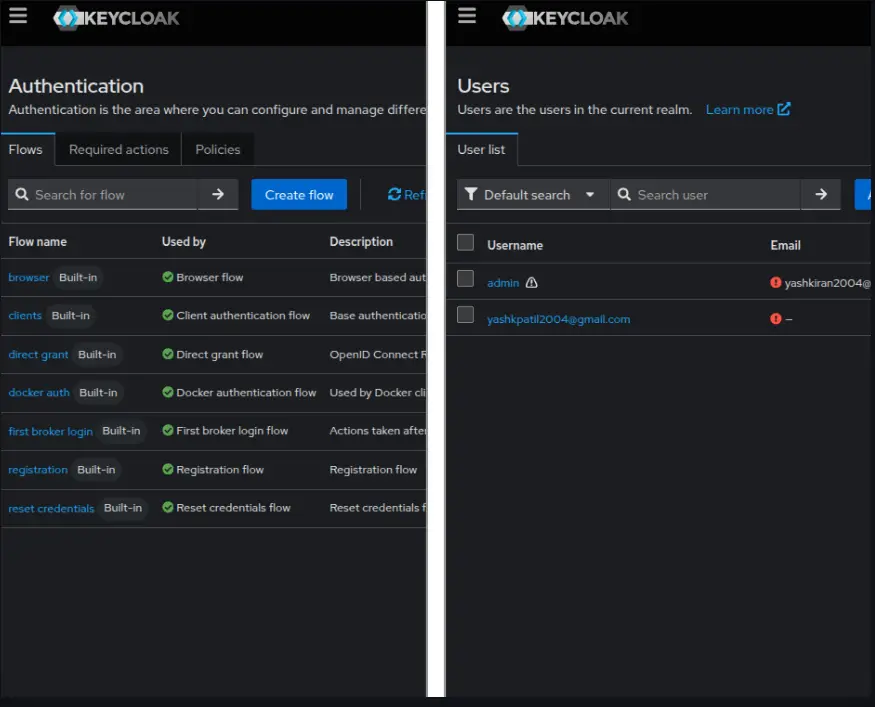
You can add Users, Groups, Events, etc., for your specific realm. You can add an email and verify it, which can be used later to add users and authenticate them.
Real-World Test: Portainer OAuth Integration
The best way to understand Keycloak is to integrate it with a real application. Portainer (a Docker management UI) supports OAuth authentication, making it a perfect test case.
For this purpose, I have my Portainer running on port 9000, which shows me all the containers, images, networks, services, etc., running on my host machine.
You can run Portainer on your own by using the following command:
docker run -d -p 9000:9000 -p 9443:9443 --name portainer --restart=always -v /var/run/docker.sock:/var/run/docker.sock -v portainer_data:/data portainer/portainer-ce:lts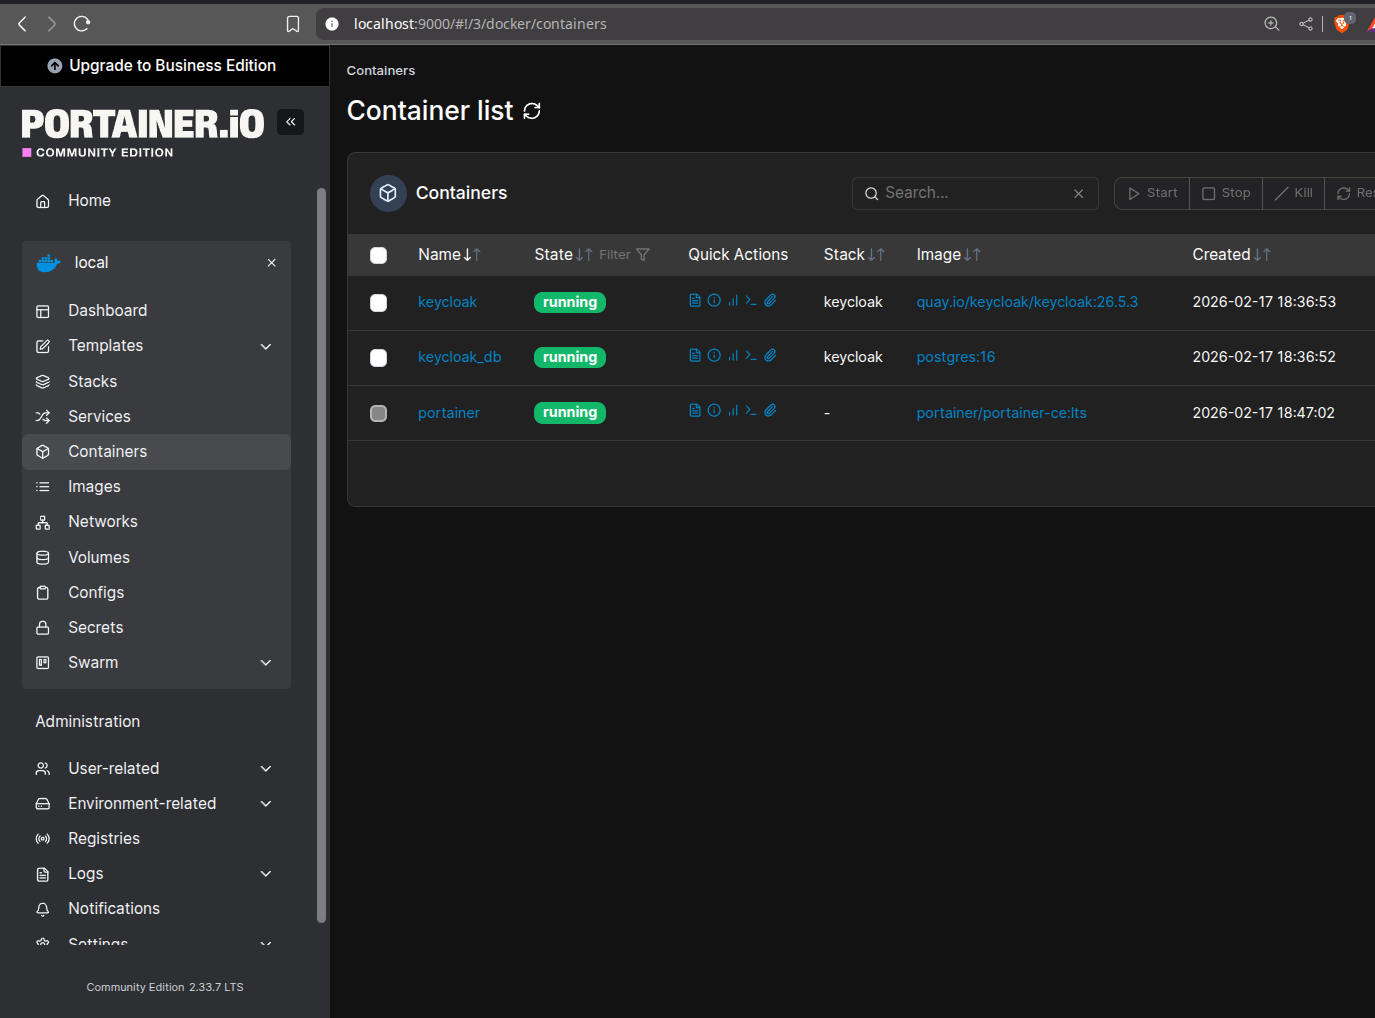
You will see the Portainer running on localhost:9000 and showing all the results of your Docker stuff.
Creating an OAuth Client: For this, navigate to your realm, then open Clients and click on create client, here you need to paste the following so that it successfully connects to the portainer running on the system.
Client ID: portainer
Client authentication: ON (this generates a client secret)
Valid redirect URIs: http://localhost:9000/*
Valid post logout redirect URIs: http://localhost:9000/*
Web origins: http://localhost:9000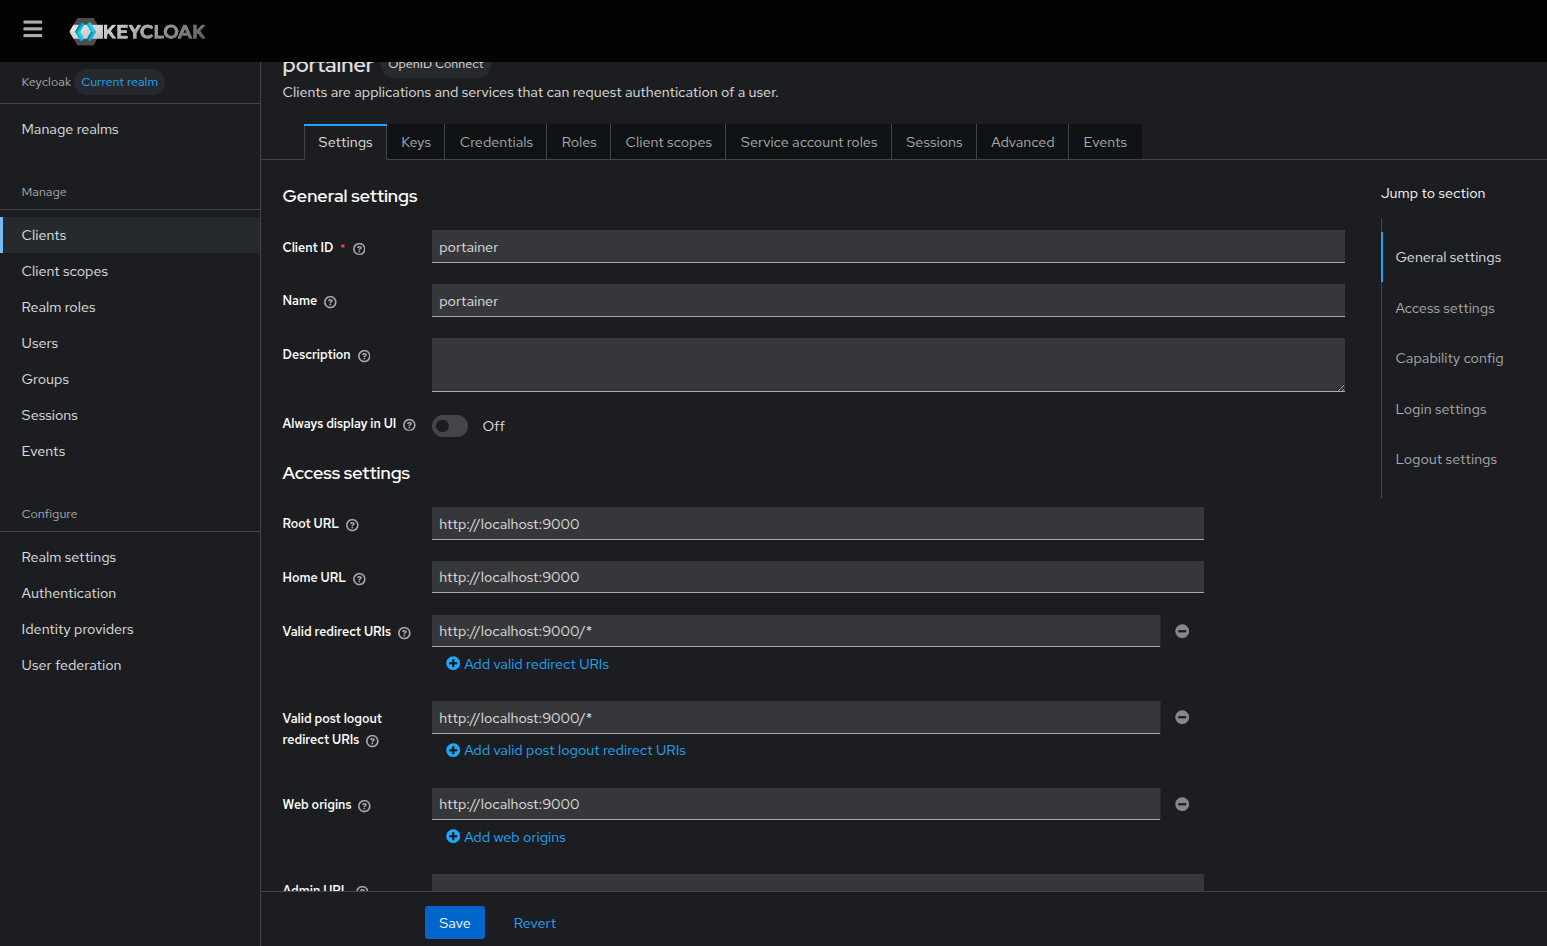
Save the client, then go to the Credentials tab and copy the Client Secret. You'll need this for Portainer.
Configuring Portainer: In Portainer, go to Settings, then Authentication,, navigate to OAuth, where you need to configure some things inorder to connect to the client created at keycloak and the portainer Oauth.
Client ID: portainer
Client secret: (paste the secret from Keycloak)
Authorization URL: http://localhost:8081/realms/myrealm/protocol/openid-connect/auth
Access token URL: http://localhost:8081/realms/myrealm/protocol/openid-connect/token
Resource URL: http://localhost:8081/realms/myrealm/protocol/openid-connect/userinfo
Redirect URL: http://localhost:9000/
User identifier: email
Scopes: email openid profile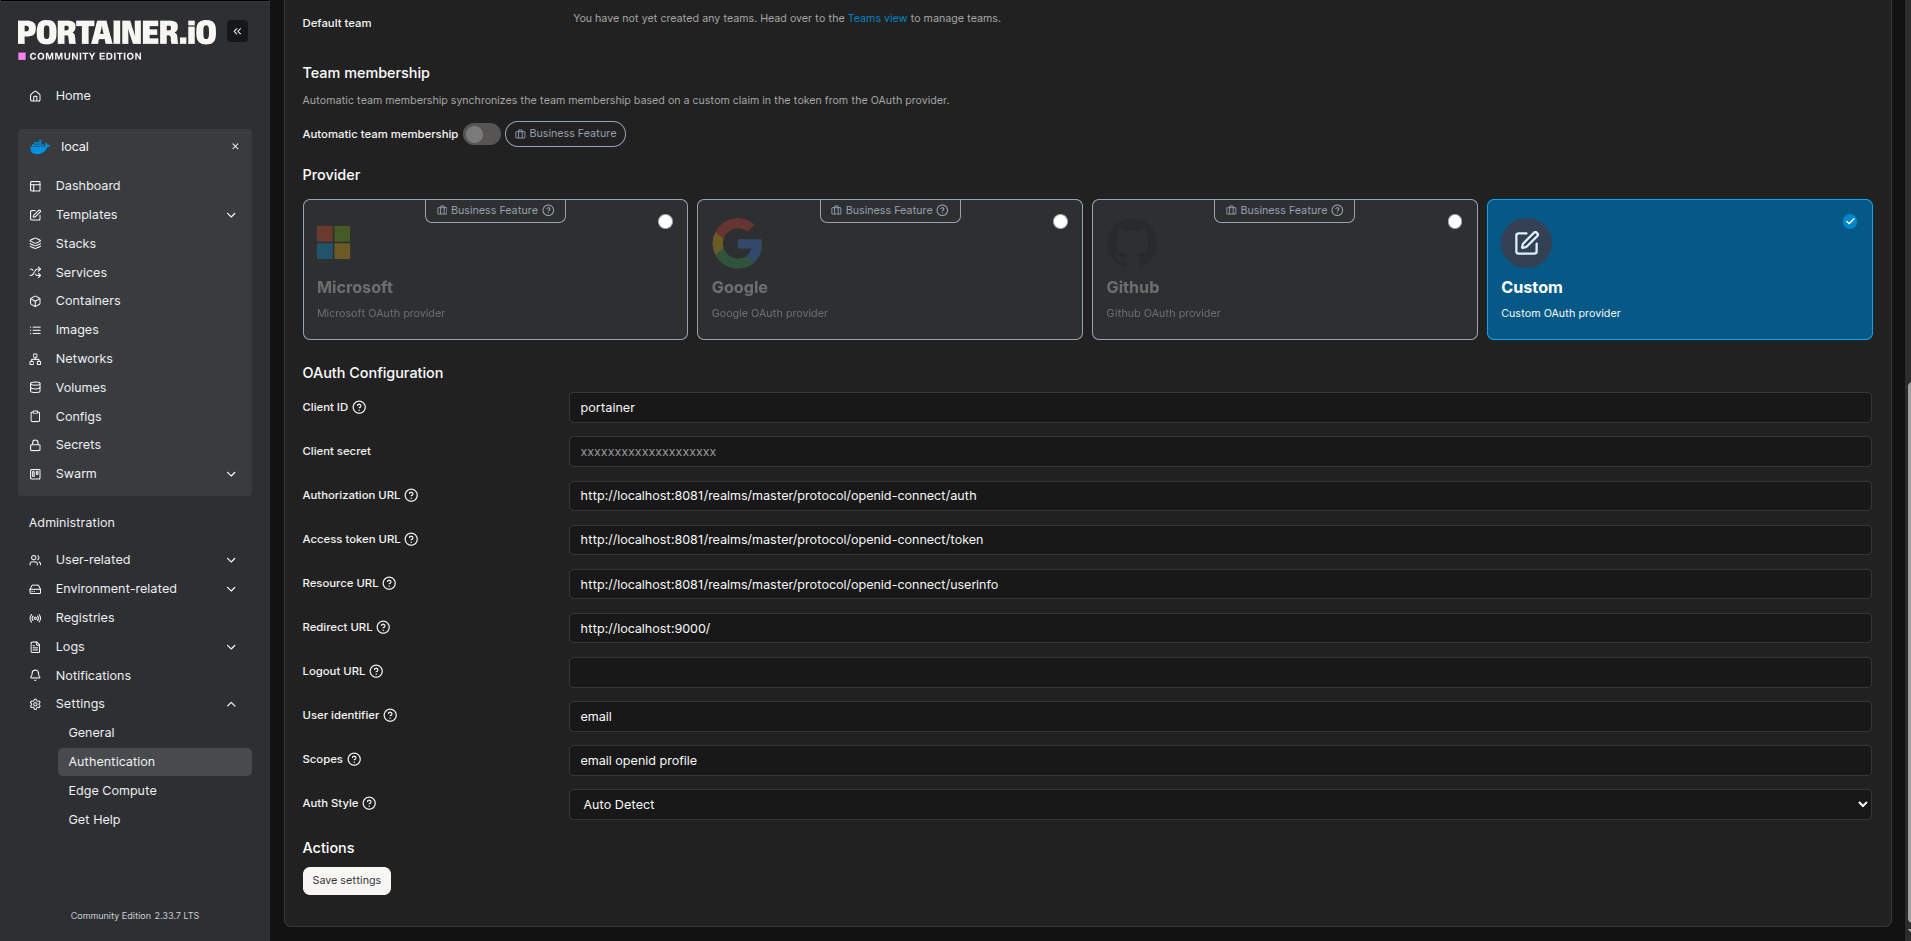
Then save the configurations and you are ready to test your Keycloak authentication.
Testing the flow: The actual test is to see if we can log out from the Portainer and see the login with OAuth, and as expected, after logging out from the portainer the login with OAuth button is visible in the Portainer.
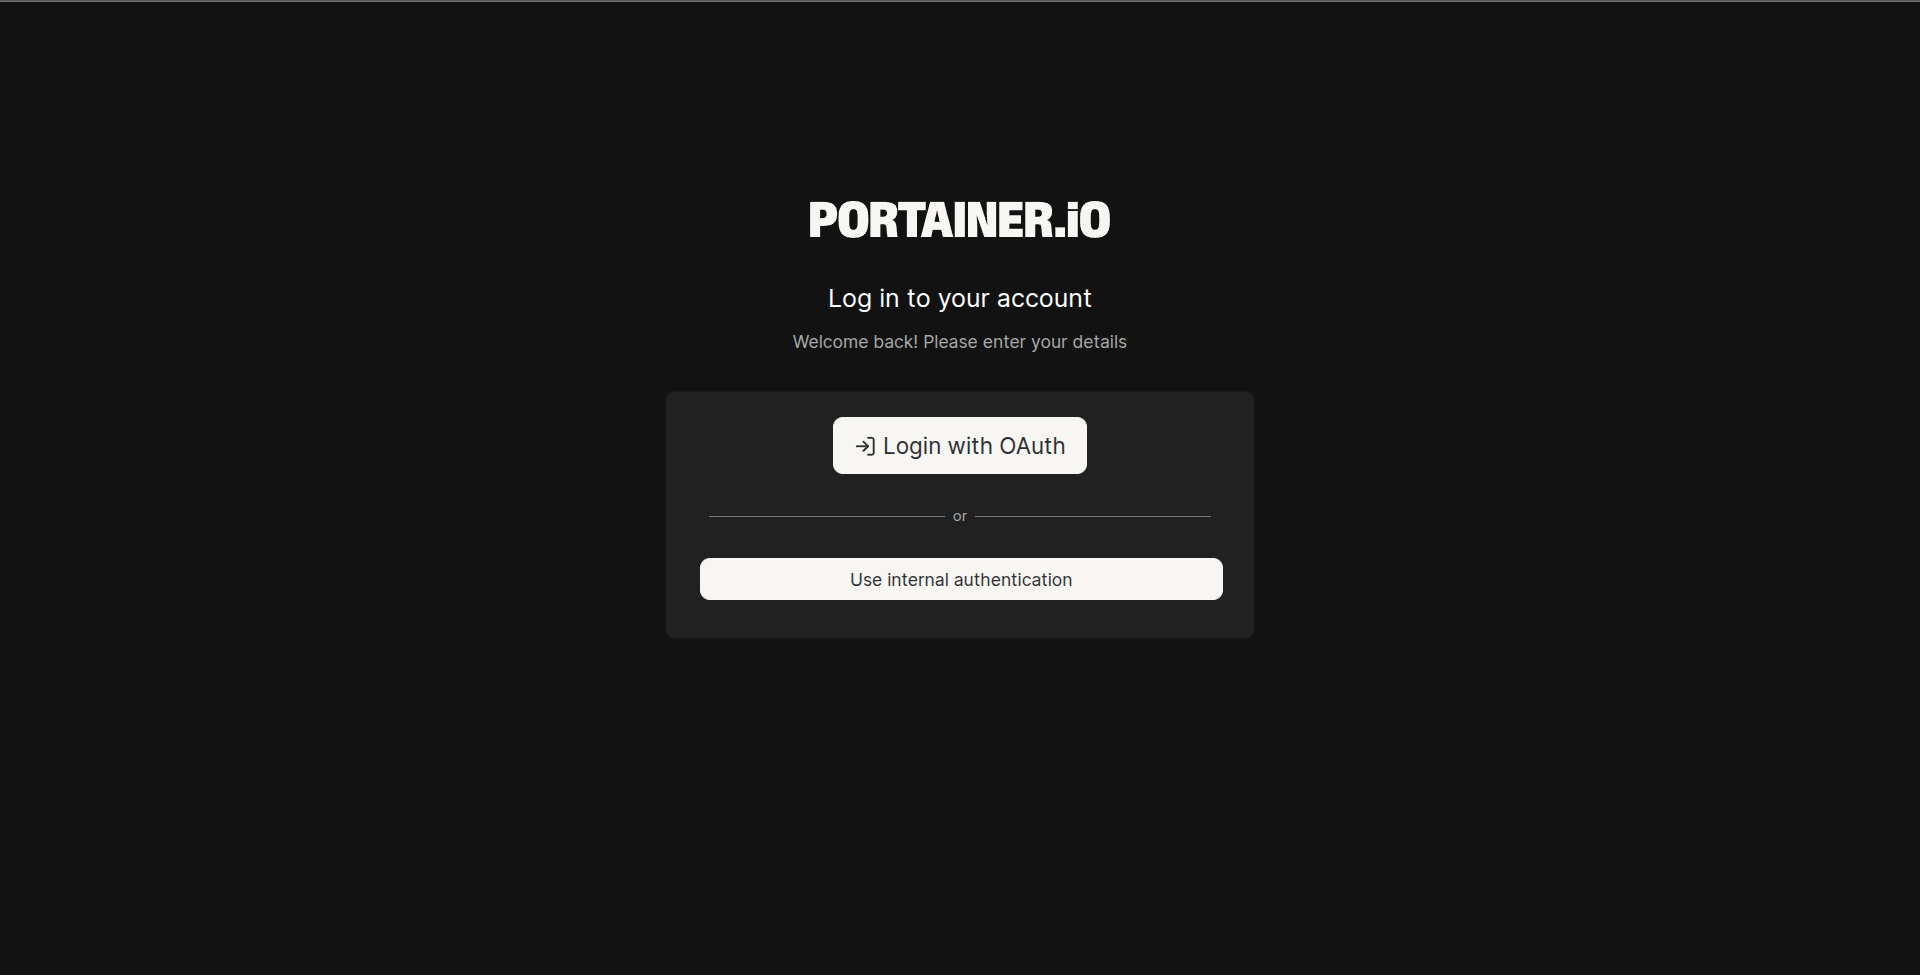
which redirects to the Keycloak sign-in page and if you have added the same user in the Keycloak with an active login session, then you will be able to log in to Portainer and be redirected to the homescreen with that user; the entire process happens seamlessly.
To be honest, as it is seamless in execution, I found it very complex and time consuming to configure the proper urls, as for the self hosted websites and architechture you need to configure the urls correctly handling the routes perfectly, otherwise there are many errors, like not redirecting to the correct destination, OAuth failed, url does not contains needed parameter, etc. that I faced during the configuration.
Social Login Integration
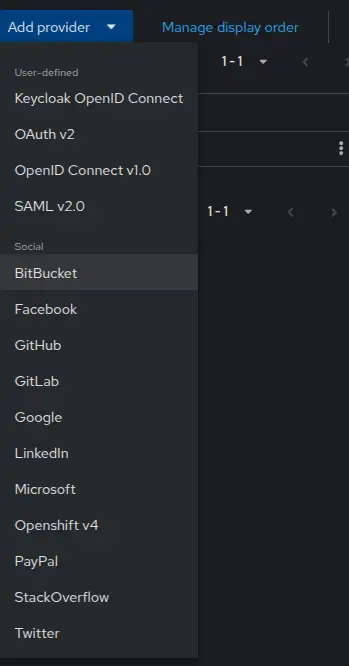
One of Keycloak's standout features is built-in support for social login providers. Adding GitHub authentication takes about 5 minutes. I tested with GitHub Identity Provider.
Setting Up: In Keycloak, you can have options to add an Identity Provider; I have taken GitHub for example. There is a list of options for the Identity provider, you can choose any as per your need.
For GitHub, you need to go to your GitHub Profile → Settings → Developer settings → OAuth Apps → New OAuth App and set the Auth callback URL as http://localhost:8081/realms/master/broker/github/endpoint
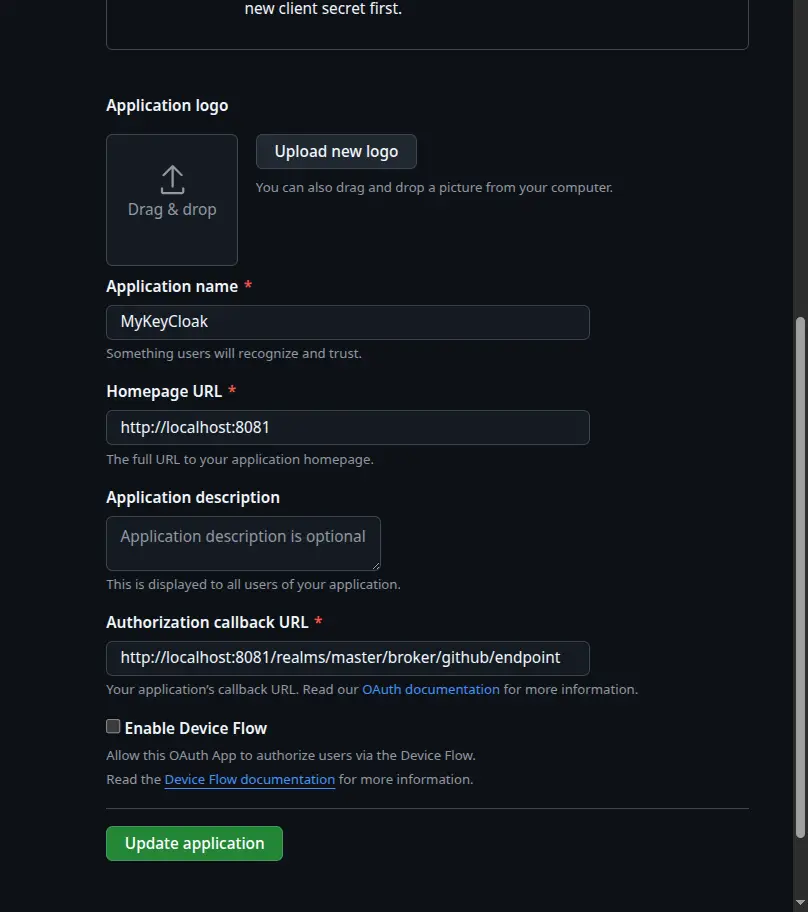
Copy the Client ID and Client Secret from GitHub into Keycloak and save the identity provider configuration.
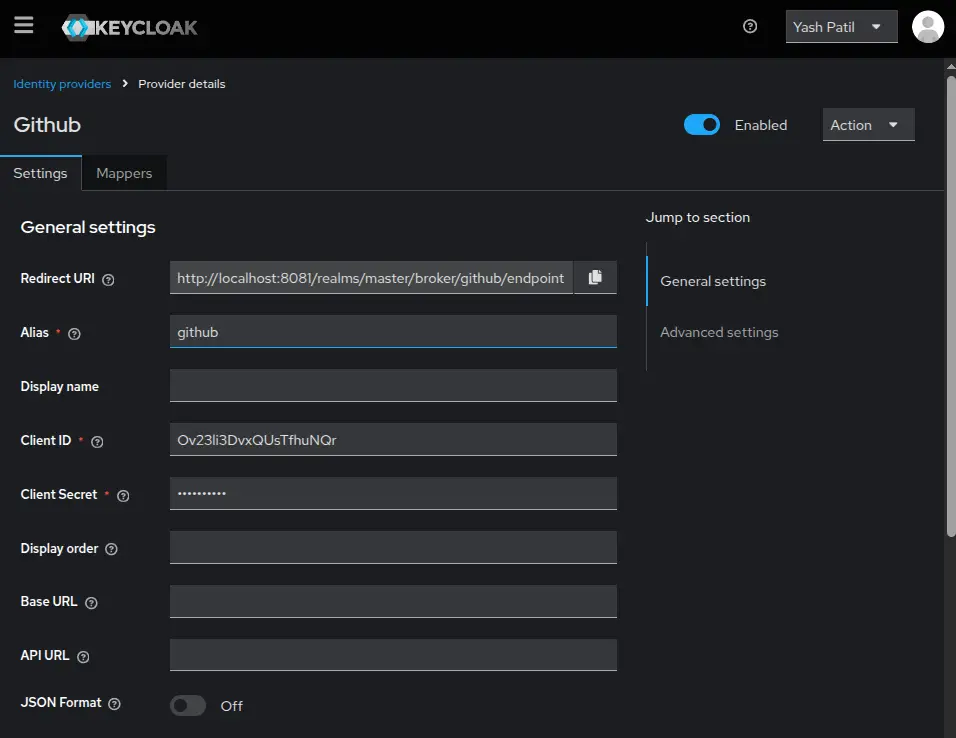
When a user logs in via GitHub for the first time, Keycloak automatically creates a user account and links it to their GitHub identity. You can see linked accounts in the user's account console.
After doing this, I was able to get the expected GitHub Identity Provider in the login window.
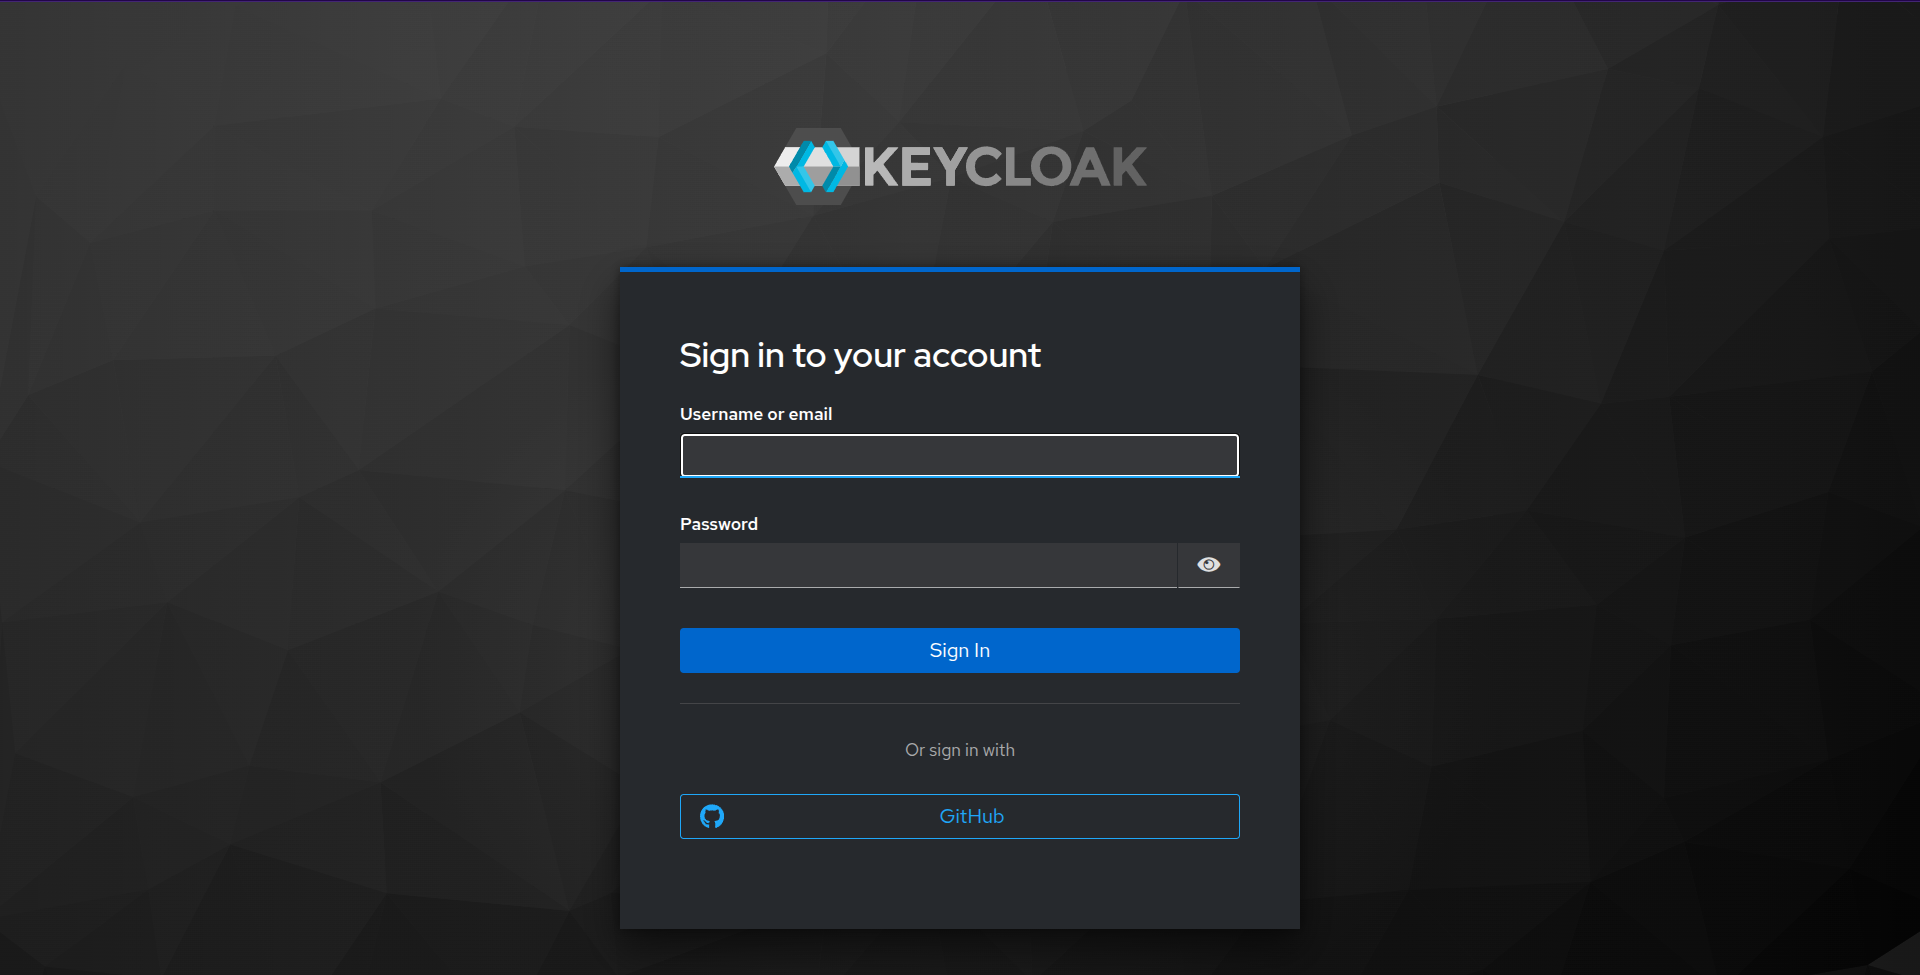
This same process works for Google, Facebook, Twitter, Microsoft, and 20+ other providers. You can even enable multiple social logins simultaneously, giving users the choice.
What Works Really Well In Keycloak
Multi-factor authentication, social login, user federation with LDAP/Active Directory and fine-grained authorization policies - features that cost hundreds of dollars per month on SaaS platforms are all included. No per-user pricing, no feature gates. Which gives Enterprise Features for free.
Keycloak implements OAuth 2.0, OpenID Connect, and SAML 2.0 correctly. This means it works with virtually any modern application that supports these protocols. You're not locked into proprietary APIs.
You can customize login themes to match your brand, create custom authentication flows (e.g., require email verification before MFA), and even write custom extensions in Java. The level of control is unmatched, giving Flexibility and customization.
As a CNCF project with backing from Red Hat, Keycloak receives regular updates, security patches, and new features. The community is active, and GitHub issues get responses signifying active development.
The experience of testing the Keycloak was seamless in terms of performance.
Where Keycloak Falls Short
No tool is perfect, and Keycloak has some significant limitations you should know about upfront.
Documentation gaps. The official docs are comprehensive but scattered. The biggest pain point: there's no official docker-compose example that includes a production database. You're left piecing together environment variables from different pages. This is why the custom docker-compose file above took trial and error to get right.
Steep learning curve. Keycloak has a lot of concepts: realms, clients, client scopes, protocol mappers, identity providers, user federation, and authentication flows. For someone new to IAM, the admin console can be overwhelming. Expect to spend a few days just understanding the terminology.
Scalability and Multi-Tenancy. Keycloak can struggle with a high number of realms (multi-tenant environments), experiencing performance degradation in the Admin Console and realm management. While newer versions are improving,, earlier and default configurations have limitations.
Resource hungry. Keycloak is a Java application that needs a PostgreSQL database. It's not lightweight like some self-hosted tools. Expect at least 512MB of RAM for Keycloak alone, plus database overhead. Startup time is 30-60 seconds, not instant.
Default Security Configuration. The default password hashing iterations are low, which requires administrators to manually tune security to prevent brute-force attacks. Keycloak can struggle with a high number of realms (multi-tenant environments), experiencing performance degradation. While newer versions are improving, earlier and default configurations have limitations.
Conclusion
Keycloak delivers enterprise-grade identity and access management without the enterprise price tag. The setup complexity is real - the lack of official Docker Compose examples and the steep learning curve are genuine barriers - but the features you get in return make it worthwhile.
Is it overkill for a simple single-app project? Absolutely. If you just need basic username/password authentication, Keycloak is too much. But if you're building a multi-app ecosystem, need SSO across services, want social login without vendor lock-in, or require features like MFA and user federation, Keycloak is one of the best self-hosted options available.
The docker-compose file above solves the biggest setup hurdle. Once you're past the initial configuration, Keycloak is remarkably powerful and flexible.