Most images contain Exif (Exchangeable image file format) data which includes some crucial data such as the date and time of capturing an image, device, place, and so on.
While this can be useful in various scenarios, it also has privacy threats and through this guide, I'll show you how to remove Exif data from images using the Linux command line.
Method 1: Using ExifTool
So if you are looking for a way by which you can have various options to remove your Exif data that does not apply any image compression, then this should be your first preference.
So let's start with the installation of various distros:
For Debian derivatives:
sudo apt install libimage-exiftool-perlFor RHEL-based distros:
sudo dnf install perl-Image-ExifToolFor Arch-based distros:
sudo pacman -S perl-image-exiftoolIf you are on other platforms, such as Gentoo, you can build ExifTool from scratch here.
ExifTool can also be used to view metadata related to the image. To list all the details, you have to use the given command syntax:
exiftool <image.jpg>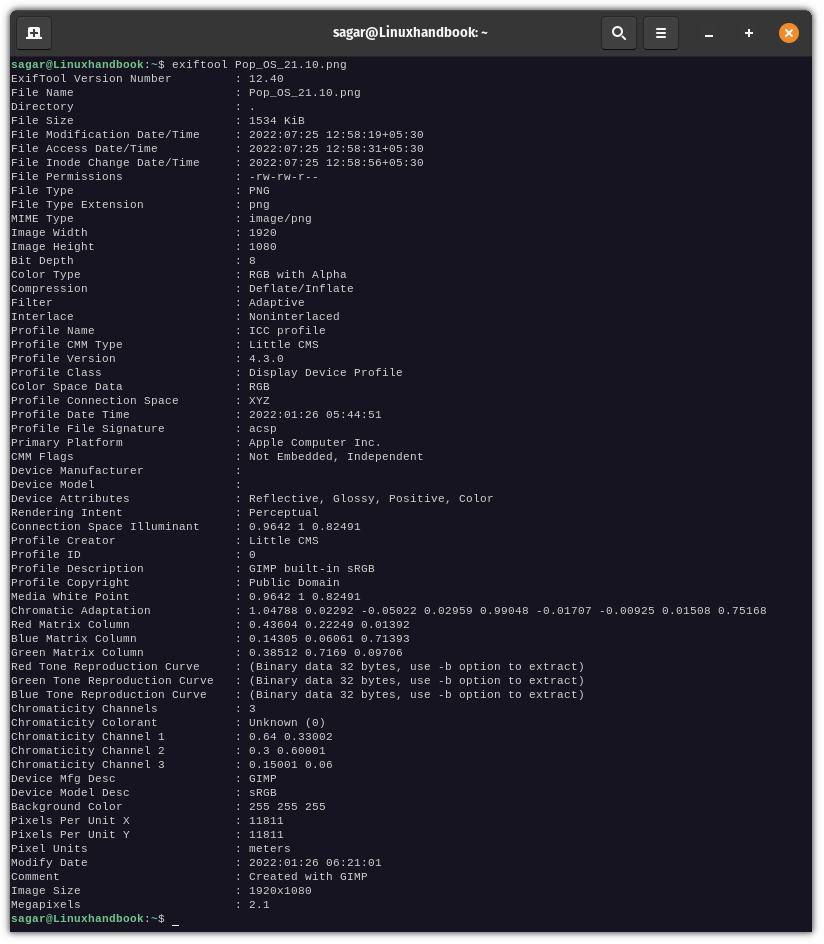
Removing Metadata from Image
There is a difference between metadata of image and exif data. Metadata includes details such as the creator of the file, the purpose of the file, and comments, if any.
Where exif data only includes details about the digital image such as size, location, software used to create/modification, etc.
Removing metadata from an image will also remove exif data.
To remove metadata, you have to use -the all option. It will create a copy of the image with no metadata, and the original file will be renamed with “_original” appended to the end of the file.
exiftool -all= <image.jpg>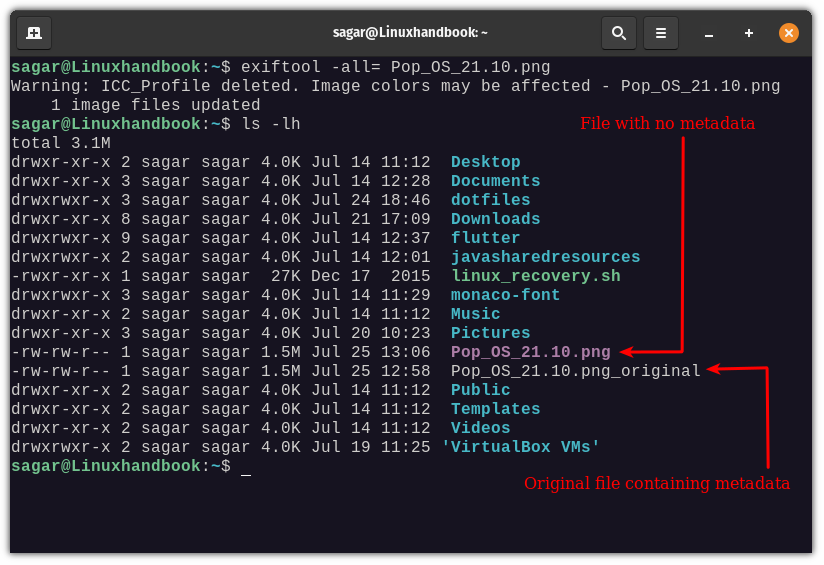
Let's use the exif command again to list the exif data of our new file.
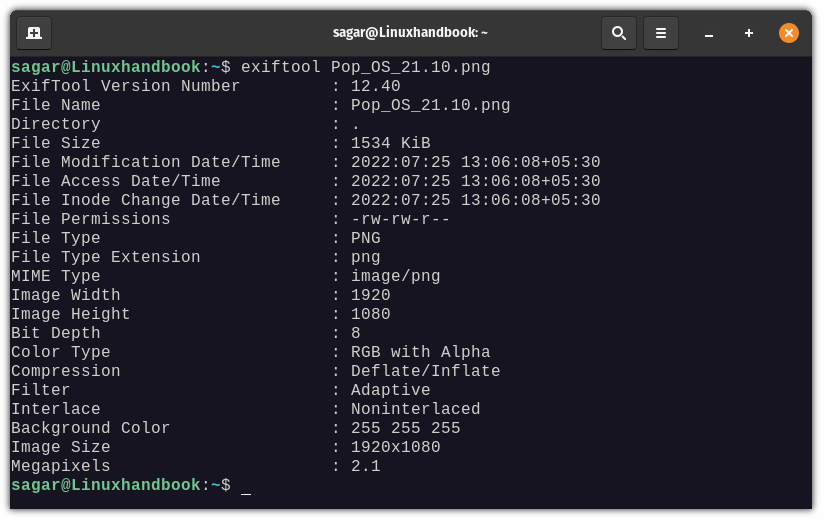
As you can see, I've managed to remove exif data from my image and there is no reduction in size as there's no compression involved.
What if you want to remove the metadata of an image without creating a new copy and want to modify the original image? Use -overwrite_original option.
exiftool -overwrite_original -all= <image.jpg>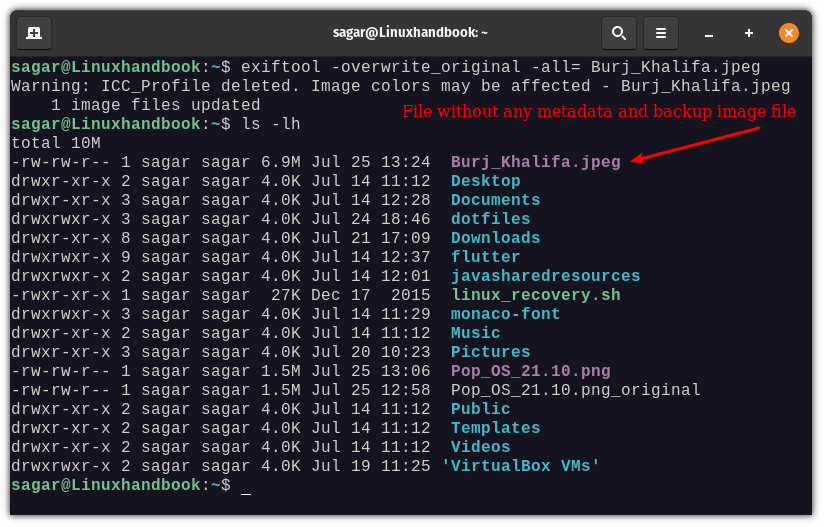
Removing Metadata from Entire Directory
This command will come in handy if you want to remove the metadata of an entire directory containing images. Let me show you how.
To remove metadata from an entire directory, you have to use -recurse option, which will instruct ExifTool to traverse subdirectories.
It makes a copy of the original file and removes metadata from the copied file and the original file will be renamed with "_original" appended at the end of it.
exiftool -recurse -all= <path of directory>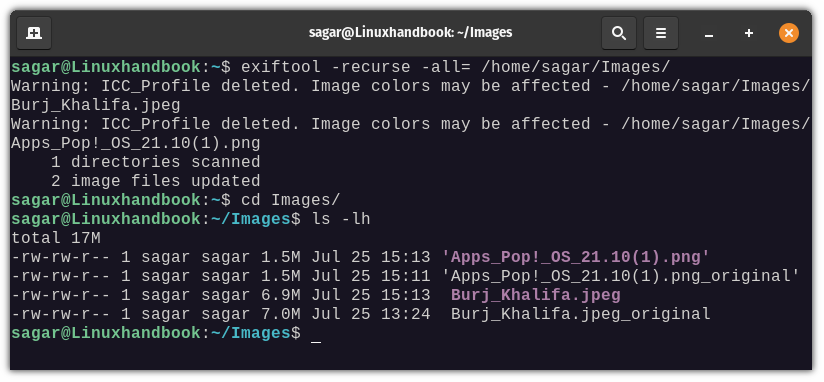
Removing Exif Data Only
So if you are looking for a way by which you can only remove exif data, you only have to follow a slight change in command and that's it.
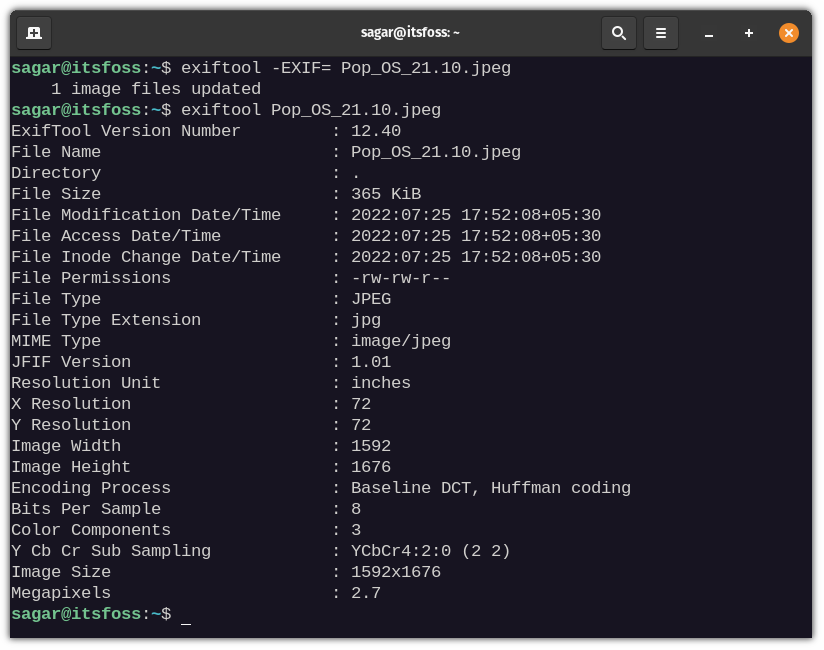
To remove exif data only, you have to use the -EXIF option as follows:
exiftool -EXIF= <image.jpg>Now, let me show you what you are left with when you only remove exif data:
Method 2: Using ImageMagick
Unlike the exif tool which was created to remove metadata and exif data, ImageMagick is not meant only to extract image data, so you won't get as many options as I have shown above.
Less option does not affect its functionality and does its job quite well and this is the perfect option for those who just want to remove exif data in the simplest manner possible.
So let's jump to the installation of ImageMagick.
For Debian-derivatives:
sudo apt-get install imagemagickFor RHEL-based distros:
sudo dnf install imagemagickFor Arch-based distros:
sudo pacman -S imagemagickOnce you are done with the installation, let's have a look at how you can list image details from ImageMagick.
To list exif data, you have to follow the given command syntax:
identify -format '%[EXIF:*]' <image.jpeg>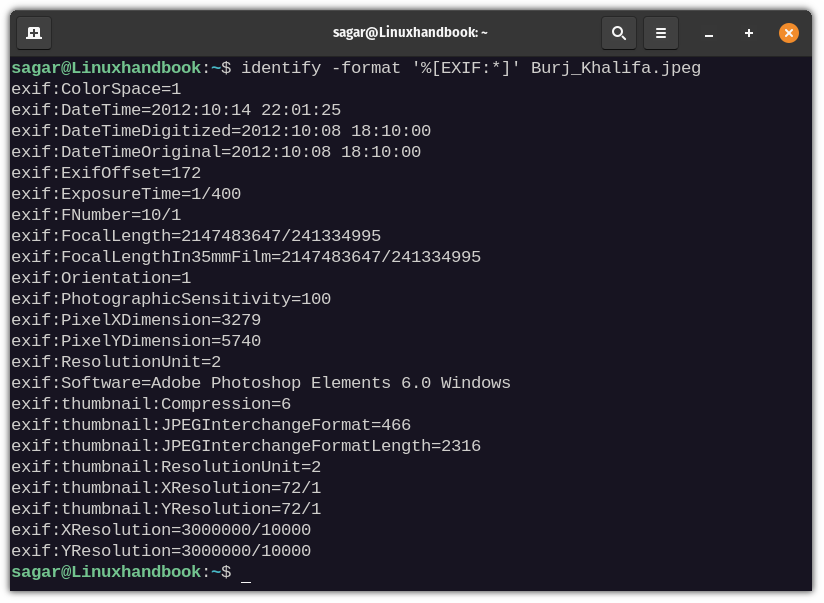
To remove exif data, you have to use -strip option with mogrify as shown below:
mogrify -strip <image.jpeg>Once you remove exif data, I'll run the previous command to cross-check whether I have successfully removed exif data or not.
identify -format '%[EXIF:*]' <image.jpeg>
It won't show any output, as there are no data related to exif.
Similarly, you can also use this command on an entire directory. Unlike the first method, you can't just assign the path to the directory, it must be your current working directory.
Then you have to apply the given command:
mogrify -strip *Final Words
Both methods work fine first is bundled with various options, while the second method is one of the promising features of ImageMagick.
But in both cases, they work fine and can be used without any issues.
