There are various cases when you may want to utilize the local repository such as on a temporary basis, the internet connection is not allowed and you want to install a specific package.
So in this guide, I will show you how the local ISO file can be used as a local repository to install packages offline in Red Hat Enterprise Linux based distros.
Install packages using Rocky Linux ISO
But before going for the installation, I would like to share some other scenarios where you can benefit from this method:
- It can be used to apply offline patches
- You can even apply minor release updates using the latest ISO
- It can be helpful if you prefer the offline environment
Now, let's start with the first step.
Step 1: Get Rocky Linux ISO
The Rocky Linux is free to download and the link can be found on the homepage of Rocky Linux
I would recommend you go with the DVD option as it includes more packages:

Step 2: Mount Rocky Linux ISO file
Once you have downloaded the ISO file, the next step is to mount the ISO file.
But to mount the ISO file, first, you have to create a mounting point.
So here, I will create a directory named disk inside the mount directory:
sudo mkdir -p /mnt/discOnce you create a directory, change your directory where the ISO resides. For me, it is the Downloads directory:
cd DownloadsNow, to mount the ISO, as a loop device using the loop flag:
sudo mount -o loop Rocky-9.1-x86_64-dvd.iso /mnt/discMake sure to change the ISO file name with yours.
To verify whether the ISO has been successfully mounted or not, you can use the lsblk command to list the mounted drives:
lsblk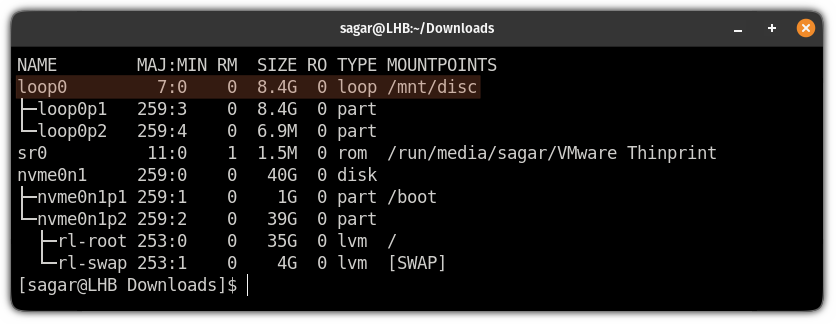
Step 3: Make changes in the repository file
To have a working local repository, first, you have to copy the contents of /mnt/disc/media.repo file.
Here, I will be computing the file contents to the file named rocky9.repo:
sudo cp /mnt/disc/media.repo /etc/yum.repos.d/rocky9.repoBut that won't allow you to make any changes as the ISO file that you mounted has read-only permission (remember the warning it gave you while mounting the ISO?).
Here, I will change the permission file permission to 644 so that you can make changes with sudo or root:
sudo chmod 644 /etc/yum.repos.d/rocky9.repoNow, open the rocky9.repo file. For the sake of this guide, I will be using the nano text editor:
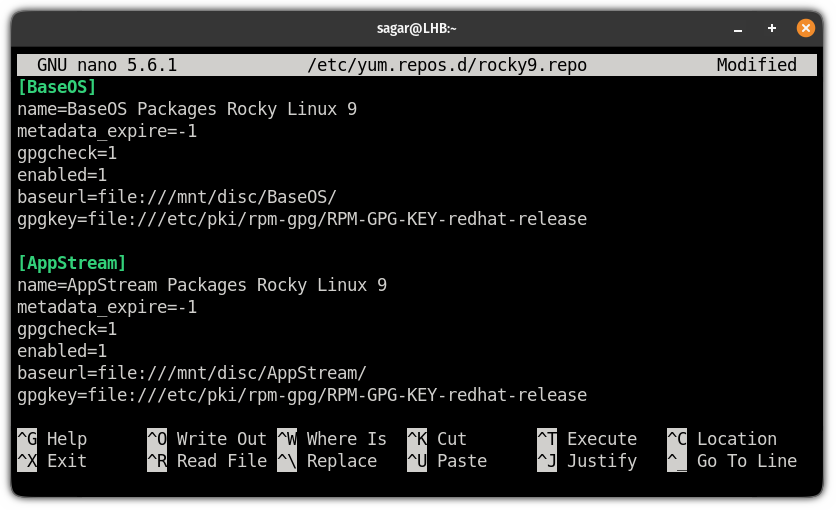
sudo nano /etc/yum.repos.d/rocky9.repoDelete the existing file contents and paste the following:
[BaseOS]
name=BaseOS Packages Rocky Linux 9
metadata_expire=-1
gpgcheck=1
enabled=1
baseurl=file:///mnt/disc/BaseOS/
gpgkey=file:///etc/pki/rpm-gpg/RPM-GPG-KEY-redhat-release

[AppStream]
name=AppStream Packages Rocky Linux 9
metadata_expire=-1
gpgcheck=1
enabled=1
baseurl=file:///mnt/disc/AppStream/
gpgkey=file:///etc/pki/rpm-gpg/RPM-GPG-KEY-redhat-release
And it should look like this:
Next, clear the yum cache using the following:
sudo yum clean all
And here's the moment of truth. Here, I will list enabled repositories and if everything is done correctly, it would show 2 local repositories:
sudo yum repolist enabled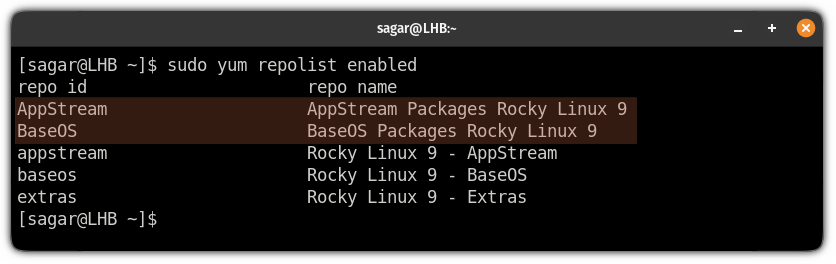
Step 4: Install packages from the local repository in Rocky Linux
Here, I will show you how you can install the package from the local repository that you've just enabled.
To list available packages in the both AppStream and BaseOS repository, you can use the following command:
For AppStream repository:
dnf --disablerepo="*" --enablerepo="AppStream" list available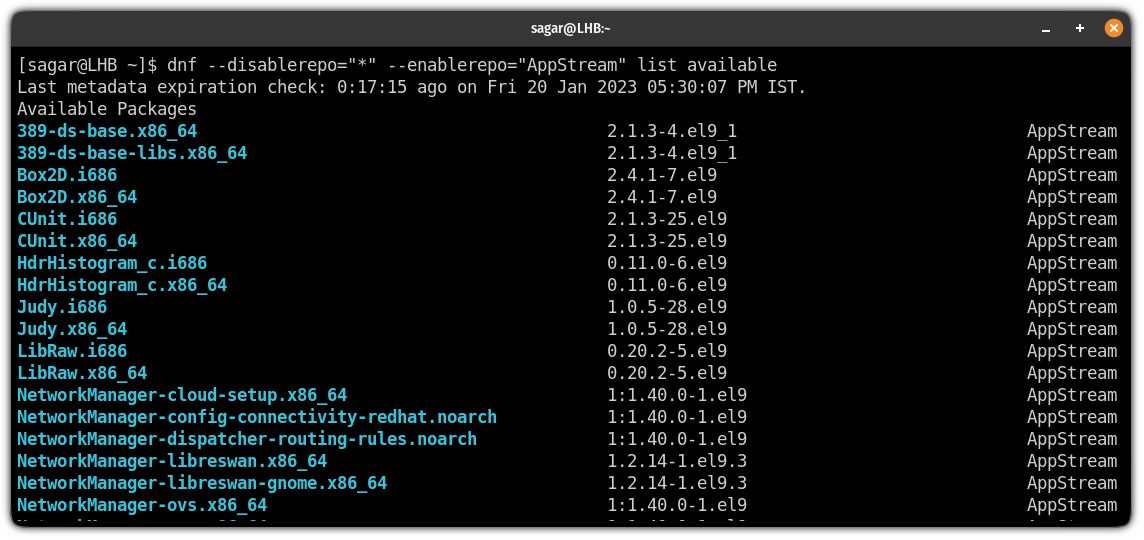
And for the BaseOS repository:
dnf --disablerepo="*" --enablerepo="BaseOS" list available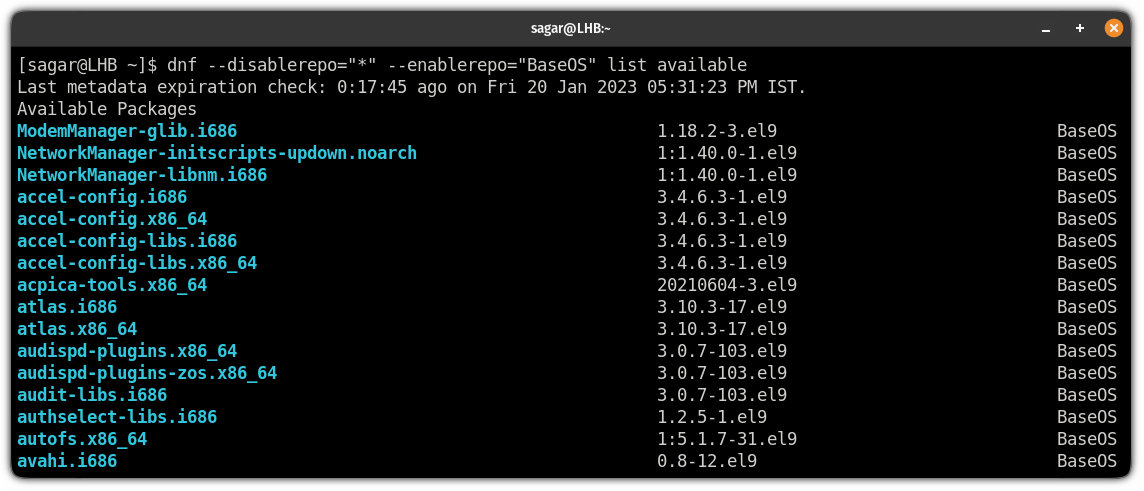
For example, here I will be using the both AppStream and BaseOS repositories to install GIMP:
sudo yum --disablerepo="*" --enablerepo="AppStream BaseOS" install gimp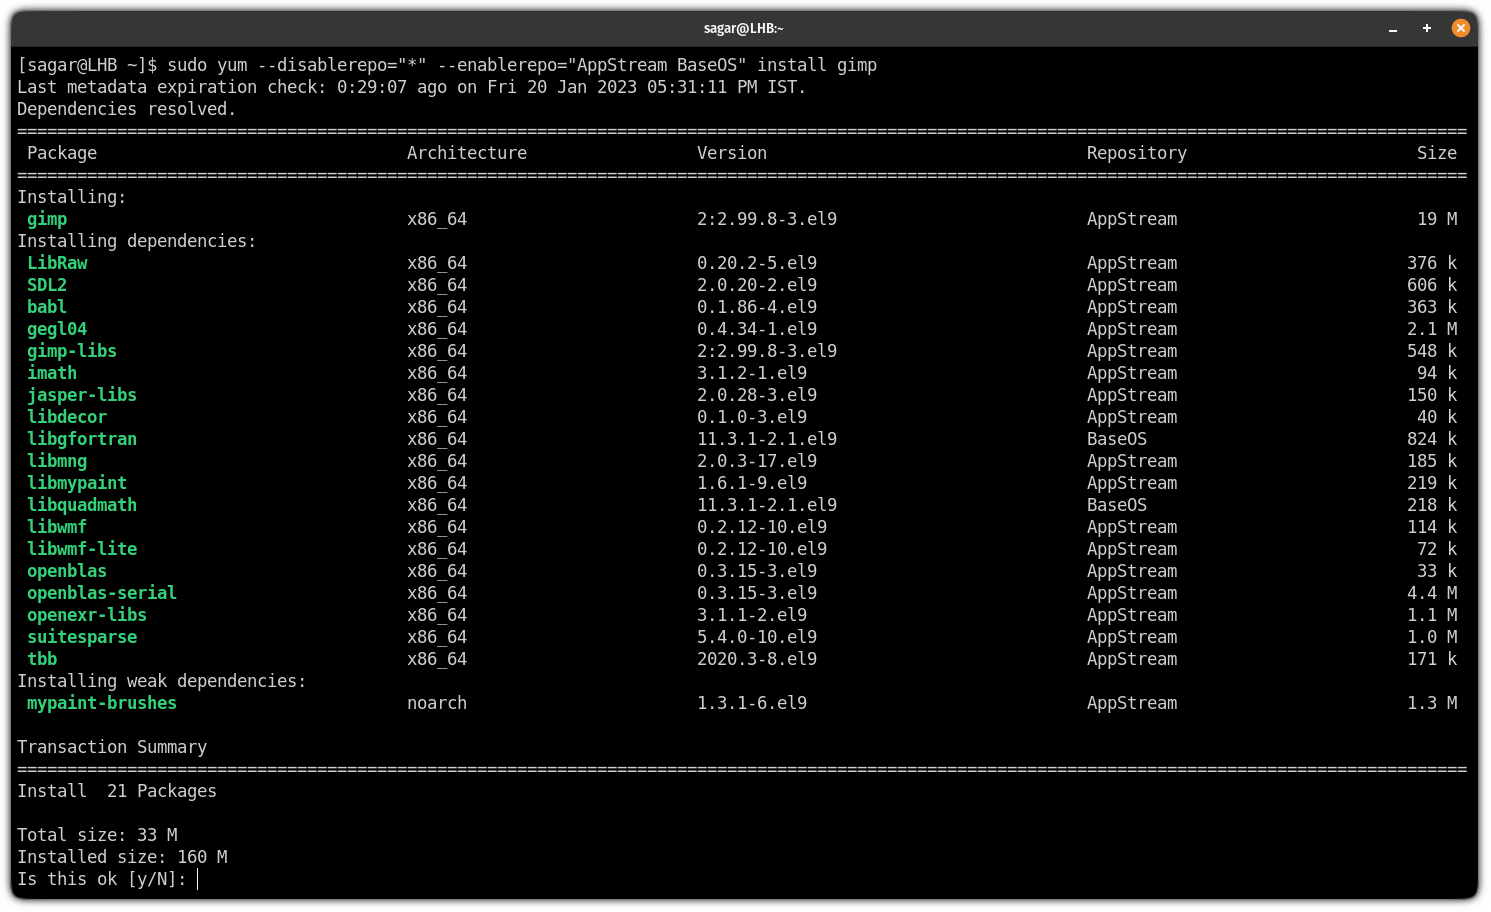
Don't worry about the --disablerepo="*" flag. It will ignore the repositories for the sake of single command execution.
As you can clearly see, it is only using the local repositories to install GIMP.
You can also use the command in the same way to update the system (minor release):
sudo yum --disablerepo="*" --enablerepo="AppStream BaseOS" updateWrapping Up
In this guide, I covered how you can use the Rocky Linux ISO image as a local repository and install packages.
I hope you will find this guide helpful in crucial times and if you want me to cover similar topics, let me know in the comments.