Matrix is an open source standard (protocol) for VoIP, instant messaging and video calls, i.e. real-time communication. It provides end-to-end encryption along with support for bridges to various other messaging alternatives like Slack, IRC, Telegram or any other XMPP client. It can work with low bandwidth connections as well.
In this tutorial, I'll show you how to install Matrix homeserver Synapse using Docker containers.
What is a Matrix homeserver?
Matrix in itself is just a specification and there are many implementations of Matrix protocol available publicly.
Homeservers are basically any of those implementations deployed on a server, that you can access through any Matrix client like Element.
The question that may arise is that why set up private homeservers if some are already available publicly?
Well, for starters, you can share your private homeserver among your friends, family or colleagues and use it as your day-to-day communication medium. Unless you engage in a conversation with some user from another homeserver, all the data will be safe and secure in your server.
This gives you the control over every aspect of it that public homeservers aren't able to provide.
Deplying Synapse Matrix homserver implementation using Docker containers
I'll be using Synapse, a popular Matrix homeserver implementation in this tutorial. Written in Python, Synapse is developed by Matrix's core team.
We at Linux Handbook prefer docker over native deployment, so the following sections will be covering Synapse deployment carried out using Docker.
Prerequisite
- A Linux system/server. We recommend using Linode for quickly deploying a Linux server in cloud.
- A functioning domain and access to its DNS records (unless you want to set it up on localhost)
- You should have both docker & docker-compose installed. You can follow our guide on installing Docker and Docker Compose on CentOS.
- I believe you have knowledge of essential Linux commands and you are not afraid of using the terminal for editing config files.
- Basic knowledge of Docker will help you but you may follow the tutorial without it as well.
Step 1: Set up reverse proxy
Before getting your hands dirty with Synapse, first, you have to set up your reverse proxy container and its companion Let's Encrypt container for TLS certificates (You do want https, trust me on that).
Configuring reverse proxy container
On a production environment, you don't use docker run ..., you use docker-compose. So, let's configure the jwilder/nginx-proxy as a reverse proxy.
Create a directory named reverse-proxy and switch to this newly created directory:
mkdir reverse-proxy && cd reverse-proxy
Now open your favorite text editor, create a file named docker-compose.yml, and add the following contents:
version: "3.3"

services:
    proxy:
        image: "jwilder/nginx-proxy"
        container_name: "proxy"
        volumes:
            - "certs:/etc/nginx/certs"
            - "vhost:/etc/nginx/vhost.d"
            - "html:/usr/share/nginx/html"
            - "/run/docker.sock:/tmp/docker.sock:ro"
        networks: ["server"]
        restart: "always"
        ports:
            - "80:80"
            - "443:443"
So here, first you define your service, named proxy. The key characteristics to keep in mind are:
- The volumes certs, vhost and html are going to be shared between
jwilder/nginx-proxyandjrcs/letsencrypt-nginx-proxy-companioncontainers. - The docker socket is mounted read only at
/tmp/docker.sock. - It uses a network other than the default bridge network.
- Ports 80 and 443 are bound, for http and https respectively.
Configure letsencrypt-nginx-proxy-companion
Add the following at the end of the same compose file
letsencrypt:
        image: "jrcs/letsencrypt-nginx-proxy-companion"
        container_name: "letsencrypt"
        volumes:
            - "certs:/etc/nginx/certs"
            - "vhost:/etc/nginx/vhost.d"
            - "html:/usr/share/nginx/html"
            - "/run/docker.sock:/var/run/docker.sock:ro"
        environment:
            NGINX_PROXY_CONTAINER: "proxy"
        networks: ["server"]
        restart: "always"
        depends_on: ["proxy"]
Here you have another service defined, named letsencrypt. Let's go through this one as well:
- All the volumes from the previous service are mounted at the same locations here as well.
- The docker socket is bound read only at
/var/run/docker.sock. - The environment variable
NGINX_PROXY_CONTAINERis set to the container name of the reverse proxy container, which in our case is "proxy". - It shares the same "server" network.
At the end of these two service descriptions, add the volumes' definitions and network definition, like below:
networks:
    server:
        external: true

volumes:
    certs:
    vhost:
    html:
Two important things to note here:
- You're going to use a separate compose file for Synapse. This way, you'll have a modular deployment, and you'll be able to easily bring down one service, without affecting others, by deploying the reverse proxy and companion using a different YAML file.
- The network is external. That's to flee out of any issues with other containers not sharing the same network because of how
docker-composenames its volumes and networks when left it be created automatically. So that takes us to creating the network. Use the commanddocker network create serverto create the network.
Now that all is done, save the file and exit the editor.
Now it's time to start your reverse proxy server.
docker-compose up -d
Step 2: Set up Synapse
Now it's time you finally start focusing on the good part. So deploying synapse is really a two-step process.
First, you need it to generate a config, next, you tidy the config up and deploy our homeserver.
Let's start with getting the compose file.
Generate config
Create a separate directory named "synapse" and switch to it.
mkdir synapse && cd synapse
Create a file named docker-compose.yml and open it, you know the drill, right?
Make sure that you use the correct values for sub.domain.com in the yml file here:
version: "3.3"

services:
    synapse:
        image: "matrixdotorg/synapse:latest"
        container_name: "synapse"
        volumes:
            - "./data:/data"
        environment:
            VIRTUAL_HOST: "sub.domain.com"
            VIRTUAL_PORT: 8008
            LETSENCRYPT_HOST: "sub.domain.com"
            SYNAPSE_SERVER_NAME: "sub.domain.com"
            SYNAPSE_REPORT_STATS: "yes"
        networks: ["server"]


networks:
    server:
        external: true
This is a standard compose file by the looks of it, but still couple standout options are explained below:
- You're using a bind mount instead of a volume, that's because the config file is going to be generated there and you're to edit it. You can surely use volumes, but then you'll have to edit the file located in
/var/lib/docker/volumes/<name>/_data. - The environment variables
VIRTUAL_HOST&LETSENCRYPT_HOSTare for the letsencrypt and reverse proxy containers, which will generate the necessary configuration changes along with the certificates, without you manually intervening. - Make sure
SYNAPSE_SERVER_NAMEpoints to the FQDN of your Synapse server (Along with the subdomain). - Set
VIRUAL_PORTto 8008. The synapse container exposes HTTP port 8008 for its clients to communicate with it. - Finally, make sure that this container uses the same network as the reverse proxy container, or else the containers won't be able to communicate, which in turn will break the whole process.
Confirm that you have the server's IP added to your DNS's A record and a CNAME record points to the exact subdomain.
Create a data directory and execute the following command
docker-compose run --rm synapse generate
This will generate the config file inside ./data, named "homeserver.yaml".
Configure synapse
There are lots of configurable options in the homeserver.yaml file, which are out of the scope for this tutorial. I suggest you go through the comments in that file and read here.
For now, just make sure of the following changes:
- The
server_namevariable is set to the subdomain of your choice, as set in the environment variableSYNAPSE_SERVER_NAME. - TLS is set to false. You are using a reverse proxy, so TLS is handled through your web server. Leave the port be.
- Make sure
enable_registrationis set to true, so that you can sign up and use your homeserver.
Save the file and exit.
Deploy Synapse Matrix homeserver
Now that everything is in place, you can start synapse using a command as simple as
docker-compose up -d
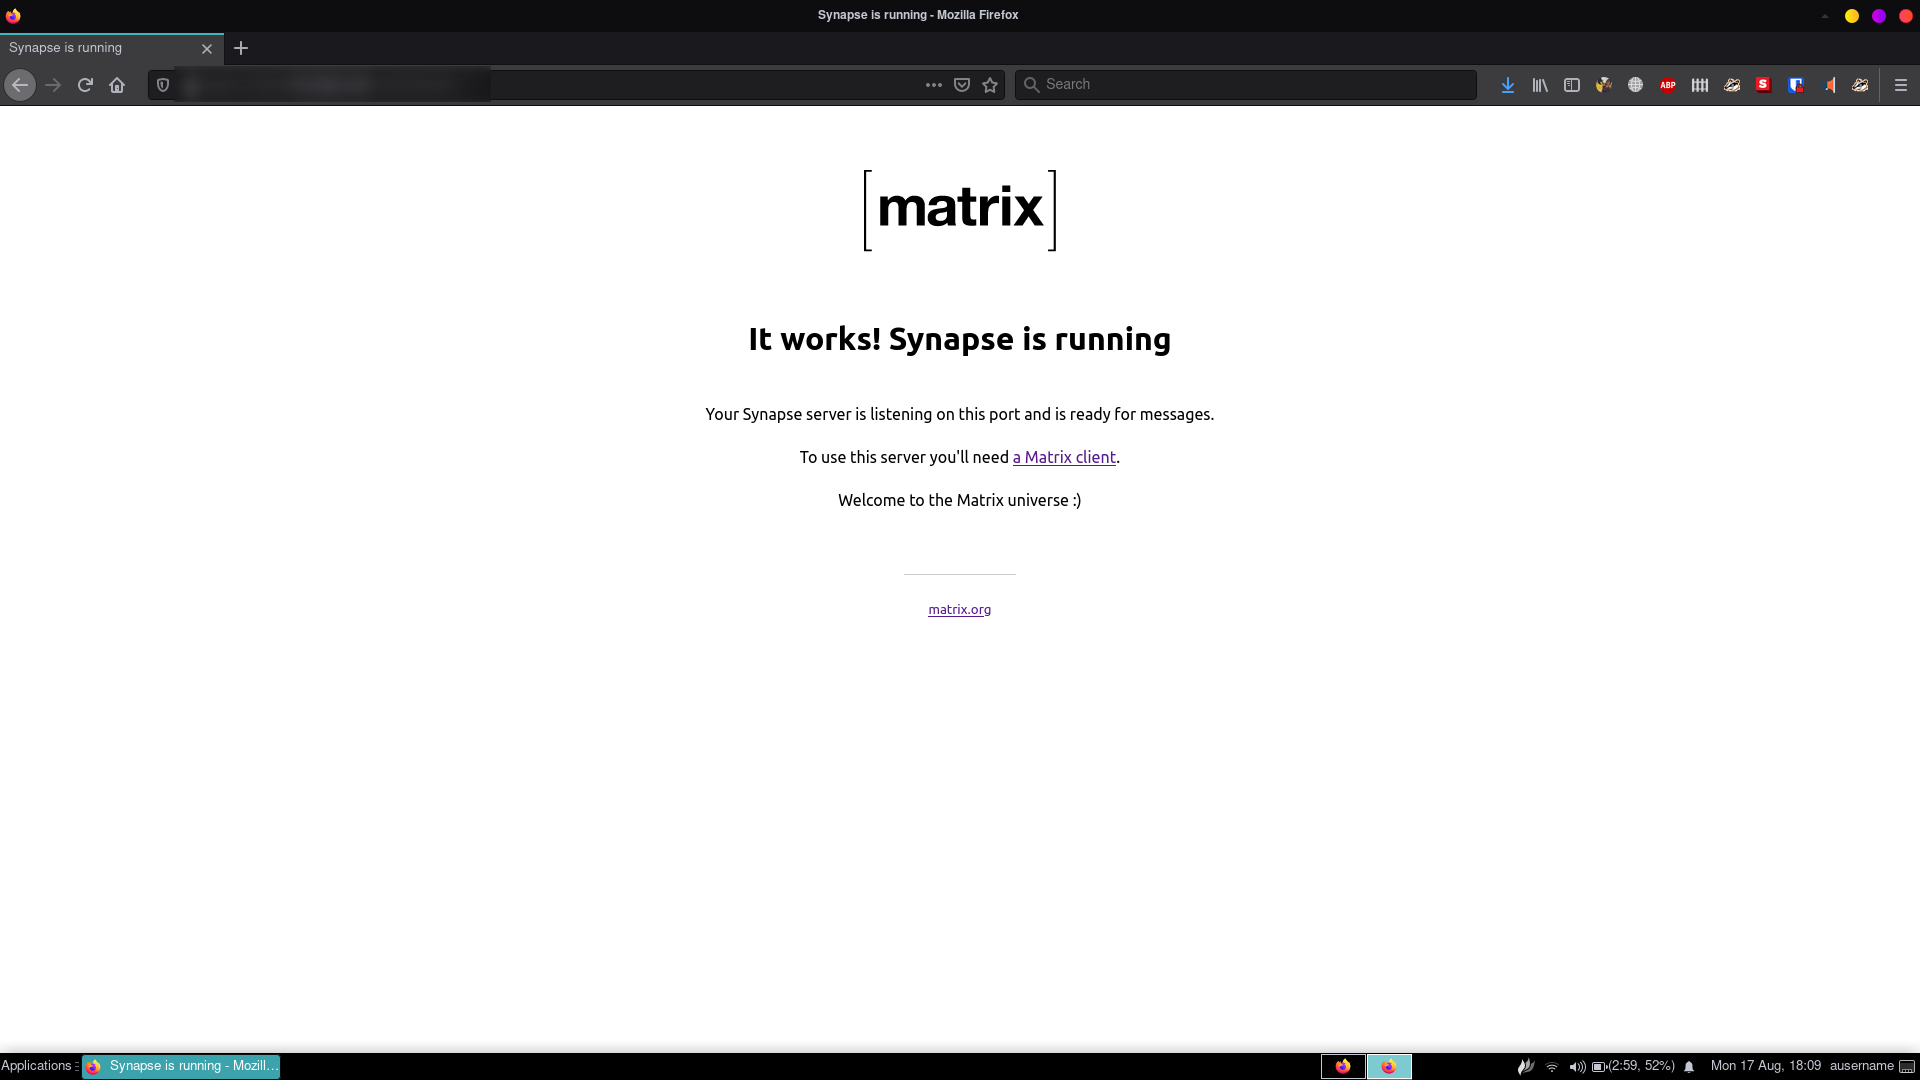
Now your homeserver is ready to be used. If you visit the subdomain in a web browser, you should see a message like this:
Using PostgreSQL for database [optional]
By default, synapse uses SQLite for its database. Now that's good for testing and casual use, but for a more important usecase, I recommend using PostgreSQL.
Add PostgreSQL to synapse compose file
Go to synapse directory if you're not in there already, and open docker-compose.yml. Add the following lines to this compose file.
postgresql:
        image: postgres:latest
        restart: always
        environment:
            POSTGRES_PASSWORD: somepassword
            POSTGRES_USER: synapse
            POSTGRES_DB: synapse
            POSTGRES_INITDB_ARGS: "--encoding='UTF8' --lc-collate='C' --lc-ctype='C'"
        volumes:
            - "postgresdata:/var/lib/postgresql/"
        networks: ["server"]
The POSTGRES_INITDB_ARGS variable is very necessary. It sets the collation, ctype and encoding used for the postgres database. These are absolute necessity for synapse to work. Add the volume to the volumes section:
volumes:
    postgresdata:
Configure Synapse
Now you have to let synapse know about the postgresql database. You do that by editing the old homeserver.yaml file. Open that file, and find out the following lines:
database:
    name: sqlite3
    args:
        database: /path/to/homeserver.db
Remove these as we don't need them anymore. Add the following instead:
database:
    name: psycopg2
    args:
        user: synapse
        password: somepassword
        host: postgresql
        database: synapse
        cp_min: 5
        cp_max: 10
The name of the database is psycopg2, which is a PostgreSQL adapter for python.
Look closely, you'll see the similarities between this, and the environment variables you have set up for the postgresql container.
As for the host, as you are using docker-compose and a custom network, synapse will be able to resolve the service name automatically. You don't have to worry about that.
Save the file and exit.
Deploy
Well, what's left to do really? Deploy it.
docker-compose up -d
Test the Synapse Matrix homeserver deployment
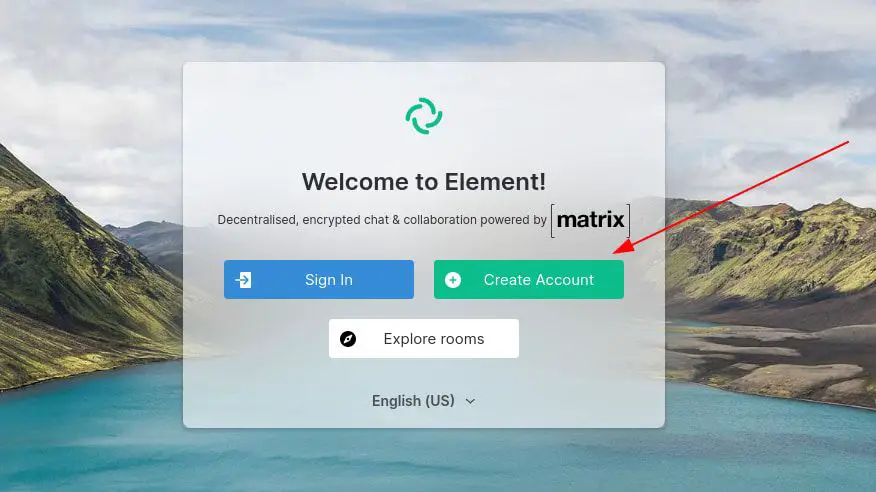
Your homeserver is ready. Let's test it. Matrix is just a protocol, Synapse is just an implementation. You need a Matrix client to be able to use it like a messaging tool.
Here is a list of various Matrix clients that are available. Element is probably one of the most popular Matrix client that you can use.
When you have the Matrix client installed, run it. Create an account here.
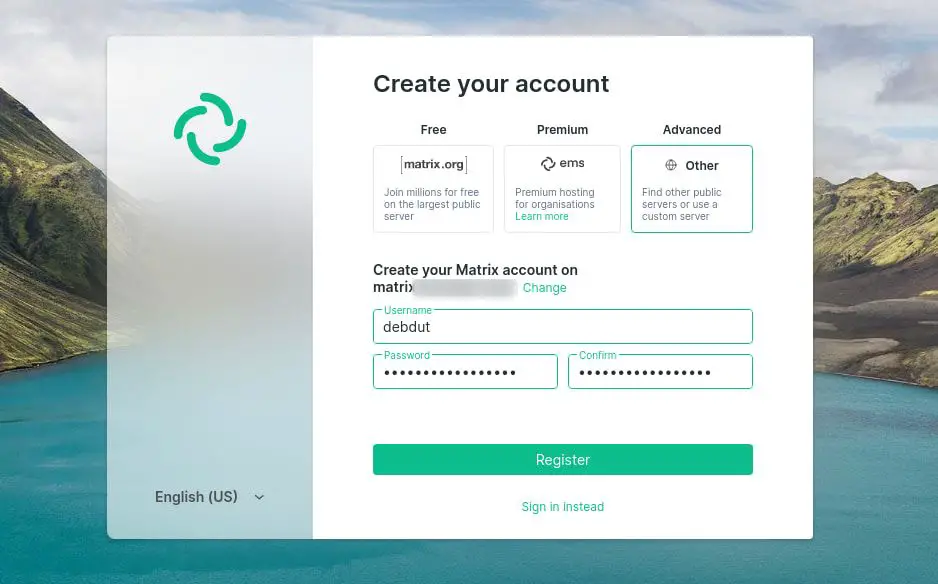
On the registration page, fill in all the details and on the homeserver, enter the subdomain you had used earlier. Click on register.
Now you have a perfectly working Synapse deployment that you can use with your family or friends without having to worry about where your data is stored or anything like that.
Setting up federation in Synapse with Docker [optional]
Federation is basically the ability to communicate with users on a different homeserver.
For example, if your userid is @coolguy:coolserver.me you'll be able to invite someone like @Greatme:awesome.us to a room in your homeserver.
Similarly, you can join rooms hosted on other homeservers as well.
If you already have synapse running, there's no need to stop the container(s). You only have to make changes to your NGINX proxy container. This consists of no more than three short and easy steps.
There are a couple of ways to get Federation working, but among those, the one that I found to be extremely easy to follow, and requires minimal changes to your existing setup, is called port delegation.
By default, each matrix server tries to reach another matrix server via port 8443. The following process basically tells the other servers to use a different port. Because https is already working in port 443, you're simply going to delegate the default matrix communication port to 443.
Step 1: Create a configuration file for our reverse proxy
Get into the Nginx reverse proxy directory. Create a file, named synapse-federation. Add the following text to this file:
location /.well-known/matrix/server {
    return 200 '{"m.server": "$VIRTUAL_HOST:443"}';
}
Change $VIRTUAL_HOST to its appropriate value, which is basically the domain at which your matrix instance is served (set according to synapse's docker-compose file).
Step 2: Edit docker-compose.yml
Open your docker-compose.yml file and add another entry to the volumes array:
- ./synapse-federation:/etc/nginx/vhost.d/$VIRTUAL_HOST
Again, change $VIRTUAL_HOST to its appropriate value.
Step 3: Restart the proxy server
Now you need to restart the proxy server.
docker-compose up -d proxyThis will recreate the reverse proxy container. You don't have to be worried about any previous configuration being lost, unless you changed anything manually post deployment. Configuration is dynamic, thus everything will be fine.
Test the changes
You can test the changes in two ways.
Try joining a room like #servers:matrix.org. Execute the following command, if you have jq installed:
curl https://federationtester.matrix.org/api/report?server_name=$VIRTUAL_HOST --silent | jq -r '.FederationOK'Or use this more hack-y one:
curl https://federationtester.matrix.org/api/report?server_name=$VIRTUAL_HOST --silent | awk '/FederationOK/ {print $2}'This should output 'true'. And obviously change $VIRTUAL_HOST to the domain serving your synapse instance.
Was it helpful?
I hope this was helpful to you just as much as the experience was to me. If you want more articles like this, feel free to comment down below. If you face any issue, do leave a comment and I'll try to help you out.