Complete Guide to Install Raspberry Pi Headless and Wireless
A step by step guide showcasing how to install Raspberry Pi without a keyboard and monitor, i.e., headless setup of Raspberry Pi using Linux.
Installing Raspbian on Raspberry Pi from a Linux system is not a difficult task. And the Raspberry Pi foundation provides the necessary pieces of information to do that unless you need to install your Raspberry Pi headless (aka, without an attached monitor and keyboard) and wireless (aka, through Wi-Fi). And this happens to be just my case.
I am going to show you how I performed headless setup of Raspberry Pi in this tutorial. I have also created a video of the steps to help you see things in action.
Headless setting up Raspberry Pi
I presume that since you are going for headless installation, you are a bit familiar with Linux command line because you are going to use it extensively here. I have used Debian Linux in this tutorial.
Step 1: Importing the Raspberry Pi Foundation download Signing key into your key ring
Since I don’t like installing software without checking their authenticity, let’s first add into your GPG keyring the necessary key to validate the Raspbian image.
As of today, the Raspberry Pi Foundation downloads Signing key fingerprint is 54C3DD610D9D1B4AF82A37758738CD6B956F460C. Something I strongly encourage you to cross-check using other sources. Since the key expires the 2019-04-10 if you read this article after that this date it will be different.
gpg --recv-key 54C3DD610D9D1B4AF82A37758738CD6B956F460CStep 2: Downloading the Raspberry OS image and its signature
The latest version of Raspberry OS (earlier known as Raspbian) is always available at this address.
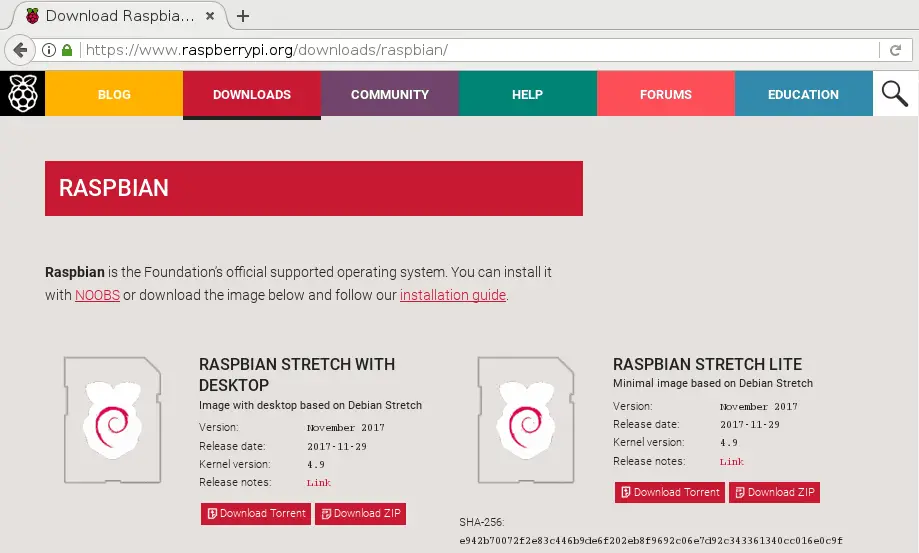
But this is only a redirection. You need the real address so you can download both the image and the corresponding detached signature file.
The best way of doing that is by using some advanced curl black magic:
URL=https://downloads.raspberrypi.org/raspbian_lite_latest
EFFECTIVE_URL=$(curl -w "%{url_effective}\n" -I -L -s -S $URL -o /dev/null)
echo $EFFECTIVE_URL
I must admit I always have some hard time remembering that command, so for interactive usage, I often fall back to a simple wget command with a limited redirection count:
URL=https://downloads.raspberrypi.org/raspbian_lite_latest
EFFECTIVE_URL=$(wget --max-redirect=0 $URL 2>&1 | sed -En 's/Location: ([^ ]*).*$/\1/p')
echo $EFFECTIVE_URL
(Actually, it should be --max-redirect=1 in that particular case, nevertheless only going through the first level of redirection is sufficient for our needs)
At this point, you have the valid URL required to download both the image and its detached signature:
wget "$EFFECTIVE_URL"{,.sig}If you have an unreliable Internet connection like mine, you may consider explicitly adding a much more aggressive timeout than the default 900 seconds like I did while recording the video)
Step 3: Checking the signature
After a moment, the download is completed and you should have those two files in the current directory:
ls *raspbian*
2017-11-29-raspbian-stretch-lite.zip  2017-11-29-raspbian-stretch-lite.zip.sig
You may now use GPG to check both if the signature is corresponding to the file and if the signature was issued by an authority you can trust:
gpg --verify 2017-11-29-raspbian-stretch-lite.zip{.sig,}
gpg: Signature made Thu 30 Nov 2017 02:48:51 PM CET
gpg:                using RSA key 8738CD6B956F460C
gpg: Good signature from "Raspberry Pi Downloads Signing Key" [full]
At this stage, anything else than Good signature from “Raspberry Pi Downloads Signing Key” should warn you that something odd is happening.
As an example to satisfy our curiosity, let’s fake the file to see what exactly would GPG report in that case:
# Add just one byte to the file
(cat 2017-11-29-raspbian-stretch-lite.zip; echo) > 2017-11-29-raspbian-stretch-lite.zip.fake
gpg --verify 2017-11-29-raspbian-stretch-lite.zip{.sig,.fake}
gpg: Signature made Thu 30 Nov 2017 02:48:51 PM CET
gpg:                using RSA key 8738CD6B956F460C
gpg: BAD signature from "Raspberry Pi Downloads Signing Key" [full]
Why didn’t I use the sha256 file fingerprint instead?
You may have noticed the Raspbian download page displays the sha256 checksum of the file. You may use that to check the file integrity against innocent download errors. But, in that context, it can’t be used to check for the file authenticity. So it will not protect you against malicious behavior. For example, if an attacker has subverted the server storing the Raspbian images, there are chances it could have gained control of the web server to display the sha256 sum of his choice. On the other hand, the GPG signature will check both for the file integrity and for its authenticity.
Step 4: Copying the image
Once you are pretty sure the Raspbian image is the genuine one it is time to copy it onto your memory card.
But, first, you need to know the device name used by the kernel to identify the memory card. So, ensure your memory card is not in the card reader. Then, launch the dmesg utility in watch mode:
sudo dmesg -wAnd now, put the card into the card reader. At this point, dmesg displays some information about the card, including its device name:
mmc0: new SDHC card at address e624
mmcblk0: mmc0:e624 SC16G 14.8 GiB
mmcblk0: p1
Here, you can see my memory card is accessible through the name /dev/mmcblk0. And it currently contains just one partition (p1) you can access as /dev/mmcblk0p1.
If your version of dmesg does not support the -w flag, do the things the other way around: put the card into the card reader first, and use dmesg to see the message afterward.
Some systems might “automount” your card, so it’s safer to explicitly check that before going further:
sudo umount /dev/mmcblk0*Finally, it’s time to copy the file per se:
unzip -p 2017-11-29-raspbian-stretch-lite.zip |
  sudo dd of=/dev/mmcblk0 conv=fsync
It may be pretty long to copy the file, so, don’t panic if your terminal seems to hang for long minutes.
Once the copy has finished, it is safer to ask the kernel to reload the partition table of the device, since it has changed in the process. That will avoid some hard to diagnose issues later where you will be unable to mount the memory card partitions onto your system:
sudo partprobe /dev/mmcblk0Step 5: Enabling ssh at startup
To enable SSH at startup you just need to create a sentinel file onto the card boot partition. The content of the file is meaningless. It just has to be present.
sudo mount /dev/mmcblk0p1 /mnt -o umask=000
touch /mnt/ssh
Step 6: Enabling Wi-Fi at startup
wpa_supplicant is the software used by your computer to gain access to your Wi-Fi access point. It is pre-installed on Raspbian, but it needs a little bit of configuration to work.
The most basic wpa_supplicant.conf file only contains the country code of your location to ensure compliance with the local regulations:
cat > /mnt/wpa_supplicant.conf << EOT
country=FR
EOT
Depending on if you want to allow non-root software (like wpa_cli) to alter the configuration, you may add the ctrl_interface=… option, and eventually the update=1 option to allow non-root clients to overwrite wpa_supplicant.conf to make their changes permanent. Check the accompanying video for an example of the former, and you may easily find on the web an example of the later.
Finally, for a reference of all possible configuration settings, check here:
https://w1.fi/cgit/hostap/plain/wpa_supplicant/wpa_supplicant.conf
In all cases, you need to add the necessary credentials, so wpa_supplicant can connect to the access point. I don’t like storing a password as plain text so I will use wpa_passphrase to do that:
SSID=my_wifi # This is your Wi-Fi AP SSID (the "name" of your Wi-Fi)
(
  # Disable echoing
  stty_orig=$(stty -g);
  trap 'stty $stty_orig' EXIT;
  stty -echo;
  # Read password from the terminal
  read -rp 'Enter your password: ';
  echo $REPLY
) | wpa_passphrase $SSID | sed '/^[[:space:]]*#/d' >> /mnt/wpa_supplicant.conf
I let you check if all is in order:
cat /mnt/wpa_supplicant.confAnd if this is OK, just umount the card and remove it from the card reader:
sudo umount /mntStep 7: Booting the board
You are almost ready to boot the board.
But to access it through SSH, you will need its IP address. There are different solutions to obtain that piece of information. You could use a static IP address on the board.
Or you could check in the DHCP server’s log to identify the lease associated with the board once it had gained it.
Or you could scan the entire network with nmap.
Here I will use tcpdump since this is less intrusive and somewhat educative.
So, before booting the board, launch tcpdump on a network attached computer:
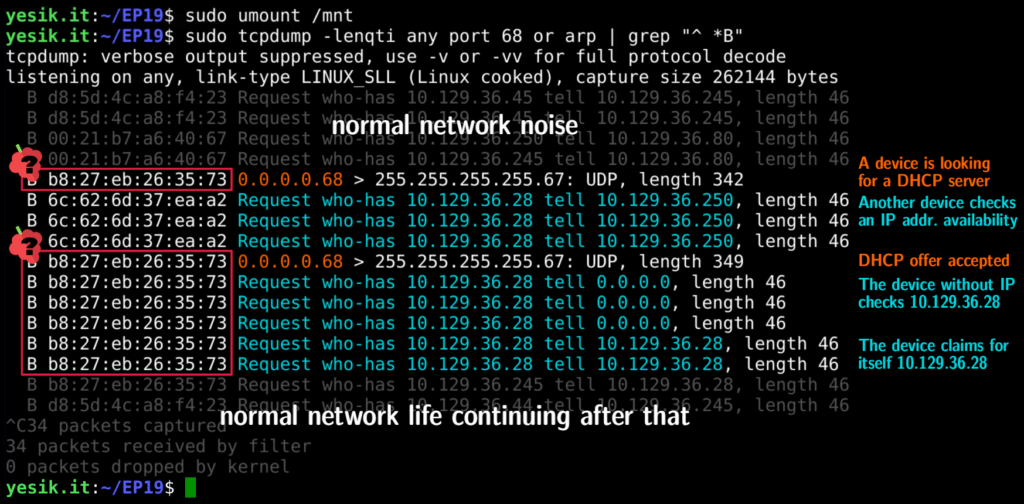
sudo tcpdump -lenqti any port 68 or arp | grep "^ B"Here I ask tcpdump to watch for DHCP (port 68) and ARP related traffic. I took the “lazy” approach of listening on any interfaces. This has some drawbacks like not being able to filter for broadcast packets directly from tcpdump–hence the need for the extra grep process. But this shouldn’t be a serious issue here unless you have a very high ARP and DHCP traffic directly targeting your computer.
With the packet capture tool ready, you may now boot the board. After a few seconds tcpdump would capture some traffic coming from the board. First to locate a DHCP server, and later to check if the DHCP provided IP address is available, and finally to advertise itself as the new owner of that IP address.
I strongly encourage you to watch the corresponding part of the video to see the live stream of events.
Once you’ve identified the IP address of the board, you can now connect to it through SSH as usual:
ssh pi@IP_OF_THE_BOARDAt this point, the board is still running with the default stock password, so changing it should be one of your very first tasks:
passwdAnd you’ve done: your board is completely set up, accessible through SSH via your local Wi-Fi network, and ready for all you might want to do with it. But that is your part of the job! So, don’t hesitate to let us know what you’ve done with your Raspberry Pi, and the eventual difficulties you might had while setting it up. And stay tuned for more!

Engineer by Passion, Teacher by Vocation. My goal is to share my enthusiasm for what I teach and prepare my students to develop their skills by themselves.