Check Linux Server Vulnerabilities with OpenVAS
OpenVAS is a free and open source tool to check Linux systems for known vulnerabilities. Learn how to get started with OpenVAS.
Everyday, new vulnerabilities are “born” in the digital world. System admins are often busy in managing the servers and they overlook obvious security issues.
Scanning a Linux server for security issues is not an easy task. This is why there are plenty of tools available to aid the sysadmins.
OpenVAS is one such open source tool that allows to check your Linux server against known vulnerabilities. You can define your own rules or use the ones provided by the community.
For years, OpenVAS has effectively leveraged its capabilities to system administrators as well as security professionals. Let’s see more about it.
What is OpenVAS?
OpenVAS stands for Open Vulnerability Assessment Scanner. Basically, OpenVAS provides the user with a friendly and simple interface so that the user does not have to modify the software significantly.
In addition, it provides a database of built-in tests, which are updated daily. As you’ll see later in this tutorial, when the user enters the device he/she wants to scan, the software will check the versions of any software that runs on the system and if any vulnerabilities are recorded in the OpenVAS database, it will return to the user the possible vulnerabilities of software in the system.
Take for example: VSFTPD software with version v2.3.4. It is known that this service is vulnerable and allows the attacker to use commands to run the infected system. If you didn’t know that by yourself, a quick OpenVAS scan would have notified you of that.
How to install OpenVAS?
OpenVAS should be available in all major Linux distributions. Just use your distribution’s package manager to install it.
To install OpenVAS on Ubuntu, you’ll have to enable the universe repository.
sudo add-apt-repository universe
sudo apt update
sudo apt install openvas
Installation can take quite some time even if the quality and speed of our connection is reliable. Once the installation is complete, the last line of the setup will be the code generated for the system administrator, so it would be a good idea to keep this password somewhere safe.
How to use OpenVAS?
Let’s see how to setup OpenVAS and get it running.
OpenVAS User Management
To create a new user or change a password from either the system administrator or another user, all we have to do is:
openvasmd –create-user=<user>
openvasmd –user=<user> --new-password=<password>
Launching and Stopping OpenVAS
To start OpenVAS Vulnerability Scanner, all we have to do is to issue the following command:
sudo openvas-startTo stop OpenVAS, just change from start to stop:
sudo openvas-stopAfter starting OpenVAS, you will find its web interface at https://localhost:9392
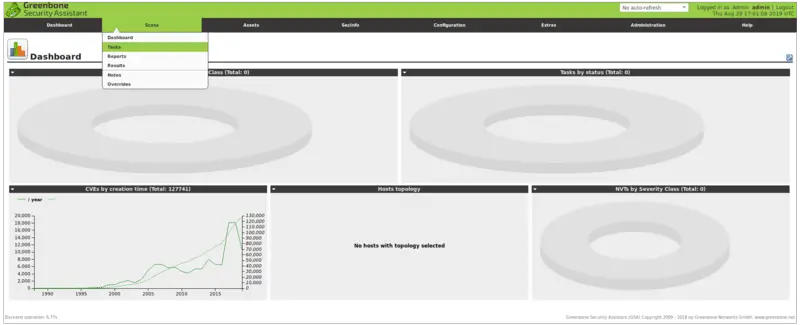
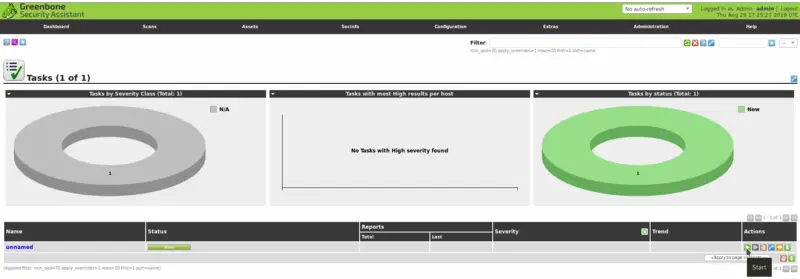
Once accepted the self-signed certificate and connected, you will have the main dashboard in front of you. The dashboard displays all the details of a scan you perform. You can manage your scans as well as perform a new scan from the dashboard.
In the Scans section, you’ll notice these sub-categories: Tasks, Report, Results.
- Tasks: At Tasks, you can create and run a new scan.
- Report: In Reports, you can see information about a report that you have delivered or a report that you have prepared yourself.
- Results: Finally, in Results, you can see the results of your scan and how critical they are. This will help you choose the appropriate security measures for your server.
- Time Refresh: In the upper right corner, you can observe the option: no auto-refresh. This means that in the run up to the results, if you want to see what openvas has found so far, you need to refresh the page yourself. This can, of course, be changed and modified by 30 seconds, 1 minute, 2 minutes and 5 minutes respectively.
Scanning for vulnerabilities
To scan our system or server for vulnerabilities you have to create a Task. Go to Scans -> Task -> New Task.
As you can see, you have several options here:
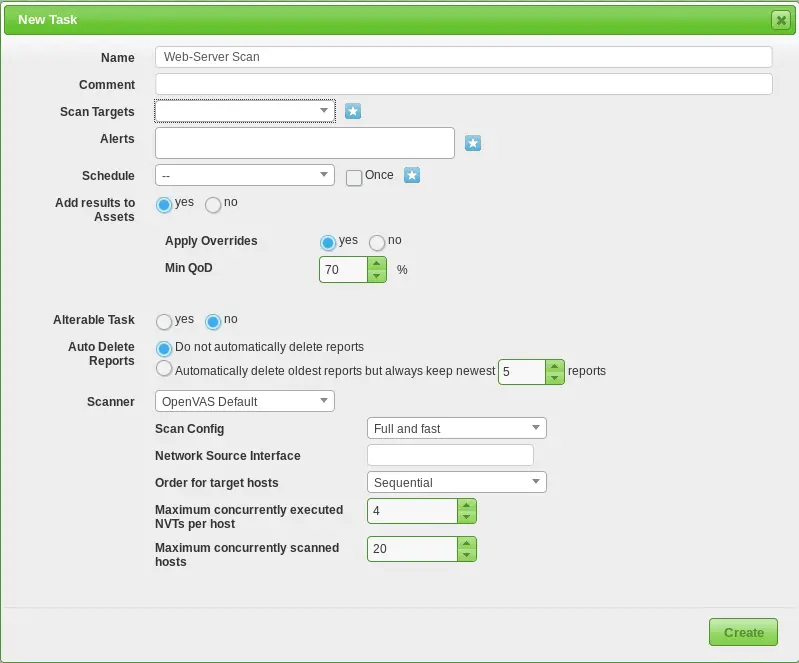
In Name, you have to specify the name of your scan. This may be the name of the server we want to scan or we can set the current date. It’s up to you.
You can specify the scanner type. You can scan for CVE’s, cve’s are stored in a database. In addition, you can set the Scan Config to determine how fast and detailed your scan can be.
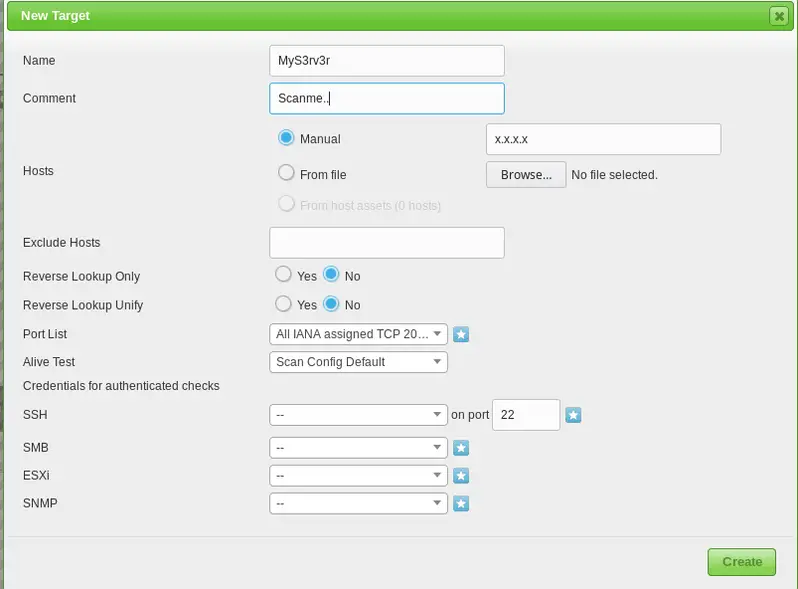
In Scan Targets, you have to specify the IP of Linux server you want to scan. At this point it would be worth noting that the IP you scan does not need to be on the same network. You can also scan a public facing server.
It’s not restricted to one IP only. You can also use a number of IPs and ports or a service such as SSH.
And finally you are ready to start the scan. Start the scan and wait for the results. The scan may take a few minutes to complete. If you want a secure Linux server, I think you can wait a few minutes.
Once the scan is complete, the result will be available in the Results tab. The good thing here is that all scan results are saved and stored in the Reports tab. This means you can consult and analyze the results of past scans.
Personally, among all the vulnerability scanners out there, I prefer OpenVAS. It provides detailed scans through a fairly user-friendly interface. It’s free and open source. I also suggest using Fail2Ban to secure your Linux server against bruteforce attacks.
That was a short trip to scanning and managing vulnerabilities with OpenVAS. I would love to hear your opinion about OpenVAS. Please use the comment section and leave your feedback.

LHB Community is made of readers like you who like to contribute to the portal by writing helpful Linux tutorials.