lsblk Command Examples
The lsblk command is helpful for getting information on drives and block devices on your Linux system.


If you notice, most Linux commands explain their purpose by their names. Same goes for the lsblk which stands for list block devices.
"List block devices" simply means it will list storage devices.
While the lsblk is one of the most basic Linux commands, it plays crucial role when troubleshooting a storage drive.
So in this tutorial, I will walk you through how you can use the lsblk command with practical examples.
How to use the lsblk command in Linux
To use the lsblk command to its full potential, you are required to know its syntax. This is the reason why I'll start this tutorial by sharing the syntax first:
lsblk [options] [device(s)]Here,
[options]: it is used to fine-tune the default behavior of the lsblk command. For example, you use the-aoption to list all the block devices.[devices(s)]: here's where you list more block devices to get specific information about it.
Now, let's take a look at some common options used with the lsblk command:
| Option | Description |
|---|---|
-a |
List all block devices, including empty devices and cdroms. |
-f |
Display filesystem information for each device. |
-m |
Print permissions for each device. |
-M |
Print kernel device-mapper mappings. |
-o |
Specify fields to display in the output. |
-t |
Print topology information for each device. |
-x |
Sort output by specified fields. |
Practical examples of the lsblk command
In this section, I will walk you through some practical examples of the lsblk command so you can learn more about the command and get a better idea of how to use it.
1. List all the block devices
To list all the block devices, use the -a flag with the lsblk command as shown here:
lsblk -a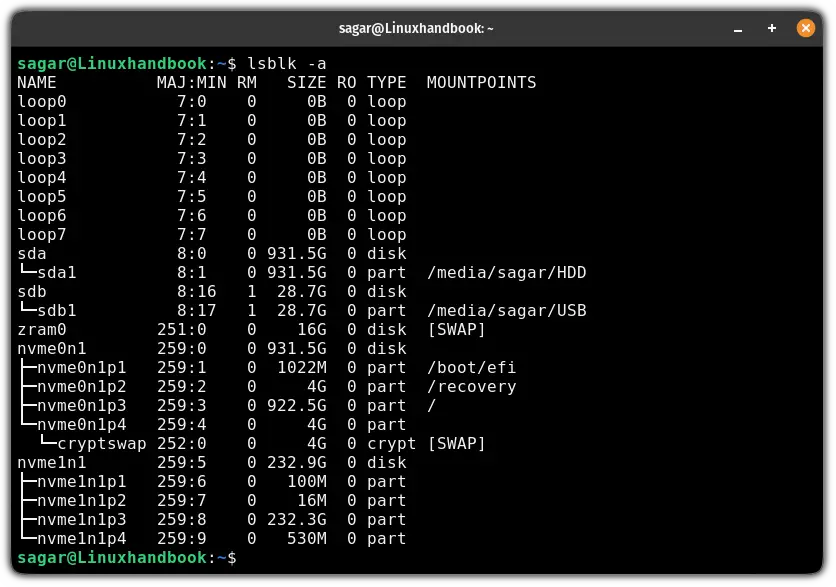
Here,
NAME: it shows the name of the block device.MAJ:MIN: it shows the major and minor device numbers used by the kernel to identify the device.RM: it tells you if the listed device is removable or not. 1 means removable and 0 means non-removable.SIZE: displays the size of the storage block device.RO: tells you that if the device is read-only or not. 1 indicates the device is read-only whereas 0 means the device can read and write.TYPE: it indicates the type of device drive. For reference,diskmeans the entire disk,partis for partition of the disk,romfor CD-ROM, andlvmfor the logical volume.MOUNTPOINTS: shows the mount point where the device is mounted.
2. Display filesystem information
This is my favorite one. When you use the -f flag with the lsblk command, it prints detailed information about each device block:
lsblk -f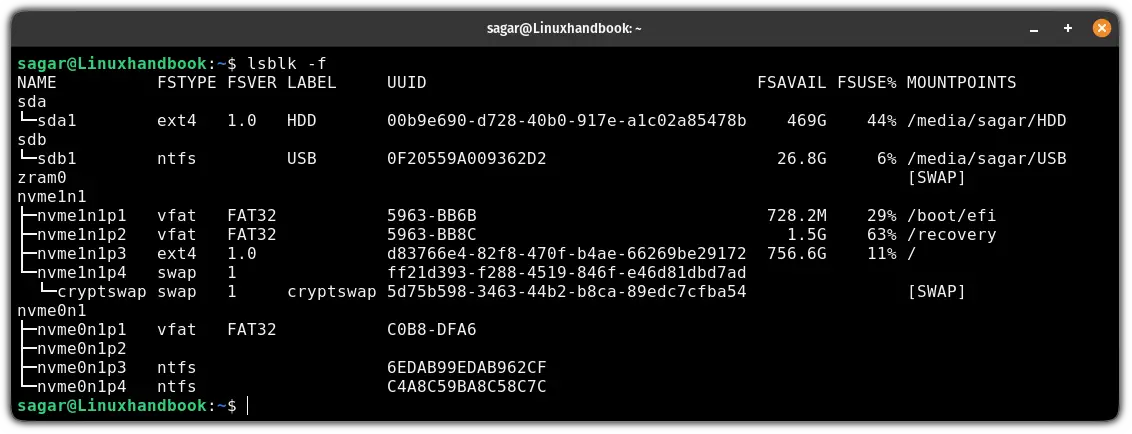
3. Get information about a specific disk drive
To get information about a specific disk drive, all you have to do is append the path to the disk drive as shown here:
lsblk /path/to/driveFor example, if I want to get details of the sda drive, then I'll be using the following:
lsblk /dev/sda
4. Print specific details only
There are times when you only want to print specific details while using the lsblk command and for that purpose, you use the -o flag and specify what details to print:
lsblk -o <data_filed(s)>For example, if I want to print only NAME, SIZE, TRAN, and REV so I'll be using the following:
lsblk -o NAME,SIZE,TRAN,REV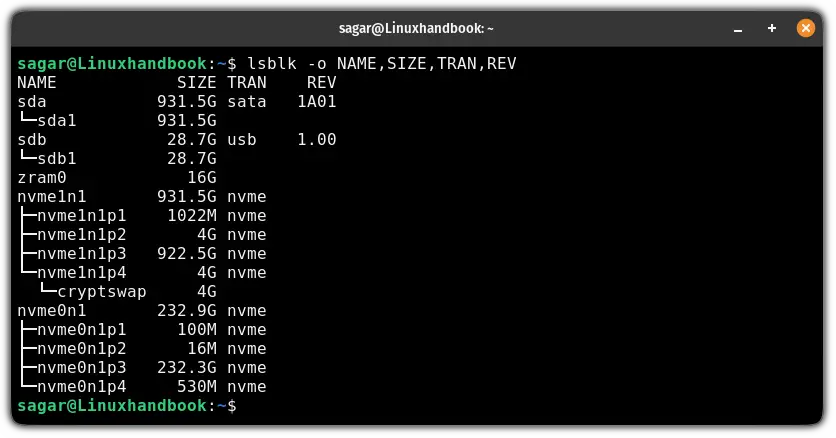
5. Get information of the device owner, group, and mode
If you want to print information such as device owner, group, and mode, then all you need to do is use the -m flag with the lsblk command:
lsblk -m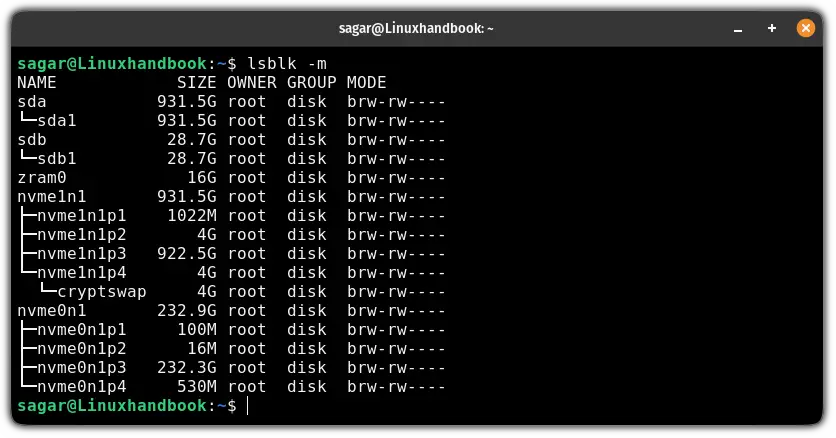
6. Exclude dependent device blocks
Whenever you use the lsblk, it will print the name of the dependent blocks such as sda1 is dependent on sda and sdb2 is dependent on sdb.
So what if you only want to print independent drives such as sda and sdb? Well, that's pretty simple and can be done using the -d flag:
lsblk -d
Wrapping Up...
This was a quick tutorial on how you can use the lsblk command on Linux where I went through some practical examples of it.
Sure, you can get more out of it by reading the man page of the lsblk command. Don't know how to use the man pages yet? Here's a detailed guide on using man pages:

I hope you will find this guide helpful.
About the author
 Sagar Sharma
A software engineer who loves to tinker with hardware till it gets crashed. While reviving my crashed system, you can find me reading literature, manga, or watering my plants.
