# Linux Handbook
> An independent, reader-supported publication focusing on Linux Command Line, Server, Self-hosting, DevOps and Cloud Learning
Public Ghost content for AI and LLM tooling. This file includes a bounded export of public pages first, then recent public posts.
Append `.md` to any post or page URL to get the content in Markdown (for example, `/example-post.md`).
## Pages
### About
URL: https://linuxhandbook.com/about/
Last updated: 2025-07-25T05:56:40.000Z
We are an independent, bootstrapped EdTech portal and learning platform from the same team behind [It’s FOSS](https://itsfoss.com/?ref=linuxhandbook.com), the web’s favourite Linux and Open-Source portal.
While It’s FOSS focuses on Open Source, Linux news and desktop Linux, Linux Handbook focuses exclusively on the server side of Linux.
At Linux Handbook, you’ll learn the Linux command line in detail along with tutorials and courses on cloud-related technologies, DevOps tools, managing servers, self-hosting and more.
## Here are a few notable things about Linux Handbook...
- More than 600 Linux tutorials, mini-courses and in-depth guides
- 18,000+ subscribers
- 150+ Pro members
- 120,000+ Twitter followers
- 6 e-books, 2 video courses, 7 text-based courses and numerous downloadable educational materials
🎓
Want to improve your Linux command line knowledge or learn Docker? Join over 18,000 other Linux users and [become a member for FREE](#/portal/signup) today. Learn [more about our membership here](https://linuxhandbook.com/membership-faq/).
## Meet your educators
At Linux Handbook, you get to learn from a range of educators. From seasoned SysAdmin and DevOps to young explorers, you are benefiting from the expertise of these individuals.
### Abhishek Prakash

**Creator of Linux Handbook.** A Linux user and educator with more than 12 years of experience, Abhishek has written hundreds of tutorials on a range of topics from Linux concepts to hosting and deploying web services. This comes with first-hand experience of self-hosting websites and applications for over a decade.
### Ahmed Alkabary

**DevOps Engineer by day and Linux educator by night**. Ahmed has written best-selling books like Learn Linux Quickly and Learn Ansible Quickly. He has also created several online courses on Bash, Docker, Ansible and many more DevOps tools.
### Doron Beit-Halahmi

**Seasoned sysadmin, forever learner**. Doron is a long-time system mangler who got his first taste of Linux compiling and configuring IRCd servers from source in the mid-90s. He then dwelled into web hosting operations through reseller accounts and dedicated servers. He runs a web hosting business and spends his free time tweaking his homelab which is composed of mostly old PCs repurposed as servers.
### Pratham Patel

**Learner and explorer**. Pratham is an undergraduate student with a keen interest in Nix, RISC-V and embedded systems. As a hobby, he juggles with Podman container pods and advocates rewriting everything in Rust using NeoVim. He has created Podman mini-course and Vim tutorial series among other things.
### Helder Martin

**Senior System Engineer**. With more than 20 years in the IT industry, Helder is a seasoned Linux user and a technology expert.
## Learn from us, support our work
Being an indie publisher and continuing to publish quality content without corporate backing is challenging.
If you want a clean reading and premium learning experience without tracking ads lurking everywhere, along with the satisfaction of supporting a bootstrapped venture without VC funding, please opt for the premium membership.
You can [become a member](#/portal/signup) for just $50 per year (less than what you would spend on a few meals in a week).
[Become a Pro Member](#/portal/signup)
💡
As a Pro member, you [get e-books](https://linuxhandbook.com/ebooks/) created by our team (6 of them so far) and access [online courses](https://linuxhandbook.com/courses/) (7 so far, while more are coming).
If you don't want to commit to a monthly subscription, you may also [make a one-time donation](https://ko-fi.com/linuxhandbook?ref=linuxhandbook.com). Every bit helps.
[Donate to Linux Handbook](https://ko-fi.com/linuxhandbook?ref=linuxhandbook.com)
Or, you can purchase individual courses for a single, one-time payment from [courses portal](https://courses.linuxhandbook.com/?ref=linuxhandbook.com).
[Courses by Linux HandbookMaking learning accessible for everyone with lifetime access to courses at affordable prices. Courses are available on Linux, Docker, Ansible and more.Courses by Linux Handbook](https://courses.linuxhandbook.com/?ref=linuxhandbook.com)
### Privacy Policy
URL: https://linuxhandbook.com/privacy-policy/
Last updated: 2023-04-06T13:25:23.000Z
At Linux Handbook, we take data privacy seriously, very seriously!
Our website runs on HTTPS which means your connection to our website is secure.
We do show ads in partnership with BuySellAds.
We use [Cove](https://cove.chat/?ref=linuxhandbook.com) for providing the commenting system. Only members (both normal and sudo members) can leave comments. Cove also doesn't track you.
We often link to external resources for further reading and consultation. The external websites have their own privacy policy and we don't have any control on that.
If you are a sudo member, your payment is processed through Stripe. We don't keep your payment information. Stripe may have JS for the correct functioning of the payment system.
We prefer to use Vimeo instead of YouTube for embedding video content. Vimeo doesn't show ads like YouTube.
If you sign up as a member, we get access to your email address.
We use [CloudFlare](https://www.cloudflare.com/?ref=linuxhandbook.com) to speed up the website so that it loads quickly for you. They collect log data like IP address, system configuration (OS, Browser). When you connect to any web server, your IP address and system configuration can be read by the server. Don't worry! You are not profiled. Your data is aggregated and it is not identifiable. Please read [what CloudFlare logs](https://blog.cloudflare.com/what-cloudflare-logs/?ref=linuxhandbook.com).
We want you to enjoy reading helpful Linux articles. You can support us by becoming a sudo member of Linux Handbook.
### Chmod Calculator: Calculate Linux File Permissions
URL: https://linuxhandbook.com/chmod-calculator/
Last updated: 2022-08-30T07:28:53.000Z
## Chmod Calculator
Just select the permissions that you want for your files and hit the Calculate button. The permissions are displayed under the calculate button.
#### Owner
Read:
Write:
Execute:
#### Group
Read:
Write:
Execute:
#### Other
Read:
Write:
Execute:
Calculate
Linux File Permission is in absolute mode and in symbolic mode.
Once you have the file permissions in absolute or symbolic mode, you can use the chmod command to change the file permission. Refer to these [chmod command examples](https://linuxhandbook.com/chmod-command/) if you are not familiar with this command.
[Linux File Permissions and Ownership Explained with ExamplesLinux file permissions explained in simpler terms. Also learn how to change the file permissions and ownership in Linux in this detailed beginner’s guide.Linux HandbookAbhishek Prakash](https://linuxhandbook.com/linux-file-permissions/)
## Chmod Explanation
Some details about the user, group and other you may need to know to clear your basics.
**User/Owner**
User is the owner of the file. When you create a file, you become the owner of the file. The ownership can be changed.
**Group**
Every user is part of a certain group(s). A group consists of several users and this is one way to manage users in a multi-user environment.
**Other**
Other can be considered as a super group with all the users on the system. Basically, anyone with access to the system belongs to this group.
I hope this nifty chmod calculator helped you to calculate the [Linux file permissions](https://linuxhandbook.com/linux-file-permissions/) easily.
[chmod 777 or 755? Learn to use chmod Command with ExamplesThis article will teach you how to change permissions in Linux with practical examples of chmod command.Linux HandbookEric Simard](https://linuxhandbook.com/chmod-command/)
## Common chmod commands and their meaning
Here are some command chmod commands with their explanation:
### chmod 777
This means that owner, group and everyone has all the rights, i.e. to read, write and execute. This is a dangerous permission to have on any file and you should avoid using it.
### chmod 755
The owner can read, write and execute. Group members and everyone else can read and execute but cannot modify (write) the file.
### chmod +x
With this command, you are adding execute permission for the owner, group and everyone else. This is equivalent to chmod a+x.
### chmod 600
With this, you are giving read and write permission to the owner user. Group members and others cannot read, write or execute. Even the owner cannot execute the file with this permission set.
### chmod 700
You are giving read, write and execute permission to the owner user but the groups members and others have no permissions at all. They cannot read, write or execute.
### chmod 400
The file can only be read by the owner. No one can write or execute it.
### chmod 775
The user and groups can read, write and execute the file. Others can read and execute but cannot write.
### chmod 644
The owner can read and write but cannot execute it. Group members and others can read the file but cannot write or execute it.
### Contact Us
URL: https://linuxhandbook.com/contact/
Last updated: 2024-11-07T12:44:55.000Z
Feel free to reach out to us if you have any questions.
### Basic Linux Commands You Should Know
URL: https://linuxhandbook.com/linux-commands/
Last updated: 2025-08-17T12:31:09.000Z
The real power of Linux lies in the terminal. With the correct Linux command, you can tweak, configure or change any aspect of your system.
Learning Linux has become synonymous to learning Linux commands and rightly so. Because you can use Linux entirely through commands and do so very effectively.
On Linux Handbook, you can find numerous commands explained with examples. But they are scattered across the website and it won’t be easy for you to find it.
## Essential Linux commands
This is why I created this Linux commands list that is more structured and organized. I have grouped the common Linux commands in categories. Even if you are absolutely new to Linux, you can start learning the commands by following their examples.
### Basic file and directory operations
- Learn to list files in a directory with [ls command](https://linuxhandbook.com/ls-command/)
- Learn to copy a file with [cp command](https://linuxhandbook.com/cp-command/)
- Learn to rename files with [mv command](https://linuxhandbook.com/mv-command/)
- Learn to change directories with [cd command](https://linuxhandbook.com/cd-command-examples/)
- Learn to create directories with [mkdir command](https://linuxhandbook.com/mkdir-command/)
- Learn to [remove files and directories](https://linuxhandbook.com/remove-files-directories/)
### File viewing commands
To [view the contents of a file in Linux](https://linuxhandbook.com/view-file-linux/), you can use:
- [Cat command](https://linuxhandbook.com/cat-command/) to view files entirely in terminal
- [Less command](https://linuxhandbook.com/less-command/) to view files one page at a time
- [Head command](https://linuxhandbook.com/head-command/) to view the first few lines of a file
- [Tail command](https://linuxhandbook.com/tail-command/) to view the last few lines of a file
### Know the file properties
Every [file and directory has attributes like size, ownership, permissions](https://linuxhandbook.com/linux-file-permissions/) etc. These Linux commands allow you to see the file attributes and change them.
- [File command](https://linuxhandbook.com/file-command/) allows you to identify the type of a file
- With [touch command](https://linuxhandbook.com/touch-command/), you can change the timestamps
- Change file permissions with [chmod command](https://linuxhandbook.com/chmod-command/)
- Change group ownership with [chgrp command](https://linuxhandbook.com/chgrp-command/)
- Count number of lines, words with the [wc command](https://linuxhandbook.com/wc-command/)
- Know the file and [directory size with du command](https://linuxhandbook.com/find-directory-size-du-command/)
### File text manipulation
Manipulating the text of a file to get what you want. Here are the commands:
- [Grep command](https://linuxhandbook.com/grep-command-examples/) to find matching lines in files
- [Cut](https://linuxhandbook.com/cut-command/) and [paste](https://linuxhandbook.com/paste-command/) commands to treat text as columns
- [Tr command](https://linuxhandbook.com/tr-command/) converts characters
- [Sort command](https://linuxhandbook.com/sort-command/) lets you sort lines in text file
- [Tee command](https://linuxhandbook.com/tee-command/) to copy the file and see its output simultaneously
- [Expand command](https://linuxhandbook.com/convert-tabs-spaces/) converts tabs to spaces
### User account management
Creating and managing users is an important job that you should not take lightly.
- Add new users with [useradd command](https://linuxhandbook.com/useradd-command/)
- Modify existing users with [usermod command](https://linuxhandbook.com/usermod-command/)
- Delete existing users with [userdel command](https://linuxhandbook.com/userdel-command/)
- Also learn the [concept of user ID (UID)](https://linuxhandbook.com/uid-linux/)
### Group management
Group management is another important task for a sysadmin.
- Add new groups with [groupadd command](https://linuxhandbook.com/groupadd-command/)
- Delete existing groups with [groupdel command](https://linuxhandbook.com/groupdel-command/)
- Modify existing groups with [groupmod command](https://linuxhandbook.com/groupmod-command/)
- Change group ownership of files with [chgrp command](https://linuxhandbook.com/chgrp-command/)
### Manage and monitor your system
Keep an eye on your system usage with these commands:
- [Check disk space with df command](https://linuxhandbook.com/df-command/)
- [Check memory usage with free command](https://linuxhandbook.com/free-command/)
- [Shutdown command in Linux](https://linuxhandbook.com/linux-shutdown-command/)
- Use [lsof command](https://linuxhandbook.com/lsof-command/) to find opened files by a process or user
- Create incremental backups with [rsync command](https://linuxhandbook.com/rsync-command-examples/)
- Check running processes with [ps command](https://linuxhandbook.com/ps-command/)
### Basic networking commands
Here are some basic commands related to networking:
- Use [dig](https://linuxhandbook.com/dig-command/) and [nslookup](https://linuxhandbook.com/nslookup-command/) commands to get DNS information
- Use [ping command](https://linuxhandbook.com/ping-command/) to check if remote host is up
- Use [curl command](https://linuxhandbook.com/curl-command-examples/) to download information from network
- Use [scp command](https://linuxhandbook.com/scp-command/) to copy files between remote hosts
### Mbps to MB/s Converter
URL: https://linuxhandbook.com/mbps-mbs-converter/
Last updated: 2024-06-15T12:02:59.000Z
Here's a quick Mbps-MB/s converter.
**Enter either field and it instantly converts the other field.**
Mega Bits Per Second (Mbps):
Mega Byte Per Second (MBps or MB/s):
[DigitalOcean – The developer cloudHelping millions of developers easily build, test, manage, and scale applications of any size – faster than ever before.Explore our products](https://m.do.co/c/d58840562553?ref=linuxhandbook.com)
Get started on DigitalOcean with a $100, 60-day credit for new users.
## Mbps or MBPS? Which is correct for network speed?
I hope you haven't forgotten the basics:
- Internet speed is measured in bits
- Bits are represented with lower case b
- File size is measured in bytes
- Bytes are represented with capital B
- Megabyte =MB and Megabit=Mb
- 1 MB (Megabyte) = 8 Mb (Megabit)
- MBps or MB/s = Mega Bytes per second
- Mbps = Mega bits per second
People often forget that the internet speed is measured in bits, but they know that the file size is measured in bytes. And that often creates a confusion.
When you have an internet speed of 40 Mbps, you may wrongly assume that you can download 40 MB per second.
A byte is equal to 8 bits so the internet speed you see as 40 Mbps can only download a maximum of 5 MB of data per second.
Of course, that is also not entirely true because if your service provider promises an internet speed of 100 Mbps, you may not really get 100 Mbps all the time. That’s the maximum bandwidth you get for all the connected devices. Moreover, your file download speed is also affected by the server you are downloading from.
To avoid confusion between Mbps (internet speed) and MBps (file transfer speed), MBps is often written as MB/s.
This Mbps to MBps converter is a simple tool. It helps you learn that if your file download speed is displaying in Mbps, how long will it really take to download a file of certain MB.
**The conversion formula is simple if you can recall the basics**:
- Mbps: Megabit per second (Mbps)
- MBps: Megabyte per second (MBps or MB/s)
- 1 Byte = 8 bits
- 1 MBps = 8 Mbps
- 1 Mbps = 0.125 MBps
I hope I was able to clarify this common confusion. Let me know if you have any questions.
### Membership
URL: https://linuxhandbook.com/membership/
Last updated: 2020-07-02T10:26:52.000Z
_No content available._
### Authors
URL: https://linuxhandbook.com/authors/
Last updated: 2025-08-22T11:00:46.000Z
_No content available._
### Tags
URL: https://linuxhandbook.com/tags/
Last updated: 2020-07-02T10:47:43.000Z
_No content available._
### Linux Handbook Pro Membership Benefit: Premium Resources Available for Free
URL: https://linuxhandbook.com/member-resources/
Last updated: 2025-10-03T11:17:27.000Z
Thank you for being a sudo or root member of Linux Handbook, an indie learning portal.
We are creating more learning materials. While others have to purchase, these premium eBooks and courses are available for free to Linux Handbook pro members.
More courses will be added at regular intervals.
Here are the books you can download for free.
## Learn Ansible Quickly (eBook)

Learn Ansible Quickly is a fully practical hands-on guide for learning Ansible Automation. It will get you up and running with Ansible in no time.
_This page is for subscribers on the Pro and Reader tiers only._
### Membership FAQ
URL: https://linuxhandbook.com/membership-faq/
Last updated: 2024-04-23T07:52:16.000Z
We understand that you may have questions about the Linux Handbook membership. We are going to answer most of the frequently asked questions here. If you have more questions, feel free to [contact us](https://linuxhandbook.com/contact/).
## What is the difference between Free and Paid/Pro membership?
With the free membership, you get access to the regular Linux and DevOps newsletter. You can also interact with us and other readers via comments if you are a member. Occasionally, we create articles and tutorials for free and paid members, and you get access to them as a free member.
As a Pro member, you get access to our exclusive learning material. It includes Pro members only tutorials, free e-books (we have 4 e-books so far), video courses (in progress), custom scripts and cheatsheets.
## How to access the Pro member resource?
All downloadable LHB Pro member resources are [available on this page](https://linuxhandbook.com/member-resources/). This Pro Resources page is visible on the top menu all the time. You log in to the website, access the page and download the content.
## What is my account password? How do I reset it?
There is no password for your account on Linux Handbook for both free and Pro members. We don't store it. This is a new security trend these days, and we are trendy people :)
Your email is the gateway to accessing your account. When you want to log in, request a login link with your email. You will be logged in on that device for a couple of weeks or until you clear your browser cookie.
## How much does the Pro membership cost?
You can opt for the annual membership for $50 per year. We call it sudo membership because you are in the 'super user' group now.
## Can I pay via PayPal?
The built-in payment system only uses Stripe at the moment. However, if you wish to use PayPal, there is an alternate manual way. [Please contact us](https://linuxhandbook.com/contact/), and we'll share the details of our PayPal account and when the payment is processed, we'll enable the membership for you.
Since it is a manual process, the PayPal option is only available for the annual membership.
## Is there a trial period?
No, there is no trial period. If you are in doubt, go for the monthly payment option.
## Can I get a refund?
No. We have no way of tracking if a member downloaded the premium content and then asked for a refund. This puts us in a spot. This is why there are no refunds.
## The pricing is high, can you reduce it?
No. Our pricing is a lot less than what other publishers charge.
After the payment gateway charges and VAT like taxes, we lose around 25% of your payment. Moreover, we have to pay 25% income tax on the profit. So, we are not pocketing a lot of money here.
## Why should I get the membership anyway?
For a number of reasons:
- Free membership allows to leave a comment, access content for free members and newsletter.
- Pro membership gets you exclusive e-books written by our team and partners for free.
- Pro members also get free access to courses.
- No ads. Ads have been necessary to keep the portal financially viable. If you don't like ads, go Pro.
## How do I get a profile picture?
The profile picture is taken from your Gravatar account. If you do not have one, you may get it on [their official website](https://en.gravatar.com/?ref=linuxhandbook.com).
## How do I cancel my pro membership?
When logged in, you can access your account page. Here, you have the option to change your subscription. You can cancel the subscription from here.
If you still face difficulties, just send us a message from the same email id as your account requesting cancellation. We'll do it manually for you.
## How do I delete my account (as a free or pro member)?
Just send us a message from your email is used for the account on Linux Handbook. We'll delete your data from the server forever.
Any other questions? [Leave us a message](https://linuxhandbook.com/contact/) :)
[Contact UsLinux Command Line, Server, DevOps and CloudLinux HandbookAbhishek Prakash](https://linuxhandbook.com/contact/)
### Write for Us
URL: https://linuxhandbook.com/write-for-us/
Last updated: 2026-10-19T02:16:14.000Z
One of the easiest ways to contribute back to the society is by sharing your knowledge.
One of the main aims of Linux Handbook is to share the knowledge and experience we have gathered for years with a global community and help them learn with our experience.
You don't need to be a subject matter expert to share your knowledge. Being an expert is obviously an excellent achievement but if you could convey your moderate knowledge or experience in a way that is helpful to other people, you are welcome to contribute to Linux Handbook.
## Things to keep in mind about writing articles
You should follow these guidelines:
- You do not need to be a native English speaker, but you should have good command over English grammar.
- Do not copy articles or parts of articles from other websites.
- Your article must not have been published previously. It cannot be republished on other platforms later.
- Just because you submit an article doesn't mean it will be published. The article quality matters the most, and if your articles are not up to the mark, it will be kept on hold unless you follow the feedback we provide you and rewrite the articles.
- Tutorials and explainer articles need screenshots so that readers can understand them easily. Make sure to include them in your articles properly.
- **Don't use it as a backlink building service for your clients. We won't publish such 'guest posts' and you won't receive a reply.**
🚧
We don't pay for community contributed articles.
Interested in contributing or still have questions? Just send us a message through the form below. Again, don't use it to pitch guest posts.
### Welcome to the club :)
URL: https://linuxhandbook.com/member-welcome/
Last updated: 2024-04-25T10:42:26.000Z
You made an awesome decision to become a member of Linux Handbook (LHB).

Here’s what you get as an LHB Member:
**Newsletter**: You’ll receive our [LHB Linux Digest newsletter ](https://linuxhandbook.com/newsletter/)2 times a month directly in your inbox. The newsletter is loved by our members for its useful content. You get a mix of basic and advanced Linux concepts, Docker and other DevOps tutorials, helpful tips for server admins, interesting new tools and (occasionally) not-to-be missed Linux deals.
**Member only content**: Another advantage of being an LHB member is that you can access some special content which we create from time to time. Sometime, we create new content and give early access to the members before opening it for public.
Take this Linux command line introductory course for example.
[Learn the Basic Linux Commands in an Hour \[With Videos\]Learn the basics of Linux commands in this crash course.Linux HandbookAbhishek Prakash](https://linuxhandbook.com/linux-command-basics/)
**Newsletter archive**: As a member, you can access the [archive of the LHB Linux newsletters](https://linuxhandbook.com/newsletter/). Even if you decide to unsubscribe from the emails, you could still access the newsletters on the website.
🔑
There is no password system. When you want to log in, request a login link on this [login page](https://linuxhandbook.com/signin/). It will be sent to your email and you can click on the link to log in.
## Get more with LHB Pro Membership

Linux Handbook also has several courses (text-based and video) and eBooks that will help you learn in a more organized way and at your own pace.
As the LHB Pro member, you get access to all our [e-books](https://linuxhandbook.com/ebooks/) (five so far, valued at $49) and [courses](https://linuxhandbook.com/courses/) (one video and two text, valued at $59). You also get access to premium content only available for Pro members.
We offer [LHB pro membership](https://linuxhandbook.com/#/portal/signup) at the flat rate of $50 a year. That’s less than the cost of a Happy Meal a month at McDonald's.
[Become a Pro Member](https://linuxhandbook.com/#/portal/signup)
You get to keep the books forever, even after your subscription has ended.
The payment is processed by Stripe but if you want to use PayPal, please make a payment of $50 to [this PayPal link](https://paypal.me/linuxhandbook?locale.x=en%5FGB&ref=linuxhandbook.com) and email us (hello@linuxhandbook.com) with the transaction details. We’ll manually activate your Pro membership.
If you really think $50 is too much, you could make a one-time donation on [Ko-Fi](https://ko-fi.com/linuxhandbook?ref=linuxhandbook.com). Optionally, you can also purchase our e-books individually on these donation pages.
[Make a one time donation](https://ko-fi.com/linuxhandbook?ref=linuxhandbook.com)
### You just joined our "sudo" group
URL: https://linuxhandbook.com/pro-member-welcome/
Last updated: 2025-07-26T03:18:46.000Z
Which means you can access more stuff than a regular member :)

I'm excited to see you've joined the Linux Handbook Pro membership!
You get a clean reading and learning experience without pop-ups and annoying tracking ads.
That's not the only advantage you get as LHB Pro member.
You also get to [download our premium ebook](https://linuxhandbook.com/member-resources/) for free, access member only content like [this SSH course](https://linuxhandbook.com/courses/ssh/), [Linux course](https://linuxhandbook.com/courses/linux/) and [Ansible Series](https://linuxhandbook.com/ansible/).
- All our courses are listed here:
- All our ebooks are available to download from here:
Both links are accessible from any page on our website. Member Resources are in the bottom footer and the Courses link is on the top header.
[Linux Handbook Pro Membership Benefit: Premium Resources Available for FreeYou get exclusive benefits for being a sudo or root member of Linux Handbook. Here are the ebooks available for free to the pro members.Linux HandbookAbhishek Prakash](https://linuxhandbook.com/member-resources/)
This helps you learn at your own pace by accessing the premium material.
***You'll have to log in to access these Pro pages. There is no password system. When you want to log in, request a login link. It will be sent to your email and you can click on the link to log in.***
I have created a [FAQ page](https://linuxhandbook.com/membership-faq/) answering common questions about membership but if you still have any questions, you just [send me a message](https://linuxhandbook.com/contact/).
I would also like to know about your expectations from Linux Handbook in general and the premium membership in particular. This will guide us in creating content of your liking.
Let's get started :)
### ebooks by Linux Handbook
URL: https://linuxhandbook.com/ebooks-temp/
Last updated: 2025-08-30T12:24:26.000Z
At Linux Handbook, we have published several eBooks to enable you to learn a certain topic at your own comfortable pace.
We offer the following ebooks to our Pro members for free while individuals can buy them from Gumroad:
- [Learn Linux Quickly](https://linuxhandbook.gumroad.com/l/mEsrwA?ref=linuxhandbook.com) ($9)
- [Learn Ansible Quickly](https://linuxhandbook.gumroad.com/l/jtHgB?ref=linuxhandbook.com) ($15)
- [Learn Bash Quickly](https://linuxhandbook.gumroad.com/l/ejfGu?ref=linuxhandbook.com) ($5)
- [Bash it Out](https://linuxhandbook.gumroad.com/l/jaFnb?ref=linuxhandbook.com) ($5)
- [GPU computing With Python](https://linuxhandbook.gumroad.com/l/yTYiC?ref=linuxhandbook.com) ($15)
💡
[Sign up for Pro membership](https://linuxhandbook.com/#/portal/signup) and get all these eBooks and access our courses for just $50 per year. The books are yours to keep forever, even if you end your membership.
## Learn Linux Quickly

Learn Linux Quickly doesn't assume any prior Linux knowledge, which makes it a perfect fit for beginners. Nevertheless, intermediate and advanced Linux users will still find this book very useful as it goes through a wide range of topics. Learn Linux Quickly will teach you the following topics:
- Installing Linux
- Over 116 Linux Commands
- User and Group Management
- Linux Networking Fundamentals
- Bash Scripting
- Automate Boring Tasks with Cron Jobs
- Create your own Linux Commands
- Linux Disk Partitioning and LVM
- Finding Files on Linux
- Understanding File Permissions
- Linux Processes
[Get the Book](https://linuxhandbook.gumroad.com/l/mEsrwA?ref=linuxhandbook.com)
## Learn Ansible Quickly

Learn Ansible Quickly is a fully practical hands-on guide for learning Ansible Automation. It will get you up and running with Ansible in no time.
With this book, you'll learn how to automate your apps deployment and IT infrastructure operations with Ansible.
**Key Features**
- Run Ansible Ad-Hoc commands.
- Deploy Files with Jinja2 templates.
- Create and run Ansible Playbooks.
- Use Ansible Vault to protect sensitive information.
- Use Ansible Galaxy to install and use Ansible roles.
- Learn various Ansible troubleshooting techniques.
Ansible is one of the most popular DevOps tools available in the IT market today. Any serious sysadmin or DevOps person must know Ansible.
This book is an amazing preparation guide for anyone wants to pass the EX294 certification exam and become a Red Hat Certified Engineer (RHCE).
[Get the Book](https://linuxhandbook.gumroad.com/l/jtHgB?ref=linuxhandbook.com)
## Learn Bash Quickly
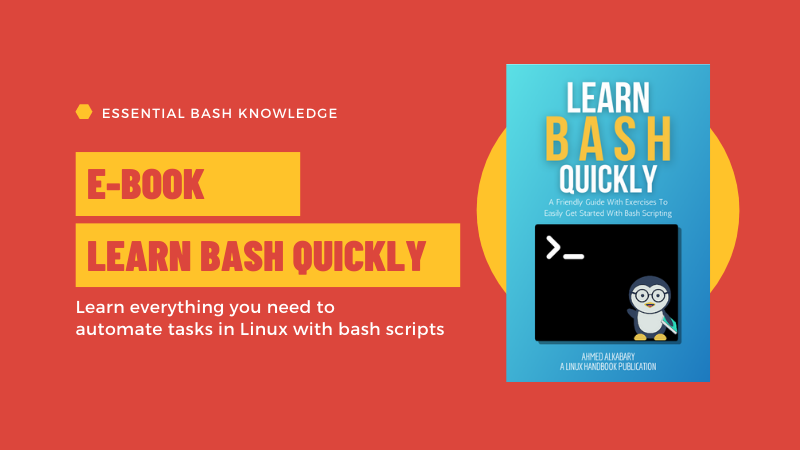
Learn Bash Quickly will teach you everything you need to get started with bash scripting. Each bash concept is explained with easy to understand examples.
You'll learn to:
- Create and run a bash script
- Use variables and pass arguments to script
- Use decision-making statements (if-else, switch)
- Perform arithmetic and string operations
- Use arrays, loops and functions in bash
- Automate repeated tasks with bash scripts
You'll also find additional exercises at the end of each chapter. Solutions to these exercises have also been included in the book.
By the end of the book, you'll learn to automate repeated tasks in Linux with bash scripts on your own.
[Get the Book](https://linuxhandbook.gumroad.com/l/ejfGu?ref=linuxhandbook.com)
## Bash it Out!

No, this book is not going to teach you bash scripting.
Instead, this book gives you 17 bash puzzles and you have to figure out why the script behaves differently or why the output of the script is not the intended one.
Of course, the book discusses the solution to all the puzzles.
This is fun. This is challenging. If you think you know enough bash shell scripting, why not test your knowledge?
[Get the Book](https://linuxhandbook.gumroad.com/l/jaFnb?ref=linuxhandbook.com)
## GPU Computing With Python (eBook)

This book aims to be your guide to getting started with GPU computing. It will start by introducing GPU computing and explaining the architecture and programming models for GPUs. You will also be briefed about the minimum system requirements to get ready for some hands-on experience with GPU computing.
[Get the Book](https://linuxhandbook.gumroad.com/l/yTYiC?ref=linuxhandbook.com)
Have questions? Feel free to [contact us](https://linuxhandbook.com/contact/).
### Support
URL: https://linuxhandbook.com/support/
Last updated: 2024-11-07T12:54:18.000Z
Please read the [membership FAQ](https://linuxhandbook.com/membership-faq/) for commonly asked questions.
If you still have any questions, please feel free to fill the form below.
You can also reach us:
High on Cloud Services Pvt Ltd
SA 14/96-55, Sarangnath Colony, Sarnath
Varanasi, 221007
Uttar Pradesh, India

### Newsletters
URL: https://linuxhandbook.com/newsletters/
Last updated: 2025-08-22T11:04:01.000Z
**Love Linux? So do we.**
That’s why we created the **LHB Linux Digest**—a weekly newsletter for people who want to:
- Discover the latest Linux tools 🛠️
- Learn practical tips and tutorials 💡
- Keep up with the open-source world 🌍
If that sounds like you, joining our newsletter and let’s geek out together.
### Latest Tutorials
URL: https://linuxhandbook.com/blog/
Last updated: 2024-05-12T15:23:29.000Z
_No content available._
### Using Linux Command Line
URL: https://linuxhandbook.com/command-line/
Last updated: 2025-08-30T10:56:49.000Z
The power of Linux lies in the terminal. The more you use it, the more 'power' you feel.
This is a collection of various things you can do in the Linux command line. They have been divided into categories so that it is easier for you to follow.
### Courses
URL: https://linuxhandbook.com/courses-old-page/
Last updated: 2025-08-19T12:53:26.000Z
At Linux Handbook, we are continually working on providing you with educational and informative content in a streamlined fashion.
In that regard, we have several text and video-based courses on various topics like Linux commands, Ansible, SSH, Proxmox and more.
These courses can be accessed at different membership levels.
## For LHB Pro members
Linux Handbook has Pro membership available at $50 per year. Which is less than the cost of a Happy Meal at MacDonald's each month.
As a Pro member, you get ad-free experience and access to the following courses and free download of our eBooks.
Sign up for [Pro membership here](https://linuxhandbook.com/#/portal/signup). Refer to our [membership FAQ](https://linuxhandbook.com/membership-faq/) if you have more questions.
Alternatively, you can purchase a course of your choice for a single payment, without a subscription from our [Courses portal](https://courses.linuxhandbook.com/?ref=linuxhandbook.com).
[Courses by Linux HandbookMaking learning accessible for everyone with lifetime access to courses at affordable prices. Courses are available on Linux, Docker, Ansible and more.Courses by Linux Handbook](https://courses.linuxhandbook.com/?ref=linuxhandbook.com)
#### Linux for DevOps
A massive 16 module course that covers all the essential Linux command line for your DevOps journey. You can also use it to learn Linux commands even if you are not in DevOps field.
🗒️ Text-based course
👩💻 Hands-on approach
🏋️ Practice questions for each chapter
[Learn More](https://linuxhandbook.com/courses/linux/)
#### Docker
An 8-chapter series that covers all the essentials of the Docker. Perfect for anyone who wants to get started with Docker containerization. The course goes in the hands-on mode by showing examples of what you'll be doing instead of dwelling in theory.
🗒️ Text-based course
👩💻 Hands-on approach
[Learn More](https://linuxhandbook.com/courses/docker/)
#### Ansible
Written with RHCE EX294 certification exam in mind, this text course provides all the fundamental knowledge of Ansible in a streamlined fashion irrespective of whether you are taking RHCE exam or not.
🗒️ Text-based course
👩💻 Hands-on approach
[Learn More](https://linuxhandbook.com/ansible/)
#### Kubernetes Operator
Dive deep into the world of Operators and learn how to effortlessly manage and scale your containerized applications. This is hands-on course and you'll learn with a practical usecase scenario.
📹 Video-based course
👩💻 Hands-on approach
[Learn More](https://linuxhandbook.com/courses/kubernetes-operator/)
#### SSH Fundamental
Complete beginner's course that shows how you can use SSH to communicate with remote servers by setting up the lab environment in a VM. You also get a brief introduction to the Linux command line.
📹 Video-based course
👩💻 Hands-on approach
[Learn More](https://linuxhandbook.com/courses/ssh/)
#### Systemd Playbook
Master systemd with hands-on labs and real-world scenarios. Learn to create unit files, automate tasks, analyze logs, and troubleshoot like a pro. No fluff—just practical Linux skills you’ll actually use.
🗒️ Text-based course
👩💻 Hands-on approach
[Learn More](https://linuxhandbook.com/courses/systemd/)
## For LHB Free members
As the free member, you get access to our LHB Linux Digest newsletter, which is read by over 16,000 Linux enthusiasts worldwide.
Sign up for [free membership here](https://linuxhandbook.com/#/portal/signup).
You also get access to this introductory Linux command line course when you are logged in as a member.
#### Introduction to Command Line
Learn the basics of Linux commands in this short introductory course.
📹 Video-based course
⌛ Approx. 1 hour
📶 Difficulty level: Beginner
[Learn More](https://linuxhandbook.com/linux-command-basics/)
## For everyone
We also have several courses and series that require no sign-ins and sign-ups. Members or not, everyone can benefit from these educational materials.
#### Bash Scripting
As a Linux user, you cannot ignore bash scripting. This 10-chapter series teaches you all the basics you need to get started with bash shell scripting.
🗒️ Text-based course
👩💻 Hands-on approach
🏋️ Practice questions for each chapter
[Learn More](https://linuxhandbook.com/bash/)
#### Proxmox
Ever since Broadcom acquired VMWare, Proxmox has become the de-facto choice of virtual machines. This series gives you all the necessary steps to get started with the latest craze in the sysadmin world.
🗒️ Text-based course
⌛ Approx. 2.5 hours
[Learn More](https://linuxhandbook.com/proxmox/)
#### Podman
The Docker alternative from Red Hat, Podman is gaining popularity. If you already know Docker, Podman will be an easy to learn skill for you.
🗒️ Text-based course
⌛ Approx. 3 hours
📋 Familiarity with Docker is required
[Learn More](https://linuxhandbook.com/podman/)
Have questions? Feel free to [contact us](https://linuxhandbook.com/contact/).
## Posts
### LHB Linux Digest #26.15: Taming stderr, Cybersecurity Certification and More
URL: https://linuxhandbook.com/newsletter/26-15/
Last updated: 2026-10-16T12:34:23.000Z
It's a security-heavy edition this time, and that's not entirely by design. October is Cybersecurity Awareness Month, a nasty VM escape bug just dropped, and the [Linux Foundation has a sale on its security certifications](https://www.awin1.com/cread.php?awinmid=85919&awinaffid=429005&ued=https%3A%2F%2Ftraining.linuxfoundation.org%2Foctober-2026-promo%2F&ref=linuxhandbook.com).
If you're still working through [Command Conqueror](https://linuxhandbook.com/ctf/command-conqueror/), you're already halfway into this world. Level 10 is privilege escalation after all. And I'm still waiting to hear how far you got 😉
And if cyber security is something that interests you, do try our '[Pentora Box](https://linuxhandbook.com/pentora-box/)' lab series. Basically, it has a collection of beginner-level pen-test scenarios that you can follow from your Linux system and do some hands-on practice.
## 🧵 Where does the output go?
Every command you run in Linux has two output channels. Standard output (stdout) carries the results. Standard error (stderr) carries the complaints. Both land on your screen, which is why they're so easy to confuse.
The difference shows up the moment you redirect. Run `find / -name "*.conf" > results.txt` and you'll still see a wall of "Permission denied" on your screen. That's because `>` only captures stdout. The errors went straight past it.
Each channel has a number. stdout is `1` and stderr is `2`. So `2>` redirects only the errors, and the classic way to silence them is to send them to [/dev/null](https://linuxhandbook.com/dev-null/), the black hole of Linux:
```bash
find / -name "*.conf" 2>/dev/null
```
Want both in the same file? Use `> file 2>&1`, which says "send stderr wherever stdout is going". Order matters here. `2>&1 > file` does not do the same thing, and it trips up a lot of people. The same trick works for [discarding all output with /dev/null](https://linuxhandbook.com/redirect-dev-null/) when you want a command to run silently.
And if you want to see the output and save it at the same time, use the [tee command](https://linuxhandbook.com/tee-command/). Our beginner's guide to [input, output and error redirection](https://linuxhandbook.com/redirection-linux/) covers all of this in more detail.
## 💡 Quick terminal tip
You can pipe the standard output and standard error of a command to pager directly using the `|&` operation.
```bash
find / -name "*.conf" |& less
```
The above command will pipe the found result as well as errors to a less pager. No need to redirect output to a file and then view its contents.

## 🎓 Make your security skills official
[](https://www.awin1.com/cread.php?awinmid=85919&awinaffid=429005&ued=https%3A%2F%2Ftraining.linuxfoundation.org%2Foctober-2026-promo%2F&ref=linuxhandbook.com)
Security isn't just a job for the security team anymore. If you manage servers, containers or pipelines, you're expected to know how to lock them down. A certification is how you prove it to someone who's hiring.
The Linux Foundation is [running its Cybersecurity Awareness Month sale](https://www.awin1.com/cread.php?awinmid=85919&awinaffid=429005&ued=https%3A%2F%2Ftraining.linuxfoundation.org%2Foctober-2026-promo%2F&ref=linuxhandbook.com) with up to 40% off security certifications, courses and bundles. It runs until 23rd October only, so hurry up.
The CKS (Certified Kubernetes Security Specialist) is the obvious pick if you work with Kubernetes. Actually, you can bundle Kubernetes and Cloud Native Security Associate (KCSA) + Certified Kubernetes Security Specialist (CKS) certification exams for $387 instead of $645.
You can attempt the exams twice in the timeframe of 12 months. Get it today, prepare for the exam for a few months and then attempt your certification.
[Linux Foundation Cybersecurity Deals](https://www.awin1.com/cread.php?awinmid=85919&awinaffid=429005&ued=https%3A%2F%2Ftraining.linuxfoundation.org%2Foctober-2026-promo%2F&ref=linuxhandbook.com)
## 📦 Self-hosting: Flame
[Flame](https://github.com/pawelmalak/flame?ref=linuxhandbook.com) is a lightweight self-hosted start page that helps you organize bookmarks, services, and frequently used web apps from a single dashboard. It integrates well with Docker and makes managing homelab or self-hosted environments much more convenient through an easy-to-use web interface.
[GitHub - pawelmalak/flame: Flame is self-hosted startpage for your server. Easily manage your apps and bookmarks with built-in editors.Flame is self-hosted startpage for your server. Easily manage your apps and bookmarks with built-in editors. - pawelmalak/flameGitHub](https://github.com/pawelmalak/flame?ref=linuxhandbook.com)
## 🛠️ Tool discovery: cocoindex-code
[cocoindex-code](https://github.com/cocoindex-io/cocoindex-code?ref=linuxhandbook.com) is an AST-based semantic code search tool that helps AI coding agents find relevant code without repeatedly scanning an entire repository. By maintaining a lightweight local index, it reduces token usage and makes navigating large codebases significantly faster.
[GitHub - cocoindex-io/cocoindex-code: A super light-weight embedded code search engine CLI (AST based) that just works - improves speed and efficiency for coding agent 🌟 Star if you like it!A super light-weight embedded code search engine CLI (AST based) that just works - improves speed and efficiency for coding agent 🌟 Star if you like it! - cocoindex-io/cocoindex-codeGitHub](https://github.com/cocoindex-io/cocoindex-code?ref=linuxhandbook.com)
## 📰 Linux news that matters
- [Microsoft has contributed a new hv-iommu-guest driver](https://www.phoronix.com/news/MS-Paravirt-Hyper-V-IOMMU?ref=linuxhandbook.com) targeted for the upcoming Linux 7.4 cycle, providing a para-virtualized IOMMU implementation for Linux guests running on Hyper-V.
- [Researchers disclosed PwnEscape (CVE-2026-99999)](https://thehackernews.com/2026/10/critical-pwnescape-linux-kernel.html?ref=linuxhandbook.com), a critical Linux kernel networking vulnerability that can allow code running inside a virtual machine to read host memory, crash the host, and potentially achieve host-level code execution.
- [The Linux kernel community has reached consensus](https://www.theregister.com/ai-and-ml/2026/10/14/linux-kernel-devs-drop-obligatory-confession-of-ai-tool-usage/5303140?ref=linuxhandbook.com) to deprecate the "Assisted-by" tag that asked contributors to disclose AI-assisted code generation in patch submissions.
- [Anthropic has launched OSS Scanner](https://www.helpnetsecurity.com/2026/10/09/anthropic-oss-scanner-ai-security-scans/?ref=linuxhandbook.com), a free service that periodically scans participating open-source projects using Claude models and sends maintainers vulnerability reports, reproduction details, and remediation suggestions.
- [GitHub introduced new fine-grained permissions](https://devops.com/github-narrows-app-permissions-to-pull-teams-off-classic-pats?ref=linuxhandbook.com), allowing automation to create repositories and manage app installations without requiring broad administrative privileges.
- [npm now automatically expires newly created trusted publishing configurations](https://devops.com/npm-puts-a-48-hour-clock-on-unused-trusted-publishing-configurations?ref=linuxhandbook.com) if they do not complete a successful publish within 48 hours of creation.
## 😂 Geek humor
## 💌 Keep on loving Linux Handbook
This CTF is free and so is Pentora Box and there will be more. It's the kind of thing our Pro members make possible. Pro gets you that plus every other course, all our eBooks, and every tutorial we've published.
[Become a Pro member](https://linuxhandbook.com/#/portal/signup) · [Browse courses](https://linuxhandbook.com/courses/) · [eBooks](https://linuxhandbook.com/ebooks/)
Missed the previous editions? You can [access the newsletter archives](https://linuxhandbook.com/newsletter/).
I like reading your messages, so just hit reply and tell me how you are enjoying Linux 😄
### Learn SSH
URL: https://linuxhandbook.com/learn-ssh/
Last updated: 2026-10-03T14:01:57.000Z
SSH is how you log in to and work on remote Linux machines. Start with the basics, then secure your setup and fix the errors you are most likely to run into.
### LHB Linux Digest #26.14: Free CTF, Special Permissions, Process Substitution and More
URL: https://linuxhandbook.com/newsletter/26-14/
Last updated: 2026-10-02T13:35:45.000Z
We've built something new for you. A free Linux CTF game, and I've had more fun testing it than I'd like to admit.
A [CTF](https://linuxhandbook.com/ctf/) (capture the flag) teaches you Linux by making you work for it. You get a locked-down system, a riddle, and a hidden flag (a string), and you have to use real commands to dig it out.
These challenges force you to think, employ your reasoning and logical skill along with your Linux command line skills.
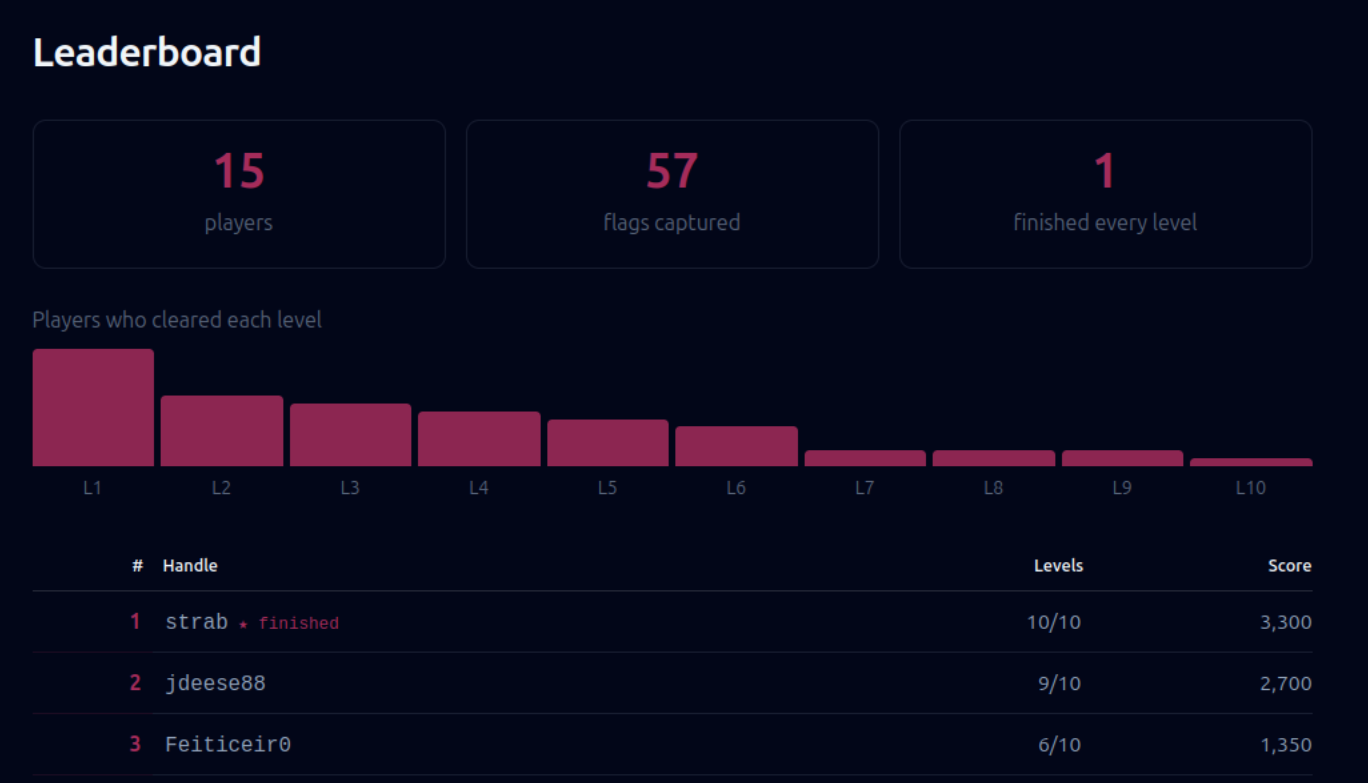
While the entire CTF is played locally on your own system, your progress can be shown on a public leaderboard.
## 🚩 Command Conqueror: our free Linux CTF
It starts with hidden files and ends with a full SUID privilege escalation. Each level drops you into a small Linux system ruled by Lord Tuxi, who leaves you a riddle and hides a flag somewhere. You find it, submit it, and climb the leaderboard.
It's free, and you don't need an account to play. If you do link your Linux Handbook account, your progress saves across machines.
You need Docker and Python 3.7+ (WSL 2 on Windows), then:
```bash
curl -fsSLO https://ctf.linuxhandbook.com/play.py
python3 play.py
```
You don't need to know Docker or Python. The CTF runs with those two.
Pick a handle, choose Command Conqueror, and type `play` to start. The early levels are gentle if you've spent time in a terminal.
Play it [here](https://linuxhandbook.com/ctf/command-conqueror/). There is a demo here that shows [how to play the CTF](https://linuxhandbook.com/ctf/#how-to-play).
[Command Conqueror: Free Linux CTF ChallengeTen Linux command line puzzles, from hidden files to SUID privilege escalation. Free, no account needed, runs in Docker on your computer.Linux HandbookYash Kiran Patil](https://linuxhandbook.com/ctf/command-conqueror/)
## 🎓 See who can do what
Level 10 of the CTF ends with privilege escalation, which sounds scarier than it is. Most of it comes down to one question: on this system, what can I actually do, and what can I do that I'm not supposed to?
A few commands answer that fast. `ls -l` shows the [permission bits](https://linuxhandbook.com/linux-file-permissions/), and an `s` where you'd expect an `x` (like `-rwsr-xr-x`) is the SUID bit, meaning the file runs with its owner's privileges instead of yours. That's the first thing a CTF player, or an attacker, goes looking for.
To find every SUID binary on a box:
```bash
find / -perm -4000 -type f 2>/dev/null
```
From there, `sudo -l` lists exactly what your user is allowed to run as root, `id` shows the groups you're in, and `getcap -r / 2>/dev/null` shows binaries with special capabilities that `ls` won't show you.
It's the same audit you'd run on your own server to check nothing has more power than it should. If you want details, our guide on [SUID, SGID and the sticky bit](https://linuxhandbook.com/suid-sgid-sticky-bit/) breaks down what those permission bits really mean.
## 💡 Quick terminal tip
Bash and zsh let you feed one command's output to another as if it were a file, using `<(...)`. No temp files, no cleanup.
It's great for comparing two states. Say you want to see what differs between two directories, or two command outputs:
```bash
diff <(ls dir1) <(ls dir2)
```
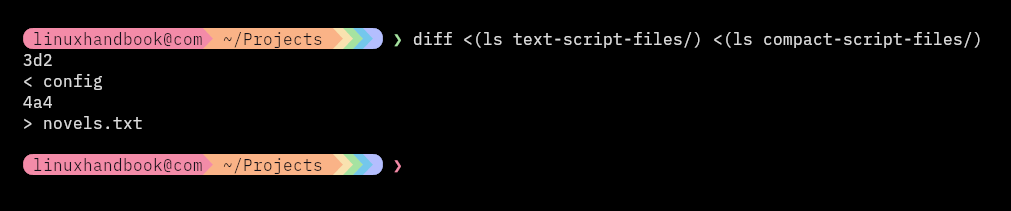
This is called [process substitution](https://linuxhandbook.com/bash-process-substitution/), and is pretty handy in bash scripts.
## 📦 Self-hosting: CyberChef
If the CTF throws a wall of base64 at you (level 5 will), this is what you want open in another tab. [CyberChef](https://github.com/gchq/CyberChef?ref=linuxhandbook.com) is a browser-based, drag-and-drop toolkit for encoding, decoding, encryption, hashing and data parsing.
[GitHub - gchq/CyberChef: The Cyber Swiss Army Knife - a web app for encryption, encoding, compression and data analysisThe Cyber Swiss Army Knife - a web app for encryption, encoding, compression and data analysis - gchq/CyberChefGitHubgchq](https://github.com/gchq/CyberChef?ref=linuxhandbook.com)
## 🛠️ Tool discovery: gopass
[gopass](https://github.com/gopasspw/gopass?ref=linuxhandbook.com) is a command-line password manager built for teams. It stores everything in GPG or age-encrypted files with git-backed version history, so your credentials live in a repo you control instead of someone else's cloud.
It works fully offline, which makes it a good fit for shared credentials across a distributed team or a CI/CD pipeline.
[GitHub - gopasspw/gopass: The slightly more awesome standard unix password manager for teamsThe slightly more awesome standard unix password manager for teams - gopasspw/gopassGitHubgopasspw](https://github.com/gopasspw/gopass?ref=linuxhandbook.com)
## 📰 Linux news that matters
- [A newly public exploit for a Linux kernel bug](https://www.linuxjournal.com/content/ubuntu-container-escape-vulnerability-gets-public-exploit-kernel-patch-arrives?ref=linuxhandbook.com) (CVE-2026-80521) lets attackers escape an Ubuntu container and get root on the host, and Ubuntu still hasn't shipped the patch.
- [Canonical is merging its split kernel update tracks](https://itsfoss.com/news/ubuntu-kernel-sru-cycle-update/?ref=linuxhandbook.com) into a single 2-week SRU cycle that overlaps weekly, so Ubuntu kernel fixes ship faster, largely because AI-assisted vulnerability hunting is finding kernel bugs faster than the old process could keep up with.
- [Portainer's Community Edition is being frozen](https://itsfoss.com/news/portainer-community-edition-freeze/?ref=linuxhandbook.com) on the 2.x line, while all new Kubernetes-first development goes exclusively into the closed-source Portainer 3.0.
- [A Google engineer has posted a 46-patch RFC series for "Orphaned VMs,"](https://www.phoronix.com/news/Orphaned-VMs-Linux-Patches?ref=linuxhandbook.com) an early-stage Linux kernel mechanism that uses the Live Update Orchestrator to keep virtual machines executing on preserved physical CPUs while the host kernel reboots or applies updates.
- [AWS has open-sourced Strands Harness](https://thenewstack.io/aws-strands-harness-agent/?ref=linuxhandbook.com), an agent runtime that bundles tools, context management, memory, and session handling on top of its Strands SDK. While it defaults to Amazon Bedrock, it works with Anthropic, OpenAI, Google, or local Ollama models, and AWS claiming 45% lower cost than Claude Code and Codex on benchmark tasks.
- Starting October 19, [GitLab will enforce new tiered API rate limits by subscription plan](https://devops.com/gitlab-tightens-rate-limits-as-coding-agents-drive-demand/?ref=linuxhandbook.com), driven by surging traffic from AI coding agents, so teams running automated tools should authenticate their requests and watch for rate-limit warnings to avoid getting throttled.
## 😂 Geek humor

## 💌 Keep on loving Linux Handbook
This CTF is free and there will be more. It's the kind of thing our Pro members make possible. Pro gets you that plus every other course, all our eBooks, and every tutorial we've published.
[Become a Pro member](https://linuxhandbook.com/#/portal/signup) · [Browse courses](https://linuxhandbook.com/courses/) · [eBooks](https://linuxhandbook.com/ebooks/)
Missed the previous editions? You can [access the newsletter archives](https://linuxhandbook.com/newsletter/).
I like reading your messages, so just hit reply and tell me how far you got in the CTF 😄
### Command Conqueror
URL: https://linuxhandbook.com/ctf/command-conqueror/
Last updated: 2026-09-30T11:41:25.000Z
Command Conqueror is a capture-the-flag game with 10 levels of Linux command line puzzles. It starts with hidden files and ends with a privilege escalation.
Each level drops you into a small Linux system ruled by **Lord Tuxi**, who leaves you a riddle and hides a flag. Use real commands to find the flag, submit it and climb the leaderboard.
It's free, and you don't need an account to play. Although, you can link it with your Linux Handbook member account and have your progress saved across time and systems.
## Quick start
You need Linux or macOS with Docker running, and Python 3.7 or newer. On Windows, use WSL 2.
Download the game and run it:
```bash
curl -fsSLO https://ctf.linuxhandbook.com/play.py
python3 play.py
```
Pick a handle, then choose **Command Conqueror** from the menu. Type `play` to enter the first level and start with:
```bash
cat hint.txt
```
When you find a flag (it looks like `LHB{...}`), copy it, type `exit` and submit it:
```
submit LHB{...}
```
If Docker complains about permissions, run `sudo python3 play.py` instead. For the full setup, the commands and the FAQ, see the [main CTF page](https://linuxhandbook.com/ctf/).
## The levels
Here's what each level tests, without giving anything away.
| Level | Points | Skills |
| ----- | ------ | ------------------------------------ |
| 1 | 100 | Hidden files |
| 2 | 150 | Searching the filesystem |
| 3 | 200 | Awkward file names |
| 4 | 250 | Archives |
| 5 | 300 | Cron and encrypted archives |
| 6 | 350 | Processes and local network services |
| 7 | 400 | Process environments |
| 8 | 450 | Log filtering and text processing |
| 9 | 500 | Hard links and inodes |
| 10 | 600 | SUID and privilege escalation |
That's 3,300 points in total. You solve the levels in order, and each one gives its points once.
The first few are friendly if you've used a terminal before. By level 8, you'll be chaining `grep`, `awk` and friends together. Level 10 starts you as an ordinary user and asks you to think like an attacker.
## Leaderboard
**–**players
**–**flags captured
**–**finished every level
Players who cleared each level
| # | Handle | Levels | Score |
| -------------------- | ------ | ------ | ----- |
| Loading leaderboard… | | | |
Show top 100
The leaderboard updates live. Players with the same score are ranked by who got there first. A ✓ next to a handle means it's linked to a Linux Handbook account.
## Tips
Read the hint more than once. Lord Tuxi likes wordplay, so read the verses closely, not just the words.
Look beyond the folder you start in. Many flags are elsewhere on the system, or held by something that's running.
If you break a level, type `restart` to get a fresh copy. It doesn't cost you anything.
## Brush up on the skills
Stuck on a level? Rather than looking for a walkthrough, read up on the skill it tests. These tutorials cover everything you need.
- [hidden files](https://linuxhandbook.com/ls-show-hidden-files/) and `ls -a`
- [find command](https://linuxhandbook.com/find-command-examples/)
- [quoting and special characters](https://linuxhandbook.com/filename-spaces-linux/) in file names
- tar and unzip
- [cron jobs](https://linuxhandbook.com/crontab/), `base64`
- `ps`, `netstat`/`ss`, `curl` with headers
- `/proc` and process environment
- `grep`, `awk`, `tr`
- [hard links](https://linuxhandbook.com/hard-link/) and [inodes](https://linuxhandbook.com/inode-linux/)
- [SUID permissions](https://linuxhandbook.com/suid-sgid-sticky-bit/)
🐛
Found a bug in a level? [Open an issue on GitHub](https://github.com/linuxhandbook/ctf/issues?ref=linuxhandbook.com).
## Play fair
The flags are inside the Docker images on your computer, so you could dig them out instead of solving the puzzles. Please don't. You'd skip exactly the part that teaches you something.
And please don't post flags or full solutions. Share how you approached a level instead.
### Link Your CTF Handle to Your Linux Handbook Account
URL: https://linuxhandbook.com/ctf/link/
Last updated: 2026-09-30T11:26:35.000Z
Loading…
Your CTF handle is tied to the computer you play on, through a key saved in `~/.ctf_user`. Link it to your Linux Handbook account and it goes wherever you go. A free account is enough.
## Why link your handle
You can play as the same handle, with the same progress, on any computer. You also don't lose it if you delete `~/.ctf_user` or reinstall your system.
Some future games will be for Linux Handbook members. A linked handle is how you get into those.
## How to link
In your terminal, run:
```bash
python3 play.py link
```
You can also type `link` in the game menu. The game shows a short code and opens this page with it.
Sign in to Linux Handbook if you aren't already, check that the code on this page matches the one in your terminal, and confirm. The game picks it up in a couple of seconds.
Only confirm a code your own terminal is showing right now. If someone sent you a link to this page with a code in it, close the page.
## Playing on another computer
Run `play.py` on the new computer. On the first run, choose "I've played before: sign in with my Linux Handbook account" instead of picking a new handle. Confirm the code here, and you're back to your handle and progress.
## What gets stored
The CTF server stores your Linux Handbook member ID and whether your membership is paid. That's how it finds your handle again.
Your email address and password never reach the CTF server. When you confirm, Linux Handbook hands this page a short-lived signed token, and the CTF server checks the signature.
Want your handle unlinked? Contact us.
### Linux CTF Challenges
URL: https://linuxhandbook.com/ctf/
Last updated: 2026-10-02T01:31:05.000Z
Think you know your way around the Linux command line? Prove it.
A capture-the-flag game, or CTF, hides a secret string somewhere in a system and challenges you to find it. It's a long-standing tradition in the security world.
Here, the idea is simpler: each game is a set of small Linux puzzles, and you solve them with the same commands you use every day.
There's no browser-based hand-holding and no multiple choice. You get a shell, a hint and a hidden flag. Find the flag, submit it and move on to the next level.
The games are free, and you don't need an account to play.
## The games
Pick one and start. Each game page has its own quick start, so you can jump straight in.
📋
More games are on the way. Some will be for Linux Handbook members only. Perfect time to get a membership.
## How it works
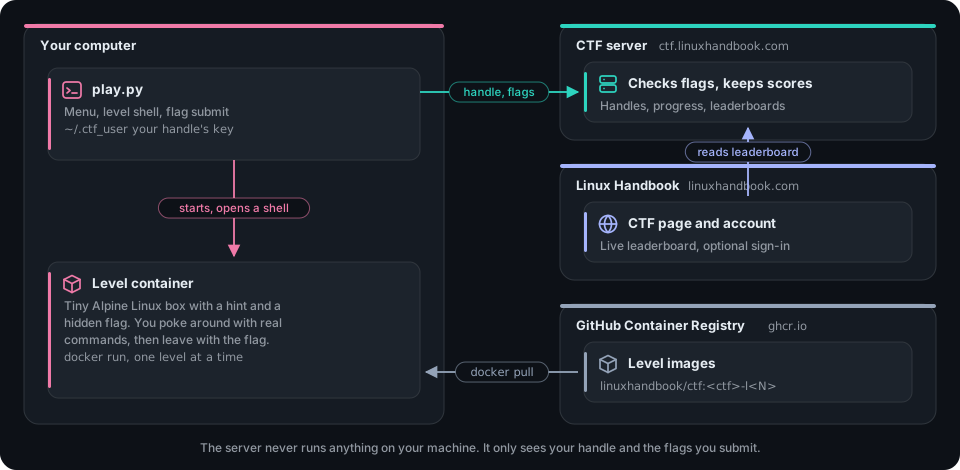
Every level is a small Linux system that runs in a Docker container on your own computer. You get a real shell to poke around in, and it stays fast no matter how many people are playing.
A small program, `play.py`, handles everything else. It downloads one level at a time, starts it, opens a shell for you and sends your flags to the Linux Handbook server. The only things that leave your computer are your handle and the flags you submit.
## What you need
You need Linux or macOS with Docker installed and running. On Windows, play inside WSL 2.
If you don't have Docker yet, follow the [official install guide](https://docs.docker.com/engine/install/?ref=linuxhandbook.com).
```bash
sudo apt install docker.io
```
You also need Python 3.7 or newer. It's already there on most Linux distributions, and the game needs nothing beyond Python's standard library.
## Get the game
Download `play.py` :
```bash
curl -fsSLO https://ctf.linuxhandbook.com/play.py
```
And then run it:
```
python3 play.py
```
On the first run, you pick a handle. That's the name shown on the leaderboards. Then choose a game from the menu.
If Docker needs root on your system, use `sudo python3 play.py`. Or add yourself to the `docker` group so you don't need `sudo`:
```bash
sudo usermod -aG docker $USER
```
Log out and back in for the group change to apply.
## How to play
Every game works the same way. Choose it from the menu, then type `play` to enter the level. Your first command inside should be:
```bash
cat hint.txt
```
The hint is a riddle. Every word in it matters. Flags look like `LHB{...}`. When you find one, copy it, type `exit` to leave the level and submit it:
```
submit LHB{...}
```
These are the commands you can use at the game prompt:
| Command | What it does |
| --------------- | ----------------------------------------------------- |
| play | Open a shell inside the level. Type exit to come back |
| submit LHB{...} | Submit the flag for this level |
| leaderboard | Top 10 for this game |
| restart | Throw the level away and start it fresh |
| menu | Back to the list of games |
| quit | Leave. Your progress is saved |
You play the levels in order, and each one gives its points once. Quit whenever you like. Run `python3 play.py` again later and you continue from the same level.
## Your handle
There's no sign-up. The first time you play, `play.py` creates a random key for your computer and saves it in `~/.ctf_user`. The server ties your handle to that key, so nobody else can play as you.
The catch is that your handle lives on that one computer. Lose the file or switch machines, and the handle stays behind. If you have a free Linux Handbook account, [link your handle to it](https://linuxhandbook.com/ctf/link/) and you can play from anywhere.
## Play fair
The levels run on your computer, and the flags are inside them. So yes, you could [dig the flags out of the Docker images](https://linuxhandbook.com/docker-inspect-command/) instead of solving anything.
I can't stop you, but you'd only be cheating yourself. The point is to learn something, and the fun is in that moment when the flag finally shows up in your terminal.
Please don't share flags or full solutions publicly. Talking about approaches is fine.
## FAQs
#### Is it free?
Most CTF games are. This will be mentioned on the game page.
#### Is it safe to run on my computer?
The levels run inside Docker containers, not on your system directly, and they're removed once you solve them. `play.py` is a single Python file you can read on [GitHub](https://github.com/linuxhandbook/ctf?ref=linuxhandbook.com) before running it.
#### Can I play on Windows?
Yes, inside WSL 2 with Docker available there. Native Windows isn't supported.
#### I'm stuck. Where are the solutions?
There are no published walkthroughs, and that's on purpose. Read the hint again, then look up the commands it points you toward. Each game page links to tutorials that cover the skills it tests. So that could give you some hint as well. If nothing works and you really want to know, just send us a message.
#### ****A level seems broken.**
Type `restart` to reset it. If it's still broken, [open an issue on GitHub](https://github.com/linuxhandbook/ctf/issues?ref=linuxhandbook.com) and tell me which level and what you saw.
#### What do you store about me?
Your handle, a hash to identify your handle and machine, and which levels you solved and when. If you link a Linux Handbook account, also your member ID and whether your membership is paid. Your email never reach the CTF server and there is no password anywhere.
#### How do I start over?
Run `python3 play.py -r`. If your handle isn't linked to a Linux Handbook account, this gives it up for good. Your handle and score stay on the leaderboard.
#### How do I clean up afterwards?
Solved levels are removed automatically. To delete any leftover images, run `docker rmi $(docker images -q ghcr.io/linuxhandbook/ctf)`
#### How do I delete my handle and scores completely?
Run `python3 play.py --delete-me` and it will delete your handle and the scores associated with it. Your username and score is removed from the leaderboard as well. This is permanent and cannot be reversed.
Enjoy capturing the flags 🎏
### LHB Linux Digest #26.13: Know Your File, File-based Workspace Certifications and More
URL: https://linuxhandbook.com/newsletter/26-13/
Last updated: 2026-09-18T12:47:47.000Z
There is a new addition to the Digest from this edition. There's a dedicated self-hosting section. Actually, it's a re-entry, as there used to be such a section earlier. Self-hosting is gaining even more popularity.
Docker compose has made things easier and then the privacy concern has made people aware. And thus the dedicated self-host section is back. Even if you do not self-host, at least you can discover some cool new tool.
## Know your file before you open it
Everything is a file in Linux and you'd be surprised how much a file will tell you before you even open it. The trick is knowing which command to ask.
Start with the [file command](https://linuxhandbook.com/file-command/). It ignores the extension entirely and reads the actual contents to tell you what something really is. That download with no extension, or the `.txt` that's secretly a JPEG? Just run file on it:
```
file mysterious-file
```
Once you know what it is, [stat](https://linuxhandbook.com/stat-command/) fills in everything else: exact size, owner, permissions, and [three separate timestamps](https://linuxhandbook.com/file-timestamps/) for when the file was last read, when its contents changed, and when its metadata was last touched. Think of it as `ls -l` but for a specific file and with more details.
Then there's [realpath](https://linuxhandbook.com/get-file-path/), for when you're not even sure where the file is located. That's why the name "real path". It resolves every symlink and those `..` in the path and gives you the real location of the file. Handy when you're inside a symlinked directory and a script keeps writing to the "wrong" place.
And if a file won't budge with a "resource busy" error, [lsof](https://linuxhandbook.com/lsof-command/) shows you exactly which process is holding it open, so you know what to stop before trying again.
## **💡**Quick terminal tip
The `namei` command breaks down a file path component by component to display the permissions of every ancestor directory.
```
namei -l
```
The above command will show the permission of each item in the path in a compact list.
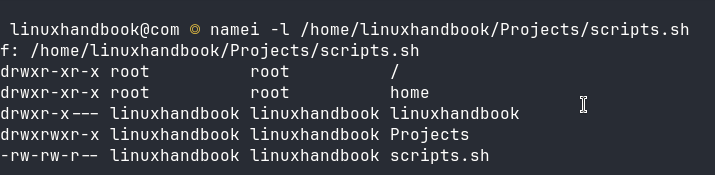
This is especially useful when resolving unexplained "Permission Denied" errors where a file is readable, but a parent directory lacks execute (`+x`) access.
## 🎓 Make your Linux skills official
[](https://www.awin1.com/cread.php?awinmid=85919&awinaffid=429005&ued=https%3A%2F%2Ftraining.linuxfoundation.org%2Fseptember-2026-promo%2F&ref=linuxhandbook.com)
Either you are an expert or you are learning. But a certification is how you prove your skill to someone who's hiring.
Linux Foundation, the official organization behind the Linux project, offers numerous certification and training exams that hold value in the job market.
Their [back-to-school sale is running until September 22](https://www.awin1.com/cread.php?awinmid=85919&awinaffid=429005&ued=https%3A%2F%2Ftraining.linuxfoundation.org%2Fseptember-2026-promo%2F&ref=linuxhandbook.com). The LFCS, their Certified System Administrator exam, is the obvious pick if Linux is your day job. Bundle it with the LFS207 course and the price drops from $645 to $387.
Going for the more lucrative Kubernetes and DevOps instead? The CKA course-and-exam bundle is also $645 down to $387, and the full CKA + CKAD + CKS exam bundle goes from $1245 to $747.
There are two codes depending on what you pick. `SEPT26BTS35` takes 35% off individual courses and certifications, and `SEPT26BTS40` takes 40% off bundles and instructor-led courses.
If a cert has been sitting on your list for months (or years), take advantage of the discount. It closes on September 22.
[Get 40% off on Certifications](https://www.awin1.com/cread.php?awinmid=85919&awinaffid=429005&ued=https%3A%2F%2Ftraining.linuxfoundation.org%2Fseptember-2026-promo%2F&ref=linuxhandbook.com)
## 📦 Self-hosting
[Jotty](https://github.com/fccview/jotty?ref=linuxhandbook.com) is a self-hosted, file-based workspace for personal notes, checklists, and project tasks. There's no external database to run, it just reads and writes plain files, which makes backups and syncing easier. A good fit if Notion feels like overkill and you'd rather own the data.
[GitHub - fccview/jotty at linuxhandbook.comLightweight but powerful alternative for managing your personal, file based, notes and checklists. - fccview/jottyGitHubfccview](https://github.com/fccview/jotty?ref=linuxhandbook.com)
## 🛠️ Tool discovery
[Lerd](https://github.com/lerd-env/lerd?ref=linuxhandbook.com) is an open-source local PHP dev environment inspired by Laravel Herd. It gives you a rootless, zero-Docker workflow on Linux, macOS, and WSL2\. If you've been spinning up containers just to run a PHP project locally, try this lighter alternative.
[GitHub - lerd-env/lerd: Open-source, Herd-like local PHP development environment for Linux and macOS. Automatic .test domains, per-project PHP/Node isolation, one-command TLS. Podman-native, rootless.Open-source, Herd-like local PHP development environment for Linux and macOS. Automatic .test domains, per-project PHP/Node isolation, one-command TLS. Podman-native, rootless. - lerd-env/lerdGitHublerd-env](https://github.com/lerd-env/lerd?ref=linuxhandbook.com)
## 📰 Linux news that matters
- [An Italian logistics company in Bergamo successfully migrated its office operations from Windows](https://itsfoss.com/linux-stories/italian-logistics-company-migration/?ref=linuxhandbook.com) to Kubuntu LTS, Nextcloud, and Mattermost, cutting recurring licensing fees and eliminating daily workstation slowdowns without disrupting freight operations.
- [Vercel’s two-week, $1 million sandbox bug bounty challenge](https://www.securityweek.com/1-million-sandbox-challenge-uncovers-linux-kernel-flaws/?ref=linuxhandbook.com) against its Firecracker microVMs received 1,285 submissions that breached no customer data, but exposed two upstream Linux kernel networking defects causing deterministic host crashes and host memory leaks.
- [Canonical developers are proposing a dedicated linux-firmware-hwe package](https://www.phoronix.com/news/Ubuntu-Considers-Linux-Firm-HWE?ref=linuxhandbook.com) for Ubuntu LTS releases to decouple newer hardware enablement firmware from General Availability kernels, preventing driver regressions for users staying on older kernel baselines.
- [The Open Secure AI Alliance has joined the Linux Foundation](https://www.prnewswire.com/news-releases/open-secure-ai-alliance-joins-the-linux-foundation-to-build-a-shared-open-defense-stack-for-the-ai-era-302877844.html?ref=linuxhandbook.com) to establish neutral governance for open-source AI defense tools, opening an RFC on its SAFE initiative to standardize incident reporting.
- [Sidero Labs has launched Talos Enterprise Linux](https://www.prnewswire.com/news-releases/sidero-labs-launches-talos-enterprise-linux-302877045.html?ref=linuxhandbook.com), introducing a commercial tier with FIPS 140-3 builds, SBOMs, and regulatory compliance artifacts while keeping the core operating system fully open source under MPL-2.0.
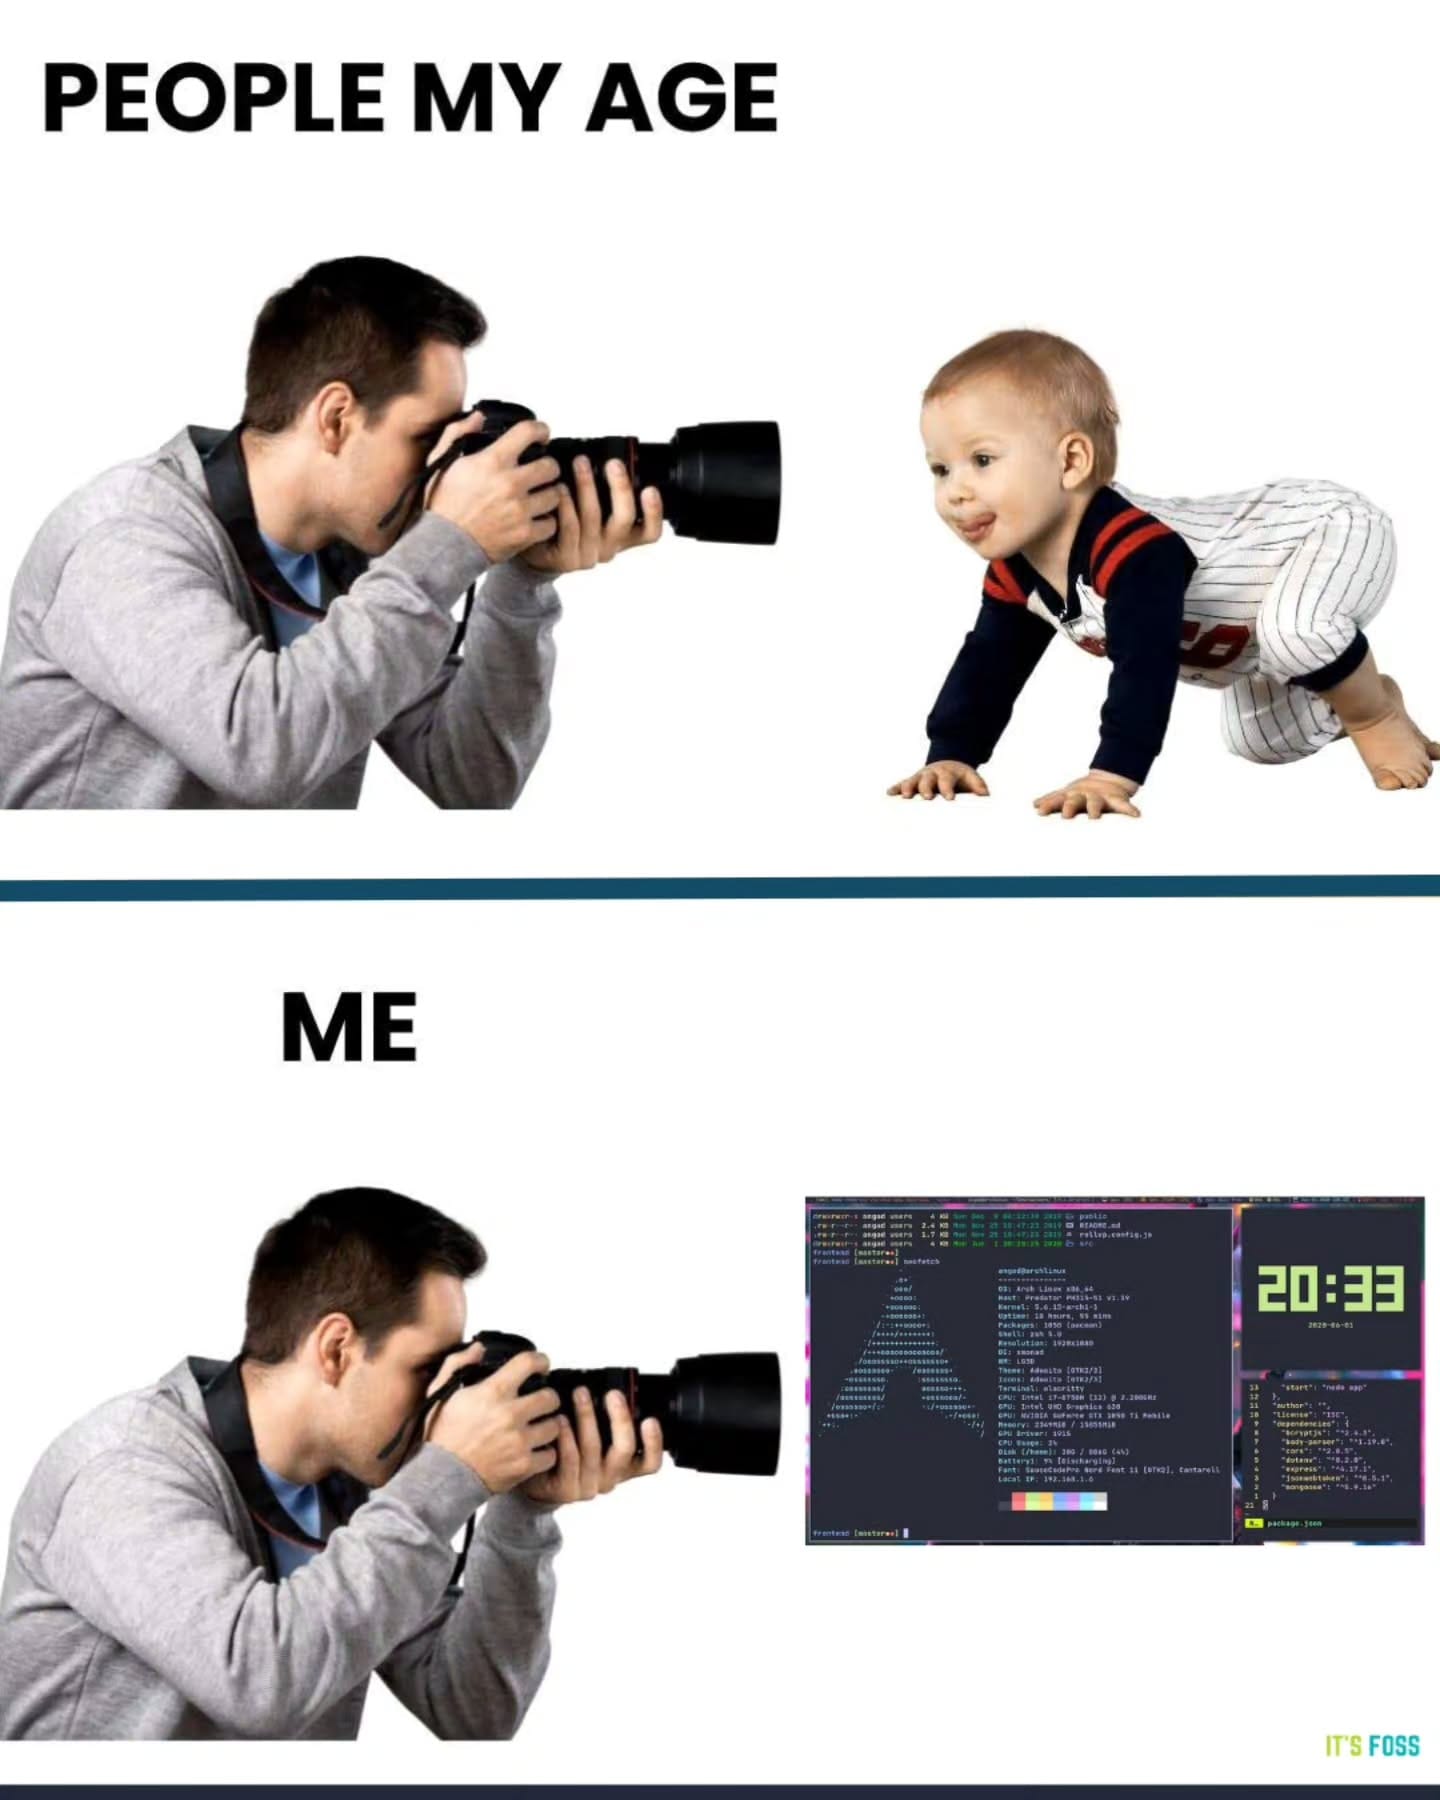
## 😂 Geek humor
Actually, I do both ;)
## 💌 Keep on loving Linux Handbook
The GitOps course is nearly ready and lands next week, built on the Git basics course. [Get your Pro membership](https://linuxhandbook.com/#/portal/signup) now and you'll have it the moment it drops, plus unlimited access to our [eBooks](https://linuxhandbook.com/ebooks/), [courses](https://linuxhandbook.com/courses/), and every tutorial we've published.
**Missed the previous editions?** You can [access the newsletter archives.](https://linuxhandbook.com/newsletter/)
I like reading your messages, so just hit the reply button and share your thoughts 😄
### LHB Linux Digest #26.12: Demystifying diff, Process Substitution, History Trick, and More
URL: https://linuxhandbook.com/newsletter/26-12/
Last updated: 2026-09-11T11:59:04.000Z
Last week, we revealed the [Free Tmux course](https://linuxhandbook.com/courses/tmux/). I am also working on creating roadmaps so that members can follow a dedicated learning path with all the resources we have created in the last 8 years.
Next week, we should have the GitOps course, focusing on ArgoCD. This will build upon the foundation of the [Git basics course](https://linuxhandbook.com/courses/git/).
## Essential Linux concept: diff
All that Git talk actually rests on a very old, very simple Linux idea. You compare two versions of something, and then you act on the difference.
That's exactly what the [diff command](https://linuxhandbook.com/diff-command/) does. You give it two files, and it tells you what you'd need to change in one to make it match the other. It's the same mental model your version control uses under the hood.
The output looks cryptic the first time you meet it, with things like `2c2`, `3a4` and `5d5`. Once you learn to read it, it makes complete sense. We explain the output line by line in [this guide](https://linuxhandbook.com/diff-command/).
Here's the part most of us forget: `diff` isn't limited to single files. With `diff -r` you can [compare two entire directories](https://linuxhandbook.com/compare-directories/) and spot exactly how two config folders drifted apart. And if you find yourself creating temporary files just to compare two command outputs, [process substitution](https://linuxhandbook.com/bash-process-substitution/) lets you do it in one line: `diff <(command1) <(command2)`.
## **💡**Quick terminal tip
Using history expansions like `!$` (last argument) or `!!` (entire previous command) can feel like a gamble when running destructive operations. You only see what it resolved to after you have pressed the Enter key.
Bind Readline's magic-space to expand history references instantly as soon as you press the Spacebar:
Open the `~/.inputrc` file and add the following line at the end.
```bash
Space: magic-space
```
Restart the terminal session.
When you type `sudo !!` or `rm -rf !$` and hit Space, the shell immediately replaces the tokens with the full command string right in front of your eyes. You can review, edit, or back out before executing, eliminating both keystrokes and blind execution risk.

## 🛠️ Tool discovery
Let's see if you find your next favorite tool.
### Monoscope: Open-Source Observability and Trace Aggregator for Distributed Microservices
[Monoscope](https://github.com/monoscope-tech/monoscope?ref=linuxhandbook.com) is an open-source observability engine tailored for developers needing unified log, metric, and distributed trace visibility across local containers and multi-service staging environments.
[GitHub - monoscope-tech/monoscope: Monoscope lets you ingest and explore your logs, traces and metrics. We store these in S3 compatible buckets. Query in natural language via LLMs.Monoscope lets you ingest and explore your logs, traces and metrics. We store these in S3 compatible buckets. Query in natural language via LLMs. - monoscope-tech/monoscopeGitHubmonoscope-tech](https://github.com/monoscope-tech/monoscope?ref=linuxhandbook.com)
### Colanode: Open-Source, Local-First Collaboration Workspace
[Colanode](https://github.com/colanode/colanode?ref=linuxhandbook.com) is an open-source, local-first collaboration platform designed to unify documents, structured databases, real-time chat, and file management under a self-hosted architecture.
[GitHub - colanode/colanode: Open-source and local-first Slack and Notion alternative that puts you in control of your dataOpen-source and local-first Slack and Notion alternative that puts you in control of your data - colanode/colanodeGitHubcolanode](https://github.com/colanode/colanode?ref=linuxhandbook.com)
## 📣 Event alert
AGNTCon + MCPCon Europe is happening in Amsterdam on 17–18 September, and if you're building anything in the agentic AI or MCP space, this is the event to attend.
The event is full of open source maintainers, enterprise engineers, infra and tooling folks, and researchers.
You'll bump into the people building MCP itself, alongside teams from AWS, Google, Hugging Face, Microsoft, Anthropic, Solo.io, and a long list of startups exploring Agentic AI.
**You can knock off your ticket prices with code ITSFOSS\_50.**
🗓 17–18 September
📍 RAI Amsterdam
[Register for AGNTCon + MCPCon Europe](https://events.linuxfoundation.org/agntcon-mcpcon-europe/?ref=linuxhandbook.com)
## 📰 Linux news that matters
- [Broadcom has quietly removed all public download pages for the VMware Virtual Disk Development Kit (VDDK)](https://itsfoss.com/news/broadcom-removes-vmware-vddk-downloads/?ref=linuxhandbook.com), restricting future access exclusively to authorized Technology Alliance partners.
- [Threat actors are actively breaching F5 BIG-IP APM appliances](https://www.bleepingcomputer.com/news/security/hackers-breach-f5-big-ip-apm-devices-to-deploy-linux-rootkit/?ref=linuxhandbook.com) to deploy "PoisonedRefresh," a stealthy Linux rootkit that persists across firmware upgrades and modifies SELinux policies.
- [CERN is migrating over 2,200 accelerator control computers to Debian 13](https://itsfoss.com/news/cern-debian-push/?ref=linuxhandbook.com) to bypass restrictive enterprise CPU requirements and modernize hardware lifecycle management. In a parallel push toward digital sovereignty, the [Swiss government has launched a CHF 9 million pilot](https://itsfoss.com/news/switzerland-replace-microssoft-pilot/?ref=linuxhandbook.com) deploying openDesk to replace Microsoft 365 across 3,000 federal workstations.
- [Intel's Dynamic PAMT support has been queued in the x86/tdx tree for Linux 7.4](https://www.phoronix.com/news/Intel-Dynamic-PAMT-For-7.4?ref=linuxhandbook.com), reducing the \~0.4% baseline memory overhead required by Trust Domain Extensions by allocating the Physical Address Metadata Table dynamically rather than upfront.
- [Google has open-sourced Mantis under Apache 2.0](https://www.marktechpost.com/2026/09/09/google-open-sources-mantis-a-modular-skills-toolkit-that-lets-coding-agents-find-reproduce-and-patch-vulnerabilities/?ref=linuxhandbook.com), providing a modular framework of slash-command skills that enables AI coding agents to manage end-to-end vulnerability triage.
## 😂 Geek humor

## 💌 Keep on loving Linux Handbook
GitOps course is nearly ready. It should arrive next week.
Perfect time to [become a Pro member](https://linuxhandbook.com/#/portal/signup) and enjoy unlimited access to our [eBooks](https://linuxhandbook.com/ebooks/), [courses](https://linuxhandbook.com/courses/) and in-depth tutorials.
**Missed the previous editions?** You can [access the newsletter archives.](https://linuxhandbook.com/newsletter/)
You may also [contribute to Linux Handbook](https://linuxhandbook.com/write-for-us/) and share your experience and expertise with the community.
I like reading your messages, so just hit the reply button and share your thoughts 😄
### LHB Linux Digest #26.11: New Free Course, Named Pipes, Multi-kernel and More
URL: https://linuxhandbook.com/newsletter/26-11/
Last updated: 2026-09-04T13:30:39.000Z
We have a new course, [Tmux Fundamentals](https://linuxhandbook.com/courses/tmux/). As evident from the name itself, the course teaches you the fundamentals of Tmux.
A terminal multiplexer like Tmux is a lifesaver if you connect to remote servers via SSH. No more session drops because your laptop went in sleep mode or if you forgot to stay connected in the terminal.
Tmux has a little learning curve, and that's the reason we created this new course. It is available to everyone for free. Enjoy 😄
[Tmux Fundamentals: Free Course on Terminal MultiplexingNever lose a terminal session again! Learn tmux sessions, panes, and windows in this free, beginner-friendly course. No signup required.Linux HandbookYash Kiran Patil](https://linuxhandbook.com/courses/tmux/)
## Essential Linux concept: Named pipe redirection
Most linux users are familiar with the concept of [redirection](https://linuxhandbook.com/redirection-linux/). One of the redirections is pipe. The vertical line | in the commands gives Linux an incredible power for combining commands.
But did you know that there is also [named pipes that exist like a file in the system](https://linuxhandbook.com/pipe-redirection/). Well, everything is file in Linux so that's not surprising. Named pipes can store output in memory buffer. It's an interesting concept that most of us Linux users don't come across every day.
[Pipe redirection in Linux: Named and Unnamed PipesThere are two kinds of pipes in Linux: named and unnamed. Here’s a detailed look at pipe redirection.Linux HandbookDebdut Chakraborty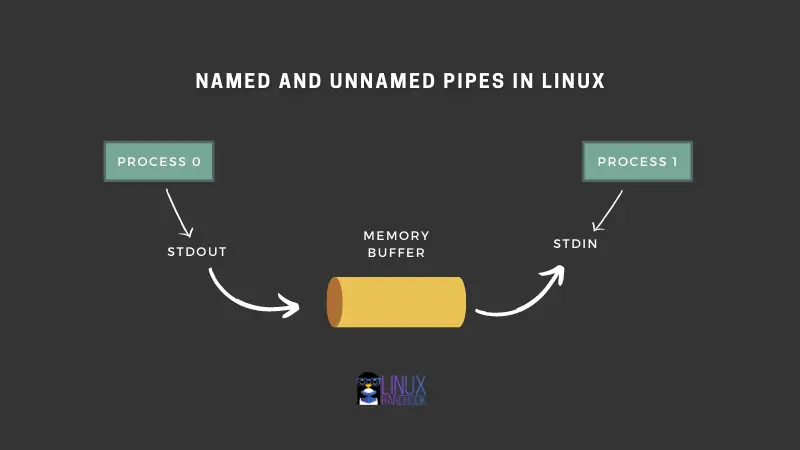](https://linuxhandbook.com/pipe-redirection/)
## Interested in Linux kernel developments?
Linux Foundation's instructor led training program on [Linux Kernel Internals and Developments](https://training.linuxfoundation.org/training/linux-kernel-internals-and-development/?ref=linuxhandbook.com) is for you. The course is designed to provide experienced programmers with a solid understanding of the Linux kernel.
It is an instructor-led virtual session that will run from 9 to 5 for 4 days. Which means that it is like attending a training class but live on your computer. The next session runs on 28th September.
If you are working in a company, you can ask your boss or company to pay for this training. Tell them that you are getting a **50% discount with ILTGTRITSFOSS coupon code that saves $1750** on this specialized course.
[Use ILTGTRITSFOSS Coupon to get 50% off](https://training.linuxfoundation.org/instructor-led-training-courses/?ref=linuxhandbook.com)
## **💡Quick terminal tip**
In a pipeline like `commandA | commandB | commandC`, the shell only records the exit code of the final command (commandC), quietly masking crashes or errors produced upstream.
Bash solves this with the built-in `${PIPESTATUS[@]}` array, which captures the discrete exit codes of every stage in your pipeline.
For example, in the below command:
```
cat app.log | grep "FATAL" | awk '{print $2}'
echo "${PIPESTATUS[@]}"
```
The `${PIPESTATUS[@]}` array preserves the discrete exit code of every process in the pipeline, not just the `awk` command.
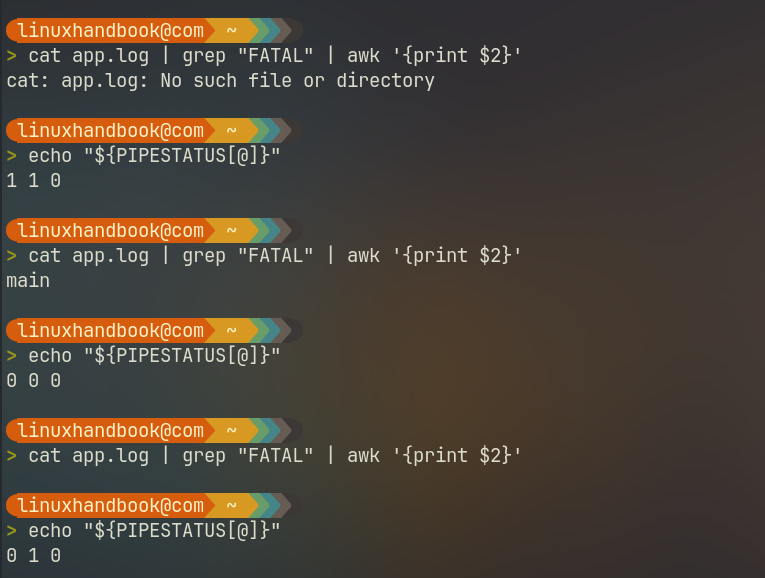
## 🛠️ Tool discovery
Let's see if you find your next favorite tool.
### Listmonk: Self-hosted, newsletter and mailing list manager
[Listmonk](https://github.com/knadh/listmonk?ref=linuxhandbook.com) is an open-source, AGPL-licensed newsletter and mailing list manager packed into a single Go binary backed by a PostgreSQL database. It features a modern web dashboard with multi-threaded SMTP queues, dynamic templating, SQL-based subscriber segmentation, and an HTTP webhook interface for transactional messaging.
[GitHub - knadh/listmonk: High performance, self-hosted, newsletter and mailing list manager with a modern dashboard. Single binary app.High performance, self-hosted, newsletter and mailing list manager with a modern dashboard. Single binary app. - knadh/listmonkGitHubknadh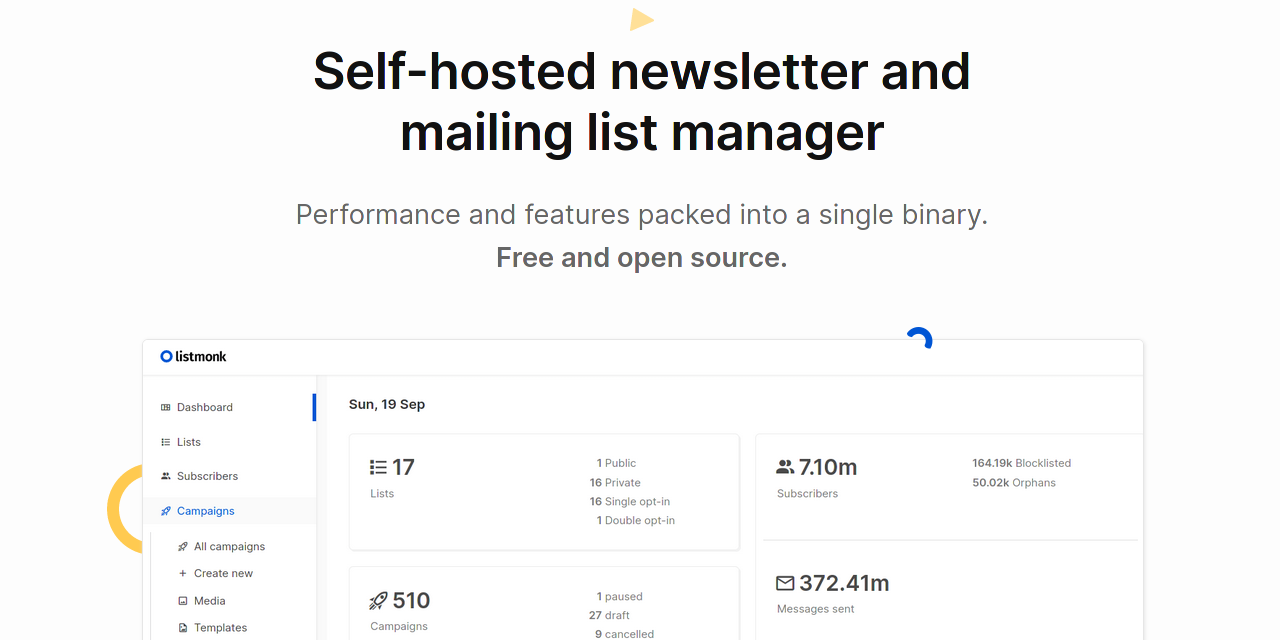](https://github.com/knadh/listmonk?ref=linuxhandbook.com)
### Updo: Real-Time Uptime Monitoring Tool
[Updo](https://github.com/Owloops/updo?ref=linuxhandbook.com) is an open-source Go CLI tool that monitors website uptime, response latency breakdowns (DNS, TCP, TTFB), and SSL certificate expiration in real time via an interactive TUI or plain-text mode.
[GitHub - Owloops/updo: Uptime monitoring CLI tool with alerting and advanced settingsUptime monitoring CLI tool with alerting and advanced settings - Owloops/updoGitHubOwloops](https://github.com/Owloops/updo?ref=linuxhandbook.com)
## 📰 Linux news that matters
- [The Linux kernel is approaching 2,000 fixed CVEs](https://www.tomshardware.com/software/linux/linux-kernel-nears-2-000-cves-per-release-as-ai-bug-hunters-scour-40-million-lines-of-code-maintainers-say-they-are-completely-overwhelmed?ref=linuxhandbook.com) per release as automated LLM analysis floods maintainers with low-priority bug reports and hallucinated fixes across obscure code paths.
- [Multikernel Technologies has launched mklinux v7.0-mk2](https://itsfoss.com/news/multikernel-public-release/?ref=linuxhandbook.com), an open-source kernel fork that allows physical servers to run multiple independent Linux kernels side by side without a hypervisor.
- [Automated AI web scrapers are consuming](https://itsfoss.com/news/linux-kernel-repo-ai-overrun/?ref=linuxhandbook.com) roughly 20% of git.kernel.org's total compute capacity by requesting individual HTML commit views instead of cloning repositories directly.
- [Debian has officially voted to allow generative AI tools](https://itsfoss.com/news/debian-allows-ai-contribution/?ref=linuxhandbook.com) for development, maintenance, and documentation, placing full legal and technical accountability directly on the human contributor to review and test all submissions.
- [California lawmakers have passed Assembly Bill 1856](https://www.phoronix.com/news/California-AB-1856-Passes?ref=linuxhandbook.com), amending the upcoming Digital Age Assurance Act to formally exempt software and operating systems distributed under permissive licenses allowing copying, modification, and redistribution.
## 😂 Geek humor

## 💌 Keep on loving Linux Handbook
GitOps course is nearly ready. It should arrive next week.
Perfect time to [become a Pro member](https://linuxhandbook.com/#/portal/signup) and enjoy unlimited access to our [eBooks](https://linuxhandbook.com/ebooks/), [courses](https://linuxhandbook.com/courses/) and in-depth tutorials.
**Missed the previous editions?** You can [access the newsletter archives.](https://linuxhandbook.com/newsletter/)
You may also [contribute to Linux Handbook](https://linuxhandbook.com/write-for-us/) and share your experience and expertise with the community.
I like reading your messages, so just hit the reply button and share your thoughts 😄
### Chapter 9: Your First Tmux Configuration
URL: https://linuxhandbook.com/courses/tmux/tmux-configuration/
Last updated: 2026-09-04T12:03:27.000Z
At this point, you can create sessions, organize them with windows, split windows into panes, navigate between them, resize and zoom panes, search terminal history, and build a complete tmux workspace.
So why configure tmux at all? The answer is simple.
After using tmux for a while, you'll start noticing small things you'd like to change. Maybe you want to use the mouse. Maybe you don't like the default prefix key. Maybe you want a shortcut for something you do repeatedly.
This is where the **tmux configuration file** comes in.
Don't worry, we're not going to turn this into an advanced configuration tutorial. The goal of this chapter is to make a few useful changes and, more importantly, help you understand how tmux configuration works.
## What Is `.tmux.conf`?
Tmux reads its configuration from a file called:
```
~/.tmux.conf
```
The `~` means your home directory. So if your username is `yash`, the file would normally be:
```
/home/yash/.tmux.conf
```
This file contains settings and key bindings that tell tmux how you want it to behave.
Think of it like this:
```
Your preferences
↓
~/.tmux.conf
↓
Tmux
↓
Your customized workflow
```
Without this file, tmux uses its default settings. With it, you can change those defaults.
## Do You Need a Configuration File?
Not at all.
Tmux works perfectly well without one. The default configuration is enough to learn everything we've covered so far. In fact, I recommend using the defaults for a while before customizing anything.
Why?
Because you first want to understand **how tmux works**. Once you've actually used it, you'll know what you want to change. So think of configuration as: **Making tmux fit your workflow, not fixing something that is broken.**
## Create Your First `.tmux.conf`
Let's create the file. From your normal shell, run:
```
touch ~/.tmux.conf
```
Now open it in your editor. For example:
```
nano ~/.tmux.conf
```
You now have an empty tmux configuration file. Don't add ten settings at once. We'll start with something simple.
### Enable Mouse Support
One of the easiest beginner-friendly customizations is mouse support.
Add:
```
set -g mouse on
```
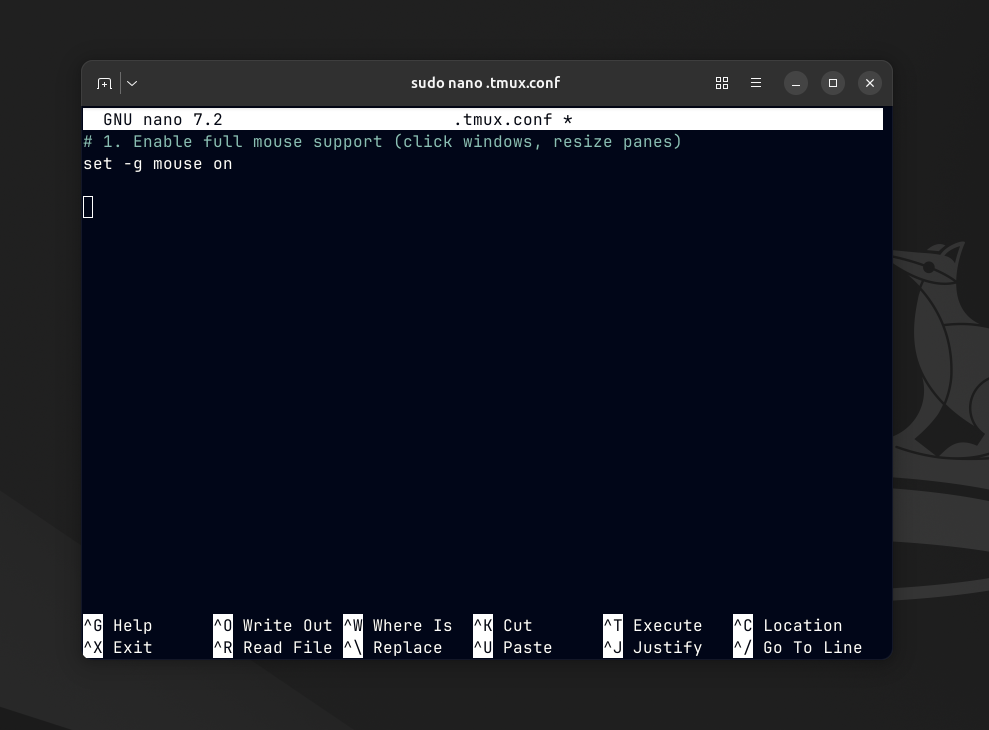
Enable mouse in config
Save the file. This enables mouse interaction for things such as selecting panes, resizing panes, scrolling and switching between windows.
This can make tmux feel much more familiar when you're just getting started.
### Reload the Configuration
There is one thing you need to understand before testing the change. Editing `.tmux.conf` does not automatically change an already-running tmux server. You need to tell tmux to reload the file.
Inside tmux, press:
```
Ctrl+b :
```
This opens the tmux command prompt. Now type:
```
source-file ~/.tmux.conf
```
and press Enter. Tmux will read the configuration file again. You can also run the same command from a shell using:
```
tmux source-file ~/.tmux.conf
```
0:00
/0:12
1×
Source config file
You might wonder: Why not just close tmux and start it again?
You can. But reloading the configuration is much more convenient when you're experimenting. Imagine you are changing a key binding.
You edit the configuration:
```
save
```
Then reload:
```
tmux source-file ~/.tmux.conf
```
Test it. If you don't like it, change the file again and reload. You don't need to destroy your existing sessions and windows every time you make a small configuration change.
This becomes especially useful as your configuration grows.
### Customizing the Prefix Key
You've been using the default prefix throughout this course:
```
Ctrl+b
```
Tmux uses this prefix to distinguish tmux commands from commands intended for your shell. For example:
```
Ctrl+b c
```
means: Send `c` to tmux to create a new window. Some users eventually change the prefix because `Ctrl+b` can feel inconvenient. A popular alternative is:
```
Ctrl+a
```
You can configure it with:
```
set -g prefix C-a
unbind C-b
bind C-a send-prefix
```
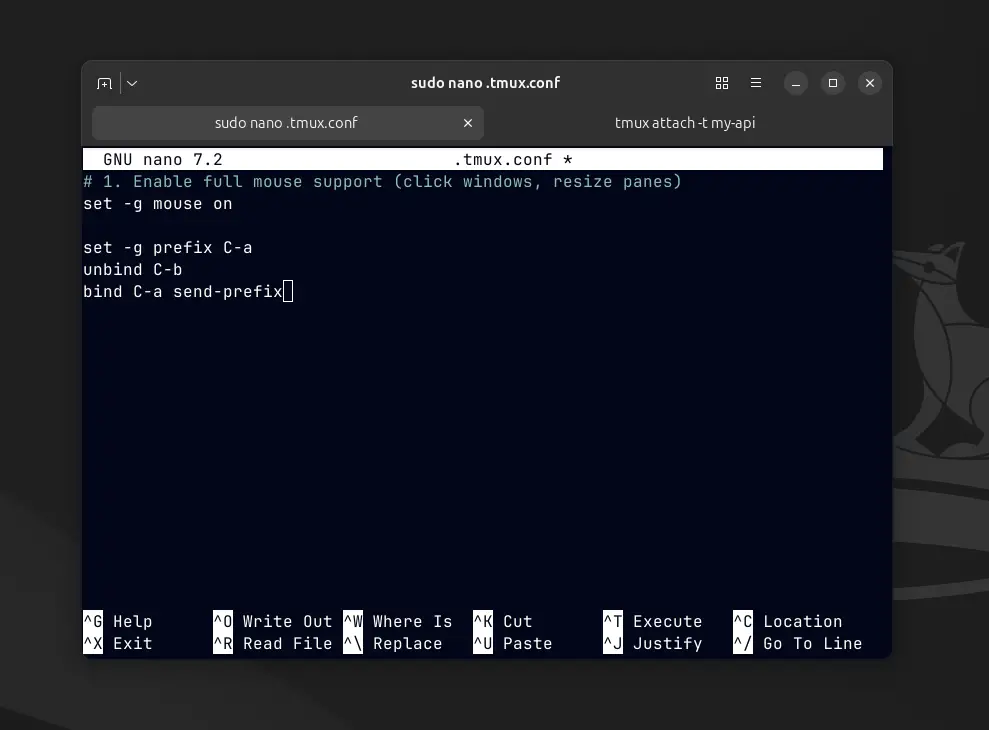
Set new Prefix Key
Let's not rush into this one. If you're comfortable with `Ctrl+b`, **there is no requirement to change it**. In fact, for this beginner course, I recommend keeping the default unless you have a specific reason to change it.
### Adding a Simple Custom Key Binding
Configuration becomes much more interesting when you start creating your own shortcuts. For example, suppose you frequently reload your tmux configuration. Instead of typing:
```
Ctrl+b :
source-file ~/.tmux.conf
```
you can create a shortcut. Add:
```
bind r source-file ~/.tmux.conf
```
Now:
```
Ctrl+b r
```
reloads your configuration. This is a simple example of the power of `.tmux.conf`:
```
Shortcut
↓
Custom action
↓
Less repetitive typing
```
Reload the configuration after adding it:
```
tmux source-file ~/.tmux.conf
```
Then test:
```
Ctrl+b r
```
At this point, you might have something like:
```
set -g mouse on
bind r source-file ~/.tmux.conf
```
That's enough. You do **not** need a huge configuration file to be productive. In fact, starting small makes troubleshooting much easier.
If something breaks later, you have only a few settings to investigate.
## What You Have Learned
You've now gone from starting your first tmux session to customizing how tmux behaves.
More importantly, you've learned the complete beginner workflow:
```
Start tmux
↓
Create a session
↓
Organize with windows
↓
Split into panes
↓
Navigate and resize
↓
Search terminal history
↓
Detach
↓
Reconnect
↓
Customize
```
You no longer need to think of tmux as a collection of shortcuts.
You can now think of it as a **persistent workspace that you can organize and adapt to your own workflow**.
**You've completed the beginner tmux workflow. From here, the best way to improve is simply to keep using it! See you next time!**
##
### Chapter 8: Build a Real Tmux Workflow
URL: https://linuxhandbook.com/courses/tmux/tmux-real-workflow/
Last updated: 2026-09-04T12:02:59.000Z
So far, you have learned the individual building blocks of tmux.
You know how to create sessions, organize work with windows, split windows into panes, move between panes, resize them, and use copy mode to work with terminal output.
But knowing these features separately is different from actually using tmux. So in this chapter, we're going to put everything together. Instead of learning another set of commands, we're going to build a **real tmux workspace** from scratch.
Imagine you're working on an application running on a remote Linux server. You need to start the application, watch its logs, run commands, and keep an eye on the system.
By the end of this chapter, you'll have a workflow you can adapt to your own work.
## The Workflow We're Going to Build
Let's start by deciding what we need. For this example, we'll use one session called:
```
my-api
```
Inside that session, we'll have three windows:
```
my-api
│
├── app
├── logs
└── system
```
The idea is simple:
- **app**: run application commands
- **logs**: watch application output
- **system**: monitor the server and run diagnostics
We can also split the `app` window into panes when we need multiple things visible at the same time.
Our final workspace will look roughly like this:
```
Session: my-api
Window 0: app
┌──────────────────────────┬────────────────────┐
│ │ │
│ application │ commands │
│ │ │
└──────────────────────────┴────────────────────┘
Window 1: logs
┌─────────────────────────────────────────────────┐
│ │
│ application logs │
│ │
└─────────────────────────────────────────────────┘
Window 2: system
┌──────────────────────────┬────────────────────┐
│ │ │
│ monitoring │ diagnostics │
│ │ │
└──────────────────────────┴────────────────────┘
```
Don't worry about building this perfectly on the first attempt. The goal is to understand **how you decide what belongs in a session, window, or pane**.
## Step 1: Create the Session
Start from your normal terminal. Create a named session:
```
tmux new -s my-api
```
You're now inside the `my-api` session. This session represents the entire application context. If you're working remotely, you can think of it as:
```
Server
│
└── my-api session
```
Everything we create next will belong to this session.
## Step 2: Create the Windows
Your first window already exists. Let's use it for the application.
Rename it:
```
Ctrl+b ,
```
Enter:
```
app
```
Now create another window:
```
Ctrl+b c
```
Rename it:
```
Ctrl+b ,
```
and call it:
```
logs
```
Create one more:
```
Ctrl+b c
```
Rename it:
```
Ctrl+b ,
```
and enter:
```
system
```
0:00
/0:41
1×
Creating the structure
You should now have:
```
0:app
1:logs
2:system
```
in your tmux status bar.
## Step 3: Set Up the Application Window
Move back to window 0:
```
Ctrl+b 1
```
Now let's create two panes. Split the window:
```
Ctrl+b %
```
You now have two panes side by side. Use one for the application and the other for commands. For example, you might run:
```
./start-app.sh
```
in one pane. And leave the other available for commands such as:
```
git status
```
or:
```
curl http://localhost:8080/health
```
0:00
/0:19
1×
Apps window with two panes
The exact commands will depend on your project. The important part is the workflow.
```
app window
┌────────────────────────┬─────────────────────┐
│ │ │
│ Application │ Commands │
│ │ │
└────────────────────────┴─────────────────────┘
```
Now you don't need to keep switching between two terminals just to see your application and run a command.
## Step 4: Set Up the Logs Window
Move to the logs window:
```
Ctrl+b 2
```
Now imagine your application writes to:
```
application.log
```
You might run:
```
tail -f application.log
```
0:00
/0:08
1×
Logs window of the application
The terminal will continuously display new log entries. This window now has one clear purpose: **Watch what's happening inside the application.**
If an error occurs, you can immediately see it without interrupting the application window. For a real project, you might instead use commands such as:
```
journalctl -f
```
or whatever logging tool your application uses. The exact command isn't the point here. The important idea is that the **window has a dedicated responsibility**.
## Step 5: Set Up the System Window
Now move to:
```
Ctrl+b 3
```
This window can be used for system monitoring. Split it:
```
Ctrl+b %
```
In one pane, you could run:
```
top
```
and use the other pane for diagnostic commands:
```
df -h
```
or:
```
free -h
```
0:00
/0:15
1×
System window of application
Now your workspace has three distinct areas:
```
my-api
│
├── app
│ ├── application
│ └── commands
│
├── logs
│ └── application logs
│
└── system
├── monitoring
└── diagnostics
```
This is a much more useful setup than simply opening six unrelated terminal windows.
## Step 6: Move Around the Workspace
Now practice navigating. Jump directly to your windows:
```
Ctrl+b 1
Ctrl+b 2
Ctrl+b 3
```
Move between panes:
```
Ctrl+b ←
Ctrl+b →
Ctrl+b ↑
Ctrl+b ↓
```
You can now move from:
```
application
↓
logs
↓
monitoring
```
without opening another terminal. This is where the session → window → pane model starts becoming natural.
## Step 7: Deal With a Large Log Output
Now imagine something goes wrong. Your logs contain a large amount of output and you need to find an error. Move to the logs window:
```
Ctrl+b 1
```
Enter copy mode:
```
Ctrl+b [
```
Search for:
```
/
```
Then enter something like:
```
ERROR
```
You can now inspect the matching output. This is where the things you learned in Chapter 7 become part of the workflow rather than isolated commands.
You are using:
```
Window → Logs
↓
Copy Mode
↓
Search
↓
Inspect error
```
## Step 8: What If You Need to Leave Without Disconnecting?
You don't always need to wait for your SSH connection to disappear. You can safely leave your tmux workspace whenever you want. Press:
```
Ctrl+b d
```
The session continues running. Later:
```
tmux attach -t my-api
```
0:00
/0:08
1×
Detach the current session and reattach
You're back. This is the workflow you will eventually use almost automatically when working on remote servers:
```
SSH
↓
Attach/Create tmux
↓
Work
↓
Detach
↓
Leave server
↓
Return later
↓
Attach
↓
Continue
```
You know how to create the workspace, organize it, work inside it, leave it running, and come back later. That's already enough to make tmux useful in everyday work.
But there is one final step. Once you've used tmux for a while, you'll probably notice small things you'd like to change.
Maybe you want mouse support. Maybe you prefer a different prefix key. Maybe you want a custom shortcut. That's where configuration comes in.
In the **final chapter**, we'll create your **first `.tmux.conf`** and make a few practical customizations without turning tmux into a complicated configuration project.
##
### Chapter 7: Copy Mode - Scroll, Search and Copy Terminal Output
URL: https://linuxhandbook.com/courses/tmux/tmux-copy-mode-2/
Last updated: 2026-09-04T11:09:43.000Z
So far, you've learned how to organize your tmux workspace using sessions, windows, and panes. But there's one problem you'll run into very quickly.
Your terminal can produce **a lot of output**.
Maybe you're checking application logs. Maybe a command printed hundreds of lines. Maybe an error happened somewhere near the top of the output.
You try to scroll up and suddenly you're not looking at the part you need.
This is where **tmux copy mode** becomes useful.
Copy mode lets you move through the history of a tmux pane, search through that output, select text, and copy it.
In this chapter, we'll learn how to use it without getting into complicated clipboard configuration. By the end, you'll be able to inspect large amounts of terminal output and grab the information you need.
## Why Do We Need Copy Mode?
Let's start with a simple example.
Run:
```
seq 1 100
```
You'll get:
```
1
2
3
4
...
97
98
99
100
```
Now imagine this wasn't 100 lines but several thousand lines of application logs.
You might want to go back and find something that appeared earlier.
That's what copy mode is designed for.
Instead of treating your terminal as a screen that only shows the latest output, tmux gives you a way to scroll through the **scrollback history** of the pane.
0:00
/0:14
1×
Scrollback history in copy mode
## Move Through Terminal History
Once you're in copy mode, you can move through the output.
Use the arrow keys to move around:
```
↑
↓
←
→
```
You can also use the Page Up and Page Down keys to move through larger sections of output.
For example:
```
Page Up → Move back through output
Page Down → Move forward
```
0:00
/0:22
1×
Moving through terminal history
You can also use the mouse wheel in environments where mouse support is enabled, but for now I want you to understand the actual tmux copy mode workflow.
This is particularly useful with logs.
## Search Through Output
Scrolling is useful when you know roughly where the information is. But what if your log contains thousands of lines and you're looking specifically for:
```
Hit
```
You don't want to scroll through everything manually. You can search. While inside copy mode, press:
```
/
```
This will **Scroll Down Search.**
```bash
?
```
This will help to **Scroll Up Search.** Then try to search for the keyword you are looking for in the search history.
```
Hit
```
Press Enter. Tmux will search through the available history and take you to a matching result.
You can move to the next match using:
```
n
```
and search in the opposite direction with:
```
N
```
The exact search behavior can depend on the mode and configuration you're using, but the basic workflow is:
```
Ctrl+b [
↓
/
↓
Type search term
↓
Enter
↓
Inspect matching output
```
0:00
/0:16
1×
Searching in the tmux copy mode
If you are not able to perform these set of commands you can set the following in the last of your tmux config file:
```bash
set -g mode-keys vi
set -g search-default-case-insensitive on
```
## Select and Copy Text
Now let's do the second important job of copy mode. Suppose you've found an error like this:
```
An error occurred during the signature verification.
```
You may want to copy that line and paste it somewhere else, likely your AI buddy. Inside copy mode, you can enter selection mode by pressing:
```
Space
```
Now move the cursor to select the text you need.
Depending on your tmux configuration and version, you can navigate through the text using the keyboard and extend the selection.
Once you've selected the text, press:
```
Enter
```
to copy the selected text into tmux's paste buffer.
The important workflow is:
```
Enter copy mode
↓
Find the text
↓
Start selection
↓
Select text
↓
Copy
```
0:00
/0:23
1×
Select and copy text form output
## Pasting What You Copied
Once you've copied something, tmux stores it in its **paste buffer**.
To paste the most recently copied text, use:
```
Ctrl+b ]
```
For example:
```
Ctrl+b [
```
Find and copy:
```
ERROR: connection refused
```
Then return to your shell and press:
```
Ctrl+b ]
```
0:00
/0:06
1×
Pasting the recently copied output
The copied text will be pasted into the current pane. This is different from your operating system's normal clipboard.
Tmux maintains its own paste buffers, which means it can keep text copied from its terminal environment even when you're working inside a remote session.
## Exiting Copy Mode
Once you're finished looking through the history, press:
```
q
```
This exits copy mode and returns you to the normal tmux pane.
So the complete basic workflow becomes:
```
Ctrl+b [
↓
Copy mode
↓
Scroll / Search
↓
Select / Copy
↓
Ctrl+b ]
↓
Paste
↓
q
↓
Back to normal shell
```
You don't have to think about all of these operations every time.
Most of the time, you'll use copy mode because you need to **inspect something that has already scrolled away**.
## What About Mouse Support?
You may have noticed that using the keyboard for copy mode can feel different from how you normally select text in a terminal.
Tmux also supports mouse interaction when mouse mode is enabled. For example, with mouse support configured, you can use the mouse to:
- scroll through panes
- select text
- interact with panes and windows
We'll cover mouse support more properly when we introduce tmux configuration in the final chapter. For now, learn the keyboard-based copy mode workflow first.
That way, you won't depend on a particular terminal emulator or mouse setup.
In the next chapter, we'll build a **complete real-world tmux workflow** using sessions, windows, panes, persistence, and copy mode.
### Chapter 6: Panes - Split, Navigate, Resize and Zoom
URL: https://linuxhandbook.com/courses/tmux/tmux-panes/
Last updated: 2026-09-04T11:08:39.000Z
In the previous chapter, you learned how to use windows to organize different tasks inside a tmux session.
Now let's make those windows more useful.
Imagine you are working on a server and want to watch your application logs while running commands at the same time. Opening another window would work, but you'd have to keep switching back and forth.
What if you could see both at once? That's exactly what **panes** are for.
A pane is simply a terminal area inside a tmux window. You can split one window into multiple panes and work in each of them independently.
By the end of this chapter, you'll be able to create splits, move between panes, resize them, and temporarily make one pane fill the entire screen.
## What Is a Pane?
Let's start with the hierarchy you've already learned:
```
Session
│
└── Window
│
├── Pane
└── Pane
```
A window can contain one pane or several panes. For example, a single window normally looks like:
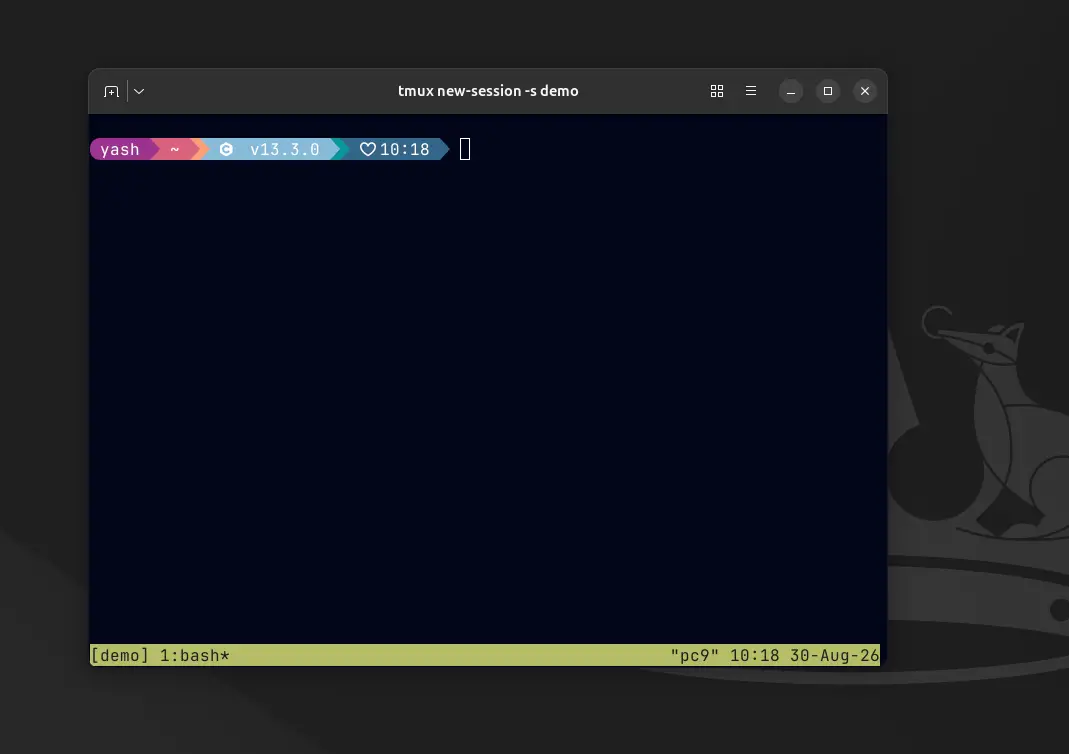
single window terminal
After splitting it vertically:
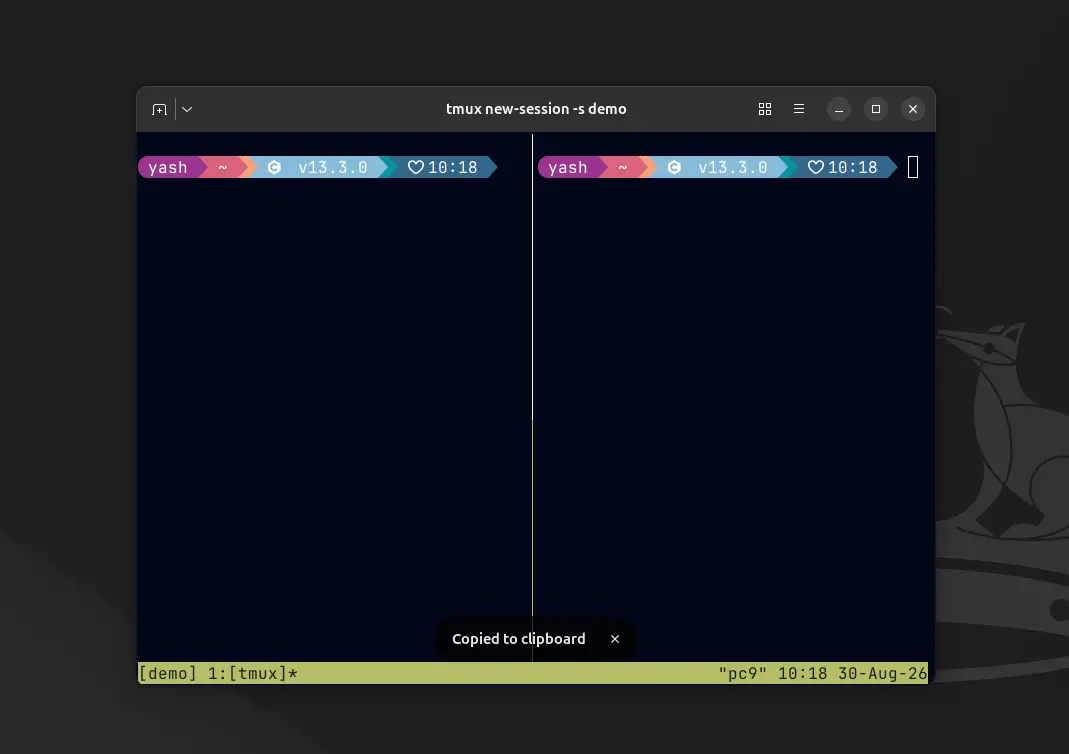
vertically split window
Now both panes are terminals, and you can run a different command in each one. This is one of the most useful everyday features of tmux.
## Create Your First Pane Split
Let's try it. Start inside a tmux session and press:
```
Ctrl+b %
```
The `%` tells tmux to split the current window vertically. You'll now have two panes side by side. Try running a command in one pane:
```
ls
```
Then move to the other pane and run:
```
pwd
```
0:00
/0:13
1×
split panes and perform indivisual commands
You now have two independent shells visible at the same time.
## Split Horizontally
You can also split the window from top to bottom.
Press:
```
Ctrl+b "
```
This creates a horizontal split.
For example:
0:00
/0:09
1×
split pane horizantally
The two split commands are easy to confuse at first:
```
Ctrl+b % → vertical split
Ctrl+b " → horizontal split
```
Don't worry if these shortcuts don't feel intuitive yet. After using them a few times, they become much easier to remember.
## Move Between Panes
Creating panes is only half the job. Now you need to move between them.
Use:
```
Ctrl+b ↑
Ctrl+b ↓
Ctrl+b ←
Ctrl+b →
```
Press the prefix first, release it, and then press the arrow key.
So, for example:
```
Ctrl+b →
```
moves you to the pane on the right.
Similarly:
```
Ctrl+b ↓
```
moves you to the pane below.
0:00
/0:13
1×
Moving between panes
This is one of those shortcuts that becomes second nature fairly quickly.
## Resize a Pane
By default, tmux gives your panes roughly equal space. But sometimes you need one pane to be larger.
For example, your logs might need most of the screen while your command pane only needs a small section.
You can resize panes using the prefix and arrow keys:
```
Ctrl+b Ctrl+↑
Ctrl+b Ctrl+↓
Ctrl+b Ctrl+←
Ctrl+b Ctrl+→
```
Notice that this is slightly different from navigation.
For navigation:
```
Ctrl+b ↑
```
For resizing:
```
Ctrl+b Ctrl+↑
```
0:00
/0:12
1×
Resizing panes
You press the prefix, then hold `Ctrl` while pressing the arrow key. You can repeat the command to make the pane larger or smaller.
## Why Would You Resize Panes?
Let's use a practical example.
Suppose you're following a log:
```
tail -f application.log
```
You may want that pane to be large because you're constantly reading new output. Your second pane might only be used for occasional commands.
So instead of:
```
┌────────────────────┬────────────────────┐
│ │ │
│ logs │ shell │
│ │ │
└────────────────────┴────────────────────┘
```
you could resize it to:
```
┌──────────────────────────────┬───────────┐
│ │ │
│ logs │ shell │
│ │ │
│ │ │
└──────────────────────────────┴───────────┘
```
This is one of the reasons panes are more useful than simply opening multiple terminal windows. You can adjust the layout to match the task you're doing.
## Zoom a Pane
Sometimes even a resized pane isn't enough. Maybe you're working inside a small pane and suddenly need the whole screen.
You don't need to destroy your layout. You can **zoom the current pane**.
Press:
```
Ctrl+b z
```
The current pane expands to fill the entire tmux window. The other panes are still there; they're simply hidden temporarily.
Press:
```
Ctrl+b z
```
again to return to the previous layout. For more clarity, you can see below.
0:00
/0:07
1×
Zooming into one pane and return
This is particularly useful when you have a complicated layout but need to focus on one task for a moment.
## Close a Pane
When you're finished with a pane, you can simply type:
```
exit
```
That closes the shell running inside that pane.
You can also use:
```
Ctrl+b x
```
0:00
/0:10
1×
Closing a pane
Tmux will ask you to confirm before closing the pane. Remember that closing a pane also closes the processes running inside it.
So if you have a server running there, closing the pane can stop that server.
## Panes in a Real Workflow
Now think about the kind of workflow you might actually use.
For a web application, you could have:
```
┌──────────────────────────────┬─────────────────┐
│ │ │
│ Application │ Logs │
│ │ │
├──────────────────────────────┴─────────────────┤
│ Monitoring │
│ top / htop / other tool │
└────────────────────────────────────────────────┘
```
For a development workflow:
```
┌───────────────────────────┬─────────────────────┐
│ │ │
│ Editor │ Terminal │
│ │ │
├───────────────────────────┴─────────────────────┤
│ Test output │
└─────────────────────────────────────────────────┘
```
And for remote server troubleshooting:
```
┌──────────────────────────┬──────────────────────┐
│ │ │
│ Logs │ Commands │
│ │ │
├──────────────────────────┴──────────────────────┤
│ System monitoring │
└─────────────────────────────────────────────────┘
```
The important idea isn't to memorize one perfect layout.
It's to understand that **you can build the layout around the work you're doing**.
In the next chapter, we'll learn how to move through terminal history, search output, select text, and copy information from a tmux pane.
### Chapter 5: Windows - Organize Your Work Inside a Session
URL: https://linuxhandbook.com/courses/tmux/tmux-windows/
Last updated: 2026-09-04T11:07:22.000Z
In the previous chapter, you learned how to create, name, detach, and reattach tmux sessions.
Now you already have the main workspace. But imagine you're working on a project and need to do several things at once.
You want one terminal for your application, another for logs, another for Git commands, and another for testing. You could open four separate terminal windows.
Or, you can keep everything inside the same tmux session. That's where **windows** come in.
A tmux window is essentially a terminal tab inside a session. Once you understand sessions, windows are the next layer of organization.
## What Is a Tmux Window?
Remember the hierarchy from Chapter 1:
```
Session
│
├── Window
├── Window
└── Window
```
A session represents the overall context. Windows represent the different tasks inside that context. For example, imagine you're working on an application called `my-api`.
You could have: my-api: (editor, server, logs, git), which will look like below in tmux:
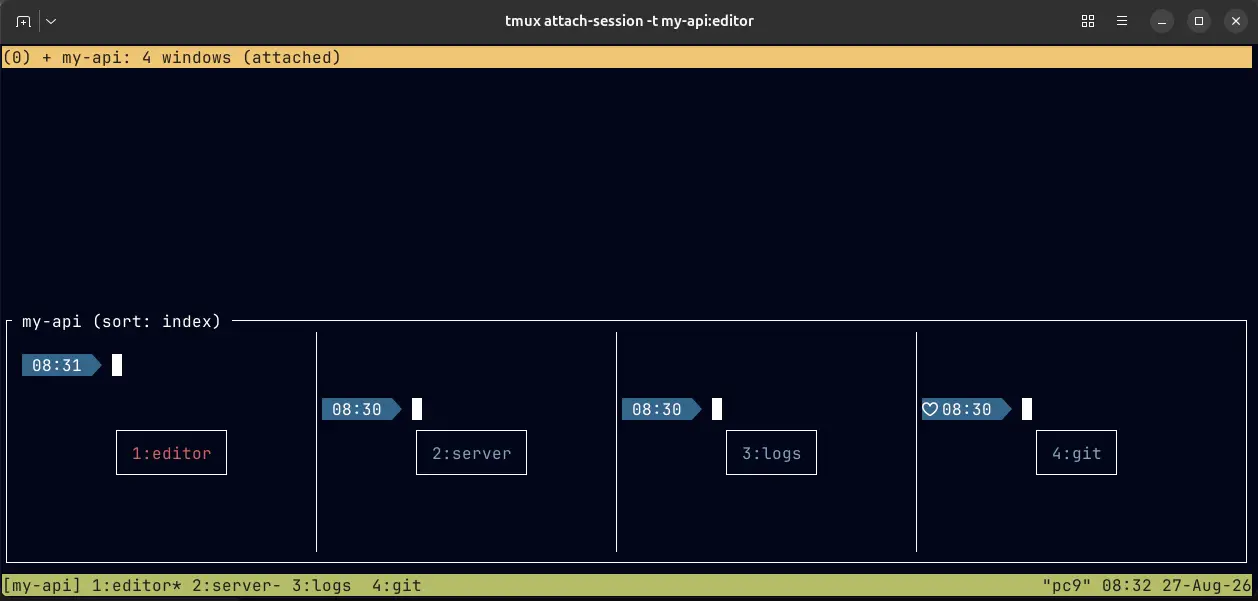
multiple windows in a session
All four windows belong to the same `my-api` session. This is useful because everything related to the project stays together.
## Create a New Window
Let's create one. Inside your tmux session, press:
```
Ctrl+b c
```
Remember the prefix sequence:
1. Press `Ctrl+b`
2. Release the keys
3. Press `c`
0:00
/0:18
1×
new window creation in tmux
A new window appears. You are now working inside that new window. You can run any normal commands here.
The important part is that you haven't created a new session. You've simply created another workspace **inside the same session**.
## Switch Between Windows
Once you have multiple windows, you need a way to move between them.
Use:
```
Ctrl+b n
```
This moves to the **next window**.
To move to the previous window:
```
Ctrl+b p
```
You can also jump directly to a window by its number.
For example:
```
Ctrl+b 2
```
takes you to window `2`.
And:
```
Ctrl+b 1
```
takes you to window `1`.
You can see below how the star pointer changes when we change windows:
0:00
/0:13
1×
Switching between windows in tmux
This is one reason the numbers shown in the tmux status bar are useful.
## Rename a Window
The default window name is usually based on the process running inside it.
For example, you might see:
```
0:bash
```
That's not very descriptive.
Let's give the window a useful name.
Press:
```
Ctrl+b ,
```
Tmux will ask you for a new name.
For example:
```
editor
```
Press Enter.
Your status bar should now show something similar to:
```
1:editor
```
Now you immediately know what that window is for.
0:00
/0:13
1×
renaming a window in tmux
Good names make a big difference once you have several windows.
## Close a Window
When you're finished with a window, you can close it by exiting the shell running inside it:
```
exit
```
If that is the only shell in the window, the window closes.
You can also use the tmux command:
```
Ctrl+b &
```
Tmux will ask you to confirm before killing the current window.
0:00
/0:16
1×
Closing a window in tmux
Be careful with this command because closing a window also closes the processes running inside it.
For example, if a server is running in that window, closing the window will terminate that server process.
So think of it this way:
```
Create window → Start work
Close window → Finish that workspace
```
All of these windows are still part of the **same session**. That means you can detach from the session and later reattach your windows will still be there. This is the combination that makes tmux powerful.
## Practice
✏️
***Try This:**
Spend a few minutes switching between your windows without looking at the shortcut table. The goal isn't perfect memorization yet; it's becoming comfortable moving around your tmux workspace.
Create a session called:
```
tmux new -s practice
```
Create three windows and name them:
```
commands
logs
monitoring
```
Practice moving between them. Then detach:
```
Ctrl+b d
```
and reattach:
```
tmux attach -t practice
```
Your windows should still be exactly where you left them. You now know how to organize different tasks using windows. But sometimes switching between windows isn't enough.
What if you want to see your application logs **and** run commands at the same time? Instead of creating another window, you can split the current window into multiple terminal areas.
Those are called **panes**. In the next chapter, we'll create, navigate, resize, and zoom panes!
### Chapter 4: Sessions - Create, Name, Detach and Reattach
URL: https://linuxhandbook.com/courses/tmux/tmux-sessions/
Last updated: 2026-09-04T11:07:54.000Z
So far, you have installed tmux, started your first session, and learned how the prefix key works.
Now we get to the feature that makes tmux genuinely useful. **Sessions.** A tmux session is a workspace that can keep running even after you leave it. This is what allows you to disconnect from a server and come back later without rebuilding everything from scratch.
Let's see how that works.
## What Is a Tmux Session?
Whenever you run:
```bash
tmux
```
tmux creates a session for you. You can think of a session as a container for your terminal work.
For example:
```bash
Session: my-project
│
├── Window 0
├── Window 1
└── Window 2
```
Later, those windows can contain multiple panes, but for now, focus on the session itself.A session usually represents one main context.
For example:
```
my-project
production
debugging
```
You might use separate sessions for separate projects, servers, or tasks.
## Create a Named Session
If you know what the session is for, it's much better to give it a name. Use:
```
tmux new -s my-project
```
0:00
/0:13
1×
Create a named session → my-project
Here:`new` tells tmux to create a new session. `-s` means we are giving the session a name.`my-project` is the session name.
Now you have a session called `my-project`. Naming sessions becomes especially useful when you have more than one. Instead of wondering which session is which, the name tells you immediately.
## See Your Sessions
Now let's say you have created a few sessions. How do you find out which ones are currently running?
Run:
```
tmux ls
```
or:
```
tmux list-sessions
```
You'll see something similar to:
0:00
/0:13
1×
The exact output will be different on your system. The important part is that tmux is showing you the sessions that currently exist.
This becomes one of the commands you'll use often when working with multiple sessions.
## Detach Without Stopping Your Work
Now let's try the most important part. Suppose you're inside your `my-project` session and a command is running.
You don't want to close the session. You simply want to leave it for now. This is where **detach** comes in.
Press:
```
Ctrl+b d
```
Remember how the prefix works: Press `Ctrl+b,` Release both keys, Press `d`.
You should see something like:
0:00
/0:04
1×
Detached session is still running
You are now back in your normal terminal. But here's the important part: **The tmux session is still running.** You have left the session without shutting it down.
💡
This distinction is one of the most important in tmux:
Detach → Leave session running
Exit → Close the shell/session
## Reattach to Your Session
Now let's get back into the session. First, list your sessions:
```
tmux ls
```
Then attach to `my-project`:
```
tmux attach -t my-project
```
You can also use the shorter form:
```
tmux a -t my-project
```
0:00
/0:13
1×
Reattaching the session in tmux
You're back. Your windows are still there. Your windows are still there. Your panes are still there and any process that continued running is still there.
## Rename a Session
Sometimes you create a session with a temporary name and later realize you want something clearer.
You can rename the current session using:
```
Ctrl+b $
```
Enter the new name and press Enter.
You can also rename a session from the command line:
```
tmux rename-session -t my-project api-server
```
Now the session is called:
```
api-server
```
It will look similar like this:
0:00
/0:17
1×
Renaming a session
## Kill a Session
When you are completely finished with a session, you can remove it.
From outside tmux:
```
tmux kill-session -t api-server
```
0:00
/0:13
1×
Kill a detached session
Or, while inside the session, you can simply exit all shells in that session. Be careful here. **Killing a session closes it and terminates the processes running inside it.**
Now you can now manage the basic lifecycle of a tmux session: Create, Name, Use, Detach, Reattach, Rename / Kill a session.
But a session alone isn't enough for a useful workflow.
Soon you'll want one place for logs, another for your editor, another for commands, and perhaps another for monitoring.
That's where **windows** come in. In the next chapter, we'll learn how to organize multiple tasks inside the same tmux session.
### Chapter 3: The Tmux Prefix Key & Essential Shortcuts
URL: https://linuxhandbook.com/courses/tmux/tmux-essential-shortcuts/
Last updated: 2026-09-04T10:53:46.000Z
In the previous chapter, you started tmux and saw that it still feels like a normal terminal. You can run commands, work with files, and use your shell just as you normally would.
Now you need a way to tell tmux: "I want you to do something, not my shell." That is what the **prefix key** does.
Once you understand this one idea, tmux shortcuts stop feeling like a collection of random key combinations. Almost every tmux action follows the same pattern: **press the prefix, then choose the action you want**.
0:00
/0:11
1×
Prefix key with different actions
## What Is the Tmux Prefix?
By default, tmux uses: `Ctrl+b` as its **prefix key**.
The prefix is like a signal to tmux: Pay attention. The next key I press is a command for you.
For example, to create a new window, you use: `Ctrl+b` then `c` The important part is how you press it. You press: `Ctrl+b` release both keys, and then press: `c` So don't think of this as one large keyboard combination.
That two-step pattern is the foundation for the rest of tmux.
## Why Does Tmux Need a Prefix?
You might be wondering why tmux cannot simply use keys such as `c`, `n`, or `z` directly. The reason is that those keys already belong to your shell and the programs running inside it.
Imagine you are typing:
```
cd projects
```
You expect your shell to receive those characters.
Tmux cannot treat every `c` you type as: "Create a new window." That would make normal terminal work impossible. The prefix gives tmux a clean boundary between **normal keyboard input** and **tmux commands**.
Without the prefix:
```
Your keyboard
↓
Shell
```
With the prefix:
```
Your keyboard
↓
Ctrl+b
↓
Tmux
↓
Action key
```
So when you press `Ctrl+b` tmux knows that the next key has a special meaning. That is why you can continue typing normal Linux commands without tmux constantly getting in the way.
## Learn the Shortcut Pattern
The easiest way to learn tmux is not to memorize every shortcut separately.
Learn the pattern first:
```
Ctrl+b then
```
Then learn what the key represents.
For example:
```
Ctrl+b then c
```
means: *Create a new window.*
And:
```
Ctrl+b then d
```
means: *Detach from the current session.*
The prefix stays the same. Only the action key changes.
This is what makes tmux much easier to learn than it initially appears. You are not learning a completely different interface for every feature. You are learning one command pattern and gradually adding actions to it.
## The Essential Shortcuts
Let's start with the shortcuts you will use throughout this course.
| Shortcut | Action |
| ------------- | ----------------------------- |
| Ctrl+b then c | Create a new window |
| Ctrl+b then n | Move to the next window |
| Ctrl+b then p | Move to the previous window |
| Ctrl+b then , | Rename the current window |
| Ctrl+b then % | Split the window vertically |
| Ctrl+b then " | Split the window horizontally |
| Ctrl+b then z | Zoom the current pane |
| Ctrl+b then d | Detach from tmux |
You do **not** need to memorize all of these immediately. Instead, understand what problem each shortcut solves.
You don't have to memorize every tmux binding because tmux can show you its key bindings.
Inside tmux, press:
```
Ctrl+b then ?
```
0:00
/0:07
1×
tmux available key bindings
Tmux will display a list of available key bindings. That makes learning much less stressful.
If these shortcuts make sense, you're ready for the next step. You now know **how to communicate with tmux**.
In the next chapter, we'll use these shortcuts to work with **sessions,** creating named workspaces, detaching from them, finding them again, and reattaching later without losing your work.
### Chapter 2: Get Tmux Running
URL: https://linuxhandbook.com/courses/tmux/get-tmux/
Last updated: 2026-09-04T09:58:26.000Z
In the previous chapter, we looked at the problem tmux solves and why persistent terminal sessions are useful, especially when working over SSH.
Now it's time to actually use tmux.
In this chapter, we'll install tmux on your system, verify that everything is working, start your first tmux session, and understand what you see when tmux starts.
We won't configure anything yet. For now, the goal is simple:
> **Get tmux running and get comfortable inside your first session.**
Once that works, we'll start learning how to control tmux in the next chapter.
## Installing Tmux
The good news is that tmux is available through the package manager on most Linux distributions, so installation is usually just one command.
On Ubuntu or Debian-based systems, run:
```bash
sudo apt update
sudo apt install tmux
```
The first command refreshes your package information, and the second installs tmux.
On Arch:
```
sudo pacman -S tmux
```
If you're using another distribution, use the command for your system from the examples above. Verify the Installation before starting tmux:
```bash
tmux -V
```
tmux version
## Start Tmux
Now comes the fun part. Type `tmux` in your terminal and that's it, you have just started your first tmux session.
At first glance, almost nothing may seem different. Your shell still works normally, and you can still run Linux commands just like before.
But look at the **bottom of your terminal**. You should now see a tmux status bar. A typical tmux screen looks roughly like this:
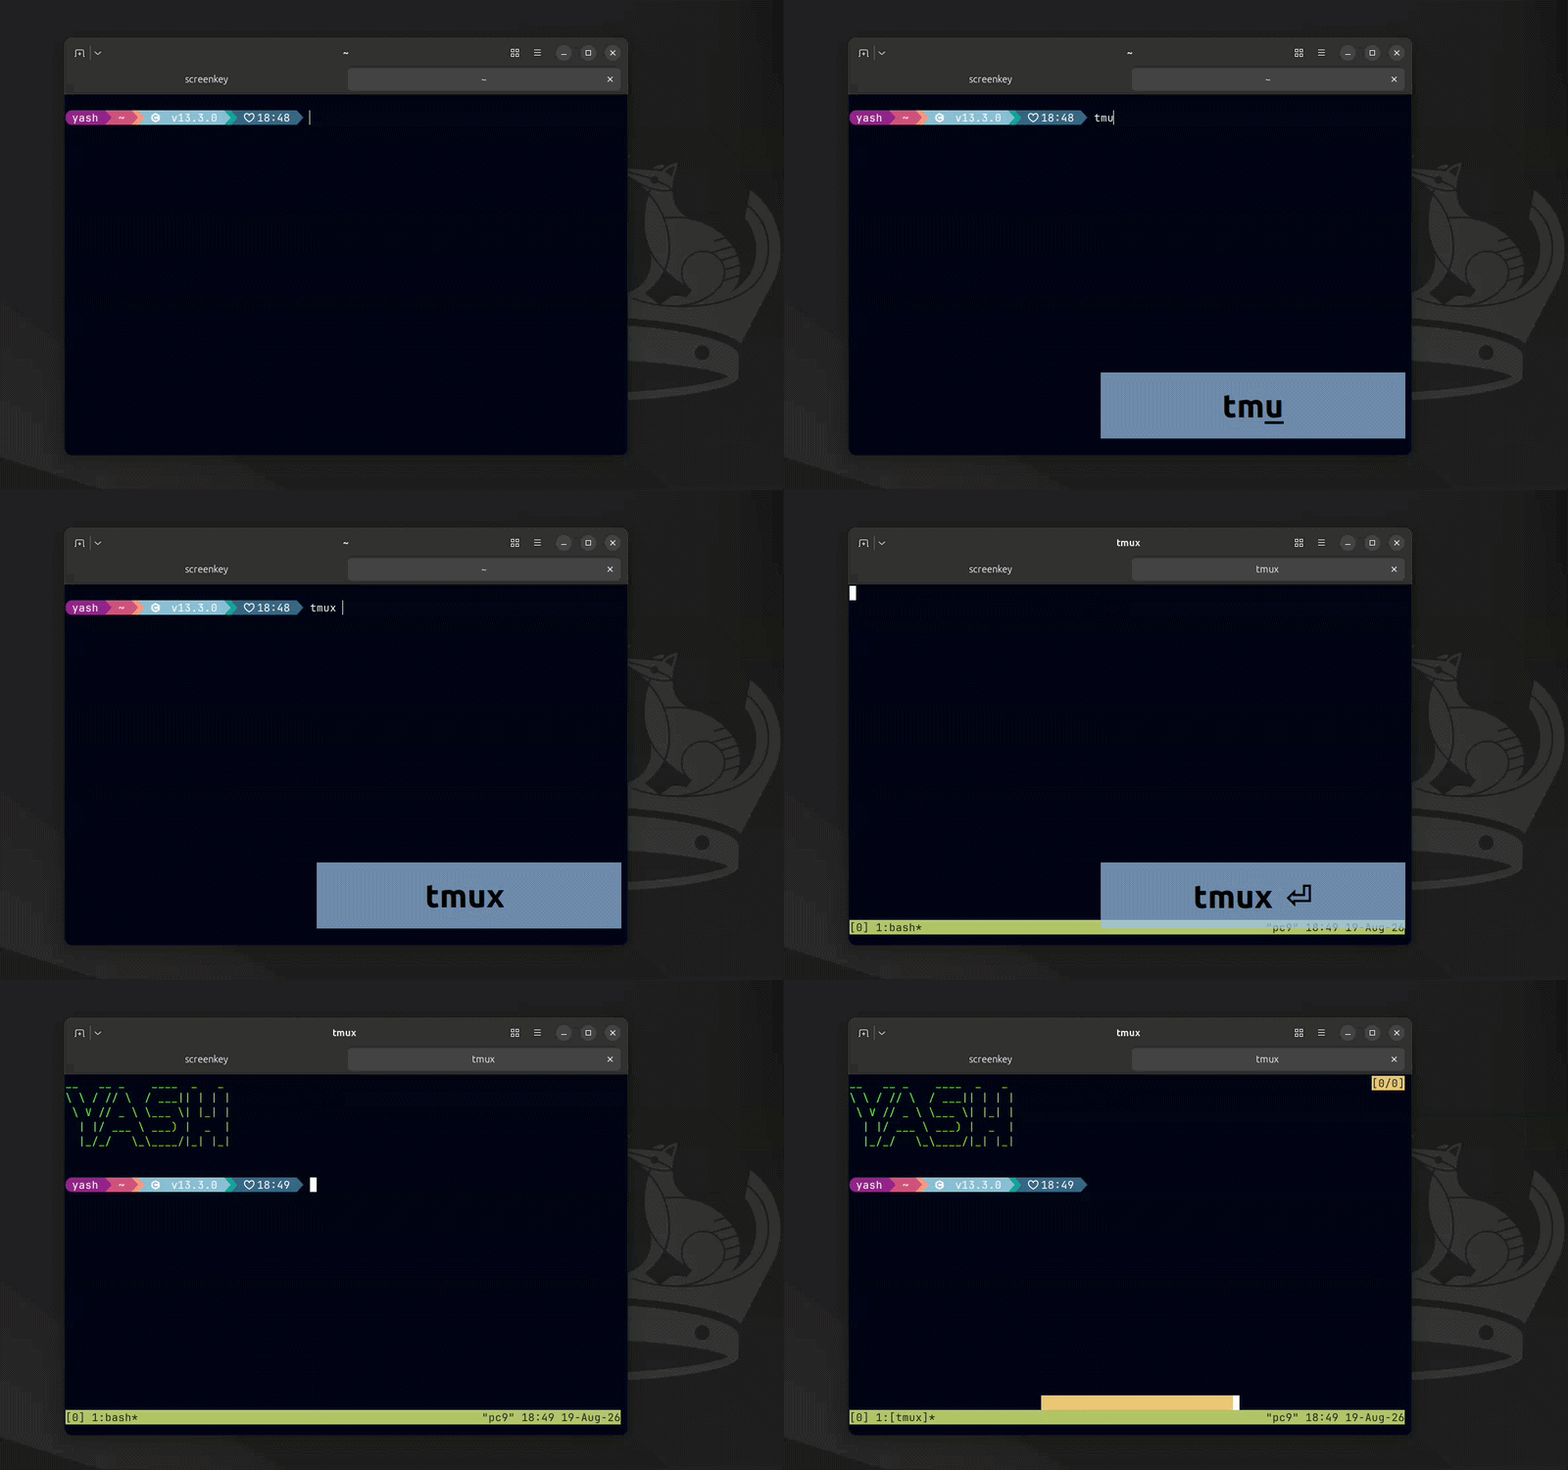
Tmux first session
Let's break down the status bar without going too deep yet. You may see something similar to:
```
[0] 1:bash*
```
The `1` represents the first window. The `bash` part tells you the shell running inside that window. The `*` marks the active window.
The Linux commands behave exactly as they normally would. Tmux isn't replacing your shell or changing how Linux commands work. It is managing the terminal environment around your shell.
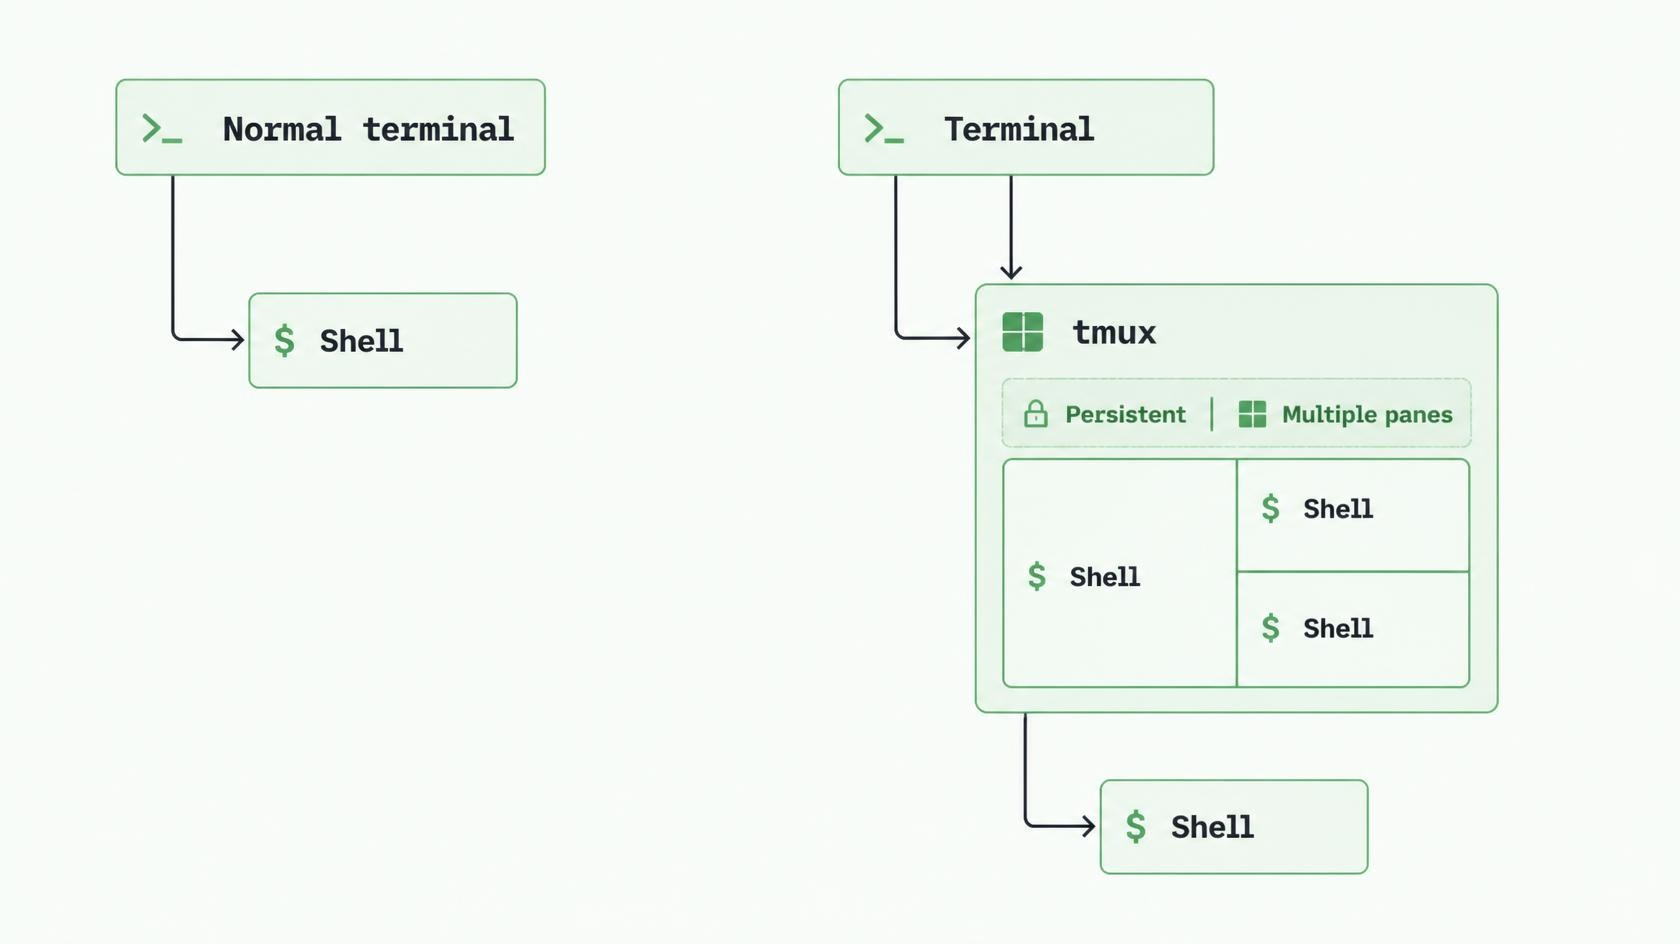
persistent session and multiple panes of Tmux
Type `exit` and press Enter. The tmux status bar disappears, and you return to your normal terminal. Later, you'll learn another operation called **`detach`**.
So far, we've only started tmux and observed what it looks like. But you may already be wondering **how do I actually control tmux?** That's what we'll answer next.
In the next chapter, we'll learn the **tmux prefix key** \- the small but important concept that lets you send commands to tmux without accidentally sending them to your shell.
Once you understand the prefix key, the rest of tmux starts to feel much more predictable.
### Chapter 1: Why Tmux? Understanding Terminal Multiplexing
URL: https://linuxhandbook.com/courses/tmux/why-tmux/
Last updated: 2026-09-04T12:23:26.000Z
If you have ever run a long command over SSH and lost it because your connection dropped, you already understand the pain tmux solves.
Tmux is a terminal multiplexer. In plain language, it lets you run and manage multiple terminal workspaces inside one terminal environment, and it keeps those workspaces alive even when your network session dies.
In this chapter, I want you to understand that core idea first. We will get into the shortcuts and commands later. For now, let us focus on **why tmux is useful and what problem it actually solves**.
## The Problem Tmux Solves
Without tmux, your remote shell is tied to your current SSH connection.
```bash
ssh user@server
```
You now have a shell running through that connection. Perhaps you start a long command:
```bash
./deploy.sh
```
Everything is fine as long as the connection stays alive.
But what happens if your network drops? The connection disappears, and your shell can disappear with it. For demo I will connect to my localhost and try a long-running command without Tmux:
0:00
/0:11
1×
This becomes frustrating when you are running: database imports, backups, deployment scripts, long test runs, builds, log monitoring, etc.
Tmux adds a persistent layer between your SSH connection and the work you are doing. Now your SSH connection can disappear while the tmux session continues running on the server.
Later, you reconnect and attach to the same session.
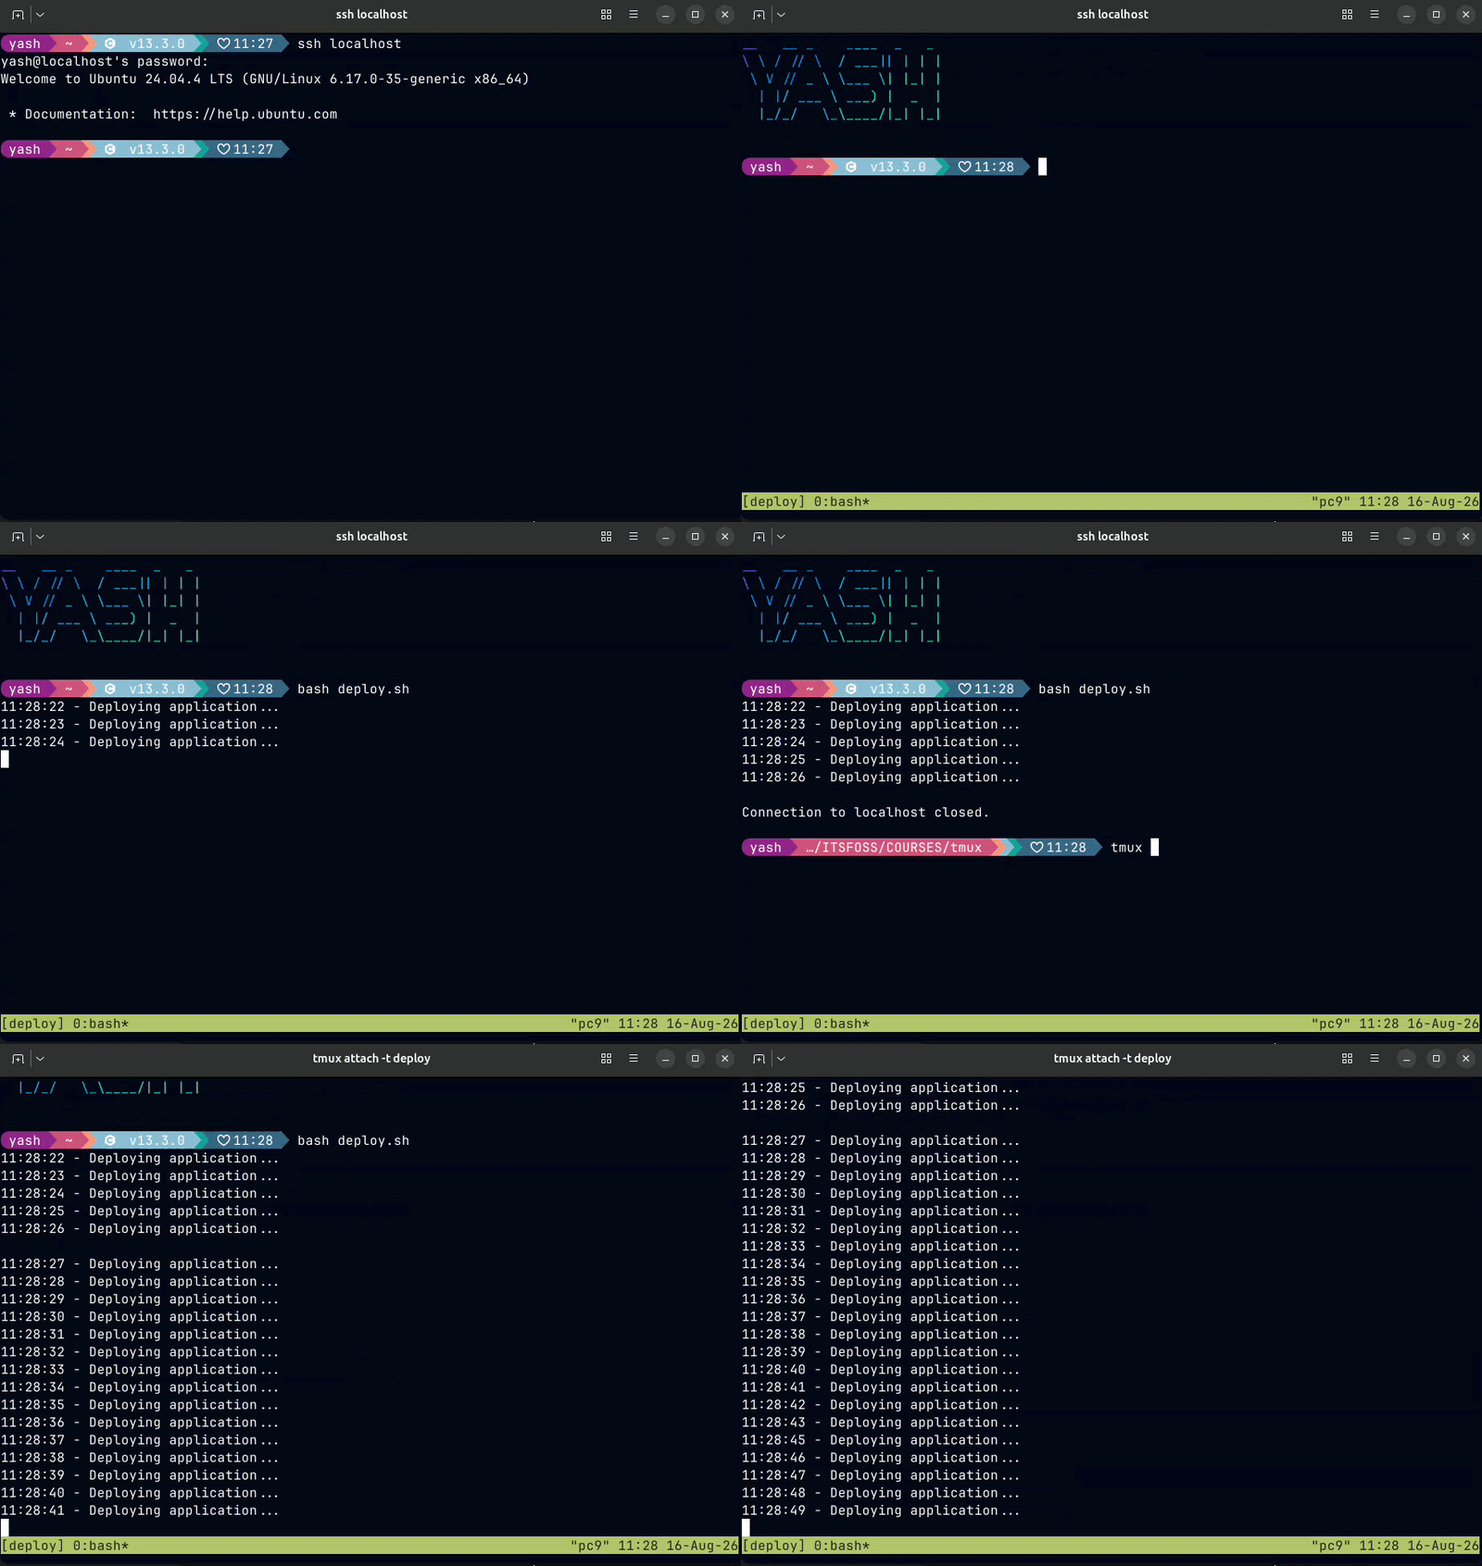
scenario with tmux
The visual representation below explains the problem Tmux solves for your use cases
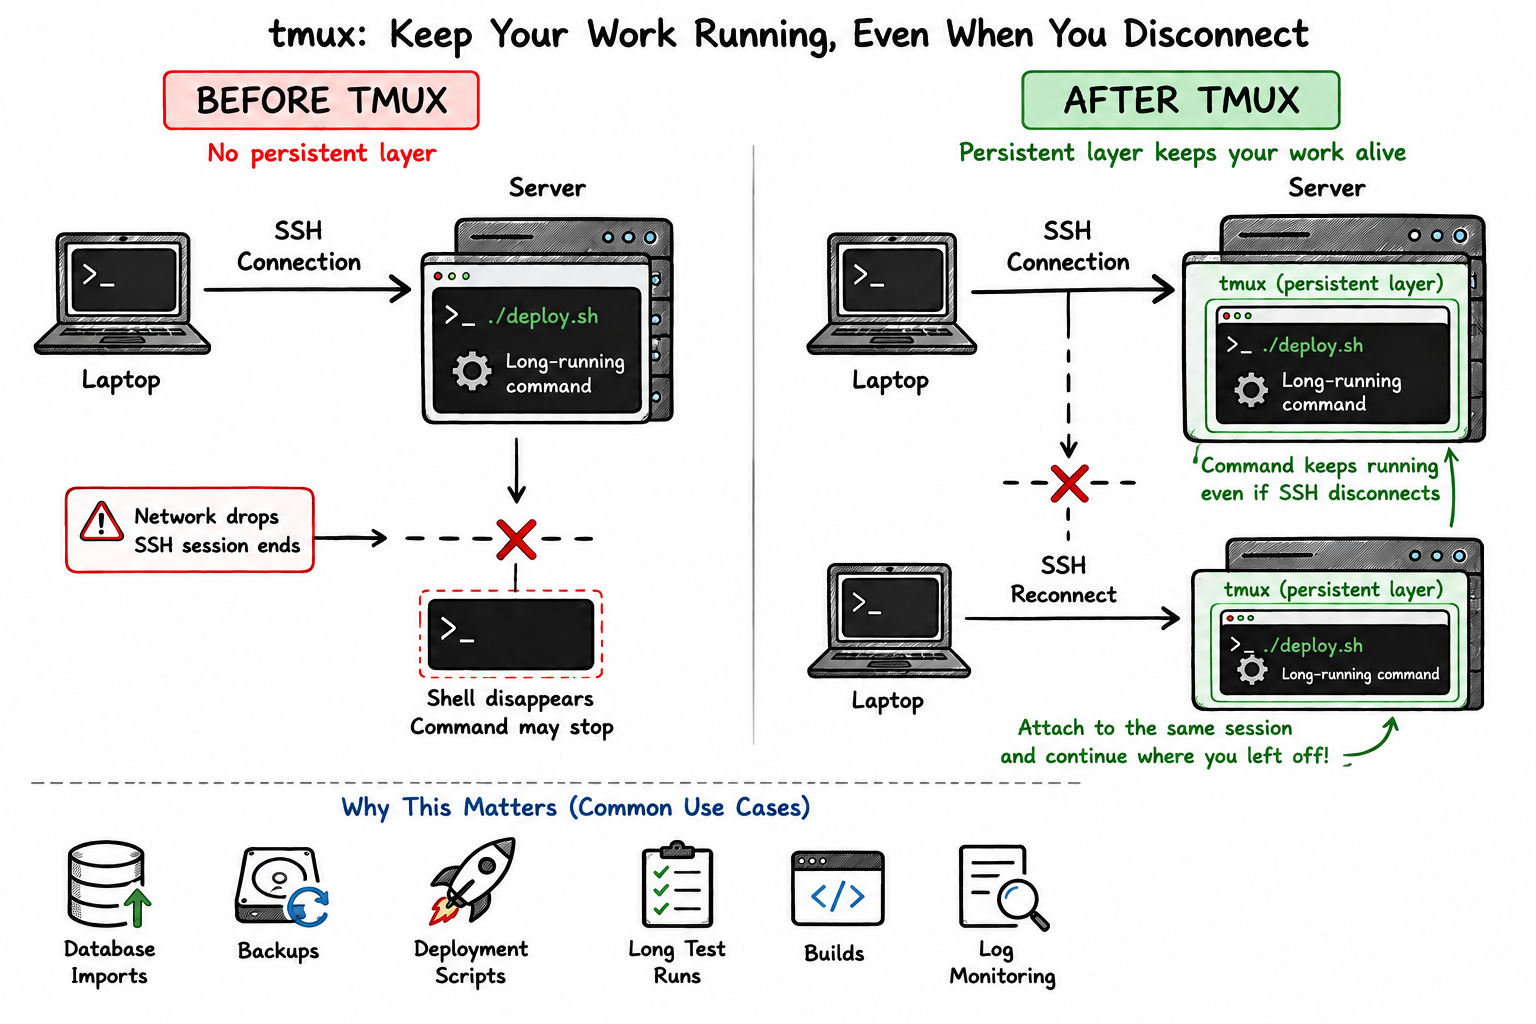
The problem TMUX solves
## **What Does "Terminal Multiplexer" Mean?**
The name sounds complicated, but the idea is simple.Tmux gives you three main layers:
Think of them like this: **Session -** your main workspace, **Window** \- a tab inside that workspace, **Pane -** a split terminal inside a window
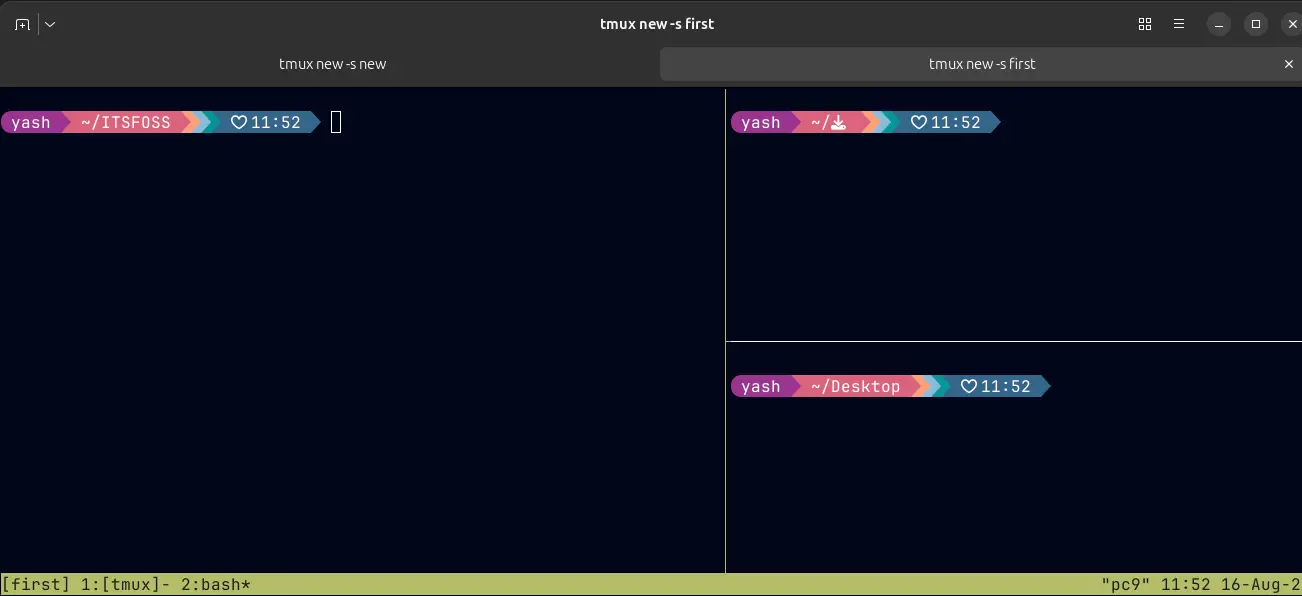
window and pane view
This structure lets you keep related work together without opening a huge number of separate terminal windows.
## **Who Benefits Most From Tmux?**
Tmux can help anyone who spends a lot of time in the terminal, but it is especially useful for: developers, DevOps and SRE engineers, system administrators, anyone running long terminal processes, or Linux learners who want a more organized workflow.
Even on your local machine, tmux can reduce terminal-tab clutter. And you don't need to be an advanced Linux user to benefit from it. The basic workflow already gives you most of the value: **sessions → windows → panes → detach → reattach**
## **A Real-World Scenario**
Imagine you are debugging an application on a production server.
You need to:
```bash
Logs
Monitoring
Diagnostics
Health checks
```
Without tmux, you might open four separate terminal tabs. With tmux, you can organize everything inside one session:
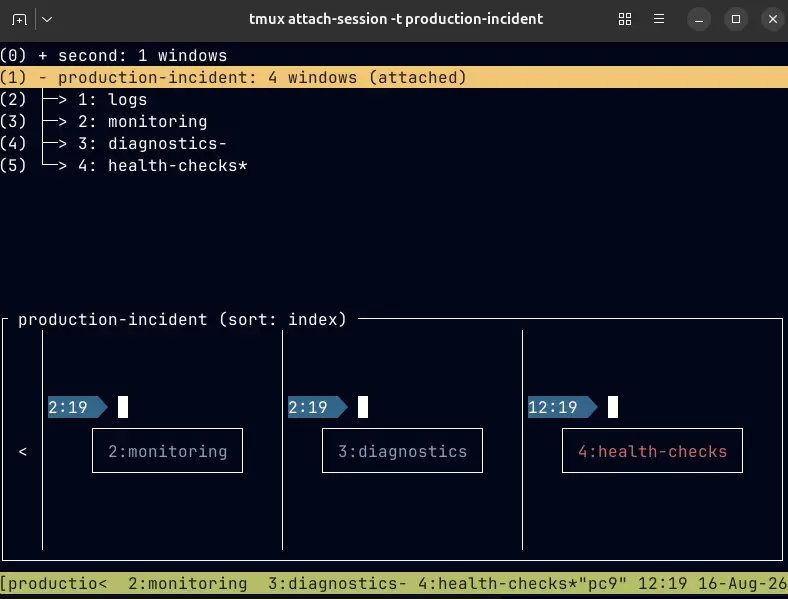
real world scenario for tmux
That's the basic flow you need to understand. In the next chapter, we'll install tmux and get our hands on it for the first time!
### Tmux Fundamentals
URL: https://linuxhandbook.com/courses/tmux/
Last updated: 2026-09-04T09:48:37.000Z
Your SSH connection drops mid-deploy. Your laptop goes to sleep. You accidentally close the wrong tab. And just like that, the build log you were watching, the SSH session you had open on three servers, the half-finished debugging session...all gone.
**Tmux fixes this.**
Tmux (terminal multiplexer) lets you run multiple terminal sessions inside a single window, keep them alive even after you disconnect, and pick up exactly where you left off, on the same machine or a different one entirely.
**It's one of those tools that, once you learn it, you wonder how you worked without it.**
## Why learn tmux?
- **Sessions that survive disconnects:** Close your laptop, lose your SSH connection, or walk away entirely. Your session keeps running and you reattach right where you left off.
- **Split panes, no extra windows:** View logs, edit a file, and run a build, all in one terminal window, side by side.
- **Multiple windows, one session: O**rganize your work like browser tabs, but built into your terminal.
- **Works everywhere: N**o GUI required. If you can SSH into it, you can run tmux on it.
- **Build repeatable workflows:** Script your entire dev environment to open exactly the way you like it, every time.
If you spend any real time in a terminal like SSHing into servers, running long processes, working across multiple projects at once, tmux isn't optional for you. You will save a lot of frustration and productive hours.
Tmux has a little learning curve, but it pays off in the long run. Ask any senior engineer.
## What you'll learn
By the end of this free Tmux course, you'll be able to:
- Keep a terminal session running even after your SSH connection drops or your laptop sleeps
- Split your terminal into multiple panes and jump between them without touching your mouse
- Organize different tasks across windows, all inside a single tmux session
- Scroll back through terminal output and copy text using only the keyboard
- Set up a real, repeatable workflow instead of retyping the same commands every time
- Write your own tmux configuration so it starts up exactly the way you want, every time
No prior tmux experience needed, just basic comfort with a terminal.
## Who this course is for
- Developers and sysadmins who SSH into remote servers regularly
- Anyone who's lost work to a dropped connection or an accidentally closed terminal
- Self-hosters and homelab enthusiasts managing multiple long-running processes
- Command-line users who are tired of juggling a dozen terminal windows
- Complete tmux beginners
## Why learn tmux with us?
Most tmux guides stop at a keybinding cheat sheet. This course doesn't.
It's built around **actually using tmux**, not memorizing commands in isolation. It also includes a dedicated chapter on building a real, practical workflow, and another on writing your own tmux configuration so it feels like *your* terminal, not a default install.
Every chapter is short, hands-on, and something you can follow along with in your own terminal as you read.
**And it's completely free. No signup, no paywall, no catch.**
## Ready to start?
Jump into **Chapter 1: Why Tmux? Understanding Terminal Multiplexing** and get your first session running in the next few minutes.
### LHB Linux Digest #26.10: systemd Playbook, Redirection, "forgit" and More
URL: https://linuxhandbook.com/newsletter/26-10/
Last updated: 2026-08-21T12:41:17.000Z
Even after all these years, some people still have a strong dislike for systemd. My colleague, Umair, [stopped hating systemd](https://linuxhandbook.com/dont-hate-systemd/) after realizing its automation capabilities.
He has created two courses on systemd:
- [Systemd playbook](https://linuxhandbook.com/courses/systemd-playbook/): A hands-on, text-based course to turn you into a confident systemd user.
- [Systemd automation](https://linuxhandbook.com/courses/systemd-automation/): Learn to schedule, monitor, sandbox, and optimize automated workflows.
The best way to learn anything on Linux is by getting your hands on the system. That's the approach we take on Linux Handbook.
Other than us, here are several other platforms you can use to [learn DevOps with practical, hands-on labs](https://linuxhandbook.com/blog/platforms-learn-devops-hands-on/).
## Basic but essential Linux concept: <, << and <<<
You'll often see <, << and <<< in various Linux command examples. It is important to know what they mean.
- `<` : It is known as **`Input Redirection`** and is used to take input from a file rather than typing instructions manually.
- `<<`: It is known as **`Here Document`** which is used to provide multiple lines of input directly to the command.
- `<<<`: It is known as **`Here String`** and used to provide a single line of input to the command.
I know it sounds super complex but [this article explains it in details](https://linuxhandbook.com/here-input-redirections/).
[What do <, << and <<< mean in Linux?The <, << and <<< look similar to redirection indicators but they have a different purpose. Learn about them.Linux HandbookSagar Sharma](https://linuxhandbook.com/here-input-redirections/)
## 🎫 Event alert: AGNTCon+MCPCon Japan
Whether you're building AI agents, adopting the Model Context Protocol (MCP), developing MCP servers and clients, or exploring the future of agentic AI, this is the event where the community comes together to share ideas, solve challenges, and shape what's next for the AI ecosystem.
Happening in Tokyo, Japan, on 10-11th September. **If you want to attend, use coupon code ITSFOSS30 to get 30% discount on the event ticket pricing.**
[Event details (use ITSFOSS30 for discount)](https://events.linuxfoundation.org/agntcon-mcpcon-japan/?ref=linuxhandbook.com)
## **💡Quick terminal tip**
In Bash (and other Readline-based shells), navigating complex directories often means dealing with annoying typos or mixed case sensitivity. You can make Tab auto-complete paths regardless of capitalization while cleanly expanding common file prefixes before cycling through options.
Add these lines to your `~/.inputrc` file:
```bash
# Ignore uppercase/lowercase differences during Tab completion
set completion-ignore-case on
# Treat hyphens (-) and underscores (_) as equivalent
set completion-map-case on
# Complete shared prefixes before cycling through individual choices
set menu-complete-display-prefix on
```

Now, if you have files named `Project-Alpha.txt` and `Project-Beta.txt`, typing `cd pro` and pressing Tab will first safely expand your prompt to the longest shared prefix (`cd Project-`). Pressing Tab a second time begins stepping smoothly through each matching file, completely ignoring letter case.
## 🛠️ Tool discovery
Check out these hidden gems.
### tuicr: Terminal Native Code Review
[tuicr](https://github.com/agavra/tuicr?ref=linuxhandbook.com) is an open-source Rust TUI utility designed to streamline code review workflows across multiple version control systems using modal, Vim-style navigation. The application aggregates multi-file diffs into a unified stream, allowing users to leave granular, line-level comments and submit them directly as live reviews to major code hosting platforms.
- ⚡ Terminal-native, Vim-centric diffs with seamless modal navigation
- 🔄 Multi-VCS compatibility for unified reviews across git, jj, and hg
- 💬 Inline line-level commenting submitted directly to GitHub, GitLab, and Bitbucket
- 🤖 Structured markdown export to clipboard/stdout tailored for AI agent workflows
- 🦀 Ultra-fast Rust binary delivering zero-dependency CLI execution
[GitHub - agavra/tuicr: a code review TUI with vim keybindingsa code review TUI with vim keybindings. Contribute to agavra/tuicr development by creating an account on GitHub.GitHubagavra](https://github.com/agavra/tuicr?ref=linuxhandbook.com)
### forgit: Interactive Git usage with fzf
[Forgit](https://github.com/wfxr/forgit?ref=linuxhandbook.com) is a shell utility that leverages fzf to provide interactive, terminal-native interfaces for routine version control operations. The tool integrates directly with CLI syntax highlighters while remaining lightweight and shell-agnostic across common terminal environments.
- ⚡ Fuzzy-search Git selectors with interactive diff and log previews
- 🌿 Interactive branch and worktree management for seamless switching
- 🛠️ Automated `.gitignore` generator to fetch templates straight from your terminal
- ⏪ Interactive rebase and fixup tools to easily squash and reorder commits
- 🎨 Extensible preview integration using external tools like delta for diffs and bat for syntax highlighting
[GitHub - wfxr/forgit: :zzz: A utility tool powered by fzf for using git interactively.:zzz: A utility tool powered by fzf for using git interactively. - wfxr/forgitGitHubwfxr](https://github.com/wfxr/forgit?ref=linuxhandbook.com)
## 📰 Linux news that matters
- [Qualcomm has started a Linux kernel discussion about upstreaming Synx](https://www.phoronix.com/news/Synx?ref=linuxhandbook.com), a vendor-agnostic global synchronization framework for coordinating fences across different processors, firmware, and Linux-hosted clients.
- Linux wireless maintainer Johannes Berg has announced that [AI/LLM-generated patches will generally be ignored](https://www.phoronix.com/news/Linux-WiFi-Strict-AI-Slop-Patch?ref=linuxhandbook.com) unless a quick review makes the fix “obviously right,” following a similar move in the kernel staging area.
- [Cloudflare has open-sourced Cloudflare OS](https://arstechnica.com/ai/2026/08/cloudflare-open-sources-vibe-coding-platform-for-people-who-arent-coders/?ref=linuxhandbook.com) (VibeSDK), an internal platform enabling non-technical personnel to build and deploy applications via natural language prompts.
- [Microsoft has open-sourced code-testing-generator](https://www.marktechpost.com/2026/08/06/microsoft-open-sources-code-testing-generator/?ref=linuxhandbook.com), an MIT-licensed polyglot unit test creation agent hosted within the dotnet/skills repository.
- Senior Linux kernel maintainer Greg Kroah-Hartman has [established a explicit policy rejecting LLM-generated patch submissions](https://itsfoss.com/news/linux-drivers-staging-ai-rejection/?ref=linuxhandbook.com) targeting the drivers/staging tree.
- [Sonatype researchers have identified an automated supply-chain campaign](https://devops.com/flooding-dropper-is-hitting-npm-with-a-tidal-wave-of-malicious-packages/?ref=linuxhandbook.com) dubbed "Flooding Dropper" that has published nearly 850 malicious npm packages distributed across hundreds of disposable accounts.
- [Modular has released the complete source code for the Mojo language compiler](https://www.phoronix.com/news/Modular-Mojo-Open-Source?ref=linuxhandbook.com), runtime, and development tooling under the Apache 2.0 license with LLVM exceptions following its 1.0 release.
## 😂 Geek humor

## 💌 Keep on loving Linux Handbook
GitOps course is nearly ready. It should arrive next week.
Perfect time to [become a Pro member](https://linuxhandbook.com/#/portal/signup) and enjoy unlimited access to our [eBooks](https://linuxhandbook.com/ebooks/), [courses](https://linuxhandbook.com/courses/) and in-depth tutorials.
**Missed the previous editions?** You can [access the newsletter archives.](https://linuxhandbook.com/newsletter/)
You may also [contribute to Linux Handbook](https://linuxhandbook.com/write-for-us/) and share your experience and expertise with the community.
I like reading your messages, so just hit the reply button and share your thoughts 😄
### 12 Best Free Platforms to Learn DevOps with Hands-On
URL: https://linuxhandbook.com/blog/platforms-learn-devops-hands-on/
Last updated: 2026-08-21T09:17:06.000Z
Watching DevOps tutorials is easy. Actually knowing what to do when a server is broken at in production is not.
The gap between the two is hands-on practice and if you have been searching for structured, interactive DevOps labs, you have probably run into the same problem: most good platforms cost money, and the free ones are scattered across a dozen different sites with no clear path connecting them.
I went through the platforms the DevOps community actually recommends on Reddit, in Discord servers, in job prep threads and pulled together the 12 best ones where you can practice for free. These are not passive reading resources. Every platform here puts you in front of a terminal and makes you figure something out.
**This list is not for you if** you are looking for video courses or reading material that is a different category. This guide is about interactive labs, broken-server challenges, browser-based environments, and hands-on projects where you learn by doing.
**Short on time?** Jump to the comparison table below, or use the headers to find platforms that match your current skill level.
## At a Glance: All 12 Platforms Compared
| Platform | Style | Skill Level | Free? | Best For |
| ----------------------- | --------------------- | ------------------- | --------- | ------------------------------ |
| SadServers | Broken-server CTF | Beginner → Advanced | ✅ Fully | Troubleshooting & debugging |
| OverTheWire (Bandit) | SSH wargame | Beginner → Mid | ✅ Fully | Linux terminal mastery |
| Learn Git Branching | Visual puzzle game | Beginner → Mid | ✅ Fully | Git fundamentals |
| Killercoda | Browser labs | All levels | ✅ Mostly | Daily DevOps practice |
| Play with Docker | Docker playground | Beginner | ✅ Fully | Docker basics |
| Play with Kubernetes | K8s cluster | Beginner → Mid | ✅ Fully | Kubernetes fundamentals |
| pwn.college | Shell challenges | Beginner → Mid | ✅ Fully | Deep Linux internals |
| Grafana Play | Live Grafana instance | All levels | ✅ Fully | Observability practice |
| Linux Upskill Challenge | 20-day course | Beginner | ✅ Fully | Structured Linux sysadmin |
| Kubernetes The Hard Way | Manual K8s bootstrap | Advanced | ✅ Fully | K8s architecture understanding |
| iximiuz Labs | Investigative labs | Mid → Advanced | ✅ Partial | Container & K8s internals |
| Terraform Tutorials | Interactive IaC labs | Beginner → Mid | ✅ Fully | Infrastructure as Code |
## SadServers - The LeetCode of DevOps Troubleshooting
SadServers is the closest thing DevOps has to LeetCode. You are given a broken Linux or DevOps environment, a problem statement, and a timer. Your job is to fix it. No hints, no hand-holding, just a terminal and a server that is doing something wrong.
**Who it's best for:** Anyone who wants to practice the skill that actually matters most in DevOps: diagnosing and fixing production problems under pressure. Especially useful if you are preparing for DevOps interviews, where live troubleshooting scenarios are increasingly common.
SadServers problem listing page
The scenarios cover real DevOps situations: a web server that refuses to start, a disk that is mysteriously full, a process that keeps dying, a misconfigured database. Each one is an actual production-style failure.
✅
****Pros:**
\- The most realistic DevOps troubleshooting practice available for free
\- Browser-based, no local setup, no SSH key management
\- Growing library of scenarios across difficulty levels
\- Community-submitted problems mean diverse coverage
🔴
****Cons:**
****\-** No structured learning path, you pick your own scenarios
\- Some advanced scenarios assume prior knowledge to even understand the problem
\- No built-in explanations after solving, you figure out the "why" yourself
**Verdict:** The single best platform for practicing the skill that defines a working DevOps engineer, fixing things that are broken. Bookmark this and do one scenario a week.
[Visit | SadServers](https://sadservers.com/?ref=linuxhandbook.com)
## OverTheWire - Bandit: Learn Linux by Breaking In
OverTheWire Bandit is a wargame where you SSH into a live server and solve challenges to discover the password for the next level. Level 0 to Level 34, each one teaching a specific Linux skill through a concrete puzzle rather than a lecture.
**Who it's best for:** Complete beginners who need real Linux terminal practice and people who are comfortable with commands but want to understand file permissions, process management, and shell scripting by actually using them under pressure.
OverTheWire Bandit challenges
The early levels cover navigation, file reading, and hidden files. By the time you reach the middle levels, you are working with SSH keys, port forwarding, shell scripting, and basic cryptography. Every concept sticks because you needed it to progress.
✅
****Pros:**
\- Zero setup, just SSH in from any terminal
\- Progressive difficulty that builds real skills in sequence
\- Community walkthroughs exist for every level if you get stuck
\- Completely free, no account required
🔴
****Cons:**
\- Purely Linux/security focused, not a broad DevOps curriculum
\- No browser-based terminal (you need an SSH client - WSL, Terminal, or PuTTY)
**Verdict:** The best free tool to build Linux command-line confidence from scratch. There is a reason DevOps engineers still recommend it to juniors in 2026; it works.
[Visit | OverTheWire Bandit](https://overthewire.org/wargames/bandit/?ref=linuxhandbook.com)
## Learn Git Branching - Master Git Visually
Learn Git Branching is a browser-based, interactive Git tutorial that teaches branching, rebasing, merging, and cherry-picking through visual puzzles. You type real Git commands and watch the commit graph update in real time.
**Who it's best for:** Anyone who uses Git daily but secretly does not understand what `rebase`, `cherry-pick`, or `HEAD~2` actually does, which is most engineers at some point.
LearnGitBranching Visual Challenges
The platform covers two tracks: Main (local Git operations) and Remote (push, pull, fetch, tracking branches). Each level sets a goal state for the commit graph and you have to figure out which commands produce it.
✅
****Pros:**
\- Instant visual feedback makes abstract Git concepts concrete
\- Covers advanced operations most tutorials skip (rebase -i, cherry-pick, reflog)
\- Completely free, no account needed, works in any browser
\- One of the most linked Git resources in the entire developer community
🔴
****Cons:**
\- Only covers Git, nothing else in the DevOps toolchain
\- The visual metaphor breaks down slightly for very complex rebases
\- No real repository, the environment is simulated
**Verdict:** The fastest way to actually understand what your Git commands are doing. Run through both tracks once and Git will never feel mysterious again.
[Visit | Learn Git Branching](https://learngitbranching.js.org/?ref=linuxhandbook.com)
## Killercoda - The DevOps Lab That Is Always Open
Killercoda gives you a real Linux environment in your browser, no install, no account required for the free tier. Choose a scenario, and within seconds, you have a terminal connected to a real server. The scenario library covers Linux, Docker, Kubernetes, Ansible, ArgoCD, Terraform, and more.
**Who it's best for:** Anyone who wants a quick, no-friction DevOps practice, especially useful for learning a new tool without setting up a local environment first, or for keeping skills sharp between projects.
Killercoda playground and lessons
The free library includes hundreds of official and community-created scenarios. Many are contributed by tool vendors themselves, Grafana, Cilium and others publish their official getting-started tutorials directly on Killercoda.
✅
****Pros:**
\- Real terminals in a real Linux environment, not a simulation
\- Hundreds of free scenarios across the full DevOps toolchain
\- No install, no local setup, works from any browser
\- New scenarios added regularly by community and vendors
🔴
****Cons:**
\- Free tier sessions time out, you cannot leave and come back to a running environment
\- Some advanced scenarios are PLUS-only (paid)
\- No structured learning path, you curate your own sequence
**Verdict:** The best free option for hands-on practice with any specific DevOps tool right now. Anytime you encounter something new, ArgoCD, Cilium, Flux, check if there is a Killercoda scenario before setting up a local environment.
[Visit | Killercoda](https://killercoda.com/?ref=linuxhandbook.com)
## Play with Docker - A Real Docker Daemon in Your Browser
Play with Docker gives you a free, 4-hour Linux instance with a real Docker daemon running, directly in your browser. Run containers, build images, write Compose files, and experiment with Docker networking without touching your local machine.
**Who it's best for:** Beginners who want to learn Docker without installing it locally, and people who need a quick sandbox to test a Docker command or Compose configuration without affecting their machine.
Play with Docker Classrooms
You can create multiple instances and connect them, useful for practicing Docker Swarm or multi-container networking scenarios. The official Docker documentation uses Play with Docker for many of its interactive examples.
✅
****Pros:**
\- Officially maintained by Docker, Inc. always up to date
\- Real Docker environment, not an emulator- Multiple instances for networking and Swarm practice
\- No credit card, no account needed for basic use
🔴
****Cons:**
\- 4-hour session limit work gets lost when sessions expire
\- Can be slow during peak hours
**Verdict:** The zero-friction way to start with Docker. No installation, no configuration, just a terminal and a Docker daemon. Use this before committing to a local Docker Desktop setup.
[Visit | Play with Docker](https://labs.play-with-docker.com/?ref=linuxhandbook.com)
## Play with Kubernetes - A Multi-Node Cluster in Minutes
Play with Kubernetes provides a free, browser-based Kubernetes playground where you can bootstrap a real multi-node cluster and run workloads, without any local Kubernetes installation or cloud account.
**Who it's best for:** People learning Kubernetes fundamentals who want to practice `kubectl`commands, deploy real workloads, and understand cluster architecture without the complexity of setting up minikube or a cloud cluster.
Play with Kubernetes Classrooms
Sessions give you a 4-hour window with enough compute to bootstrap a control plane and add worker nodes. Every standard kubectl operation works: deployments, services, configmaps, namespaces and RBAC.
✅
****Pros:**
\- Real multi-node cluster, not a single-node simulation
\- Bootstrapping the cluster yourself teaches how it actually works
\- Free with a Docker Hub account
\- Ideal for CKA/CKAD exam concept practice
🔴
****Cons:**
\- 4-hour session limit, not suitable for long-running experiments
\- Bootstrapping the cluster from scratch every session takes 5-10 minutes
\- No persistent volumes that survive session restarts
**Verdict:** The most accessible way to get a real Kubernetes cluster for practice without a cloud bill. Pair it with Kubernetes The Hard Way for a deeper understanding of what that bootstrap process is actually doing.
[Visit | Play with Kubernetes](https://labs.play-with-k8s.com/?ref=linuxhandbook.com)
## pwn.college - Deep Linux Internals Through Structured Challenges
pwn.college is a university-backed (Arizona State University) platform that teaches Linux internals through a structured series of challenges. Unlike typical beginner Linux tutorials, it covers how the shell works, process interactions, file descriptors, environment variables, and privilege escalation, concepts that are foundational to DevOps but rarely taught explicitly.
**Who it's best for:** Engineers who use Linux daily but want to deeply understand what is actually happening beneath the commands, process spawning, shell internals and permissions at the kernel level. Especially valuable if you work with Docker, because containers are Linux primitives underneath.
pwn.college structured paths
The platform is organized into modules (Linux Luminarium is the entry point for DevOps practitioners) and every challenge is a real binary running on a real Linux system that you interact with directly.
✅
****Pros:**
\- University-quality curriculum, completely free
\- Teaches the Linux concepts that Docker and container knowledge depend on
\- Structured modules with clear progression
\- Discord community with active support from instructors
🔴
****Cons:**
\- Leans toward security/CTF in its later modules (beyond DevOps needs)
\- Browser-based terminal can be slower than a native SSH session
**Verdict:** The best free resource for understanding ***why*** Linux behaves the way it does, not just memorizing commands. If you use containers daily and want to understand what namespaces and cgroups actually are, start here.
[Visit | pwn.college](https://pwn.college/?ref=linuxhandbook.com)
## Grafana Play - Live Observability Practice With Zero Setup
Grafana Play is a fully functional, live Grafana instance that anyone can open in a browser right now, pre-loaded with dashboards, Loki log data, Prometheus metrics, alerting rules, and Tempo traces. No installation, no Docker Compose stack, no Prometheus setup.
**Who it's best for:** Engineers who want to get comfortable with Grafana dashboards, PromQL queries, Loki log queries, and alert configuration before setting up a full observability stack locally or in production.
Grafana Play interface
✅
****Pros:**
\- No setup whatsoever, open a URL, start exploring
\- Pre-loaded with real dashboards covering Linux, Kubernetes, and application metrics
\- Covers the full Grafana stack: Metrics, Logs (Loki), Traces (Tempo), Alerting
🔴
****Cons:**
\- No local date source testing
\- Covers Linux fundamentals, not higher-level DevOps tooling
**Verdict:** If your Linux skills feel shaky and you want to fix that with a structured, real-world approach, the Linux Upskill Challenge is the most complete free answer. Twenty focused days produce a genuine foundation.
[Visit | Grafana Play](https://grafana.com/grafana/dashboards/14125-grafana-play-home/?ref=linuxhandbook.com)
## Linux Upskill Challenge - 20 Days to Real Linux Sysadmin Skills
The Linux Upskill Challenge is a free, community-run 20-day course where you rent a cheap VPS (or use a free cloud trial) and learn to manage it as a real system administrator would. Each day introduces new concepts with clear instructions, exercises, and a community forum for questions.
**Who it's best for:** Beginners who want a structured, day-by-day Linux learning path that produces a real skill foundation, not just knowledge of commands, but actual comfort managing a remote server. The VPS-based approach means everything you do is real.
Linux Upskill Challenge 20 Days
The course covers everything a working sysadmin needs: SSH key management, file permissions, package management, process management, system services with systemd, firewalls, cron jobs, log analysis, and basic security hardening.
✅
****Pros:**
\- A complete, structured 20-day curriculum, always know what to do next
\- Working on a real VPS means skills transfer directly to real systems
\- Community forum for everyday exercises, never stuck alone
\- Free forever; the GitHub repository is open source
🔴
****Cons:**
\- Requires a VPS, most cloud-free tiers work, but it is not purely zero-cost
\- 20 days of consistent daily work require commitment
\- Covers Linux fundamentals, not higher-level DevOps tooling
**Verdict:** If your Linux skills feel shaky and you want to fix that with a structured, real-world approach, the Linux Upskill Challenge is the most complete free answer. Twenty focused days produces a genuine foundation.
[Visit | Linux Upskill Challenge](https://linuxupskillchallenge.org/?ref=linuxhandbook.com)
## Kubernetes The Hard Way - Build a Cluster From Scratch
Kubernetes The Hard Way, created by Kelsey Hightower (Google), guides you through bootstrapping a Kubernetes cluster manually, without kubeadm, without any helper scripts, every component configured by hand. It is not the easiest way to get a cluster, which is exactly the point.
**Who it's best for:** Engineers who already use Kubernetes daily but feel like they are operating it without truly understanding it. Going through this once answers questions that years of `kubectl apply` never will.
Kubernetes The Hard Way Git Repo
✅
****Pros:**
\- The definitive resource for understanding Kubernetes internals
\- Goes through the components no other tutorial explains (etcd, API server internals)
\- Completely free on GitHub; cloud provider-specific forks exist (GCP, AWS, bare metal)
\- Highly respected in the DevOps community, a milestone for K8s practitioners
🔴
****Cons:**
\- Takes significant time (4-8 hours minimum for a careful first pass)
\- Requires cloud instances or VMs, not purely browser-based
\- Not a daily practice tool - it is a one-time deep understanding exercise
**Verdict:** Not something you do every day, but something every serious Kubernetes practitioner should do at least once. The understanding it provides changes how you operate clusters permanently.
[Visit | Kubernetes The Hard Way](https://github.com/kelseyhightower/kubernetes-the-hard-way?ref=linuxhandbook.com)
## iximiuz Labs - Investigate How Containers and K8s Actually Work
iximiuz Labs takes a deliberately different approach to DevOps learning: instead of guided tutorials, it puts you in an environment and asks you to investigate how something works. Labs cover container networking, Linux namespaces, Kubernetes control plane behavior, and distributed systems concepts through exploration rather than instruction.
**Who it's best for:** Intermediate to advanced practitioners who want to understand ***why*** containers and Kubernetes behave the way they do, the Linux primitives underneath Docker, why pod networking works the way it does and what the scheduler actually considers.
ixium Labs official collection of playgrounds
The free tier includes a solid selection of foundational labs on container runtimes, networking, and Kubernetes basics. The platform is built by Ivan Velichko, widely respected in the cloud-native community for the depth of his writing on container internals.
✅
****Pros:**
\- Teaches the "why" that most DevOps platforms skip
\- Browser-based multi-terminal environment with relevant tools pre-installed
\- Covers container/K8s concepts that no other free platform addresses
\- Built by a practitioner known for technical accuracy
🔴
****Cons:**
\- Some advanced labs require a paid subscription
\- Not beginner-friendly, assumes comfort with containers and Linux already
\- Investigative format requires more patience than step-by-step tutorials
**Verdict:** The best platform for going from "I can use Kubernetes" to "I understand Kubernetes." If you have been using containers for a year and still feel uncertain about the internals, this fills that gap.
[Visit | iximiuz Labs](https://labs.iximiuz.com/playgrounds?ref=linuxhandbook.com)
## Terraform Tutorials - Official Interactive IaC Practice
HashiCorp's official Terraform tutorials on the Developer portal are interactive, browser-based labs that teach Infrastructure as Code without requiring a cloud account for most foundational content. They cover AWS, Azure, GCP, and local Terraform workflows with a consistent, practical structure.
**Who it's best for:** Engineers who know containers and Kubernetes but have not yet learned Infrastructure as Code and anyone preparing for the Terraform Associate certification who wants practice alongside the theory.
Terraform Tutorials Homepage
The tutorials build progressively: start with a local Docker provider (no cloud account needed), move to cloud providers once you understand the workflow. Each tutorial includes working code, an explanation of what each block does, and a real-world step.
✅
****Pros:**
\- Official documentation and tutorials from HashiCorp, always accurate and up to date
\- Many tutorials run entirely locally with no cloud account needed
\- Covers the full Terraform workflow: init, plan, apply, state, modules, workspaces
🔴
****Cons:**
\- Cloud provider tutorials require an AWS/Azure/GCP account (though free tier works)
\- No challenge/puzzle format, more guided tutorial than active problem-solving
**Verdict:** The most reliable starting point for Terraform. If IaC is the gap in your DevOps skillset and for many practitioners it is, start here before looking anywhere else.
[Visit | Terraform Tutorials](https://developer.hashicorp.com/terraform/tutorials?ref=linuxhandbook.com)
## How to Use These Platforms Together
These platforms are not competing alternatives; they cover different skills and different learning modes. A practical sequence:
- **Start with Linux fundamentals** : Linux Upskill Challenge (structured) + OverTheWire Bandit (challenges)
- **Add Git mastery early** : Learn Git Branching (spend one afternoon, do both tracks)
- **Learn containers hands-on** : Play with Docker, then Killercoda Docker scenarios
- **Move to Kubernetes** : Play with Kubernetes for basics → Killercoda K8s scenarios → Kubernetes The Hard Way for deep understanding → iximiuz Labs for internals
- **Add IaC** : Terraform Tutorials (start with local Docker provider, no cloud account needed)
- **Add observability** : Grafana Play (explore before setting up your own stack)
- **Keep troubleshooting sharp** : SadServers (one scenario per week) + pwn.college Linux modules
None of these require paid subscriptions to start; all have free tiers that cover the core learning value.
## FAQ
**Do I need a powerful computer to use these platforms?**
No. Every platform on this list is either browser-based or requires only a basic setup. Your local machine is just a browser or SSH client.
**Which platform should a complete beginner start with?**
Start with Linux Upskill Challenge for structured foundations, then add OverTheWire Bandit for command-line confidence, then Learn Git Branching for Git. After those three, Killercoda opens up most of the rest of the DevOps toolchain at a reasonable pace.
**Are these platforms useful for certification preparation (CKA, CKAD, Terraform Associate)?**
Yes. Play with Kubernetes and Killercoda are both consistently recommended for CKA/CKAD practice. Terraform Tutorials covers the Terraform Associate curriculum directly. SadServers builds the troubleshooting speed that the CKA exam requires.
**Is Kubernetes The Hard Way still relevant with modern tools like k3s and minikube?**
Yes, and for the same reason, reading a car manual is still useful even if you use a GPS. K3s and minikube are better for daily use. The Hard Way is for understanding what they are abstracting. Do it once, then use the convenient tools with actual understanding.
## **Conclusion**
The best DevOps skill is not knowing which tool to use; it is knowing what to do when something breaks. Every platform on this list gets you closer to that, whether you are starting from zero with the Linux Upskill Challenge, building Git intuition with Learn Git Branching, diagnosing broken servers on SadServers, or finally understanding what Kubernetes is actually doing under the hood with Kubernetes The Hard Way and iximiuz Labs.
You do not need to work through all twelve at once; pick the one that matches your current gap, spend a few hours a week, and let the practice compound. The engineers who stand out in DevOps are the ones who have broken things, fixed things, and done it enough times that the instinct becomes automatic. These platforms give you the reps. **If you know of such a platform, do drop it in the comments!**
### Why GitOps is in Trend
URL: https://linuxhandbook.com/courses/gitops/why-gitops-in-trend/
Last updated: 2026-08-21T07:53:14.000Z
_This post is for paying subscribers only._
### LHB Linux Digest #26.09: Docker Compose Override, Claude Skills for DevOps, Solidtime and More
URL: https://linuxhandbook.com/newsletter/26-09-2/
Last updated: 2026-07-24T11:35:24.000Z
Don't we learn something new everyday? Something that might be obvious to others but feels like discovery to you?
I had that feeling when I learned about the concept of compose override in Docker. In my self-hosted Ghost CMS deployment, I made [modifications in the compose file to introduce log rotation](https://linuxhandbook.com/docker-log-space-issue/). But now the compose file was modified and any upstream change would complain about modified file. Git stash comes to rescue, but it's an additional pain.
And that pain went away with the override compose file. It's an excellent way of separating local and upstream changes, local and production compose files. I [wrote about it here](https://linuxhandbook.com/blog/docker-compose-override-trick-ghost/).
[Git Pull Kept Failing on My Ghost Server. Docker Compose Override Fixed ItModifying your docker-compose.yml directly and now git pull throws a “local changes would be overwritten” error? Use a compose.override.yml file to keep your changes separate from the file Ghost’s repo manages.Linux HandbookAbhishek Prakash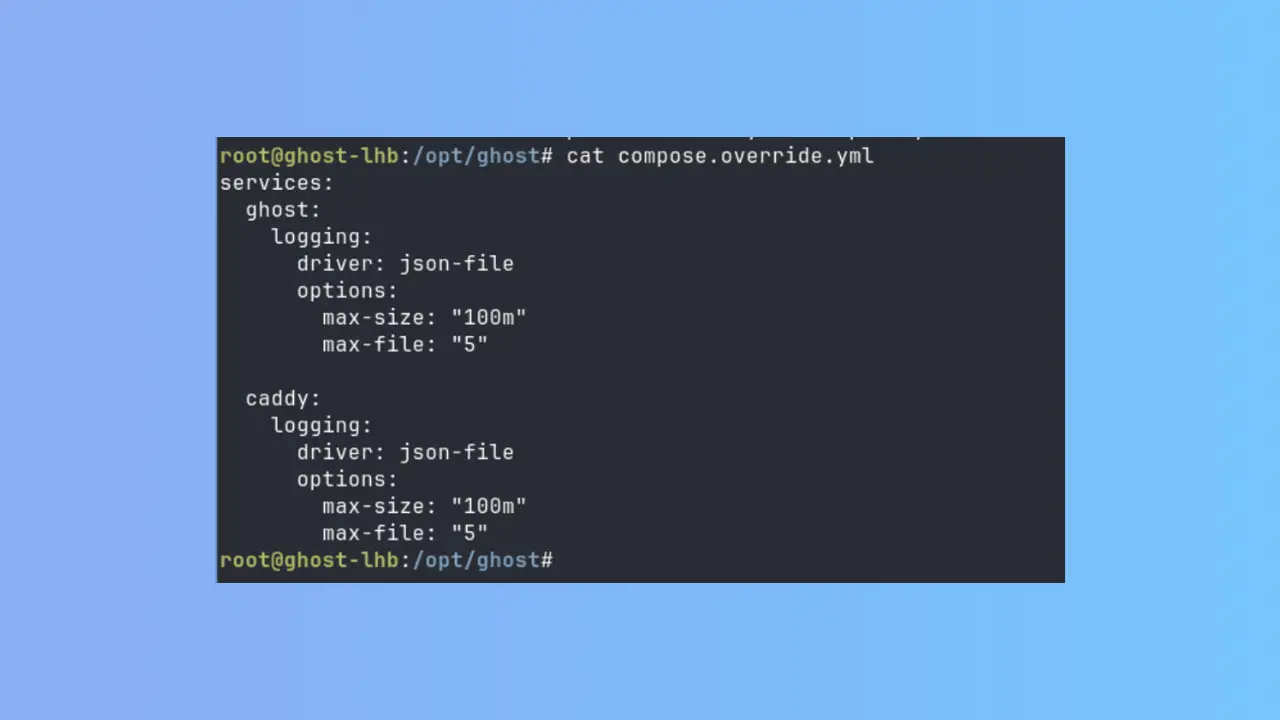](https://linuxhandbook.com/blog/docker-compose-override-trick-ghost/)
Claude (or other mainstream AI tools) can be an excellent help in troubleshooting your infrastructure issues. But if you just ask it "find me for this error message", you'll get generic answers. Yash who has recently started working as a [DevOps engineer shares some of the Claude skills he uses](https://linuxhandbook.com/blog/devops-engineer-claude-skills/). You can take inspiration and modify these skills as needed or use them as it is.
[8 Claude Skills I Use Everyday as a DevOps EngineerSharing the skills I use for troubleshooting and other purposes as a devops engineer. They are primarily for Claude but should work with other AI tools, too.Linux HandbookYash Kiran Patil](https://linuxhandbook.com/blog/devops-engineer-claude-skills/)
## **💡Quick terminal tip**
In bash (and other readline-based shells), press `Alt+Shift+3` (or `Alt+#`) while typing a command. It prefixes the line with `#`, submits it, and since `#` starts a comment, the command won't execute.
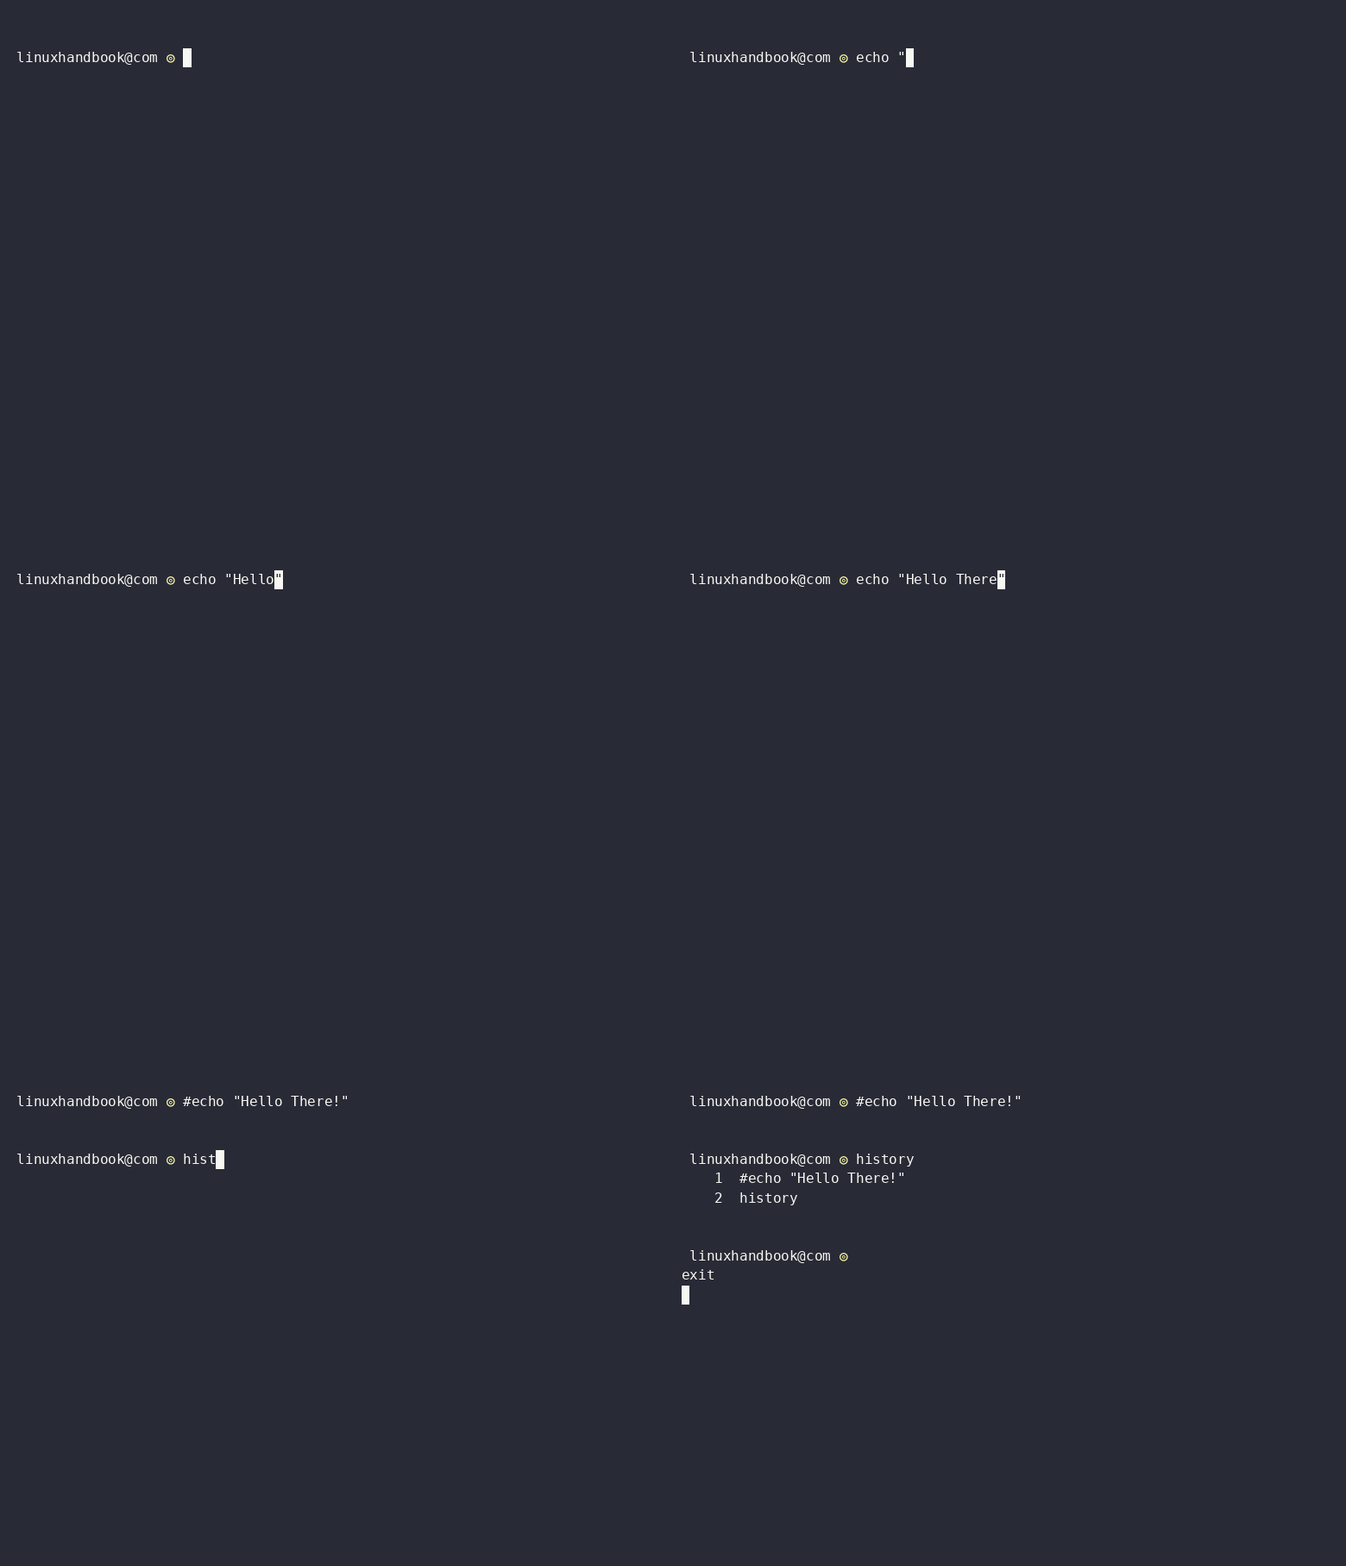
It stays in your shell history for later. Handy for jotting down a command you're not ready to run yet.
Now that you know this one, [here are a few more shortcuts](https://itsfoss.com/linux-terminal-shortcuts/?ref=linuxhandbook.com) worth adding to your muscle memory.
## 🛠️ Tool discovery
Let's find your next favorite software in this section.
### Buzz: Self-Hostable Workspace for Humans and AI Agents
[Buzz](https://github.com/block/buzz?ref=linuxhandbook.com) is an open-source collaboration platform from Block that brings team chat, Git repositories, and AI agents into a single workspace. Built on the Nostr protocol, it lets organizations self-host their collaboration platform while allowing AI agents to participate as authenticated team members with their own identities and permissions.
- 💬 Integrated Team Collaboration – Channels, threads, DMs, media sharing, and search in one workspace (voice huddles in progress).
- 🤖 AI Agents as Teammates – Agents hold cryptographic identities and can review code, submit patches, and collaborate alongside humans.
- 🌐 Self-Hostable & Open Source – Apache 2.0 licensed; deploy on your own infrastructure with full data control.
- 🛠️ Built-in Git Collaboration – Host repos, submit patches, and manage code review without external Git hosting.
- 🔐 Nostr-Based Architecture – Every event is signed via Nostr, giving verifiable identity and a full audit trail.
[GitHub - block/buzz: A hive mind communication platformA hive mind communication platform. Contribute to block/buzz development by creating an account on GitHub.GitHubblock](https://github.com/block/buzz?ref=linuxhandbook.com)
### Solidtime: Modern Open-Source Time Tracking for Teams
[Solidtime](https://github.com/solidtime-io/solidtime?ref=linuxhandbook.com) is an open-source time tracking platform built for freelancers, agencies, and teams that need an easy way to track work, manage projects, and generate invoices. It offers a polished web and desktop experience, supports self-hosting, and keeps activity tracking privacy-friendly by processing desktop activity locally before converting it into time entries.
- ⏱️ Time Tracking – Simple, modern interface to track work time.
- 📁 Projects & Tasks – Create projects and tasks, and assign them to team members.
- 👥 Clients – Manage clients and link them to projects.
- 💰 Billable Rates – Set rates per project, member, or organization.
- 🏢 Multiple Organizations – Manage several organizations from one account.
- 🔑 Roles & Permissions – Control access within organizations.
- 📥 Data Import – Import from Toggl, Clockify, or CSV.
[GitHub - solidtime-io/solidtime: Modern open-source time-tracking appModern open-source time-tracking app. Contribute to solidtime-io/solidtime development by creating an account on GitHub.GitHubsolidtime-io](https://github.com/solidtime-io/solidtime?ref=linuxhandbook.com)
## 📰 Linux news that matters
- [**The Linux kernel CVE team published 432 CVEs over just two days**](https://www.theregister.com/security/2026/07/22/linux-kernel-team-publishes-432-cves-in-two-days/5276497?ref=linuxhandbook.com), prompting concerns from security engineers about the practicality of reviewing and prioritizing individual kernel vulnerabilities. The surge reflects the kernel project's policy of assigning CVEs to virtually every qualifying security-related bug fix in stable releases, with AI-assisted bug discovery also contributing to the growing number of reports reaching maintainers.
- [**NetworkManager 1.58 adds support for IPv6-only deployments**](https://www.networkworld.com/article/4200847/networkmanager-update-advances-ipv6-only-support-wi-fi-management-and-security-for-linux-based-operating-systems.html?ref=linuxhandbook.com) through RFC 8925 IPv6-only-preferred signaling and 464XLAT (CLAT), enabling legacy IPv4 applications to continue working on IPv6-only networks. The release also introduces GENEVE tunnel management for virtualized environments, 6 GHz Wi-Fi enhancements, persistent managed state across reboots for automation, and fixes multiple DHCP-related security issues, including CVE-2026-10805.
- [**Cisco has released Antares-350M and Antares-1B**](https://www.securityweek.com/cisco-launches-low-cost-ai-models-for-source-code-security/?ref=linuxhandbook.com), two open-weight small language models purpose-built to locate known vulnerabilities within large source code repositories. Unlike general-purpose coding models, Antares focuses on repository-level vulnerability localization. Can run locally without uploading proprietary code to the cloud, and Cisco claims it achieves comparable accuracy at up to 172× lower cost than leading frontier AI models while also releasing a benchmark to measure this task.
- [**The Model Context Protocol (MCP) is preparing its 2026-07-28 specification**](https://www.theregister.com/devops/2026/07/23/model-context-protocol-prepares-to-break-with-its-stateful-past/5276722?ref=linuxhandbook.com), replacing its stateful architecture with a stateless protocol core by removing session IDs and the initialization handshake while introducing a new extensions framework and stronger authorization mechanisms. The redesign allows MCP servers to run behind standard HTTP load balancers without sticky sessions or shared session stores, making large-scale deployments significantly easier, although existing implementations will require migration because of breaking protocol changes.
- [**GitHub has made its redesigned Pull Requests Dashboard generally available**](https://devops.com/githubs-redesigned-pr-inbox-tackles-the-review-bottleneck-ai-created/?ref=linuxhandbook.com), introducing an Inbox that surfaces review requests, CI failures, merge-ready pull requests, saved views, advanced search, and support for identifying AI agent-created pull requests. The update reflects a broader industry shift where AI coding assistants generate code faster than humans can review it, prompting GitHub to focus on review triage rather than code generation alone.
## 😂 Geek humor
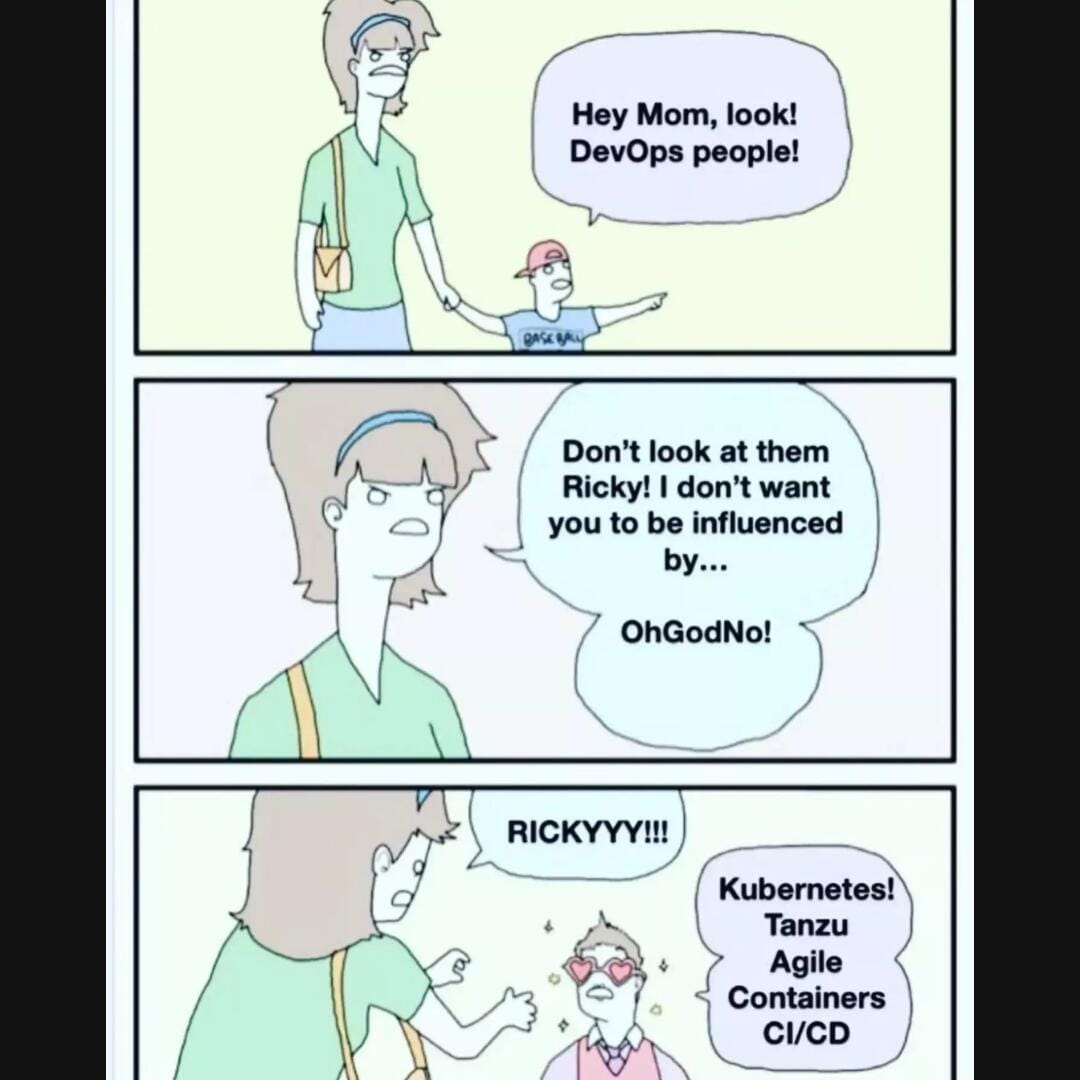
## 💌 Keep on loving Linux Handbook
GitOps course is nearly ready. It should arrive next week.
Perfect time to [become a Pro member](https://linuxhandbook.com/#/portal/signup) and enjoy unlimited access to our [eBooks](https://linuxhandbook.com/ebooks/), [courses](https://linuxhandbook.com/courses/) and in-depth tutorials.
**Missed the previous editions?** You can [access the newsletter archives.](https://linuxhandbook.com/newsletter/)
You may also [contribute to Linux Handbook](https://linuxhandbook.com/write-for-us/) and share your experience and expertise with the community.
I like reading your messages, so just hit the reply button and share your thoughts 😄
### 8 Claude Skills I Use Everyday as a DevOps Engineer
URL: https://linuxhandbook.com/blog/devops-engineer-claude-skills/
Last updated: 2026-07-24T11:17:27.000Z
I was skeptical about AI tools in a DevOps workflow for a long time. Every demo I saw showed someone asking AI Agent to write a Hello World Dockerfile. That's not a DevOps use case, that's a simple chat.
What changed my mind was using Claude for things that actually slow me down at work. Not boilerplate code generation, but the genuinely tedious parts of the job: interpreting a cryptic error from a stack trace buried inside a Kubernetes pod, converting a Bash script someone wrote in 2017 into something readable, or asking "what does this flag do again" without having to leave the terminal context I'm already in.
But here's the thing: generic Claude and [***skilled* *Claude***](https://code.claude.com/docs/en/skills?ref=linuxhandbook.com) are two very different tools.
Out of the box, Claude gives you general-purpose answers. When you add a SKILL.md, a structured instruction file that tells Claude exactly how to approach a specific task, you get a focused, deterministic workflow instead of a guess. The difference matters in DevOps, where a half-correct answer about a Kubernetes misconfiguration or a Terraform plan can cause real problems.
This article covers both sides: the skills themselves, and the concrete difference between using Claude with and without them. I'm running this on VS Code with Claude Sonnet 4.6.
## What Are Claude Skills?
Claude Code supports a feature called [**skills**](https://platform.claude.com/docs/en/agents-and-tools/agent-skills/overview?ref=linuxhandbook.com): markdown files named `SKILL.md` that live inside a `.claude/skills/` directory in your project. When you ask Claude something that matches a skill's trigger phrases, it automatically uses the structured workflow defined in that file instead of its default behavior.
Think of it like the difference between asking a new colleague a question and asking someone who's already written the runbook for it. Same knowledge, completely different depth and reliability.
I've written 8 of my own, one for each workflow I find myself using regularly.
## Why Skills Actually Matter
Let me show the difference concretely before going through each skill.
I'll use the **error-decoder** skill as the example, with a Docker container that keeps exiting. This is something you can reproduce on any machine with Docker installed.
**The prompt**: "My Docker container keeps exiting immediately. Here's the output." (with `docker logs` and `docker inspect` output pasted in)
Here's what I actually pasted in:
```bash
$ docker run --name my-app myrepo/my-app:2.1.0
Error: DATABASE_URL environment variable is not set.
Exiting.
$ docker inspect my-app --format='{{.State.ExitCode}} {{.State.OOMKilled}}'
1 false
$ docker ps -a | grep my-app
my-app myrepo/my-app:2.1.0 Exited (1) 3 seconds ago
```
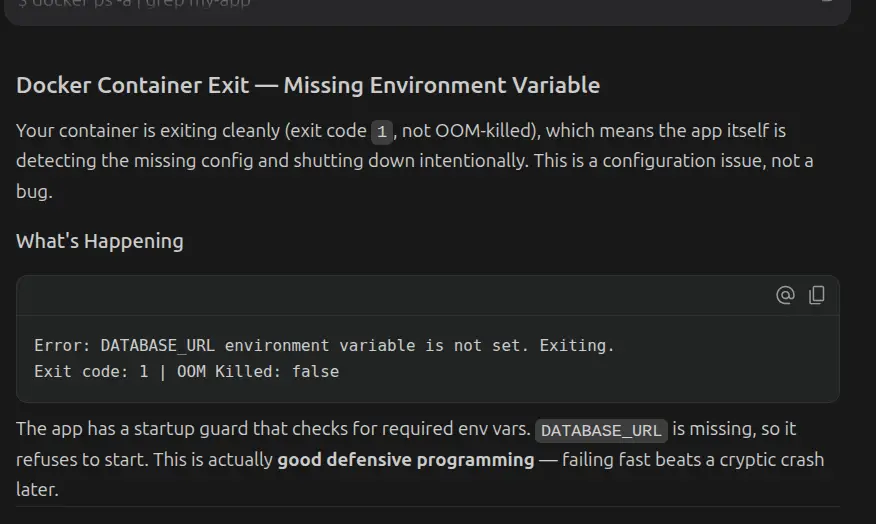
Before applying the skill.md for error-decoding
The response is accurate but completely generic. It lists common causes without engaging with the actual output that was pasted. The real answer is sitting right there in the logs (`DATABASE_URL environment variable is not set`) but Claude, without the skill, doesn't structure its analysis to find it.
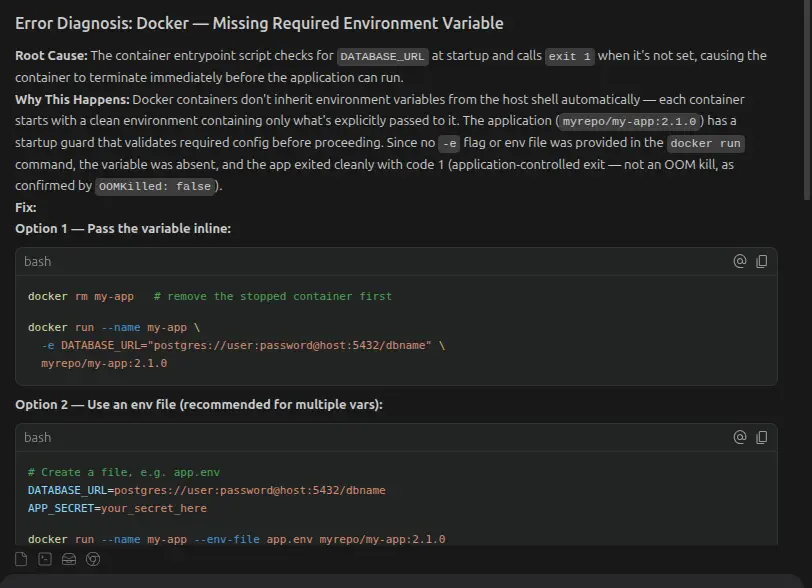
After applying the skill.md for error-decoding
The response now follows the skill's output format. It pulls the specific root cause directly from the logs, gives the exact fix command, tells you what a successful run looks like, and gives the next diagnostic step if it still fails.
The skill didn't add knowledge Claude didn't have. It added **structure and focus*,* it forces Claude to identify the root cause separately from the proximate cause, and to give a verification step instead of stopping at "here's the fix."
## The 8 Claude Skills in My Toolbox
Below are the 8 skills you will have in your project, which will give you a focused and structured workflow for your projects. I will also show you the results I get after the prompt I give to the agent with the skills enforced. You are free to download them and modify them as per your requirements.
💡
You can use the skills that fits your workflow. Use them as base and modify them as needed.
The skills folder structure will look like this:
.claude/
└── skills/
├── error-decoder/
│ └── SKILL.md ← Diagnose Kubernetes, Terraform, Helm errors
├── bash-auditor/
│ └── SKILL.md ← Write and audit Bash scripts
├── k8s-manifest-reviewer/
│ └── SKILL.md ← Explain and audit Kubernetes YAML
├── format-converter/
│ └── SKILL.md ← Convert between DevOps formats and tools
├── runbook-drafter/
│ └── SKILL.md ← Draft runbooks, postmortems, SOPs
├── terraform-explainer/
│ └── SKILL.md ← Explain and audit Terraform code and plans
├── api-tester/
│ └── SKILL.md ← Generate cURL and API test commands
└── cicd-auditor/
└── SKILL.md ← Audit GitHub Actions, GitLab CI, Jenkins
### error-decoder - Diagnosing Cryptic Errors
This is the one I use most often. DevOps tools are notoriously bad at error messages. Docker exits a container with code 137 and you're left guessing whether it's [OOM](https://linuxhandbook.com/oom-killer/) or a signal. Terraform throws a provider error with a reference ID you have to track down. Helm fails on a templating issue with a line number that doesn't match your file. Kubernetes gives you a pod in `CrashLoopBackOff` with no explanation of why. In all of these cases, the raw error is pointing **at** a symptom, not ***at*** the cause.
My workflow: paste the full error, not a summary, the full thing and add two sentences of context:
```bash
Here is the error from my Kubernetes pod. This pod was working yesterday.
The only change was updating the image tag from 1.3.2 to 1.4.0.
[full kubectl describe pod output]
```
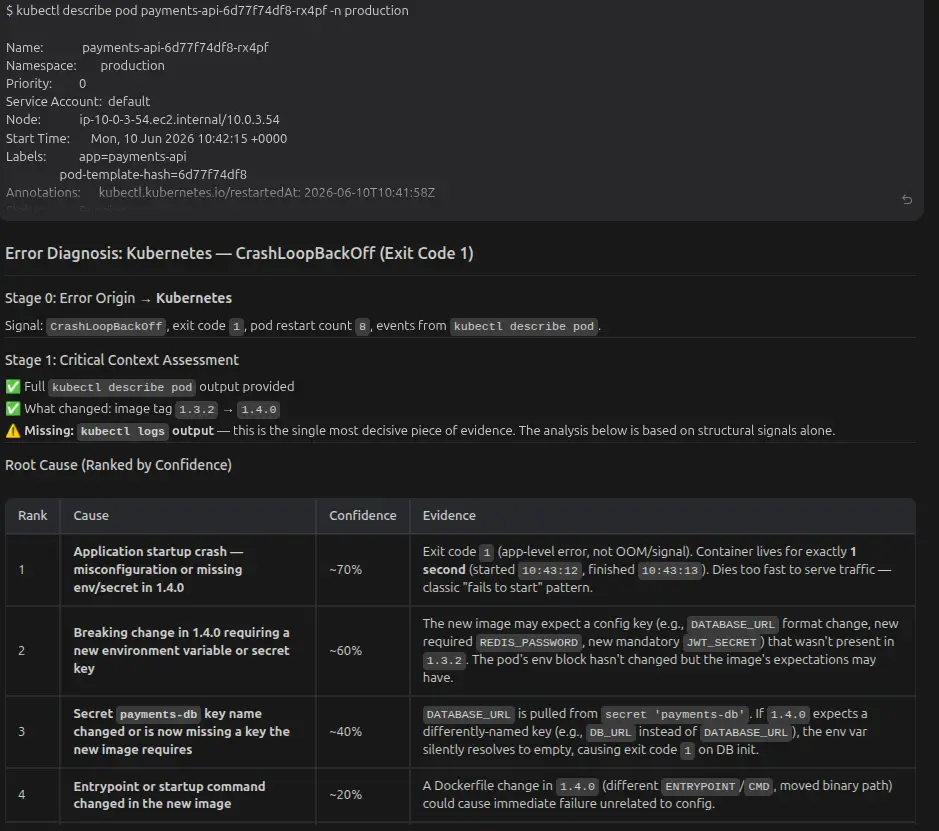
Output of Claude with error-decoder skill.md
[error-decoderSKILL.md5 KBdownload-circle](https://linuxhandbook.com/content/files/2026/06/SKILL.md "Download")
The single biggest thing that improved my results: treating Claude like a knowledgeable colleague who needs to be briefed, not a search engine. The skill enforces this by requiring full context before proceeding.
### bash-auditor - Writing and Reviewing Bash Scripts
[Bash](https://linuxhandbook.com/courses/bash/) is the lingua franca of DevOps and also one of the most footgun-prone languages in existence. A script that looks fine will silently fail because someone forgot `set -e`. A loop will do something destructive because the variable expansion wasn't quoted. A condition will always evaluate to true because of the way `[[ ]]` handles empty strings.
I use this skill for three things: Writing scripts from a plain-English description, reviewing scripts I didn't write, explaining what a script does, etc.
```bash
# My Prompt
Review this Bash script as if you're performing a production code review.
Identify:
- Bugs
- Security issues
- Reliability problems
- Quoting mistakes
- Error handling issues
- Race conditions
- Portability concerns
- Performance improvements
Explain why each issue matters and then provide a corrected production-ready version with comments.
```
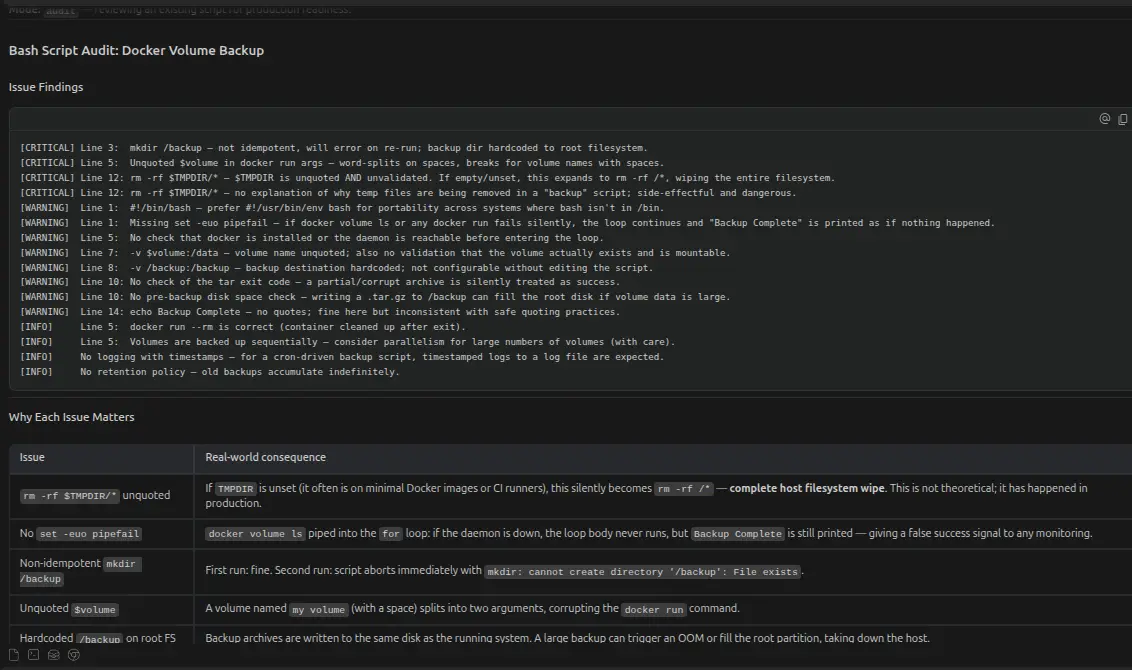
Output of Claude with bash-auditor skill.md
[bash-auditorSKILL.md5 KBdownload-circle](https://linuxhandbook.com/content/files/2026/06/SKILL-1.md "Download")
A note on trust: I always read through generated Bash before running it, especially anything that touches the filesystem or makes external requests. The skill produces a first draft with proper structure, not production-certified code.
### k8s-manifest-reviewer - Understanding Kubernetes YAML
Kubernetes YAML is verbose by design. A single Deployment manifest can be 80 lines long and most of it is boilerplate. The meaningful parts, resource limits, liveness probes, affinity rules and security contexts are buried in the middle.
I use this skill in two ways:
**Explaining what a manifest does:** Paste in a Deployment or StatefulSet YAML I haven't seen before and the skill walks through it section by section, calling out anything non-obvious. Particularly useful when you inherit infrastructure and need to quickly understand what's running and why.
**Spotting misconfigurations:** The skill audits against a production-readiness checklist
```bash
# My prompt
Review this Kubernetes Deployment as if you're the platform engineer responsible for approving it for production.
Please:
1. Explain what each section of the manifest does.
2. Point out any security, reliability, scalability, or performance issues.
3. Identify Kubernetes best-practice violations.
4. Rank the issues by severity (Critical, High, Medium, Low).
5. Explain why each issue matters.
6. Suggest concrete fixes.
7. Provide a corrected production-ready manifest.
Context:
- This is running in a production EKS cluster.
- It was migrated from a development environment.
- Traffic is expected to reach 800-1000 requests per second.
- High availability is required.
- Zero-downtime deployments are expected.
Here's the manifest provided:
```
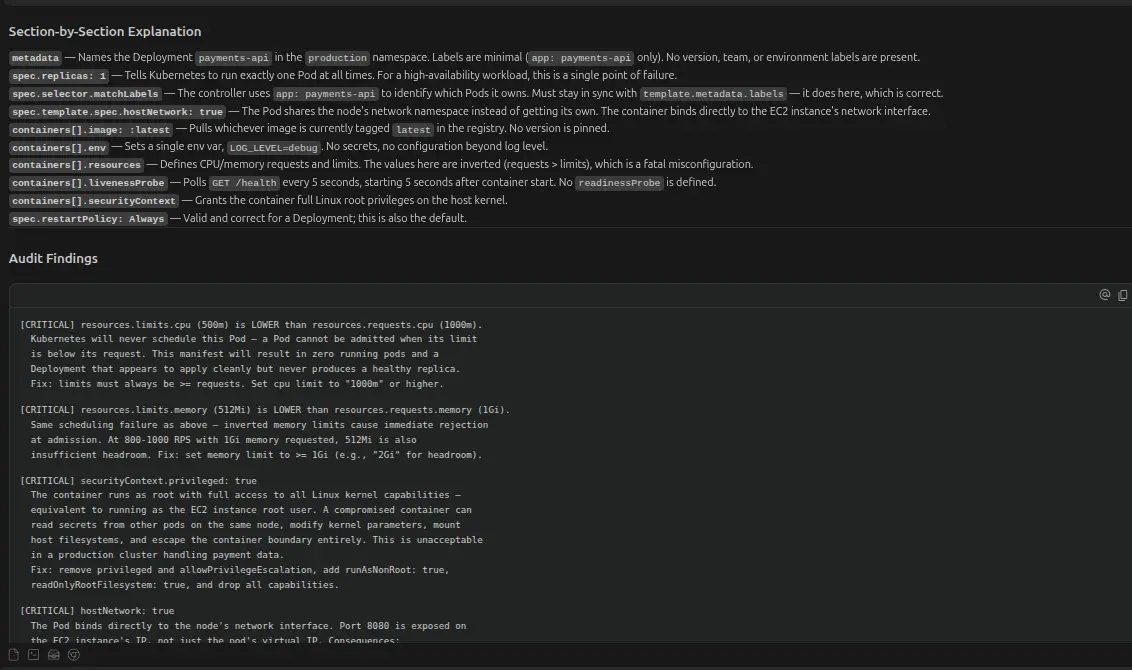
Output of Claude with k8s-manifest-reviewer skill.md
[k8s-manifest-reviewerSKILL.md5 KBdownload-circle](https://linuxhandbook.com/content/files/2026/06/SKILL-2.md "Download")
Things the skill catches that are easy to miss: Memory limit lower than memory request, missing `readinessProbe`, `hostNetwork: true` left in from a debugging session, `:latest` image tag in a production manifest, no `podAntiAffinity` rules, etc.
### format-converter - Converting Between DevOps Formats
DevOps involves a lot of format conversion work that nobody talks about because it's unglamorous. Docker Compose files that need to become Helm charts. Bash scripts that need to become Ansible playbooks. [cURL](https://linuxhandbook.com/curl-command-examples/#what-is-curl) commands from API docs that need to become Python scripts. JSON that needs to become YAML.
All of this is mechanical but error-prone when you do it by hand.
[format-converterSKILL.md5 KBdownload-circle](https://linuxhandbook.com/content/files/2026/06/SKILL-3.md "Download")
The skill enforces that constraints are explicit before generating output. The more specific your constraints, the less cleanup you do afterwards.
### **runbook-drafter - Writing Operational Documentation**
A runbook is only useful if it's actually written. Most teams have "runbooks" that are either a Confluence page last updated in 2021 or just "the person who knows how to restart the thing."
My process: do the thing first, then write a quick stream-of-consciousness description of what I did and why:
```bash
# My prompt
I just fixed a production database connectivity issue. Here's what happened:
the app pods were getting connection refused on port 5432, which turned out to
be a NetworkPolicy that was blocking traffic from the app namespace to the db
namespace after a recent namespace label change. I fixed it by updating the
namespaceSelector in the NetworkPolicy. Write a runbook section for this.
```
[runbook-drafterSKILL.md5 KBdownload-circle](https://linuxhandbook.com/content/files/2026/06/SKILL-4.md "Download")
The skill turns that stream-of-consciousness into a structured runbook section in about 30 seconds. I edit it, add the actual commands I ran, and it becomes something a teammate could actually follow at 2am.
The same approach works for postmortems. Dump the timeline, dump the actions, ask the skill to organize it into a postmortem structure. You still write the "lessons learned" section yourself; that's the part that requires judgment.
### terraform-explainer - Understanding Infrastructure as Code
[Terraform's](https://linuxhandbook.com/courses/terraform/infrastructure-as-code/#2-uses-hcl-hashicorp-configuration-language) HCL is readable enough on its own, but complex module structures - especially third-party modules with 40 variables, can be hard to parse quickly. I use this skill to understand infrastructure I didn't write.
**Reading a module:**
```bash
Explain what this Terraform module does. I specifically want to understand:
- What resources it creates
- What the required vs. optional variables are
- Whether anything here creates a public-facing resource
- Anything that might be surprising in a production AWS account
```
[terraform-explainerSKILL.md5 KBdownload-circle](https://linuxhandbook.com/content/files/2026/06/SKILL-5.md "Download")
Provider APIs go stale. Terraform and cloud provider APIs evolve constantly. For anything version-sensitive, verify against the official registry before trusting the output.
### api-tester - Generating cURL and API Test Commands
Every time I'm integrating a new service or debugging a webhook, I end up constructing `cURL` commands from API documentation. JWT auth headers, JSON body formatting, the right Content-Type; this is tedious and the skill is fast at it.
**The prompt I put:**
```bash
Give me a cURL command to call the GitHub REST API to list all open pull
requests for the repo "myorg/myrepo", authenticated with a personal access
token stored in $GITHUB_TOKEN, with output formatted as JSON and piped to jq
to show only the PR title and number.
```
[api-testerSKILL.md5 KBdownload-circle](https://linuxhandbook.com/content/files/2026/06/SKILL-6.md "Download")
The skill knows the auth patterns for common APIs (GitHub, Slack, Prometheus, Alertmanager, PagerDuty) without needing to be told. It also enforces that credentials are always environment variables and generated commands never contain a literal token.
I use this for any API I haven't touched before: Prometheus remote write, Alertmanager webhooks, AWS API Gateway, Slack, PagerDuty, wherever I need a quick working example to start from.
### cicd-auditor - Reviewing CI/CD Pipeline Configs
CI/CD pipelines written in YAML accumulate complexity over time. Stages that nobody remembers the purpose of. Jobs that run sequentially because nobody added `needs:` correctly. Secrets being printed to logs somewhere. Docker layers not being cached.
**My review prompt:**
```bash
Review this GitHub Actions workflow for common issues:
- Steps that could be parallelized but aren't
- Secrets being exposed in logs
- Missing caching for dependencies or Docker layers
- Jobs that will always run even when they should be conditional
- Third-party actions not pinned to a SHA
```
[cicd-auditorSKILL.md6 KBdownload-circle](https://linuxhandbook.com/content/files/2026/06/SKILL-7.md "Download")
The skill specifically checks for something that most miss: [**third-party GitHub Actions pinned to mutable tags**](https://docs.github.com/en/actions/reference/security/secure-use?ref=linuxhandbook.com#using-third-party-actions). `uses: some-action/tool@v3` looks fine, but it can be hijacked; the tag can be moved to point at different code. The safe version is pinning to a commit SHA.
## Wrapping Up
The value I get from Claude in a DevOps context is concentrated in specific places: decoding errors faster, auditing configs I didn't write, handling format conversion that's mechanical but annoying, and getting documentation drafted while the context is fresh. You can refer the official documentation for [Claude skills](https://docs.anthropic.com/en/docs/claude-code/skills?ref=linuxhandbook.com).
The skills are what make this reliable instead of hit-or-miss. Without them, Claude gives you general advice. With them, it follows a deterministic workflow - asks for the right inputs, applies a consistent checklist, and formats the output in a way you can actually act on.
**If you have more such skill.md that you use, share them in the comments and tell how these skills enhance your workflow!**
### Why GitOps is Not Just CI/CD
URL: https://linuxhandbook.com/courses/gitops/gitops-is-not-just-ci-cd/
Last updated: 2026-07-24T10:50:36.000Z
_This post is for paying subscribers only._
### GitOps vs Traditional DevOps
URL: https://linuxhandbook.com/courses/gitops/gitops-vs-traditional-devops/
Last updated: 2026-07-24T10:52:23.000Z
_This post is for paying subscribers only._
### What GitOps Really Is
URL: https://linuxhandbook.com/courses/gitops/what-is-gitops/
Last updated: 2026-07-24T09:50:54.000Z
_This post is for paying subscribers only._
### GitOps Handbook (Work in Progress)
URL: https://linuxhandbook.com/courses/gitops/
Last updated: 2026-08-21T07:58:06.000Z
Have you ever deployed an app to Kubernetes and later realized you don't really know what changed, who changed it, or how to roll it back safely? Maybe dev looked fine, staging looked stable, and production still broke at midnight, right when nobody wanted to touch it.
*This is exactly the problem GitOps exists to solve.*
GitOps isn't just another DevOps trend. It's a deployment model where Git becomes the single source of truth for your infrastructure and applications. Your cluster continuously pulls the desired state from Git, so every change is auditable, reversible, and predictable.
Tools like ArgoCD make this possible on Kubernetes, and that's exactly what this course teaches you, starting from the core concepts and working all the way to real production deployments.
## What you'll learn
This course is split into four modules, taking you from concepts to implementation to production-grade, safe deployments.
**Module 1: GitOps Foundations**
- What GitOps really is, and how it compares to traditional DevOps
- Why GitOps is not just CI/CD, and why it's trending right now
- Push vs pull deployments, explained with real-world examples
**Module 2: Getting Started with ArgoCD**
- Installing ArgoCD and understanding its architecture
- Deploying your first application the GitOps way
- Setting up RBAC and managing user access
**Module 3: Working with ArgoCD**
- Secret management in GitOps
- Helm vs Kustomize deployments
- Multi-environment GitOps strategy across dev, staging, and production
**Module 4: Progressive Delivery with Argo Rollouts**
- Blue-green and canary deployments
- Automated rollbacks
- Metrics based decision and safe production releases
💡
The course includes a complete, end-to-end, real world project so that you can get hands-on practice on what you learned.
## Who this course is for
This course is for you if you deploy applications to Kubernetes and want a safer, more predictable way to do it. It works well whether you're a DevOps engineer tired of manual deployments, a platform engineer building GitOps workflows for your team, or a developer and student who just wants to understand what ArgoCD and Argo Rollouts are actually doing under the hood.
You don't need any prior experience with ArgoCD to start. A [basic understanding of Kubernetes](https://linuxhandbook.com/courses/kubernetes/) will help you get more out of the course, but the first module builds up the concepts from scratch anyway.
## Start the course
Start with Module 1 and go through the four modules in order. Each one builds on the last, so you move from GitOps concepts, to your first ArgoCD deployment, to running progressive, production-grade rollouts by the end.
By the time you finish the final project in Module 5, you'll have hands-on experience with the same GitOps setup used to run real production systems.
### Git Pull Kept Failing on My Ghost Server. Docker Compose Override Fixed It
URL: https://linuxhandbook.com/blog/docker-compose-override-trick-ghost/
Last updated: 2026-07-21T13:49:18.000Z
If editing your docker-compose.yml directly is breaking git pull from upstream, here's the fix: move your customizations into a separate compose.override.yml file instead of editing the original.
## The fix: use a compose override file
Create a `compose.override.yml` in the same folder as your `compose.yml`, and use the exact service names from your original file (`ghost` and `caddy`, in my case).
```yaml
services:
ghost:
logging:
driver: json-file
options:
max-size: "100m"
max-file: "5"
caddy:
logging:
driver: json-file
options:
max-size: "100m"
max-file: "5"
```
Docker Compose picks up `compose.override.yml` automatically and merges it into `compose.yml` at runtime, so you don't need to pass any extra flags.
So, when you run:
```
docker compose up
```
It is equivalent to running:
```
docker compose -f compose.yml -f compose.override.yml up
```
Your original `compose.yml` never gets touched, so there's nothing left for `git pull` to conflict with and so no complaints from git.
## How I ran into this
I run my Ghost sites using [Ghost's official Docker Compose self-hosting method](https://docs.ghost.org/install/docker?ref=linuxhandbook.com). Eventually, I noticed that Ghost's default setup generates a lot of log output, so I [added log rotate option in the docker compose file](https://linuxhandbook.com/docker-log-space-issue/) for the `ghost` and `caddy` services directly inside `compose.yml`.
This solved the logs eating up disk space problem, but updating the Ghost version became inconvenient.
Updating to a newer Ghost version after that is meant to be a simple three-step routine:
- git pull
- docker compose pull
- docker compose up -d.
That routine broke because I modified `compose.yml`. Every `git pull` started failing with the same error:
```text
root@ghost-learnubuntu:/opt/ghost# git pull
remote: Enumerating objects: 89, done.
remote: Counting objects: 100% (68/68), done.
remote: Compressing objects: 100% (46/46), done.
remote: Total 89 (delta 52), reused 29 (delta 20), pack-reused 21 (from 2)
Unpacking objects: 100% (89/89), 31.28 KiB | 485.00 KiB/s, done.
From https://github.com/TryGhost/ghost-docker
14cc722..d3204b2 main -> origin/main
Updating 14cc722..d3204b2
error: Your local changes to the following files would be overwritten by merge:
compose.yml
Please commit your changes or stash them before you merge.
Aborting
```
For a while, my workaround was keeping a backup of the untouched `compose.yml`, or running `git stash` before every pull. It worked, but it meant remembering an extra step every single time I wanted to update Ghost.
And one day, I came across the concept of compose override file.
## What is a compose override file
A compose override file is just a [second compose file](https://docs.docker.com/compose/how-tos/multiple-compose-files/?ref=linuxhandbook.com) that sits next to your main one. Anything you define inside it gets layered on top of `compose.yml` automatically, without you having to pass any extra flags to `docker compose`.
Since it's a separate file, it's not the one git is tracking against upstream, so pulling new changes from Ghost's repo doesn't touch anything you've customized.
💡
The only thing that matters is getting the service names right. If a service name in your override file doesn't match the one in `compose.yml` exactly, Docker Compose treats it as a new service instead of merging into the existing one.
Here's the compose.override.yml file for my Ghost.
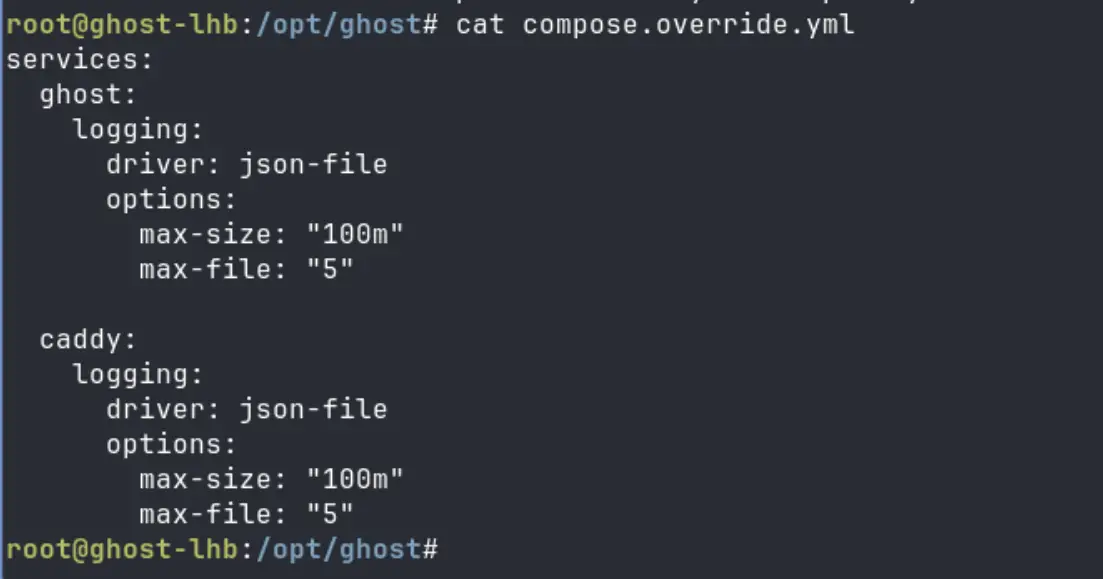
This solved the problem for me completely. My `compose.yml` now stays exactly as it comes from upstream, and `git pull`, `docker compose pull`, `docker compose up -d` goes back to being a clean three-step routine.
## Using override files to separate test and production
The same mechanism works for more than just logging. Since an override file just layers extra configuration on top of the base file, you can use a similar setup to separate test and production: keep one `compose.override.yml` for local tweaks like lighter resource limits or different ports, and a separate file, say `compose.prod.yml`, for anything specific to production. You pick which one applies at deploy time with the `-f` flag.
## Other ways to use override files
Let's see various ways you can use the overrride compose file.
### Run without override
If you ever need to deploy without applying the override, point `docker compose` at only the base file explicitly:
```bash
docker compose -f compose.yml up -d
```
Passing `-f` like this skips the automatic override merge entirely.
### Use multiple override files
You're also not limited to one override file. Layer as many as you need by repeating `-f` in order, with later files taking priority over earlier ones:
```
docker compose -f compose.yml -f compose.override.yml -f compose.prod.yml up -d
```
### See what the final compose file looks like
Whenever you want to double check what's actually being applied after all that layering, run:
```
docker compose config
```
It prints the fully merged result.
## 💡Add override to gitignore
I have added my `compose.override.yml` to the `.gitignore`. It's local to my setup, not something upstream needs to know about, and keeping it out of git means I'll never run into a merge conflict over it either. You can do the same if it fits your scenario.
I'm sure there's more you can do with override files depending on your setup, but this fixed the problem I had: keeping my logging tweaks out of the file Ghost's repo manages.
If you're running Ghost, or anything else, through docker compose and editing the compose file directly, it's worth switching to an override file before you reach for `git stash` every time.
### LHB Linux Digest #26.08: Two Kernel Bugs You Need to Know, SSH Tunneling, and AI Pentesting
URL: https://linuxhandbook.com/newsletter/26-09/
Last updated: 2026-07-10T11:51:32.000Z
Short one this week my friend, energy's a bit low on my end, but two kernel vulnerabilities landed that are too important to skip, so let's get into it.
Two old, nasty kernel bugs got public exploits this week. If you're running KVM or any kind of multi-tenant containers, this is a "patch today, not this weekend" situation.
[GhostLock (CVE-2026-43499) is a 15-year-old use-after-free bug](https://thehackernews.com/2026/07/15-year-old-ghostlock-flaw-enables-root.html?ref=linuxhandbook.com) in the Linux kernel's futex/rtmutex subsystem. It lets an unprivileged local user grab root and escape containers on unpatched systems. This one's been sitting quietly since 2011, affects pretty much every major distro, and researchers have already shown a reliable exploit that gets root in about five seconds. It also breaks container isolation, so if you're self-hosting anything multi-tenant, take this seriously.
[Januscape (CVE-2026-53359) is a 16-year-old use-after-free in KVM](https://www.bleepingcomputer.com/news/linux/new-januscape-linux-kernel-flaw-allows-vm-escape-on-intel-amd-devices/?ref=linuxhandbook.com)'s shadow MMU implementation. It can let an attacker escape a guest VM and run code on the host, on both Intel and AMD systems. Cloud providers and anyone running untrusted workloads in virtualized environments are the biggest targets, but if you run KVM at home, it's worth checking your patch status too.
Two decade-plus-old bugs surfacing with working exploits in the same week is a good reminder that "old and stable" doesn't mean "safe to ignore."
## 📚 Worth reading from Linux Handbook
A Postgres instance on a remote server, port 5432 not exposed to the internet (rightly so). How to access it? The fix is SSH tunneling, and [this tutorial](https://linuxhandbook.com/ssh-tunneling/) walks through all three flavors with the actual commands and real use cases behind them.
- **Local forwarding (`-L`)** to reach a remote service, like that Postgres box, as if it were running on your own machine
- **Remote forwarding (`-R`)** to expose something local, like a webhook receiver on your dev machine, to the outside world through a VPS
- **Dynamic forwarding (`-D`)** to turn your SSH connection into a SOCKS proxy for encrypting your traffic on untrusted WiFi
If you've ever wanted to skip standing up a VPN just to reach one service, this is worth ten minutes of your time. [Read the full guide](https://linuxhandbook.com/ssh-tunneling/).
**Also recent, in case you missed them:**
- [I Like This Fuzzy Search Finder Better Than Find Command in Linux](https://linuxhandbook.com/blog/fzf-command/), a quick case for swapping `find` for `fzf` in your daily workflow
- [These 11 Open Source Tools Completely Improved My Docker Workflow](https://linuxhandbook.com/blog/docker-workflow-tools/), a practical roundup if you're managing more than a couple of containers
## **💡Quick terminal tip**
Most Linux users know how to extract archives, but tar includes several lesser-known options that can make working with archives safer and more efficient.
Before extracting an archive, inspect its contents:
```
tar -tf archive.tar.gz
```
This lists every file and directory inside the archive without extracting anything.
To avoid cluttering your current directory, extract the archive into its own automatically created folder:
```
tar -xf archive.tar.gz --one-top-level
```
If you prefer a custom directory name instead, specify it explicitly:
```
tar -xf archive.tar.gz --one-top-level=archive
```
Finally, you don't have to extract the entire archive. To restore only specific files or directories, list them after the archive name:
```
tar -xf archive.tar.gz path/to/file.txt docs/
```
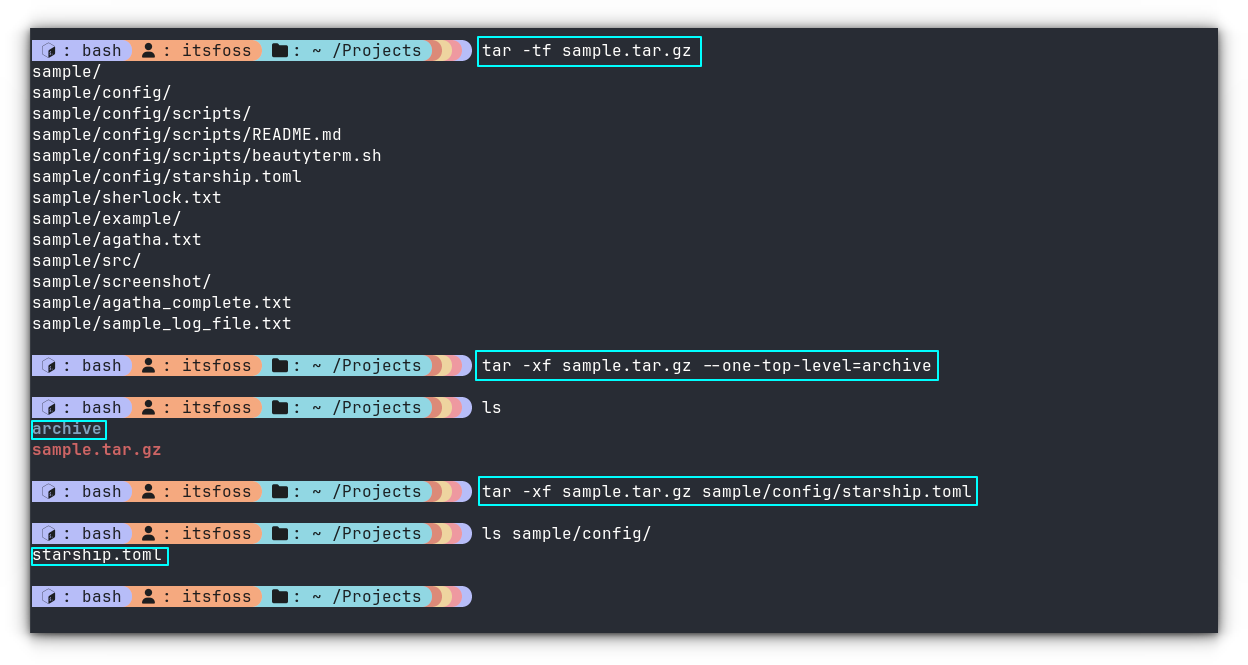
This is particularly useful when working with large source archives or backups where you only need a handful of files.
## 🛠️ Tool discovery
Let's find your next favorite software in this section.
### DarkMoon: AI-Powered Autonomous Penetration Testing Platform
[DarkMoon](https://github.com/ASCIT31/Dark-Moon?ref=linuxhandbook.com) is an open-source platform that runs full penetration tests using AI agents that plan, execute, and validate real exploits against a target, across web apps, Active Directory, and Kubernetes.
Why use it? Well, manual pentesting takes weeks and a proper consultant costs thousands a day, and Dark-Moon automates that entire loop, from recon to a structured, evidence-backed report, using 50+ integrated tools like Nuclei, sqlmap, and BloodHound under the hood.
It also runs a local privacy gateway that keeps your real IPs, hosts, and credentials from ever reaching the LLM provider. Good fit for DevSecOps pipelines, bug bounty workflows, or just testing your own homelab exposure before someone else does.
You can [self-host it](https://github.com/ASCIT31/Dark-Moon?ref=linuxhandbook.com) or purchase a [plan from their website](https://dark-moon.org/?ref=linuxhandbook.com).
[GitHub - ASCIT31/Dark-Moon: Autonomous AI pentesting engine, continuous offensive security across web, cloud, AD & Kubernetes. Agentic reasoning + real exploit execution deliver proof-based vulnerabilities. Privacy gateway: the LLM never sees your real IPs, hosts, creds or paths (deterministic placeholders rehydrated locally), nothing leaves your perimeter.Autonomous AI pentesting engine, continuous offensive security across web, cloud, AD & Kubernetes. Agentic reasoning + real exploit execution deliver proof-based vulnerabilities. Privacy gatewa…GitHubASCIT31](https://github.com/ASCIT31/Dark-Moon?ref=linuxhandbook.com)
### Dashy: Self-Hosted Dashboard for Homelab and Infrastructure Services
[Dashy](https://github.com/Lissy93/dashy?ref=linuxhandbook.com) is an open-source, self-hosted dashboard that provides a unified homepage for accessing infrastructure services, applications, and development tools. It combines link management with service health monitoring, widgets, authentication, and extensive customization, making it a practical landing page for homelabs, self-hosted environments, and DevOps teams managing numerous services.
- 🚦 **Service Health Monitoring**: Displays real-time availability and status checks for configured applications and services.
- 📊 **Rich Widget Ecosystem**: Integrates dynamic widgets for self-hosted services, system information, and external APIs to create an operational dashboard.
- 🎨 **Highly Customizable UI**: Supports multiple themes, icon packs, custom CSS, configurable layouts, and a built-in visual configuration editor.
- 🔍 **Fast Navigation**: Includes instant search, keyboard shortcuts, multiple pages, and flexible launch options for quickly accessing services.
- 🐳 **Easy Deployment**: Runs via Docker, Docker Compose, or directly from source, with support for multi-architecture container images.
[GitHub - lissy93/dashy: 🚀 A self-hostable personal dashboard built for you. Includes status-checking, widgets, themes, icon packs, a UI editor and tons more!🚀 A self-hostable personal dashboard built for you. Includes status-checking, widgets, themes, icon packs, a UI editor and tons more! - lissy93/dashyGitHublissy93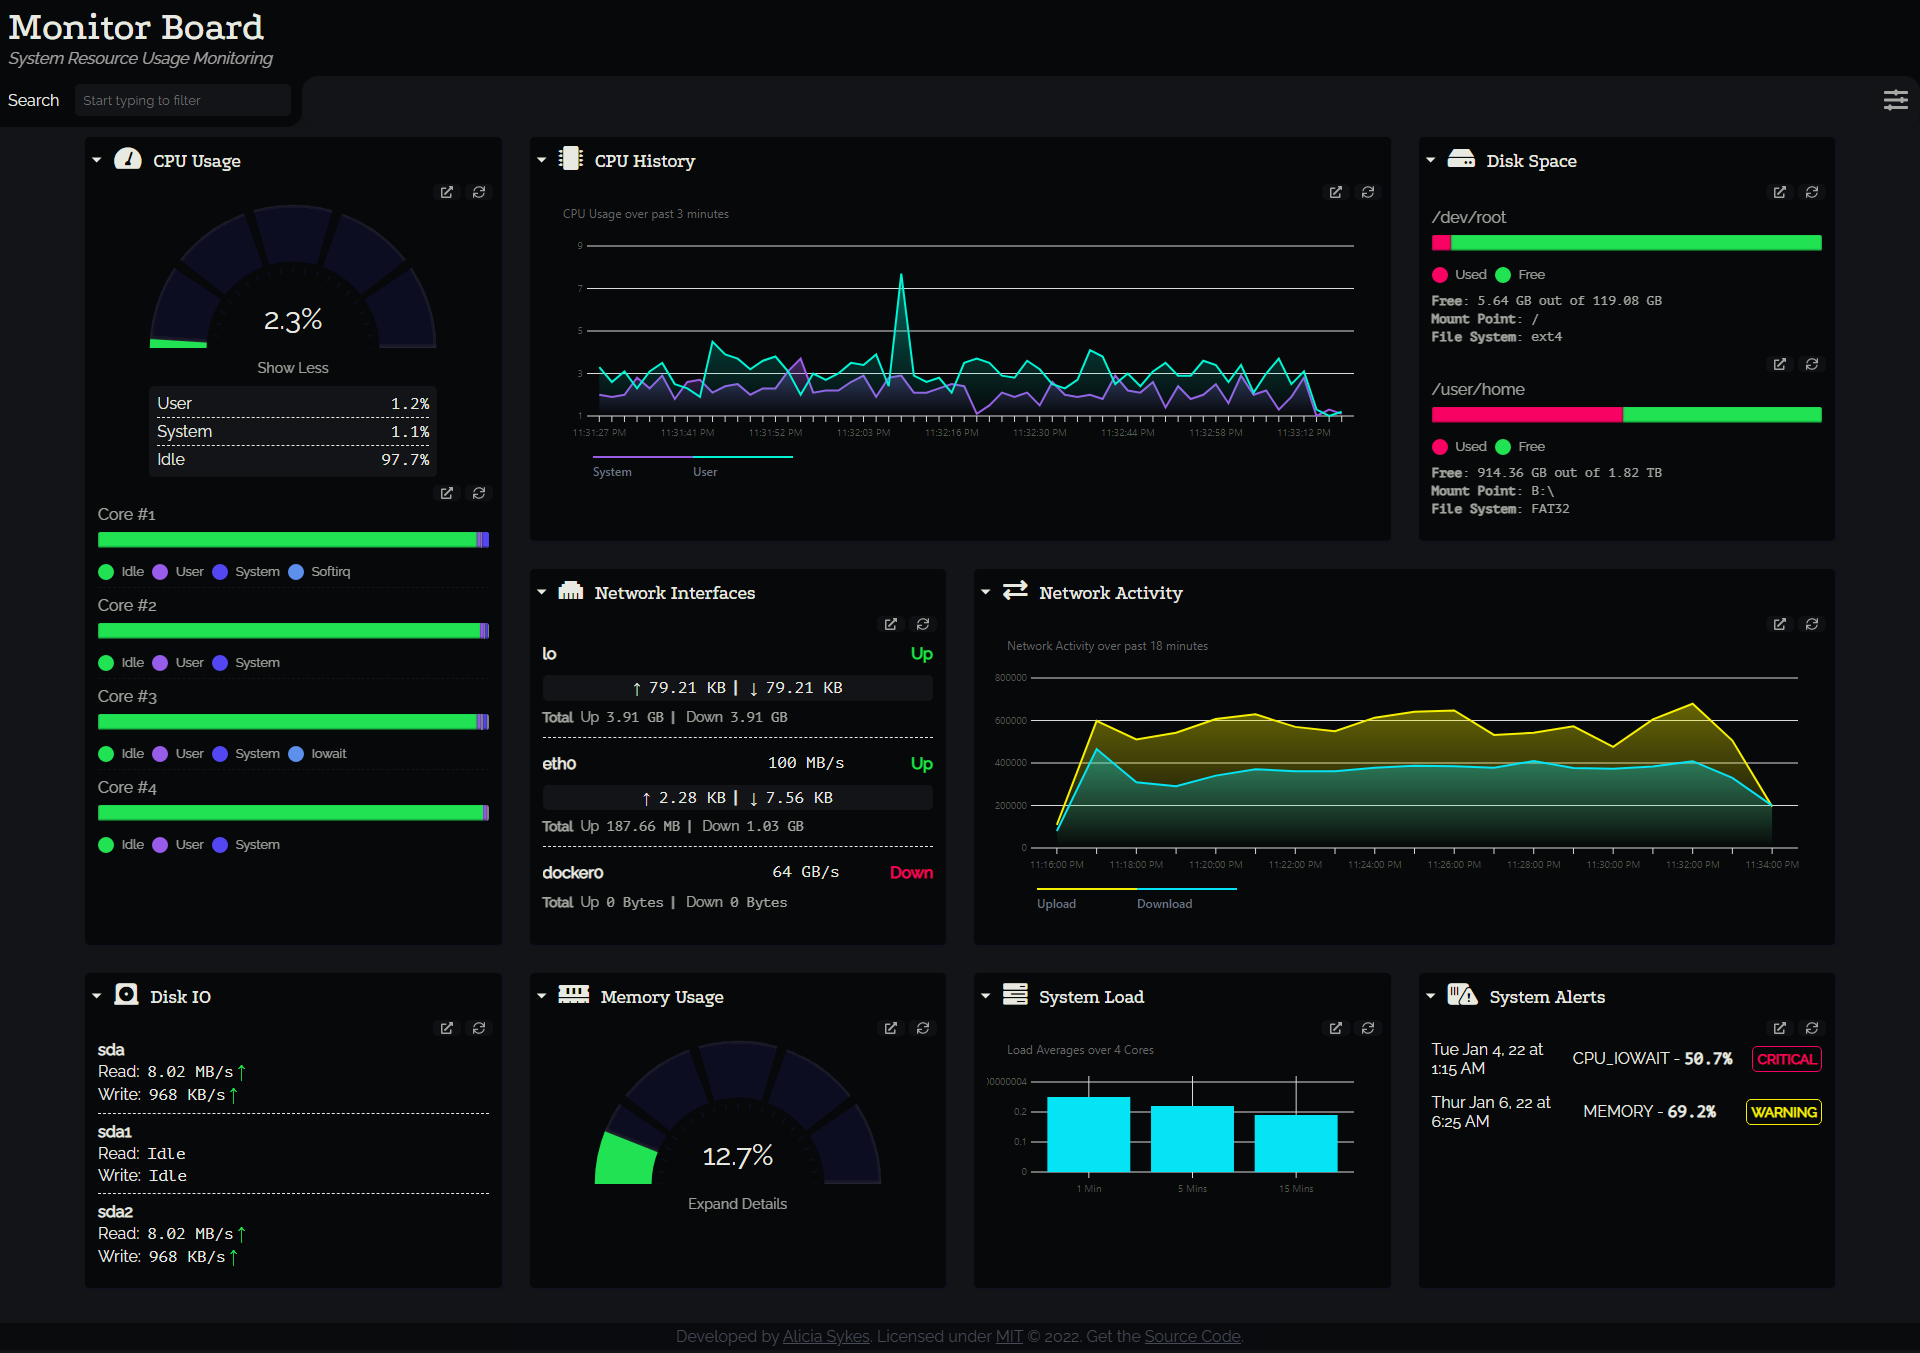](https://github.com/Lissy93/dashy?ref=linuxhandbook.com)
## 📰 Linux news that matters
- [Apple has released version 1.0 of its open-source Container project](https://www.helpnetsecurity.com/2026/07/07/apple-container-open-source-linux-mac/?ref=linuxhandbook.com), a Swift-based tool that runs OCI-compatible Linux containers inside lightweight virtual machines on Apple silicon Macs. The stable release introduces persistent Linux environments through the new container machine command, adopts TOML-based configuration, and adds capabilities such as host-to-container file copying while establishing a stable baseline for future development.
- The German state of [Mecklenburg-Vorpommern is expanding its open-source strategy](https://itsfoss.com/news/german-state-ditches-sharepoint/?ref=linuxhandbook.com) by rolling out a self-hosted Nextcloud platform across state and municipal administration, with a long-term target of more than 50,000 public-sector employees. The initiative replaces Microsoft SharePoint for collaboration, is operated on state-controlled infrastructure, and forms part of a broader digital sovereignty strategy that also includes OpenProject and a locally controlled AI assistant based on OpenWebUI while emphasizing open standards and European technologies.
- AWS has expanded its [DevOps Agent with release management capabilities](https://www.infoq.com/news/2026/07/aws-devops-ai-agent/?ref=linuxhandbook.com) that automatically review code changes, validate dependency impacts and access controls, and execute functional verification in managed environments before software is deployed. The enhancement moves the agent beyond troubleshooting and operations into pre-production quality assurance, positioning it as an AI-assisted release engineer integrated into the software delivery lifecycle.
- Researchers at Noma Security disclosed [GitLost, a prompt-injection technique](https://devops.com/gitlost-flaw-lets-attackers-trick-github-ai-agent-into-leaking-private-repos/?ref=linuxhandbook.com) that tricks GitHub Agentic Workflows into reading data from private repositories and publishing it in a public repository comment. The attack requires only a crafted GitHub Issue in a public repository when the organization's AI workflow has read access to private repositories, illustrating how natural-language instructions embedded in untrusted content can override the agent's intended behavior.
## 😂 Geek humor

## 💌 Keep on loving Linux Handbook
GitOps course is nearly ready. It should arrive next week.
Perfect time to [become a Pro member](https://linuxhandbook.com/#/portal/signup) and enjoy unlimited access to our [eBooks](https://linuxhandbook.com/ebooks/), [courses](https://linuxhandbook.com/courses/) and in-depth tutorials.
**Missed the previous editions?** You can [access the newsletter archives.](https://linuxhandbook.com/newsletter/)
You may also [contribute to Linux Handbook](https://linuxhandbook.com/write-for-us/) and share your experience and expertise with the community.
I like reading your messages, so just hit the reply button and share your thoughts 😄
### SSH Tunneling: How I Securely Access Anything From Anywhere
URL: https://linuxhandbook.com/ssh-tunneling/
Last updated: 2026-06-29T11:54:26.000Z
There's a moment every Linux user eventually hits, you need to access something on a remote machine, but it's not exposed to the internet. Maybe it's a database running on port 5432, a local web app on port 3000, or a service hidden behind a firewall. The "obvious" solution is to punch a hole in the firewall and expose it. The *\*right\** solution is SSH tunneling.
I started using SSH tunnels out of necessity. I had a PostgreSQL database running on a remote server, and the sysadmin (correctly) refused to open port 5432 to the internet. Someone in the team mentioned that I could just "tunnel through SSH" to access it. I had no idea what that meant. Twentyminutesofreadinglater*,* I had it working and I've been using SSH tunnels regularly ever since for everything from accessing remote services to getting around restrictive networks.
I'll walk through what SSH tunneling actually is, how each type works, how I set them up, and **importantly,** what the risks are and how to stay on the right side of them.
## **What is SSH Tunneling?**
SSH (Secure Shell) is usually thought of as a way to get a remote terminal. But [SSH also has the ability to forward ports](https://linuxhandbook.com/ssh-port-forwarding/); it can take network traffic on one port and route it through the encrypted SSH connection to emerge somewhere else entirely.
That's SSH tunneling in a sentence: **using an SSH connection as a secure pipe to route other traffic.**
The traffic inside that pipe is encrypted by SSH, which means it gets the same protection as your terminal session. A service that has no encryption of its own, an old database, a plain HTTP admin panel, a Redis instance, suddenly gets full TLS-grade protection just because you're reaching it through SSH.
There are three types of SSH tunnels. Understanding which one solves your problem is most of the battle:
**Local forwarding:** `-L` tunnel forwards a port on *your machine* to somewhere the *remote server* can reach.
**Remote forwarding:** `-R` tunnel forwards a port on the *remote server* to something on *your machine.*
**Dynamic forwarding:** SOCKS proxy, `-D` tunnel turns the SSH connection into a proxy that routes any traffic through the remote.
Let's go through each one the way I actually use them.
## Local Port Forwarding: Accessing Remote Services Locally
This is the one I use most. Local forwarding lets me open a port on my laptop and have traffic on that port come out on the remote server, as if I'm connecting from the server itself.
**My exact use case:** I needed to connect my local database client (DBeaver) to a PostgreSQL instance running on a remote server. Port 5432 was not open to the internet. SSH port 22 was.
```bash
ssh -L 5433:localhost:5432 username@remote-server.example.com
```
Breaking this down: `-L` tells SSH we're doing local forwarding, `5433` is the port I'm opening on **my machine,** `localhost:5432` is where the traffic should go *from the remote server's perspective,* `lhb@remote-server.example.com` is the SSH server I'm tunneling through.
After running this, I opened DBeaver, pointed it at `localhost:5433`, and it connected to the PostgreSQL instance on the remote server, over an encrypted channel, as if the database were running locally.
The tunnel is active for as long as the SSH session stays open. When you exit, the tunnel closes. If you don't need an interactive shell, just the tunnel - add `-N` to suppress it:
```bash
ssh -N -L 5433:localhost:5432 username@remote-server.example.com
```
And if you want it to run in the background:
```bash
ssh -N -f -L 5433:localhost:5432 username@remote-server.example.com
```
`-f` sends the process to the background after authenticating. The tunnel stays open without occupying your terminal.
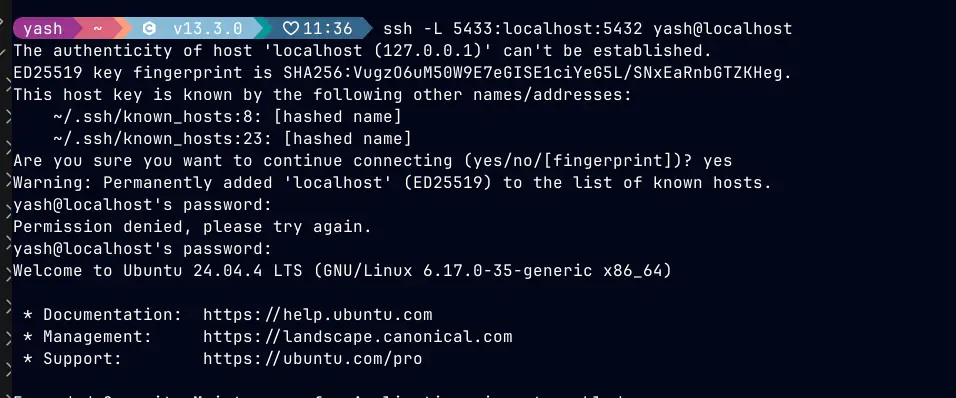
Using locally hosted docker container as remote server for example
Here, I have used a [Docker PostgreSQL](https://hub.docker.com/%5F/postgres?ref=linuxhandbook.com) container to show the SSH connection to the remote server.
## Remote Port Forwarding: Exposing Your Local Machine to the World
Remote forwarding is local forwarding in reverse. Instead of bringing a remote service to me, I'm pushing something on my machine out to a remote server.
**My use case for this:** I was developing a webhook receiver locally. The service I needed to receive webhooks from (a payment processor) needed a public URL to send to. My development machine is behind NAT, with no public IP. I had a cheap VPS with a public IP. Remote forwarding solved it.
```bash
ssh -R 8080:localhost:3000 username@my-vps.example.com
```
Here, `-R` for remote forwarding, `8080` is the port that opens on the ***remote server,*** `localhost:3000` is where traffic on that remote port gets forwarded, back to my machine, port 3000.
After running this, anyone hitting `my-vps.example.com:8080` would have their request tunneled back to port 3000 on my laptop. My local dev server was now reachable from the internet, through an encrypted SSH connection. For the example I have setup the container for the vps as:
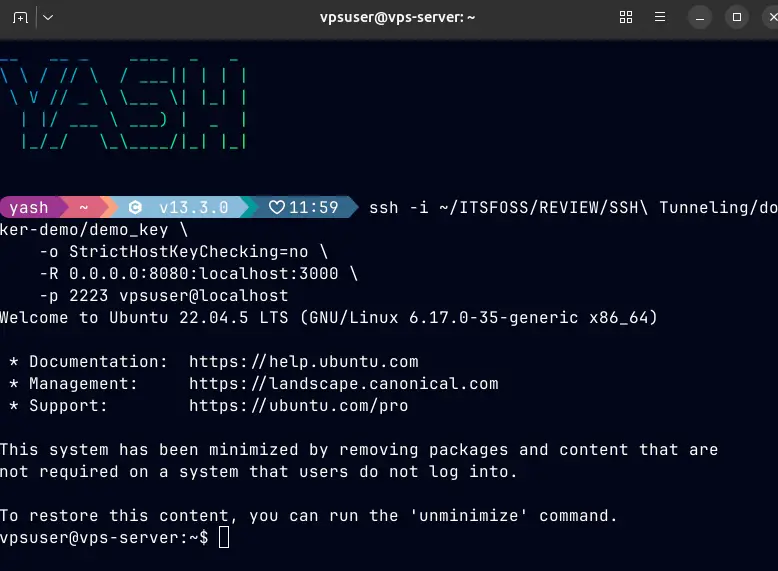
VPS container running for reverse tunnel
The VPS container is running for reverse tunneling for the requests that are coming.
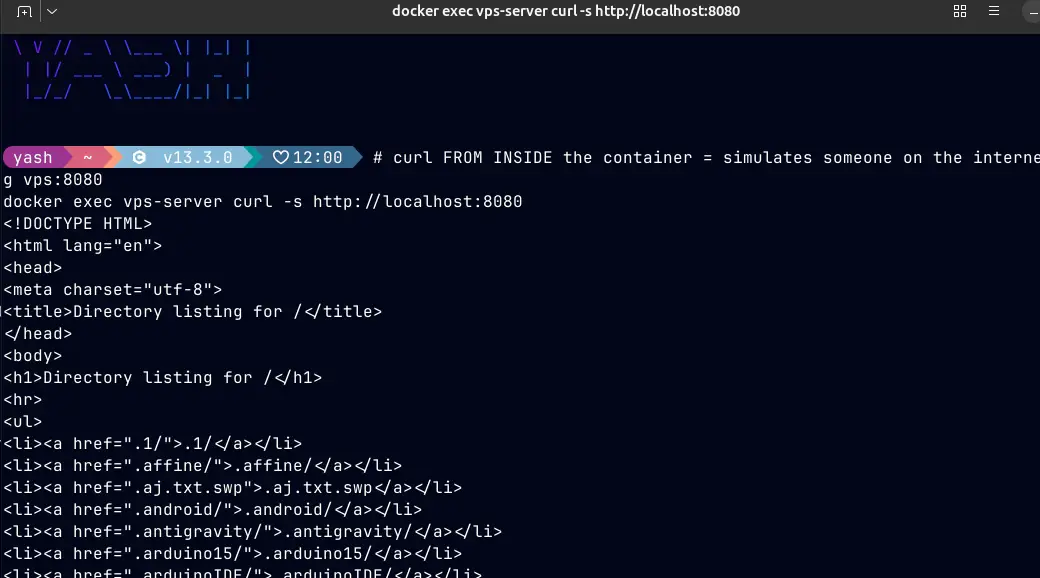
simulate external request to vps:8080
curl from inside the container simulates the external request to the vps:8080 endpoint.
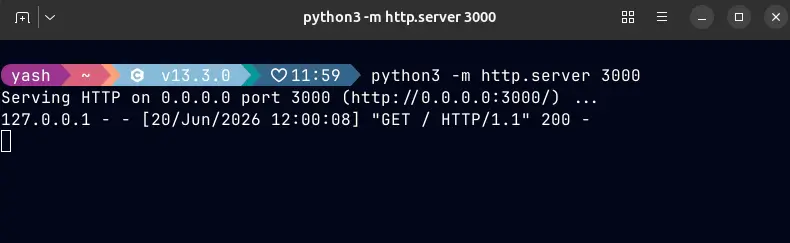
python server logs
Python server verifying and logging the connected request from the internet that comes to the VPS and then to the `localhost:3000`
**When to use this:** Remote forwarding is incredibly useful for quick webhook testing, sharing a local demo with a client, or giving someone remote access to something on your internal network without setting up a VPN.
## Dynamic Port Forwarding: SSH as a SOCKS Proxy
Dynamic forwarding is the most flexible of the three. Instead of forwarding a specific port to a specific destination, it creates a [SOCKS proxy](https://en.wikipedia.org/wiki/SOCKS?ref=linuxhandbook.com) on your machine. Any application that supports SOCKS proxies can route all its traffic through your SSH connection and it will appear as if that traffic is coming from the remote server.
Command that can be used:
```bash
ssh -D 1080 -N yash@remote-server.example.com
```
This opens a SOCKS5 proxy on `localhost:1080` on my machine. Any traffic I route through that proxy goes through the SSH tunnel and exits from `remote-server.example.com`.
I have used it as:
```bash
ssh -f -D 1080 -N \
-i ~/ITSFOSS/REVIEW/SSH\ Tunneling/docker-demo/demo_key \
-p 2223 -o StrictHostKeyChecking=no \
vpsuser@localhost
ss -tlnp | grep 1080
```
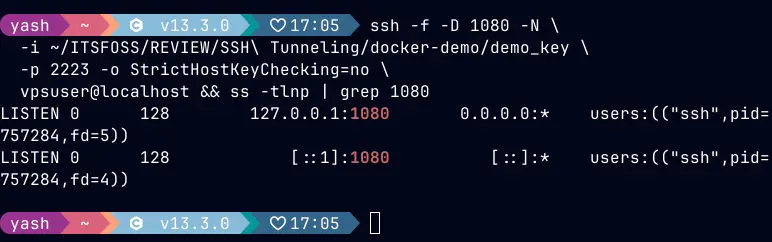
proxy is bound to localhost:1080
Then I can setup the network proxy through the network settings as:
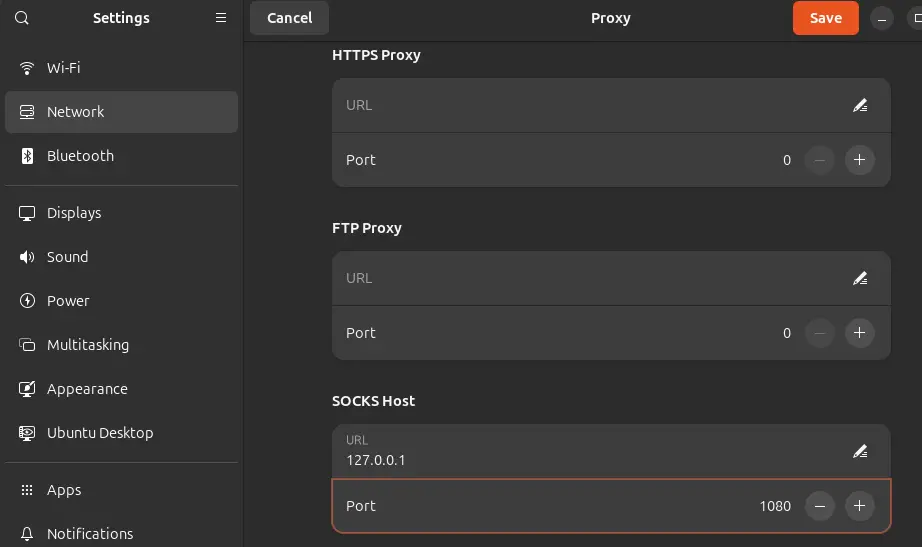
Network SOCKS proxy setup
Then, you need to set up the SOCKS proxy through the network settings.
**When to use this:** When you are in a coffee shop with WiFi and want to encrypt all your browsing, you need to access something that's only reachable from a specific server (e.g., an internal admin panel that only allows connections from the VPS's IP), or you want to test how your website looks from the perspective of another geographic location.
## Making Tunnels Persistent
Running long `ssh -L ...` commands every time is annoying. I put my common tunnels in `~/.ssh/config` so I can activate them with a short alias:
```bash
Host db-tunnel
HostName remote-server.example.com
User yash
LocalForward 5433 localhost:5432
ServerAliveInterval 60
ServerAliveCountMax 3
Host socks-proxy
HostName my-vps.example.com
User yash
DynamicForward 1080
ServerAliveInterval 60
ServerAliveCountMax 3
```
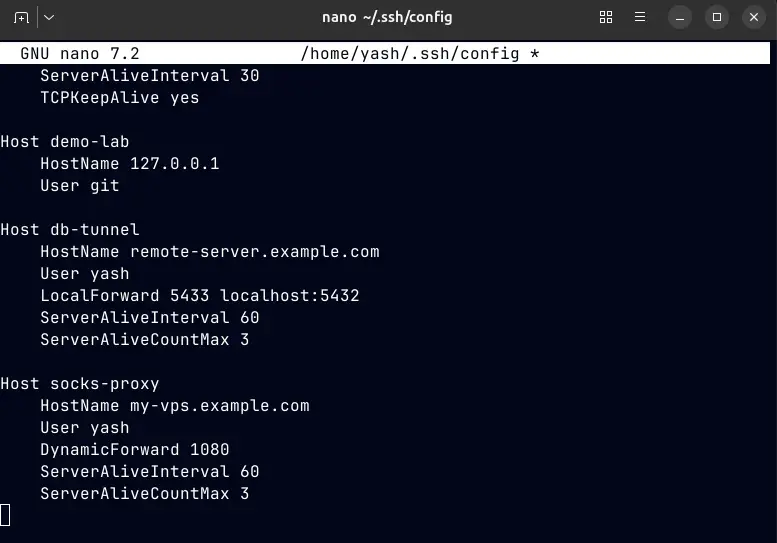
config at \~/.ssh/config
Now activating the database tunnel is just:
```bash
ssh -N db-tunnel
```
And the SOCKS proxy:
```bash
ssh -N socks-proxy
```
## The Risks And How to Handle Them
SSH tunneling is powerful, and like most powerful tools, it can cause problems if misused or misconfigured. This is the part most tutorials skip.
### Risk 1: Unauthorized Tunnel Creation
The flip side of remote forwarding (`-R`) is that if someone has SSH access to your server, they can open tunnels out of it, potentially bypassing your network security controls. An attacker with a compromised SSH key could use your server as a relay to reach systems inside your network.
**Mitigation:** Restrict what SSH users can do. In `/etc/ssh/sshd_config`:
```bash
# Disable port forwarding for all users by default
AllowTcpForwarding no
GatewayPorts no
# Then allow it only for specific trusted users:
Match User deploy-user
AllowTcpForwarding local
```
Use SSH keys (not passwords), enforce key-based auth only, and audit your `~/.ssh/authorized_keys` files regularly.
### Risk 2: Tunnel Misuse on Corporate/Managed Networks
Dynamic SSH tunneling (`-D`) is a common technique for bypassing network monitoring and content filters. On a corporate or university network, using a SOCKS proxy to route traffic through an external server may violate acceptable use policies, even if you have a legitimate reason.
I use it when I'm on untrusted public WiFi to protect my own traffic, which is reasonable. Using it to bypass your employer's security controls on company equipment is a different matter; read your acceptable use policy, and don't be surprised if your IT team can see that you're making an encrypted SSH connection to an external server even if they can't see inside it.
### Risk 3: Exposing Tunnels Beyond Localhost
When you run `-L 5433:localhost:5432`, by default the tunnel binds to `127.0.0.1` on your machine, only you can use it. But if you bind it to `0.0.0.0`, anyone on your local network (or beyond) can use that forwarded port to reach the remote service.
```bash
# DANGEROUS — binds to all interfaces
ssh -L 0.0.0.0:5433:localhost:5432 user@remote-server.example.com
```
Unless you specifically need to share a tunnel with other people on your network, always let the tunnel bind to `127.0.0.1` (the default). You can explicitly enforce this:
```bash
# Safe — explicitly binds to loopback only
ssh -L 127.0.0.1:5433:localhost:5432 user@remote-server.example.com
```
### Risk 4: Keeping SSH Keys Secure
All of this relies on the security of your SSH keys. If your private key is stolen, your tunnels and everything behind them are compromised.
**My key hygiene:** Use `ssh-keygen -t ed25519` for new keys, as Ed25519 keys are smaller, faster, and considered stronger than RSA-4096 for most use cases, always set a passphrase on private keys, use `ssh-agent` to avoid retyping the passphrase constantly while keeping the key protected at rest, never share private keys or put them in version control.
```bash
# Generate a new Ed25519 key with a passphrase
ssh-keygen -t ed25519 -C "yash@workstation" -f ~/.ssh/id_ed25519_tunnel
# Add it to ssh-agent so you don't retype the passphrase every session
ssh-add ~/.ssh/id_ed25519_tunnel
```
```
## A Quick Reference: When to Use Which Tunnel
| Situation | Tunnel type | Command pattern |
| ------------------------------------------- | ----------- | ------------------------------------------------- |
| Access a remote database or service locally | Local \-L | ssh -L localport:host:remoteport user@server |
| Share a local dev server with the internet | Remote \-R | ssh -R remoteport:localhost:localport user@server |
| Encrypt all browsing on untrusted WiFi | Dynamic \-D | ssh -D 1080 -N user@server |
## Wrapping Up
What I like about SSH tunneling is that it solves real problems without adding infrastructure. No VPN server to configure, no WireGuard keypairs to exchange, no nginx proxy rules to write. The SSH connection you already use for server access can also carry your database traffic, your webhook traffic, or your browsing traffic, all encrypted, all without opening extra firewall ports.
Local forwarding (`-L`) is the one I reach for most often, any time I need to access a service on a remote machine from a local client. Remote forwarding (`-R`) is what I use when I need to do the reverse: expose something local to the internet temporarily. Dynamic forwarding (`-D`) is the occasional privacy tool for when I'm not on a network I trust.
The risks are real but manageable: keep port forwarding locked down on your SSH servers, bind tunnels to localhost unless you have a specific reason not to, and treat your SSH keys with the same care you'd give a password.
The setup is one command. The maintenance is minimal. The usefulness compounds the more remote infrastructure you work with.
### LHB Linux Digest #26.08: Knowledge Base Boosting, Local AI, Terminal Course, Podman 6.0 and More
URL: https://linuxhandbook.com/newsletter/26-08/
Last updated: 2026-06-26T13:09:54.000Z
A good Linux user takes notes all the time. A better Linux user organizes them in a proper knowledge base.
From [Obsidian](https://obsidian.md/?ref=linuxhandbook.com) to [Tolaria](https://tolaria.md/?ref=linuxhandbook.com), there are plenty of choices. You could explore [some self-hosted knowledge base tools](https://linuxhandbook.com/blog/self-hosted-knowledge-base-tools/) that may even help your team.
If your knowledge base grows bigger, you can [plugin an AI and get answers from your personal notes](https://linuxhandbook.com/blog/personal-knowledge-base-with-local-ai/).
Lately, we have been exploring AI... local AI mostly with open source models running on your machine and keeping the data private on your system.
For example, take [this AI powered file sorter app](https://linuxhandbook.com/blog/ai-file-sorter/). To a seasoned sysadmin, this could be a shell script but it could still fit someone's need I think.
Then there is agent based automation. So we took [ZeroClaw and plugged it with Fizzy CLI to manage Kanban task board](https://linuxhandbook.com/blog/zeroclaw-ai-with-fizzy-automation/). Interesting times we live in.
I still find it amsuing that many new age developers are not familiar with even the basics of Linux command line. Our [intro course is free](https://linuxhandbook.com/courses/command-line-basics/) so feel free to use it and share it with others.
[Quick Introduction to Linux Command LineLearn the basics of Linux commands in this short introductory course. Also contains videos.Linux HandbookTed LeRoy](https://linuxhandbook.com/courses/command-line-basics/)
And for advanced Linux users, the [systemd Playbook](https://linuxhandbook.com/courses/systemd-playbook/) is a good way to make more out of systemd.
[The systemd Playbook: Learn by DoingMaster systemd the practical way—one lab at a time.Linux HandbookBhuwan Mishra](https://linuxhandbook.com/courses/systemd-playbook/)
## **💡Quick terminal tip**
Ever need to document a complex deployment, or share the exact errors a script threw with a teammate? Instead of manually copying and pasting from your terminal, you can record the entire session, both the commands you typed and their visual outputs to a single text file.
Launch a dedicated logging session using the built-in `script` command:
```
script sample.txt -T sample_time
```
Here, the `sample_time` file saves the timing information, needed to replay the content later.
From this moment on, your terminal behaves normally, but every keystroke, command, and output is quietly recorded in the background.
When your task is finished, simply exit the recording session:
```
exit
```
Now you have a perfect, chronologically ordered transcript (sample.txt) ready for documentation or debugging.
To replay the commands, use:
```
scriptreplay -B sample.txt -T sample_time
```

## 🛠️ Tool discovery
Let's find your next favorite software in this section.
### WTF: Build a Personal DevOps Dashboard Inside Your Terminal
[WTF (wtfutil)](https://github.com/wtfutil/wtf?ref=linuxhandbook.com) is an open-source terminal dashboard that aggregates operational data, development workflows, and personal productivity information into a single TUI interface. Instead of constantly switching between GitHub, Jira, Kubernetes dashboards, calendars, monitoring tools, and terminal windows, WTF presents everything through configurable modules arranged in a customizable grid layout.
[GitHub - wtfutil/wtf: The personal information dashboard for your terminalThe personal information dashboard for your terminal - wtfutil/wtfGitHubwtfutil](https://github.com/wtfutil/wtf?ref=linuxhandbook.com)
### GoAccess: Real-Time Web Log Analytics Without Tracking Scripts
[GoAccess](https://github.com/allinurl/goaccess?ref=linuxhandbook.com) is an open-source web log analyzer that provides real-time traffic analytics directly from web server logs. Unlike Google Analytics and similar services, it requires no JavaScript trackers, cookies, databases, or external services, making it a privacy-friendly choice for self-hosted environments. It runs in the terminal or generates live HTML dashboards, allowing administrators to monitor traffic, bandwidth usage, response times, errors, and suspicious activity directly from Apache, Nginx, Caddy, CloudFront, and other log sources.
[GitHub - allinurl/goaccess: GoAccess is a real-time web log analyzer and interactive viewer that runs in a terminal in \*nix systems or through your browser.GoAccess is a real-time web log analyzer and interactive viewer that runs in a terminal in \*nix systems or through your browser. - allinurl/goaccessGitHuballinurl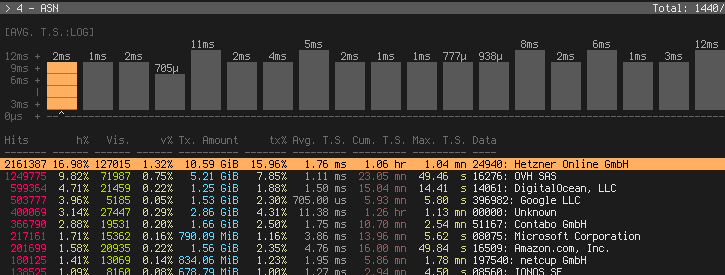](https://github.com/allinurl/goaccess?ref=linuxhandbook.com)
## 📰 Linux news that matters
- [Podman 6.0 is here with some breaking and some interesting features](https://github.com/podman-container-tools/podman/releases?ref=linuxhandbook.com). In cleaning, cgroups v1, iptables, CNI networking, slirp4netns, Intel Mac, and Windows 10 support are all dropped. BoltDB is gone and Podman auto-migrates to SQLite. Network isolation now defaults to enabled. New additions: AMD GPU support via `--gpus`, a `podman machine os update` command, and a patch for CVE-2026-57231 (host env var leakage via malformed image metadata)
- [Microsoft's long-planned Secure Boot certificate rollover](https://arstechnica.com/security/2026/06/windows-and-linux-users-the-deadline-to-update-secure-boot-keys-is-near/?ref=linuxhandbook.com) has reached its final stage as legacy certificates issued in 2011 begin expiring in June 2026, requiring systems to transition to newer 2023 certificate chains. The change is intended to maintain UEFI trust integrity and enable future security updates that protect against firmware attacks, bootkits, and supply-chain compromises.
- The [Linux Foundation announced its intent to launch the Agent Name Service (ANS)](https://www.linuxfoundation.org/press/linux-foundation-announces-intent-to-launch-agent-name-service-to-establish-trusted-identity-infrastructure-for-ai-agents?ref=linuxhandbook.com), an open standard that extends DNS to provide identity, verification, and discovery mechanisms for AI agents operating across organizations and platforms. ANS aims to create a federated trust layer that allows operators to verify who an agent represents, what permissions it has, and whether its software remains authentic, without relying on proprietary registries or centralized control.
- [Linux 7.2 removes the final uses of the strncpy() function](https://www.phoronix.com/news/Linux-7.2-Drops-strncpy?ref=linuxhandbook.com) from the kernel after roughly six years of work and more than 360 patches spread across numerous subsystems. The API has long been discouraged because its semantics frequently lead to truncation bugs, non-terminated strings, and other memory-handling mistakes, prompting kernel developers to replace it with safer alternatives.
- [AWS has released AWS Blocks in public preview](https://www.infoq.com/news/2026/06/aws-blocks-framework-preview/?ref=linuxhandbook.com), an open-source TypeScript framework that packages application code, local development environments, and AWS infrastructure definitions into reusable modules called "Blocks." The framework provides local Postgres, authentication, messaging, storage, and other backend services without requiring an AWS account, while generating production AWS infrastructure automatically during deployment.
- [Vercel has released **eve**](https://thenewstack.io/vercel-launches-eve-an-open-source-framework-that-treats-agents-as-directories/?ref=linuxhandbook.com), an open-source framework that defines AI agents as directories containing Markdown instructions, skills, and TypeScript tools, allowing agents to be developed using a filesystem-first workflow. The framework ships with production-oriented capabilities such as durable execution, sandboxed compute, subagents, approvals, and workflow orchestration already integrated rather than requiring developers to assemble multiple infrastructure components.
- [GitHub has started retiring GitHub Models](https://devops.com/github-retires-its-free-ai-model-playground-what-developers-need-to-know/?ref=linuxhandbook.com), the free AI playground and API layer introduced in 2024, with new customers already blocked from accessing the service as of June 16, 2026\. Existing users can continue using the playground, APIs, and hosted models for now, but GitHub has confirmed that the service is heading toward full retirement and is directing new projects toward Azure AI Foundry.
## 😂 Geek humor
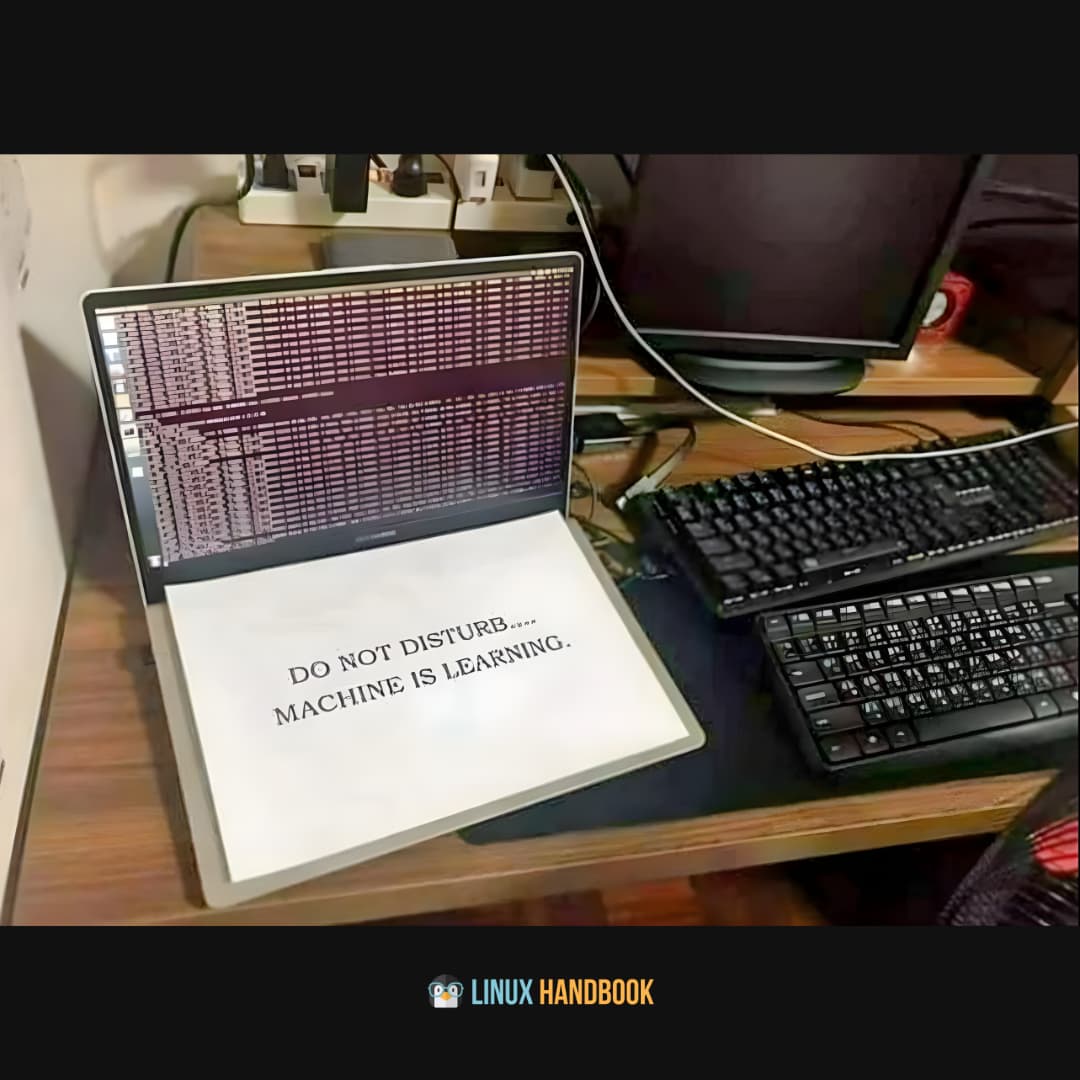
## 💌 Keep on loving Linux Handbook
We are working on a few new courses. GitOps is the next in publishing queue followed by GNS3\.
And if you like the LHB Linux digest, you can **encourage others to** subscribe to this newsletter. ([From here](https://linuxhandbook.com/newsletter/))
[Become a Pro member](https://linuxhandbook.com/#/portal/signup) and enjoy unlimited access to our [eBooks](https://linuxhandbook.com/ebooks/), [courses](https://linuxhandbook.com/courses/) and in-depth tutorials.
**Missed the previous editions?** You can [access the newsletter archives.](https://linuxhandbook.com/newsletter/)
You may also [contribute to Linux Handbook](https://linuxhandbook.com/write-for-us/) and share your experience and expertise with the community.
I like reading your messages, so just hit the reply button and share your thoughts 😄
### I Used a Local AI Tool To Organize My Files and Folders
URL: https://linuxhandbook.com/blog/ai-file-sorter/
Last updated: 2026-06-23T11:40:21.000Z
My Downloads folder is a crime scene. My home directo
Thousands of files with names like `IMG_2048.jpg`, `Copy_of_final_FINAL_v3.pdf`, and `untitled(2).docx` accumulated over years of telling myself I'd sort it out later. I never did.
I tried manual sorting. I tried renaming scripts. Nothing stuck because the real problem isn't laziness, it's that I don't know what half the files actually are without opening them first.
**AI File Sorter** takes a different approach. Instead of applying fixed rules, it reads your files, actually looks at images using a visual LLM, extracts text from documents, reads audio/video metadata and then ***suggests*** what each file is and where it should go. You review the suggestions before anything moves. Nothing happens without your approval.
With over **1,000 stars on GitHub** and 16 releases since launch, this isn't an abandoned proof-of-concept. It's a cross-platform desktop app actively being developed, and version 1.8.0 just shipped with meaningful improvements to the visual model and local learning.
[AI File Sorter | GitHub](https://github.com/hyperfield/ai-file-sorter?ref=linuxhandbook.com)
## What AI File Sorter Actually Does
Let me be precise about this, because "AI file organizer" can mean very different things.
AI File Sorter does three related but distinct things:
**Categorization** \- It analyzes each file (by name, extension, content, and folder context) and assigns it a category and optional subcategory. "Photography", "Work Documents", "Music", "Screenshots" - then creates the folders and moves files into them. You pick the categories or let the model suggest them freely.
**Rename suggestions** \- For images, it uses a visual LLM to actually look at the picture and suggest a descriptive filename. IMG\_2048.jpg might become sunset\_over\_lake.jpg. For documents, it reads the text content and proposes a cleaner name. For audio/video, it reads the embedded metadata tags and turns them into a consistent library-style name like 2024\_artist\_album\_title.mp3.
**Review before action** \- This one matters. None of the above actually happens until you see the suggestions in a review table, approve what you want, edit anything you don't like, and click confirm. Nothing is irreversible without your sign-off.
## Getting It Running on Linux
I tested this on Ubuntu 24.04\. The prebuilt `.deb` package from [https://filesorter.app/](https://filesorter.app/?ref=linuxhandbook.com)
First, install the runtime prerequisites:
```bash
sudo apt update && sudo apt install -y \
libqt6widgets6 libcurl4 libjsoncpp25 libfmt9 libopenblas0-pthread \
libvulkan1 mesa-vulkan-drivers patchelf
```
Then download the latest released version `deb` file form [https://filesorter.app/download/](https://filesorter.app/download/?ref=linuxhandbook.com) and then install it:
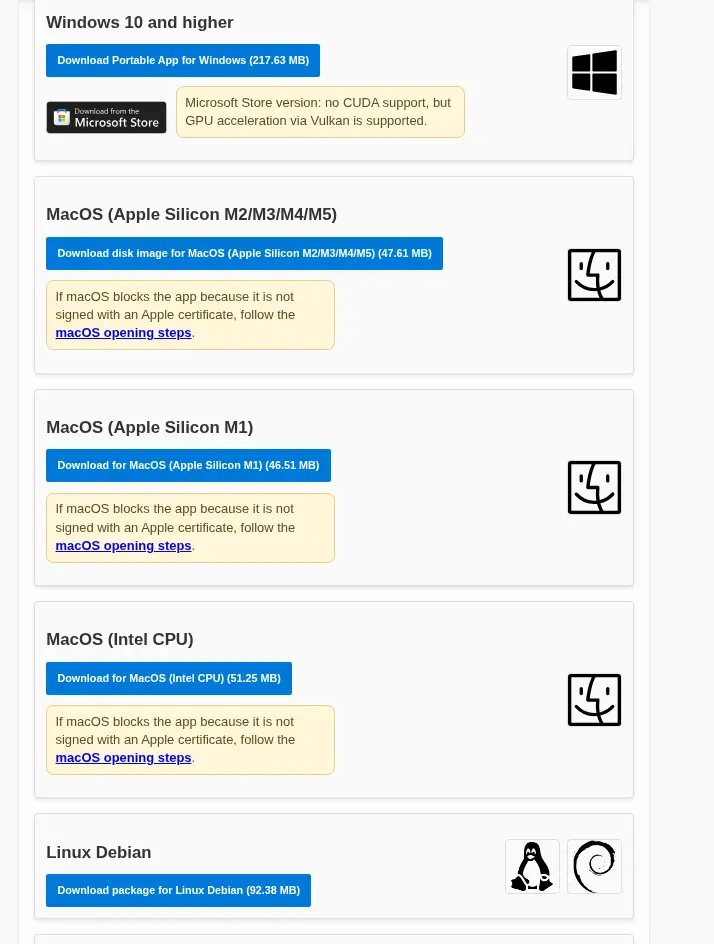
Supported OS for ai-file-sorter app
After that install the package:
```bash
sudo apt install ./aifilesorter_*.deb
```

Installing aifilesorter
Once installed, launch it from your application menu or run:
```bash
aifilesorter
```
Application running on linux
## Choosing Your LLM Backend
This is the first real decision you make, and it shapes the whole experience. AI File Sorter supports several options:
**Local models (no internet required): Gemma 3 4B IT,** the new default for both text and visual analysis. Downloads once via the in-app Select LLM dialog. **Gemma 1.1 7B,** a solid local text-only choice for categorization. **Mistral 7B,** another built-in option with broader category language support. **Your own GGUF,** any compatible model you already have can be registered
**Remote models (API key required): -** **ChatGPT,** your own OpenAI API key, any model (gpt-4o-mini, gpt-4.1, etc.). **Gemini,** your own Google AI Studio key (gemini-2.5-flash, gemini-2.5-pro, etc.). **Custom OpenAI-compatible endpoint,** LM Studio, Ollama, or any local server you're already running
Interface of aifilesorter
After that there is option to analyse the folder which starts the analysis and one by one parses the files from that folder and categorises it as follows:
file categorization by aifilesorter
A few things I noticed in the review: An old screenshot was correctly categorized as "Screenshots/Desktop UI" rather than as a generic "Image" and the images are structured under the folder as per the content and not just by name of the files.
It asks for your permission to proceed and turn the given randomly stuffed files into categorised, well-structured files. Now, after accepting the changes, you will be able to see the structured files in your Downloads folder:
Structured categorization after analysis of aifilesorter
In the `Downloads`, there are multiple folders created, like `Images`: which contains different folders like `General`, `Logos` and `Photographs` which are created with the help of categorization of `aifilesorter`.
Documents folder containing categorized files
`Documents`: which contain different documents categorized after the analysis by `aifilesorter`. The rename suggestions aren't always perfect. Some generic outdoor shots got overly generic names
## Document Analysis: Reading the File, Not Just the Name
Document analysis uses the same LLM (text mode, no mmproj needed) to extract text from supported file types and generate a summary and filename suggestion. Supported formats include:
Plain text: `.txt`, `.md`, `.rtf`, `.csv`, `.json`, `.yaml`, `.log`, `.html`
PDF: built-in PDFium extractor (no pdftotext dependency needed)
Office formats: `.docx`, `.xlsx`, `.pptx`, `.odt`, `.ods`, `.odp`
For my test files, a `.pdf` result certificate got the `Academic_record.pdf` based on its opening paragraph. A `.odt` export from a bank statement was categorized as "Finance" correctly. An old HTML file from a downloaded web page got correctly identified as a web capture rather than a document.
result certificate renamed and categorized in Academic Records
## GPU Acceleration: Vulkan, CUDA, and CPU Fallback
The app supports GPU acceleration via CUDA (NVIDIA) and Vulkan (AMD, Intel, NVIDIA). On Linux, the launcher script auto-detects available backends and prefers CUDA over Vulkan, falling back to CPU if neither is detected.
You can check and force backends with flags:
```bash
# Force CPU only
aifilesorter --cuda=off --vulkan=off
# Force Vulkan
aifilesorter --vulkan=on --cuda=off
```
## Category Whitelists and Consistency Controls
One thing I appreciated after my first run: you can constrain what categories the model can pick. Under **Settings → Manage category whitelists…**, you create named lists of allowed categories.
Category whitelist options in aifilesorter
On a re-run of my Downloads folder with a whitelist set to `["Work", "Personal", "Finance", "Software", "Media", "Archive"]`, the suggestions became noticeably more consistent. Files weren't spread across thirty micro-categories; they clustered into the buckets I actually wanted.
The docs recommend keeping whitelists to 15–20 entries so they don't overflow smaller local model context windows. For a tightly defined use case (organizing a project folder, sorting a media library), whitelists are the right tool.
Pair whitelists with "More Consistent" categorization mode for the strongest uniformity across a batch.
## What Works Well
**The review-first workflow is the right design**. Nothing moves until you approve it. This sounds obvious, but a lot of "automatic" organizers just move your files and hope for the best. The review table with inline editing gives you real control.
**Visual analysis on images is genuinely useful**. Calling a local 4B model to look at actual pixel content and suggest a descriptive name is the thing that separates this app from any rename-by-rules script. It won't always be perfect, but it's directionally right far more often than filename heuristics.
**It runs entirely offline**. No data leaves your machine when using local models. Images, filenames, document text, all processed locally. For people sorting sensitive files, this matters.
**The 1.8.0 screenshot-awareness is a real improvement**. UI screenshots no longer get misclassified as generic photos. The app adds specific prompt guidance for dashboards, forms, mockups, and terminal captures.
**The undo feature works**. Edit → Undo last run reverses the moves on a best-effort basis. Combined with dry-run mode, the safety net is solid for cautious users.
## What to Be Aware Of
**Analysis time scales with folder size and model.** Processing a 500-file folder with visual analysis on every image takes meaningful time on CPU. Plan for it, don't run this right before you need your machine for something else.
**Legacy Office formats (.doc, .xls, .ppt) are not supported.** Only the modern Office XML formats (.docx, .xlsx, .pptx) and OpenDocument equivalents are handled. Old binary formats need converting first.
**The visual model needs two GGUF files.** The main model and the mmproj projector. If you download one and forget the other, image analysis is silently disabled. The app will prompt you to open the Select LLM dialog, but it's easy to miss if you're not looking.
**Rename suggestions on images aren't always specific.** A generic outdoor photo might get a generic descriptive name. The model does its best with what it can see, but "mountain\_landscape.jpg" is only marginally better than "IMG\_2048.jpg" if you have fifty of them. The categorization accuracy is stronger than the rename precision.
## Conclusion
**AI File Sorter** is doing something meaningfully different from rename scripts and rules-based organizers. Reading actual image content with a visual LLM, extracting document text, reading audio metadata and then letting you review everything before a single file moves, is the right design for a tool that touches your files.
The local-first approach is a genuine differentiator. My images, documents, and filenames stayed on my machine throughout. No API key, no cloud, no data leaving my hard drive.
The 1.8.0 improvements to the visual model (Gemma 3 4B IT as default, better screenshot detection, local learning from your approved reviews) make this a noticeably better version than what shipped a few months ago. It's not a finished, polished SaaS product; it's an actively developed open-source desktop app with rough edges, but for the specific problem of **"I need to make sense of this chaotic folder of files,"** it works.
I am loving to use local AI. It started with [using AI for knowledgebase](https://linuxhandbook.com/blog/personal-knowledge-base-with-local-ai/) and now for file sorting. I got to keep exploring 😄
### 11 Self-Hosted Knowledge Base Tools (For Individuals and Teams)
URL: https://linuxhandbook.com/blog/self-hosted-knowledge-base-tools/
Last updated: 2026-06-05T10:29:39.000Z
I spent time evaluating these across personal homelab setups, team documentation workflows, and AI-augmented note-taking, filtering down to 11 tools that solve real problems that cloud-only solutions like Notion and Confluence leave unaddressed.
There's a reason self-hosted knowledge bases are surging in interest right now: **local AI integration**. Tools like Claude (via MCP), [Ollama-backed local LLMs, and RAG pipelines mean you can now ask your own knowledge base questions in natural language](https://linuxhandbook.com/blog/personal-knowledge-base-with-local-ai/), without sending your private notes to a third-party server. The difference between a knowledge base that supports Markdown on disk and one that locks you into a proprietary format is now the difference between AI-queryable and AI-blind.
**Short on time?** Jump to the comparison table below, or use the headers to find your fit.
## **At a Glance: All 11 Tools Compared**
Here's a quick overview before the full breakdowns.
| Tool | Best For | AI Integration | Managed Hosting | Our Pick |
| ------------- | ------------------------------------ | --------------------------------------- | ---------------------- | ------------------------ |
| Outline | Team wikis with Claude/MCP support | MCP + built-in AI search | ✅ Official cloud | 🏆 Top Pick |
| BookStack | Simple structured team docs | API-connectable | ❌ Self-host only | Best for Simplicity |
| Wiki.js | Developer-first wikis | Via modules + API | ❌ Self-host only | Best for Devs |
| Obsidian | Personal knowledge + AI plugins | Ollama + Claude plugins | ✅ Obsidian Sync (paid) | Best Personal PKM |
| AFFiNE | Notion-like all-in-one + whiteboard | Built-in Copilot (Claude/OpenAI/Gemini) | ✅ AFFiNE Cloud | Best Notion Alternative |
| SiYuan | Private block-based PKM | Local AI proxy support | ✅ Official service | Best Privacy-First Pick |
| Logseq | Networked thought + graph view | Ollama + API plugins | ❌ Self-host only | Best Graph Thinker |
| AppFlowy | Open Notion replacement | AI integrations in progress | ✅ AppFlowy Cloud | Best Growing Alternative |
| Trilium Notes | Deep hierarchical personal knowledge | API scripting + LLM bridges | ❌ Self-host only | Best Power User PKM |
| Anytype | Local-first object-based knowledge | Planned | ✅ Anytype Sync | Best for Offline-First |
| Joplin | Portable encrypted notes + sync | AI plugins + Joplin AI | ✅ Joplin Cloud (paid) | Best Portable Notes |
Now let's go through each one.
## Outline - Best Team Knowledge Base with Native Claude/MCP Integration
Outline is a fast, Markdown-based team wiki and knowledge base that has quietly become the go-to self-hosted alternative to Notion/Confluence for small-to-medium teams - and its Model Context Protocol (MCP) support now lets you connect Claude directly to your Outline wiki to search, read, and write documents through natural language.
**Who it's best for:** Engineering teams and small companies who want a clean, fast, team-accessible wiki that doesn't require a Confluence subscription - especially teams that want Claude or other AI assistants to be able to query the wiki directly.
**Quick Setup:**
```yaml
git clone https://github.com/vicalloy/outline-docker-compose.git
cd outline-docker-compose
cp scripts/config.sh.sample scripts/config.sh
# update config file: vim scripts/config.sh
make install # Create a docker-compose config file and start it. Initializing the oidc-server(add oidc client for outline and create a superuser).
```
You will be asked to set up the username and the password for the authentication. Once you set all the things, you will see the outline running on localhost:8888 as below:
Home page of Outline.
The Claude/MCP integration is the headline feature here. With the Outline MCP server, Claude can search your wiki, fetch document contents, and even create or update documents.
API integration feature of Outline.
✅
****Pros:**
\- Built-in AI-powered search that answers questions from your docs
\- Official MCP server for Claude, Cursor, and VS Code AI integrations
\- Export any document or entire workspace as Markdown, HTML, or JSON
\- Guest links, public collections, and team permissions
\- Official managed cloud option if self-hosting isn't your preference
🔴
****Cons:**
\- Self-hosting requires PostgreSQL + Redis
\- Not a trivial single-container setup
\- OIDC/SSO setup adds complexity for secure multi-user deployments
\- Real-time collaboration editing is limited compared to Google Docs
**Verdict:** The most AI-forward self-hosted team wiki available today. If your team uses Claude and wants the AI to actually *know* what's in your internal docs, Outline's MCP integration makes that real.
[GitHub | Outline ](https://github.com/outline/outline?ref=linuxhandbook.com)
## BookStack - Best Self-Hosted Wiki for Simple, Structured Team Documentation
BookStack is a self-hosted documentation platform organized around a physical book metaphor: **Books → Chapters → Pages**. It's opinionated in the best way, the structure makes sense immediately, and there's virtually no setup overhead for the end user.
**Who it's best for:** Small teams, IT departments, and homlab operators who need a clean, no-frills internal wiki for SOPs, runbooks, and project docs and don't want to spend time configuring the tool itself before using it.
**Quick Setup:**
```yaml
#docker compose file
services:
bookstack:
image: lscr.io/linuxserver/bookstack:latest
container_name: my_bookstack
environment:
- PUID=1000
- PGID=1000
- APP_URL=http://localhost:6875
- APP_KEY=[key]
- DB_HOST=my_bookstack_db
- DB_USER=bookstack
- DB_PASS=yourpassword
- DB_DATABASE=bookstackapp
volumes:
- ./bookstack_app_data:/config
ports:
- 6875:80
restart: unless-stopped
depends_on:
- bookstack_db
bookstack_db:
image: lscr.io/linuxserver/mariadb:latest
container_name: my_bookstack_db
environment:
- PUID=1000
- PGID=1000
- MYSQL_ROOT_PASSWORD=yourpassword
- TZ=Etc/UTC
- MYSQL_DATABASE=bookstackapp
- MYSQL_USER=bookstack
- MYSQL_PASSWORD=yourpassword
volumes:
- ./bookstack_db_data:/config
restart: unless-stopped
```
You need to set the parameters as per your requirements, then after `docker compose up` you will see the application running on `localhost:6875`. You just need to generate one `APP_KEY` then you can replace the same and run the compose file.
Bookstack running on localhost:6875.
You will see a simple minimalist view which represents the books, chapters and pages. Export formats: **Markdown, HTML, PDF, Plain Text, ZIP** (portable backup of an entire Book or shelf).
Bookstack feature showing stack arrangement.
✅
****Pros:**
\- Extremely clean UX, non-technical users don't need training
\- Full REST API for AI integrations and automation
\- Export: MD, HTML, PDF, TXT, Portable ZIP for full backups
\- Diagram support (draw.io) built in-Active development, large community, great documentation- LDAP and SAML SSO support
🔴
****Cons:**
\- No official managed hosting, you self-host or look for third-party providers
\- Page editor is limited for power users compared to Notion-like block editors
\- No graph view, backlinks, or bidirectional linking- AI integration requires third-party tooling via the API
**Verdict:** The most production-ready, plug-and-play wiki on this entire list. If your team has been putting off setting up internal documentation because every option felt complex, BookStack removes that excuse.
[GitHub | BookStack ](https://github.com/BookStackApp/BookStack?ref=linuxhandbook.com)
## Wiki.js - Best Self-Hosted Wiki for Developer Teams
Wiki.js is a modern, Node.js-based wiki platform with multiple storage backends, including **Git sync -** meaning your documentation can live as Markdown files in a Git repository, automatically synced both ways. This makes it trivially easy to point AI tools at your docs.
**Who it's best for:** Developer teams who want their documentation to live in Git alongside their code and want a clean web UI on top without giving up version history, PRs, or \`git blame\` for docs.
**Quick Setup:**
```yaml
services:
db:
image: postgres:15-alpine
environment:
POSTGRES_DB: wiki
POSTGRES_PASSWORD: wikijsrocks
POSTGRES_USER: wikijs
volumes:
- db-data:/var/lib/postgresql/data
restart: unless-stopped
wiki:
image: ghcr.io/requarks/wiki:2
depends_on:
- db
environment:
DB_TYPE: postgres
DB_HOST: db
DB_PORT: 5432
DB_USER: wikijs
DB_PASS: wikijsrocks
DB_NAME: wiki
ports:
- "3000:3000"
restart: unless-stopped
volumes:
db-data:
```
After running the compose, you will be able to see the application running:
Wiki.js initial configuration page.
After the initial setup of the email and password, you will get to see different features like search engines, API access, authentication, storage, analytics and many more.
Wiki.js in action.
✅
****Pros:**
\- Git-backed storage keeps docs in Markdown in a real Git repo
\- Multiple database backends: PostgreSQL, MySQL, SQLite, MSSQL
\- LDAP, SAML, Auth0, Google, GitHub SSO all configurable
\- Beautiful, modern reader and editor UI
🔴
****Cons:**
\- No managed hosting option (self-host only)
\- Setup is heavier than BookStack
\- Wiki.js 3.x has been in development for a long time;c stable 2.x is the current release
\- No graph/backlink view
**Verdict:** The best choice for engineering teams who want their wiki to behave like their code, in Git, reviewable, version-controlled, and introspectable by any AI tool that can read a repo.
[GitHub | Wiki.js ](https://github.com/Requarks/wiki?ref=linuxhandbook.com)
## Obsidian - Best Personal Knowledge Base with AI Plugin Ecosystem
Obsidian stores your notes as plain Markdown files on disk, which sounds simple, but it means you have the most AI-friendly knowledge base possible. Every local LLM (via Ollama), every AI agent (including Claude via MCP), and every search tool can work directly with your notes without any export step.
**Who it's best for:** Researchers, writers, developers, and knowledge workers who want a powerful personal knowledge base with bidirectional links, a graph view, and access to the richest AI plugin ecosystem of any PKM tool available.
**Quick Setup:**
```yaml
services:
obsidian:
image: lscr.io/linuxserver/obsidian:latest
container_name: obsidian
environment:
- PUID=1000
- PGID=1000
- TZ=Etc/UTC
volumes:
- obsidian-config:/config
ports:
- 3000:3000
- 3001:3001
restart: unless-stopped
shm_size: "1gb"
volumes:
obsidian-config:
```
After setting up your obsidian will be running on `localhost:3000`
Obsidian running on localhost:3000.
It supports many open source and community plugins and the graph view is one of the most promising features. Through these plugins, like [obsidian-mcp](https://github.com/aaronsb/obsidian-mcp-plugin?ref=linuxhandbook.com) you can expose your Obsidian vault to Claude desktop.
AI Plugins integration in obsidian.
✅
****Pros:**
\- Files are just `.md` files in a folder, zero lock-in, maximum AI compatibility
\- Graph view shows the full web of connected notes
\- 1000+ community plugins including mature AI integrations (Ollama, Claude, OpenAI)
\- Bidirectional links, tags, data views, daily notes, canvases
\- Claude MCP integration lets Claude read your vault natively
🔴
****Cons:**
\- Not a team/shared knowledge base, designed for a single user's vault
\- AI plugins require setup time, no "AI that just works" out of the box
\- Graph view can become overwhelming with large vaults
**Verdict:** The most AI-ready knowledge base because it's the most file-system-friendly. Your notes are just Markdown. Claude can read them via MCP. Ollama can embed them for RAG. If AI augmentation of your personal knowledge base matters, start here.
[GitHub | Obsidian ](https://github.com/obsidianmd?ref=linuxhandbook.com)
## AFFiNE - Best All-in-One Knowledge Base with Built-In AI Copilot
AFFiNE is an open-source, self-hostable Notion alternative that combines documents, databases, and an **infinite whiteboard canvas** \- with a built-in AI Copilot that supports Claude, OpenAI, and Gemini models, configurable from the admin console of your self-hosted instance.
**Who it's best for:** Teams and individuals who want the Notion all-in-one experience (notes + projects + databases + visual thinking) but want to self-host their data and plug in their own AI provider, including Claude.
**Quick Setup:**
```yaml
name: affine
services:
affine:
image: ghcr.io/toeverything/affine:${AFFINE_REVISION:-stable}
container_name: affine_server
ports:
- '${PORT:-3010}:3010'
depends_on:
redis:
condition: service_healthy
postgres:
condition: service_healthy
affine_migration:
condition: service_completed_successfully
volumes:
# custom configurations
- ${UPLOAD_LOCATION}:/root/.affine/storage
- ${CONFIG_LOCATION}:/root/.affine/config
env_file:
- .env
environment:
- REDIS_SERVER_HOST=redis
- DATABASE_URL=postgresql://${DB_USERNAME}:${DB_PASSWORD}@postgres:5432/${DB_DATABASE:-affine}
- AFFINE_INDEXER_ENABLED=false
restart: unless-stopped
affine_migration:
image: ghcr.io/toeverything/affine:${AFFINE_REVISION:-stable}
container_name: affine_migration_job
volumes:
# custom configurations
- ${UPLOAD_LOCATION}:/root/.affine/storage
- ${CONFIG_LOCATION}:/root/.affine/config
command: ['sh', '-c', 'node ./scripts/self-host-predeploy.js']
env_file:
- .env
environment:
- REDIS_SERVER_HOST=redis
- DATABASE_URL=postgresql://${DB_USERNAME}:${DB_PASSWORD}@postgres:5432/${DB_DATABASE:-affine}
- AFFINE_INDEXER_ENABLED=false
depends_on:
postgres:
condition: service_healthy
redis:
condition: service_healthy
redis:
image: redis
container_name: affine_redis
healthcheck:
test: ['CMD', 'redis-cli', '--raw', 'incr', 'ping']
interval: 10s
timeout: 5s
retries: 5
restart: unless-stopped
postgres:
image: pgvector/pgvector:pg16
container_name: affine_postgres
volumes:
- ${DB_DATA_LOCATION}:/var/lib/postgresql/data
environment:
POSTGRES_USER: ${DB_USERNAME}
POSTGRES_PASSWORD: ${DB_PASSWORD}
POSTGRES_DB: ${DB_DATABASE:-affine}
POSTGRES_INITDB_ARGS: '--data-checksums'
# you better set a password for you database
# or you may add 'POSTGRES_HOST_AUTH_METHOD=trust' to ignore postgres security policy
POSTGRES_HOST_AUTH_METHOD: trust
healthcheck:
test:
['CMD', 'pg_isready', '-U', "${DB_USERNAME}", '-d', "${DB_DATABASE:-affine}"]
interval: 10s
timeout: 5s
retries: 5
restart: unless-stopped
```
After setting up, your application will be running on `localhost:3010`
AFFiNE running on localhost:3010.
You can also manage AI integration through the settings by providing API\_KEY and necessary URLs.
API integration feature configuration in obsidian.
✅
****Pros:**
\- Built-in AI Copilot, supports Claude, OpenAI, Gemini; configure your own API key
\- Edgeless whiteboard mode for visual thinking alongside structured docs
\- True offline mode, works without internet connection
\- Open-source (MIT License) with AFFiNE Cloud as managed hosting option
\- Import from Notion (ZIP export), legit migration path
🔴
****Cons:**
\- AI features require PostgreSQL with `pgvector` adds infra complexity for self-hosters
\- Still actively maturing, some rough edges vs. Notion's polish
\- Whiteboard + docs + databases in one can feel overwhelming initially
\- Mobile apps are new and less polished than desktop ones
**Verdict:** The most feature-complete open-source Notion alternative, and the only one with a genuinely integrated AI Copilot you can point at Claude. For teams migrating from Notion who want to keep their AI features, this is the path.
[GitHub | AFFiNE ](https://github.com/toeverything/AFFiNE?ref=linuxhandbook.com)
## SiYuan Notes - Best Privacy-First Knowledge Base with Local-First Architecture
SiYuan is a block-based, local-first personal knowledge management system with a built-in SQLite index, which means you get powerful block-level cross-referencing and database-like queries entirely on your own machine, with no mandatory cloud connection.
**Who it's best for:** Privacy-conscious individuals and power users who want deep block-level relational linking, a clean self-contained app, and the option to self-host their own sync server without any third-party cloud involvement.
**Quick Setup:**
```yaml
version: "3.9"
services:
siyuan:
image: b3log/siyuan
command: ["--workspace=/siyuan/workspace/", "--accessAuthCode=siyuanrocks"]
ports:
- 6806:6806
volumes:
- siyuan-data:/siyuan/workspace
restart: unless-stopped
volumes:
siyuan-data:
```
After running the setup you need to enter the authcode that you have set in the configuration in this case: `siyuanrocks`
SiYuan Homepage.
You can also get the AI features through the API\_KEY of ChatGPT, Claude, DeepSeek, and other models that support the OpenAI interface.
AI Integration configuration in SiYuan.
✅
****Pros:**
\- Completely local-first, no cloud required for any core feature
\- Block-level SQL queries and relational cross-referencing built in
\- End-to-end encryption for sync, data never leaves encrypted in transit
\- Docker server mode, self-host your own sync for family or small team
\- AI integration via API, community projects bridge SiYuan to local LLMs
🔴
****Cons:**
\- Native format (`.sy`) is custom JSON, requires conversion for AI tools (use Markdown export)
\- Community is smaller than Obsidian, with fewer third-party AI plugins
\- Steeper learning curve than BookStack or Outline
\- Mobile apps exist, but sync setup requires technical comfort
**Verdict:** The most technically sophisticated privacy-first PKM on the list. The SQL-queryable block database is genuinely unique; no other tool on this list lets you run relational queries across your notes like this.
[GitHub | SiYuan ](https://github.com/siyuan-note/siyuan?ref=linuxhandbook.com)
## Logseq - Best Knowledge Base for Networked Thought and Graph-Based Thinking
Logseq is a local-first, outline-based knowledge tool built around the concept of networked thought, every bullet point is a block that can be referenced from anywhere, and a graph view visualizes the connections between all your notes. Like Obsidian, it stores everything as plain Markdown (or Org-mode) files on disk.
**Who it's best for:** Researchers, academics, writers, and deep thinkers who work with connecting ideas across many notes, anyone who has found flat note apps limiting and wants to see how their knowledge ***relates*** to itself.
**Quick Setup:**
```yaml
services:
logseq:
image: ghcr.io/logseq/logseq-webapp:latest
ports:
- "3001:80"
restart: unless-stopped
```
After deploying the setup, the Logseq will be available at `localhost:3001`
Logseq in action.
Whiteboard and flashcards are one of the promising features from Logseq.
Infinite Whiteboard feature of Logseq.
✅
****Pros:**
\- Outliner-first, every line is a block, referenceable from anywhere
\- Graph view shows the full web of connections across all notes
\- Plain Markdown files on disk, maximum AI compatibility
\- Journals (daily note) workflow built in for capturing
🔴
****Cons:**
\- Learning curve, the outliner paradigm feels different from traditional note apps
\- No official self-hosted sync server, relies on third-party Logseq Sync
\- Not a team/collaborative tool, fundamentally personal and local-first
\- No managed hosting option for teams
**Verdict:** The best choice for people who think in connections rather than linear documents. If you've ever wanted to see how all your research relates to itself, the graph view will immediately make sense. Pair it with Ollama and the Smart Search plugin for local AI querying.
[GitHub | Logseq ](https://github.com/logseq/logseq?ref=linuxhandbook.com)
## AppFlowy - Best Open-Source Notion Alternative with Growing AI Features
AppFlowy is an open-source, local-first Notion replacement built in Flutter, with a modular architecture designed from the ground up for customization and self-hosting. Its AI integration is under active development, with integrations for local models (Ollama) and cloud providers being added in 2024-2025.
**Who it's best for:** Teams and individuals who want a Notion-like interface (documents, databases, kanban boards, calendars) with full local ownership and the ability to deploy their own sync server and are willing to accept that AI features are still maturing.
**Quick Setup:**
```bash
# clone repo
git clone https://github.com/AppFlowy-IO/AppFlowy-Cloud.git
cd AppFLowy-Cloud
# copy .env file
cp deploy.env .env
# change ports
NGINX_PORT=80
NGINX_TLS_PORT=443
docker compose up -d
docker compose ps
```
After the setup, if there is an error of a port already in use, try changing the ports and running the application again.
✅
****Pros:**
\- Built for local-first ownership, your data stays on your machine
\- Free managed cloud tier available (AppFlowy Cloud)
\- Multi-view databases (grid, board, calendar, gallery) in the same document
\- Open-source (AGPL) with active development
\- Growing AI integrations - Ollama, OpenAI, Claude support added
\- Cross-platform: Linux, macOS, Windows, iOS, Android
🔴
****Cons:**
\- AI features are still maturing, functionality lags behind Notion AI
\- Fewer third-party integrations than Notion
\- Self-hosted sync server setup is non-trivial (Docker Compose with multiple services)
\- Export formats are limited compared to other tools on this list- Performance on very large documents can still be rough
**Verdict:** The most Notion-like experience in the open-source world, with local-first data ownership. The AI integrations are genuinely there, just earlier-stage. If you want to own your Notion replacement and watch it grow, AppFlowy is the right bet.
[GitHub | AppFlowy ](https://github.com/AppFlowy-IO/AppFlowy?ref=linuxhandbook.com)
## Trilium Notes - Best Self-Hosted Tool for Deep Hierarchical Personal Knowledge
Trilium Notes is a hierarchical personal knowledge base with an unusual superpower: **scripted automation via built-in JavaScript note scripts**. Notes can contain runnable JS that queries and manipulates other notes, making it a programmable knowledge system, not just a static wiki.
**Who it's best for:** Power users and developers who want maximum flexibility in how their knowledge is organized and automated, including those who want to build custom AI integrations directly into their notes via JavaScript.
**Quick Setup:**
```yaml
services:
trilium:
image: zadam/trilium:latest
container_name: trilium-notes
restart: unless-stopped
ports:
- "50081:8080" # Mapping to an alternative port to avoid conflicts with other apps
volumes:
- trilium_data:/home/node/trilium-data
environment:
- TRILIUM_PORT=8080
volumes:
trilium_data:
```
After the setup the Trilium will be running on `localhost:50081`
Trilium running on localhost:50081.
It has a hierarchical structure of notes and also has the feature of canvas notes where you can add shapes, arrows and colors to your notes.
canvas notes feature.
✅
****Pros:**
\- JavaScript scripting inside notes, programmable knowledge base
\- REST API (ETAPI) for external integrations, including AI tools
\- Hierarchical tree organization can go extremely deep without losing structure
\- Relation maps for visual linking
\- Self-hosted sync server between desktop clients- Extensive attribute system for metadata
🔴
****Cons:**
\- No managed cloud hosting, fully self-hosted only
\- Trilium Notes (zadam) was archived in 2024, community fork TriliumNext is the active maintained version (use `TriliumNext/Notes` on GitHub)
\- UI looks dated compared to AFFiNE or Outline
\- Not built for teams, fundamentally single-user
**Verdict:** The most ***programmable*** personal knowledge base on the list. If you've ever wanted your notes to run code and call an AI API on their own, Trilium (via TriliumNext) is the only tool on this list that does that natively.
[GitHub | Trilium](https://github.com/TriliumNext/Trilium?ref=linuxhandbook.com)
## Anytype - Best Local-First Knowledge Base with Offline-First Architecture
Anytype is a privacy-focused, object-based personal knowledge tool built on a peer-to-peer protocol (Any-Sync). Everything is stored locally first and synced peer-to-peer; there's no central server that holds your data. Even when using Anytype's network for sync, data is end-to-end encrypted before leaving your device.
**Who it's best for:** Privacy-focused individuals who want a Notion-like structured knowledge system with the strongest possible data sovereignty guarantees and are comfortable with a younger, still-maturing product.
**Quick Setup:**
Unlike the other projects this one needs you to download the Desktop app through their website: [https://anytype.io/](https://anytype.io/?ref=linuxhandbook.com)
Anytype Desktop Application.
Any experience gallery is one of the features they provide to experience different configurations created by some users for easy workflow management.
Any Experience Gallery.
✅
****Pros:**
\- End-to-end encrypted by default, data encrypted before leaving your device
\- Self-hostable sync infrastructure (MongoDB + Redis + S3 stack)
\- Free tier on Anytype's sync network with E2EE
\- Object graph model, more flexible than flat notes or rigid hierarchy
\- Import from Notion, Markdown, CSV
🔴
****Cons:**
\- AI integration is planned but not yet available
\- Self-hosting the Any-Sync infrastructure is complex (MongoDB + Redis + S3)
\- Custom Any-Block format limits direct AI tool compatibility (use Markdown export)
\- Product is still maturing, some features feel unfinished
**Verdict:** The strongest privacy guarantee of any tool on this list, peer-to-peer, E2EE, and self-hostable right down to the sync layer. For users who treat data sovereignty as a non-negotiable, Anytype is the pick, even if it means waiting for AI features to land.
[GitHub | Anytype](https://github.com/anyproto?ref=linuxhandbook.com)
## Joplin - Best Open-Source Notes App with Portable Encryption and Sync
Joplin is a mature, battle-tested open-source note-taking app that strikes the best balance between data portability, privacy, and accessibility across platforms. It syncs to virtually anything: Nextcloud, WebDAV, Dropbox, OneDrive, S3 and has Joplin AI and AI plugin support for LLM integration.
**Who it's best for:** Users switching from Evernote or OneNote who want an open-source, self-hostable replacement with broad platform support, end-to-end encryption, and enough extensibility to add AI features via the plugin system.
**Quick Setup:**
```yaml
services:
postgres:
image: postgres:16
volumes:
- ./data/postgres:/var/lib/postgresql/data
restart: unless-stopped
environment:
- POSTGRES_PASSWORD=${POSTGRES_PASSWORD}
- POSTGRES_USER=${POSTGRES_USER}
- POSTGRES_DB=${POSTGRES_DATABASE}
networks:
- joplin_network
joplinsync:
image: joplin/server:latest
depends_on:
- postgres
ports:
- "22300:22300"
restart: unless-stopped
environment:
- APP_PORT=22300
- APP_BASE_URL=${APP_BASE_URL}
- DB_CLIENT=pg
- POSTGRES_PASSWORD=${POSTGRES_PASSWORD}
- POSTGRES_DATABASE=${POSTGRES_DATABASE}
- POSTGRES_USER=${POSTGRES_USER}
- POSTGRES_PORT=5432
- POSTGRES_HOST=postgres
networks:
- joplin_network
networks:
joplin_network:
```
After giving the necessary parameters in your .env or values in specific parameters, the Joplin server will run at `localhost:22300`.
Joplin Homepage.
It has a plugin named [Jarvis](https://joplinapp.org/plugins/plugin/joplin.plugin.alondmnt.jarvis/?ref=linuxhandbook.com) (Joplin Assistant Running a Very Intelligent System), which is an AI note-taking assistant for Joplin, powered by online and offline LLMs (such as OpenAI's ChatGPT or GPT-4, Hugging Face, Gemini, Universal Sentence Encoder). For the Desktop application, you can download it from the official [link](https://objects.joplinusercontent.com/v3.5.13/Joplin-3.5.13.AppImage?source=JoplinWebsite&type=New).
Joplin Desktop Application.
✅
****Pros:**
\- The most sync-target flexibility of any tool on the list (Nextcloud, S3, etc.)
\- End-to-end encryption option for all synced notes
\- Joplin AI plugin adds Claude/OpenAI/Ollama AI directly in the editor
\- Battle-tested and mature, not a new or experimental product
\- Joplin Cloud (paid) for zero-hassle managed sync
🔴
****Cons:**
\- JEX native backup format is tar-based, not human-readable without Joplin
\- Web Clipper exists but is less polished than Evernote's
\- No graph view or bidirectional links, flat notebook hierarchy only
\- Editor UX is functional but lacks the polish of AFFiNE or Outline
**Verdict:** The safest choice for Evernote/OneNote migrants who value data portability above all else. The plugin ecosystem and AI integration make it more capable than it looks, and the sync flexibility means it fits into virtually any existing self-hosted stack.
[GitHub | Joplin](https://github.com/laurent22/joplin?ref=linuxhandbook.com)
##
## Final Recommendation
**If you need a team knowledge base with AI today, use Outline.** Its MCP integration for Claude is production-ready, its Markdown export keeps you unlockedin, and the managed cloud tier means you can start without infrastructure. After that, pick based on your primary use case:
- Team documentation: Outline (AI-first, MCP/Claude) or BookStack (simple, structured)
- Developer teams wanting Git-backed docs → Wiki.js (Markdown in Git, then any AI agent can query it)
- Personal knowledge + AI plugins: Obsidian (plain files + Ollama/Claude MCP) or Logseq (graph-first with local AI)
- Notion replacement with built-in AI Copilot: AFFiNE (Claude/OpenAI/Gemini configured in admin)
- Privacy-first with maximum data sovereignty: SiYuan (local-first, SQL-queryable) or Anytype (E2EE P2P sync)
- Programmable personal knowledge base: TriliumNext (JavaScript scripting in notes, call AI APIs directly)
- Evernote migrators: Joplin (ENEX import, E2EE sync, AI plugin available)
If you have any of the self-hosted knowledge base tools not listed here, feel free to drop them in the **comments!**
### How I Set Up AI Agent to Access My Kanban Task Board
URL: https://linuxhandbook.com/blog/zeroclaw-ai-with-fizzy-automation/
Last updated: 2026-05-29T02:39:54.000Z
I manage my project boards in [Fizzy](https://www.fizzy.do/?ref=linuxhandbook.com), Basecamp's clean, opinionated kanban tool, and I got tired of the same ritual: open the browser, navigate to the board, drag a card, close the tab, back to work, repeat. The board lives in one app, my actual work lives somewhere else, and that context switching chips away at focus more than I'd like to admit. So I decided to fix it. Here's what I did.
## What I built
Before going through this, I need you to know what Fizzy CLI and ZeroClaw is:
Fizzy CLI fixes half of that problem. It's an official command-line tool that lets you create cards, post comments, search your board, and manage attachments entirely from the terminal, no browser required. The other half of the problem gets solved by ZeroClaw.
[ZeroClaw](https://github.com/zeroclaw-labs/zeroclaw?ref=linuxhandbook.com) is an open-source agent runtime written in Rust, a single binary you install and configure. It connects to 30+ channels (Telegram, Discord, Matrix, email, or just your CLI), and is genuinely provider-agnostic: it talks to Anthropic, OpenAI, Gemini, Ollama, Groq, and about twenty other LLM backends, all from the same TOML config file. Everything runs on your machine, with your keys. This guide walks you through installing Fizzy CLI, authenticating it, and wiring it up to a running NanoClaw agent so you have end-to-end control of your boards from the terminal and from any messaging app.
Once you wire Fizzy into ZeroClaw as a shell tool, you can message your agent ***"add a card titled fix the auth bug to my backlog"*** and it just does it - from your phone, from Telegram, from wherever you happen to be.
I ended up installing Fizzy CLI, authenticating it, and wiring it to a ZeroClaw agent, and in this post I'm walking through exactly what I did, including the parts that didn't go smoothly.
## What I used
- A Linux machine - I ran this on Ubuntu 22.04 LTS; Arch and Fedora should work fine too
- An active [Fizzy](https://fizzy.do/?ref=linuxhandbook.com) account with at least one board created
- A Fizzy personal access token - get it from **Profile → API Tokens** in the Fizzy web UI
- One of: a free [Gemini API key from Google AI Studio](https://aistudio.google.com/app/apikey?ref=linuxhandbook.com), or [Ollama](https://ollama.com/?ref=linuxhandbook.com) running locally with a model pulled (e.g., `ollama pull qwen2.5:7b`)
💡
The Gemini API has a generous free tier - 15 requests per minute and 250,000 tokens per minute on the free plan. That's more than enough for personal board management. If you already have Google One AI Premium, you get even higher limits in AI Studio.
## Installing Fizzy CLI
The fastest path on Linux is the official install script - it detected my architecture, pulled the right binary, and verified checksums automatically. I just ran:
```bash
curl -fsSL https://raw.githubusercontent.com/basecamp/fizzy-cli/master/scripts/install.sh | bash
```
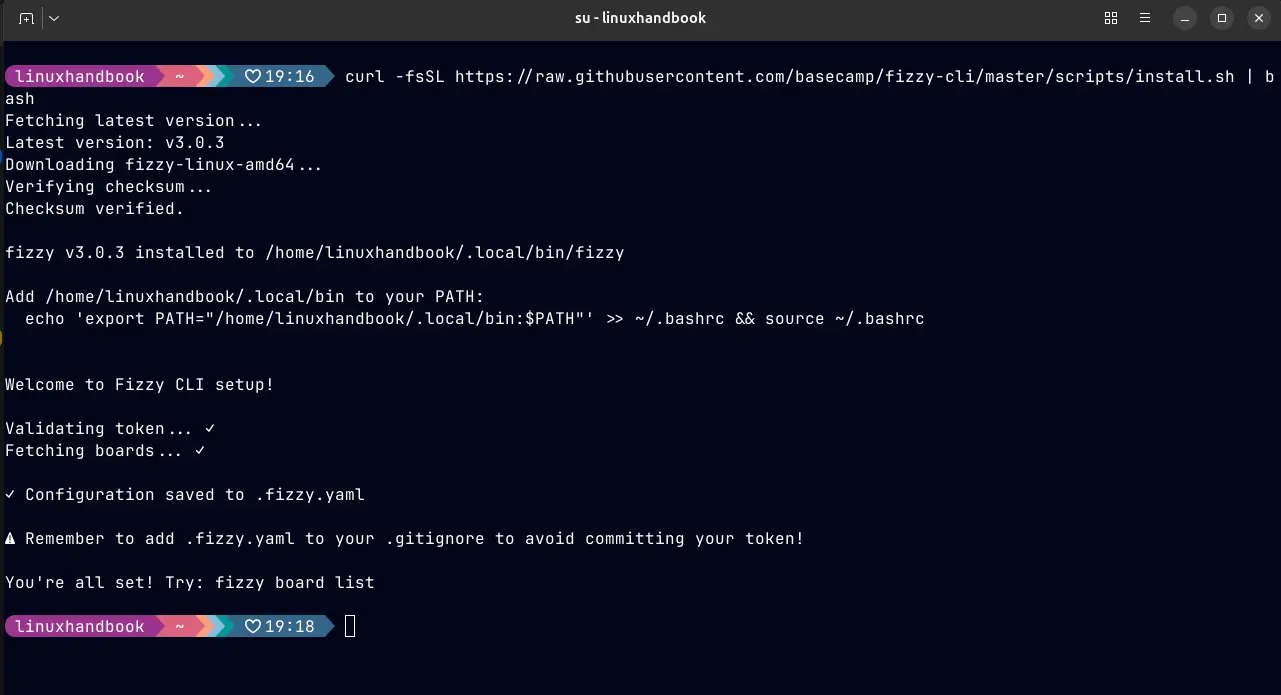
Installing fizzy-cli
Complete the installation process, it will prompt for the PAT, generate it from your personal fizzy profile and enter it when prompted.
If you're on Arch Linux or Omarchy, it's available in the AUR:
```bash
yay -S fizzy-cli
```
Once the installer finishes, confirm the binary is on your PATH:
```bash
fizzy --version
```
You should see the version string printed cleanly. If your shell says `command not found`, the binary likely landed in `~/.local/bin` \- make sure that's in your `PATH`.
```bash
export PATH="/home/USERNAME/.local/bin:$PATH"
```
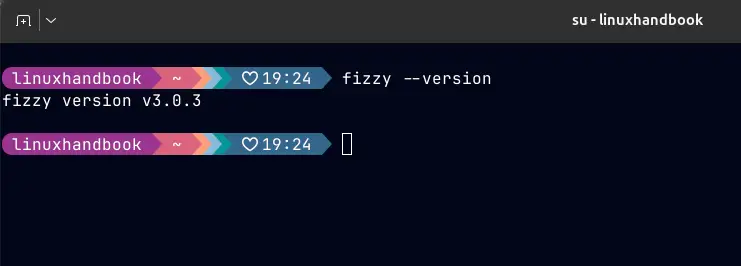
fizzy working in terminal
## Exploring the Basic Commands
First I ran this to confirm my identity and grab my account slug:
```bash
fizzy identity show
```

Fizzy Identity information
It will show all the identity information along with your `slug id` , use that id and run the following command:
```bash
fizzy board list --account "slug id"
```

Fizzt listing boards
Here is a list of boards with their names. As I have more accounts, I need to mention the account ID for commands.
Try more commands like:
```bash
# List cards on your default board
fizzy card list
# View details of a specific card
fizzy card show 2
# Search across your board
fizzy search "authentication bug"
# Add a comment to a card
fizzy comment create --card 42 --body "Reproduced on staging."
```
It will display the cards, a specific card, searching across the board, etc.
Also, if you use `jq` the output will be in formatted so that you can clearly make sense of the results.
```bash
fizzy card list --account "id" | jq
```
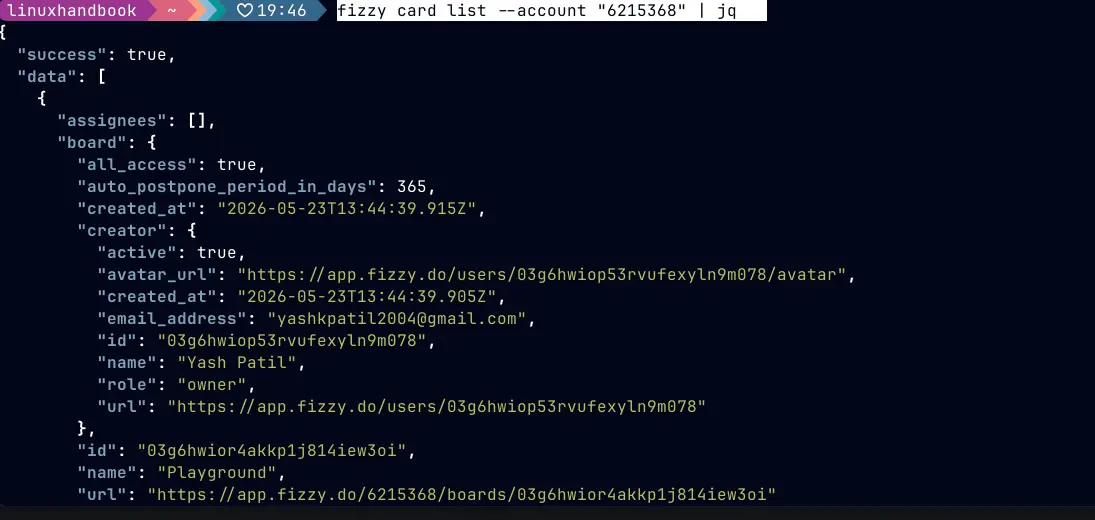
Formatted JSON output of fizzy
## Installing ZeroClaw
ZeroClaw ships as a single Rust binary. When the install script asked me whether I wanted a prebuilt binary or a source build, I went with prebuilt - it was done in seconds:
```bash
curl -fsSL https://raw.githubusercontent.com/zeroclaw-labs/zeroclaw/master/install.sh | bash
```
When it finishes, confirm it's available:
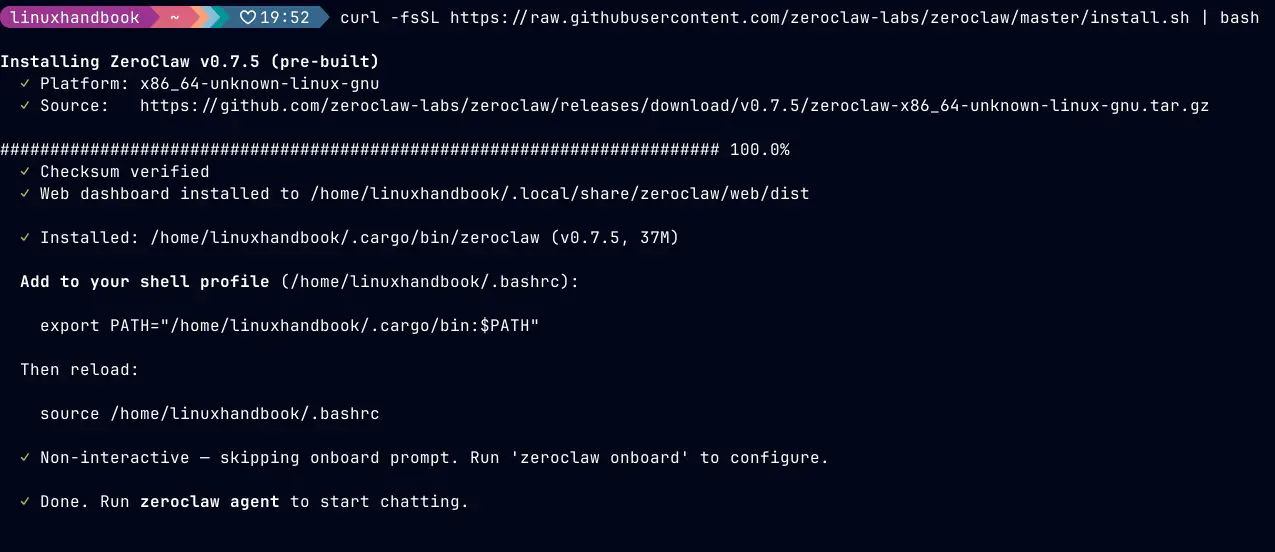
ZeroClaw installed
When it finishes, confirm it's available:
```bash
zeroclaw --version
```

ZeroClaw installed and working
ZeroClaw has no runtime dependencies. No Docker, no Node.js, no Python. The binary is self-contained.
## Running the Onboarding Wizard
ZeroClaw's config lives at `~/.zeroclaw/config.toml`. Running the onboarding wizard creates it for you:
```bash
zeroclaw onboard
```
The wizard walked me through four things:
- LLM provider - which model backend to use
- API key or endpoint - your credentials for that provider
- At least one channel - the built-in `cli` channel works for now; you can add Telegram or Discord later
- Agent alias - a name for your agent entry in the config
For the LLM provider step, enter `gemini` and paste your Google AI Studio API key when prompted. If you're using Ollama locally, choose `ollama` instead, the wizard will ask for your model name (e.g., `qwen2.5:7b`) and leave the endpoint at the default `http://localhost:11434`.
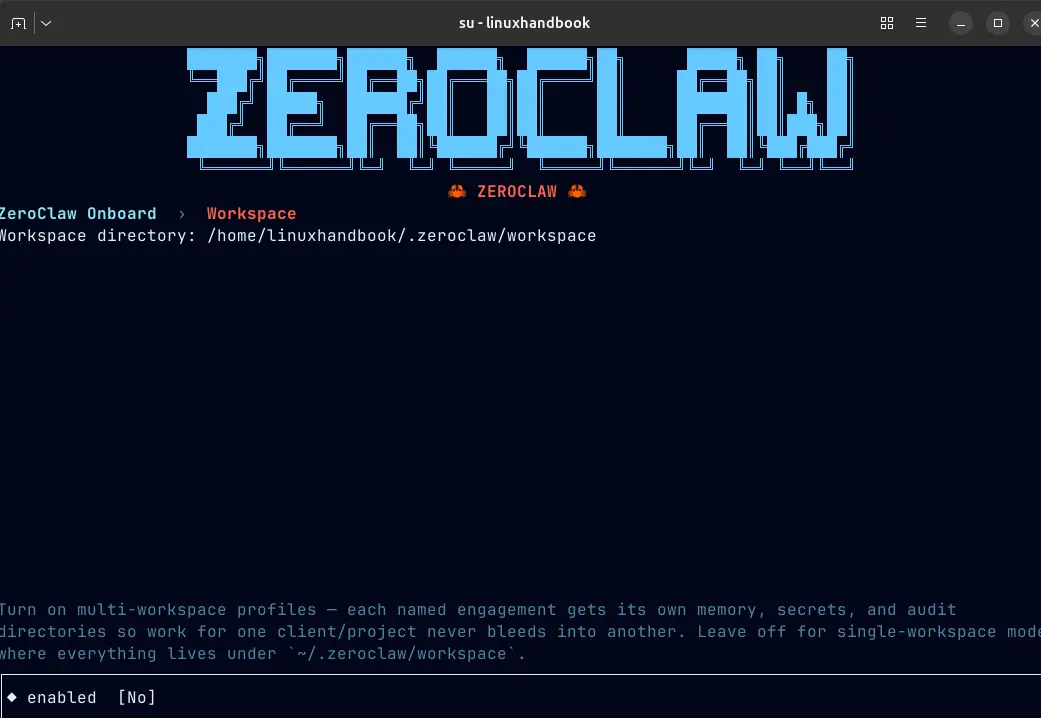
ZeroClaw onboard setup
There is vast support for various channels:
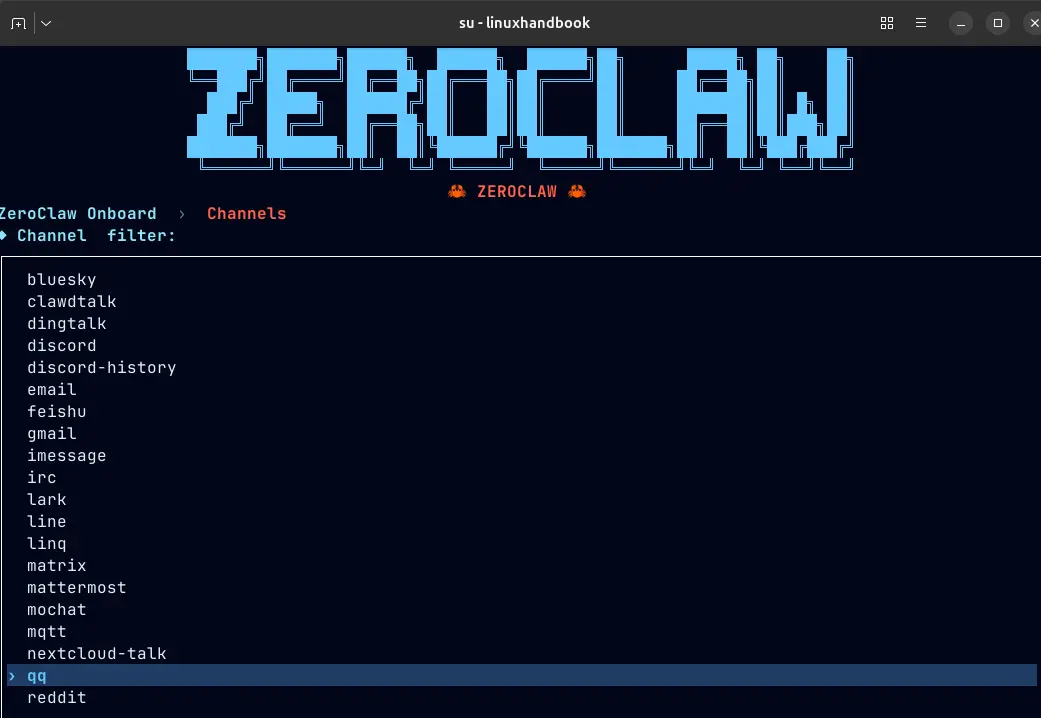
Supported channel in ZeroClaw
Then there will be an option to select a memory backend, select the appropriate one as per your need:
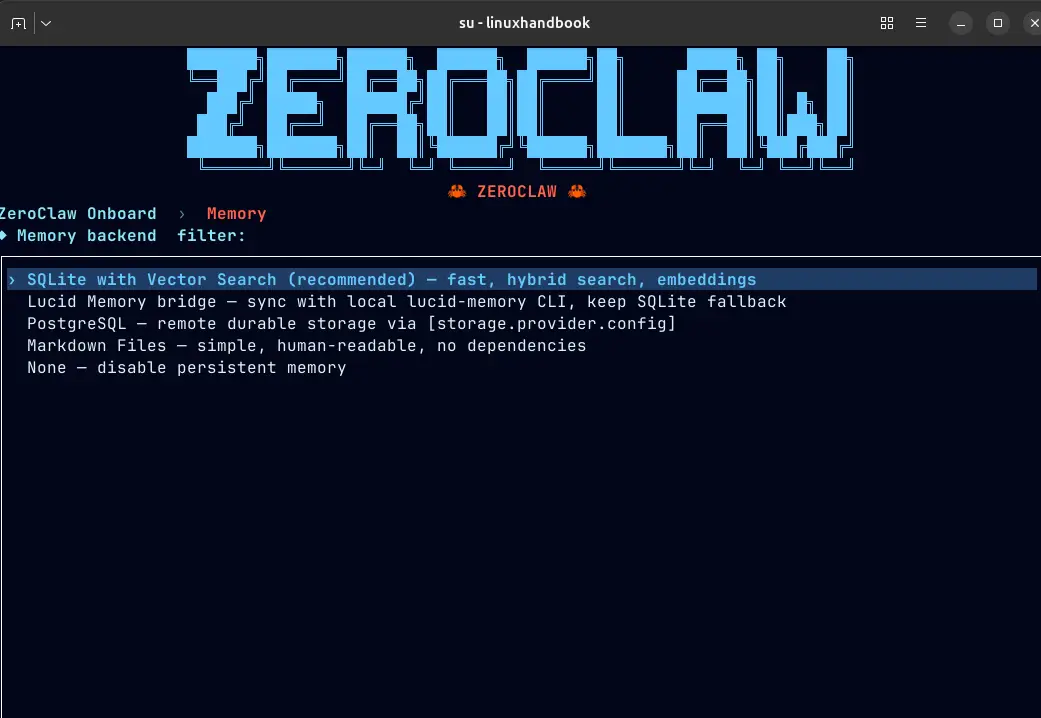
Memory backend filter
**the `model_provider` field on your agent is the only place you specify which LLM to use** in your `~/.zeroclaw/config.toml` . Swapping from Gemini to Ollama to Groq is a one-line change.
## Registering Fizzy as a Shell Tool
ZeroClaw's shell tool lets the agent run any command on your machine. To give it access to `fizzy`, add a tool entry to your config and give the agent permission to use it:
Add "fizzy" at commands in config, it will look like this:
```toml
allowed_commands = [
"git",
"npm",
"cargo",
"ls",
"cat",
"grep",
"find",
"echo",
"pwd",
"wc",
"head",
"tail",
"date",
"df",
"du",
"uname",
"uptime",
"hostname",
"python",
"python3",
"pip",
"node",
"free",
"fizzy"
]
```
One thing that caught me off guard: Fizzy has to be explicitly listed in allowed\_commands or ZeroClaw's security layer blocks it, even if you've defined the tool entry. I learned this the hard way after getting a "Command not allowed by security policy" error.
Then add the new entry in the config:
```toml
[tools.shell.fizzy]
description = "Manage Fizzy kanban boards via the Fizzy CLI"
command = "fizzy"
allowed_args = ["board", "card", "comment", "search", "commands"]
[agents.assistant]
model_provider = "gemini-cli"
risk_profile = "supervised"
tools = ["shell.fizzy"]
```
Follow the similar steps for ollama setup too.
Check once the parameters as per your model are selected. Whichever path you followed, the wizard ends with a quick live chat to confirm your agent is working. You'll see a prompt like:
## Confirming the Agent Responds
Whichever path you followed, Gemini or Ollama, start the agent to confirm everything is working:
```bash
zeroclaw agent
```
You should get a CLI chat prompt. Type a test message:
```bash
Hello, are you there?
```
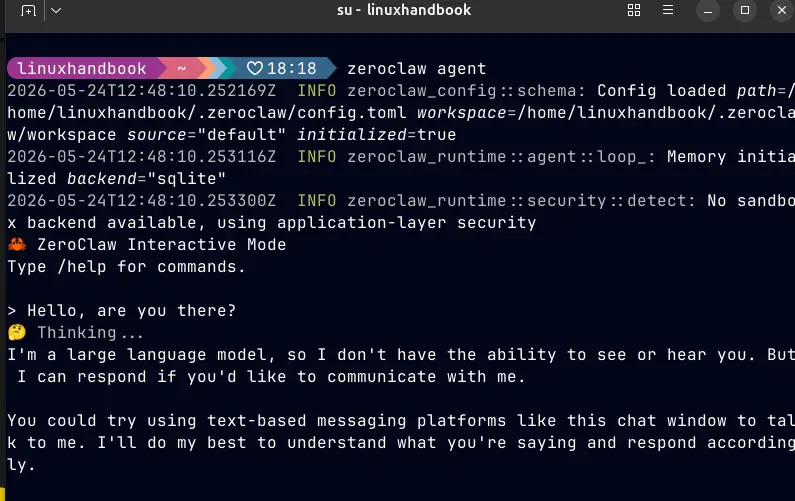
Agent responding to the model
If it responds, you're done. If you are using a local LLM and see an error like **model requires more system memory than is available**, your chosen model is too large for the free RAM currently available. Fix it by pulling the 1B model instead and updating your config:
```bash
ollama pull llama3.2:1b
# Then edit ~/.zeroclaw/config.toml and set: model = "llama3.2:1b"
```
If it responds, your LLM backend is wired up correctly. Total setup time is about five minutes. Once the agent responds, you're ready to wire in Fizzy.
## Verifying the Fizzy Integration
I asked the agent something simple to confirm the wiring:
```bash
Use the fizzy shell tool to run: fizzy card list
```
ZeroClaw called fizzy card list, parsed the JSON output, and summarized my cards in natural language. In supervised mode it asked for approval first - I pressed Y, and it worked.
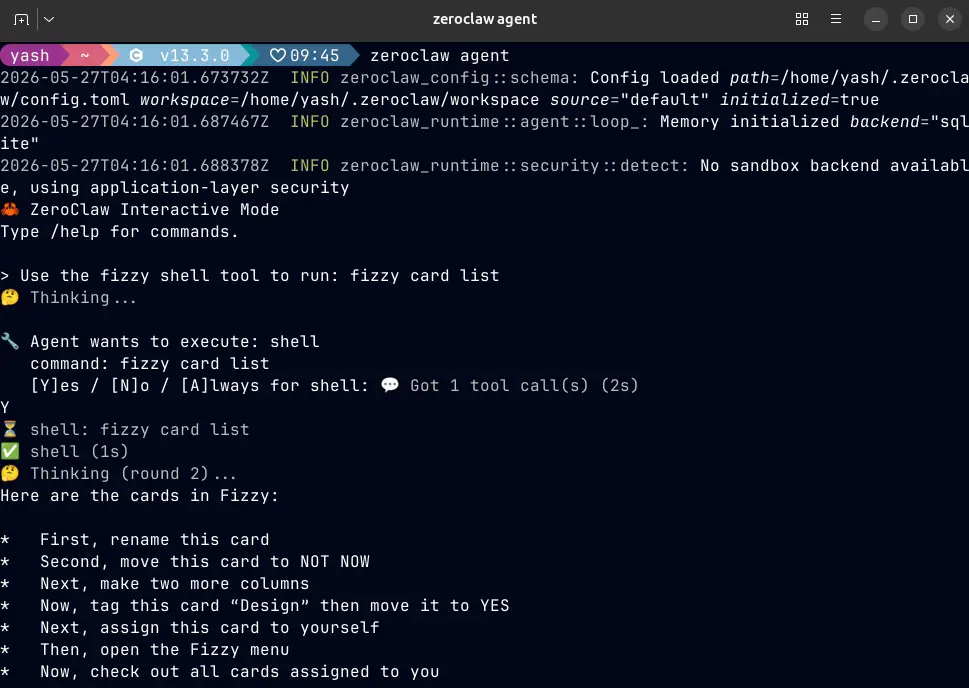
Fizzy cli with zeroclaw agent
One tip I'd pass on: be explicit in your prompt. "List the cards on my board" can confuse the agent into doing a web search instead. Saying "use the fizzy shell tool to run..." removes the ambiguity entirely.
From there, you can do things like:
```bash
Create a card titled "Review auth middleware" on my board.
Add a comment to first card saying I'll look at this after the release.
Search for anything related to "database migration".
```
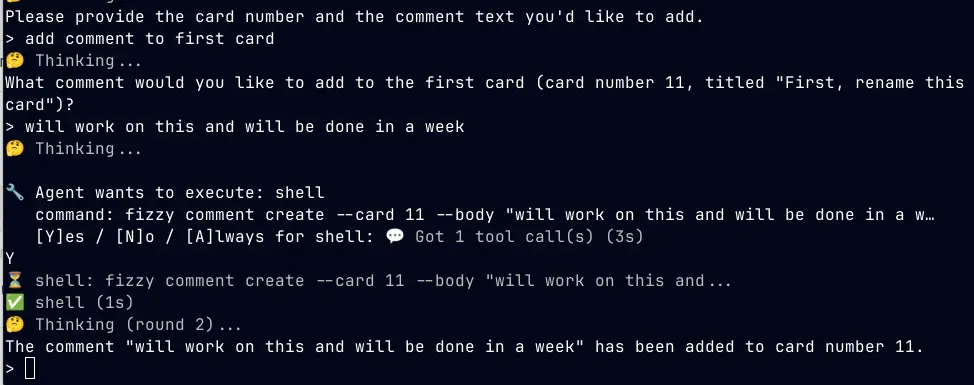
Agent adding comment to respective cards
## What to Explore Next
We have covered how to setup and get started with Fizzy CLI with ZeroClaw agent, but you can explore more things like:
**Per-repo board context**: Create a `.fizzy.yaml` in any project directory with a `board` field. When you're inside that directory, `fizzy card list` will default to that project's board automatically, no flags needed.
**Swap the model**: If Gemini starts hitting rate limits or you want to try something faster, add a second provider entry and change the `model_provider` alias on your agent.
**Add a second agent**: ZeroClaw supports multiple `[agents.*]` entries pointing at different providers. You could run a lightweight Ollama model for quick card operations and route heavier reasoning tasks to Gemini, all from the same ZeroClaw instance.
## Wrapping Up
What I like most about this setup is the flexibility. ZeroClaw doesn't care which LLM I use. I started with Ollama locally, hit tool-calling limitations with smaller models, and switched to Gemini's free tier without touching anything except two lines in the config.
The context switching problem is what motivated all of this, and I think this setup genuinely solves it. Having Fizzy in the terminal is one improvement. It took me an afternoon to get everything right. The time it saves should compound from here.
**Do visit the repos and try it yourself!**
### How I Supercharged My Personal Knowledge Base with Local AI
URL: https://linuxhandbook.com/blog/personal-knowledge-base-with-local-ai/
Last updated: 2026-05-22T10:03:07.000Z
I have thousands of notes. [Obsidian](https://obsidian.md/?ref=linuxhandbook.com) vaults, random Markdown files, half-finished research documents, meeting notes from three years ago. And for the longest time, they just sat there, searchable by filename, searchable by keyword, but never actually ***understood***.
Then one evening I thought, What if I could just ***ask*** my notes a question?
You might be thinking the ChatGPT already does that, but it does not have access to your local workspace. You need to upload all the files you want to discover, not a cloud service that makes me wonder what happens to my data.
Instead, I thought of using just a small AI model, completely running on my own machine. I thought that it could handle these situations, which could read my notes and answer questions about them.
I tried it. It worked. And I have not stopped using it since. No GPU required, no monthly subscription, no data leaving my machine.
## The problem with the huge pile notes (and how AI fixes it)
Here is the honest truth: most knowledge management systems fail not at ***storing*** information, but at ***retrieving*** it. You spend time writing the note. You tag it. You organize it. And then, three weeks later, you cannot find it because you cannot remember what you called it or which folder you put it in.
Traditional search is keyword-based. It finds notes that contain the word "containerization", but it cannot answer "how do I deploy a container in a restricted environment?" by synthesizing your notes on Docker, your notes on firewalls, and that one Markdown file you wrote during a workshop.
That synthesis is exactly what a local AI model can do.
The technique is called **RAG (Retrieval-Augmented Generation)**. The AI does not memorize your notes. Instead, it reads them at query time, pulls the most relevant chunks, and uses them as context to generate an answer.
Think of it as giving the AI your notes as a reference book every time you ask a question.
## What I used in this setup
A fully local setup with three components:
- Ollama: Runs LLM models locally on your CPU (or GPU if you have one)
- A lightweight embedding model: Converts notes into searchable vectors
- AnythingLLM (or Open WebUI): UI that connects your notes to the model
Everything runs on the local machine. The notes never leave the computer. The model does not even need an internet connection once it is downloaded.
## Choosing the right model
This is the part most guides get wrong. They recommend a 7B parameter model. You try to run it on your laptop, and it takes 90 seconds to answer a simple question.
For a knowledge base assistant that runs comfortably on a CPU, even a mid-range one, the sweet spot is **Phi-3 Mini** (3.8B parameters from Microsoft) or **Gemma 2B** (from Google). Both are surprisingly capable for question-answering tasks, and they run well with 8 GB of RAM.
You can also refer to this [article](https://itsfoss.com/testing-local-llms-without-gpu/?ref=linuxhandbook.com) for information about models running on CPU.
**My recommendation**: **phi3:mini,** it is fast, accurate, and was specifically fine-tuned for instruction-following tasks like Q&A. It is the model I use for my own notes.
📋
These tests were done on a machine with 16 GB RAM and no dedicated GPU. Phi3:mini took roughly 5–8 seconds to respond to most queries. I find that acceptable for a personal knowledge base.
## Part 1: Setting up Ollama
Ollama is the engine that lets you run LLMs locally. It is a single binary, and the installation is one command.
### Step 1: Install Ollama
```bash
curl -fsSL https://ollama.com/install.sh | sh
```
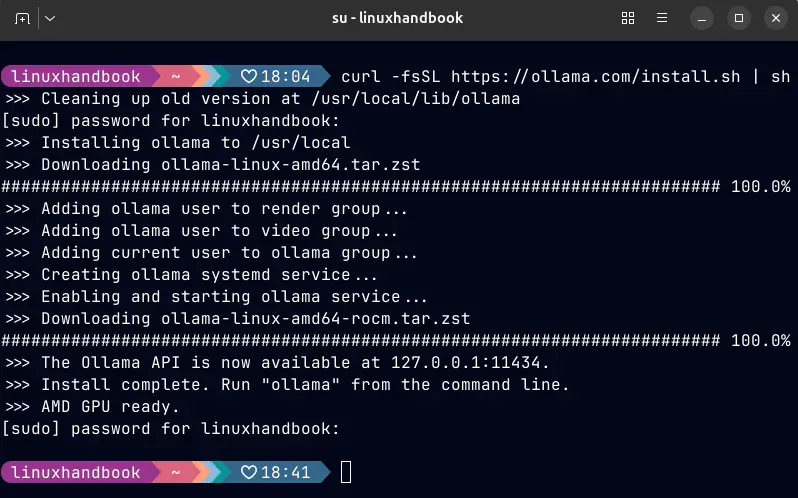
Ollama installed through curl
Once installed, verify it is running:
```bash
ollama --version
```
Ollama starts a background service automatically. You can check its status:
```bash
systemctl status ollama
```
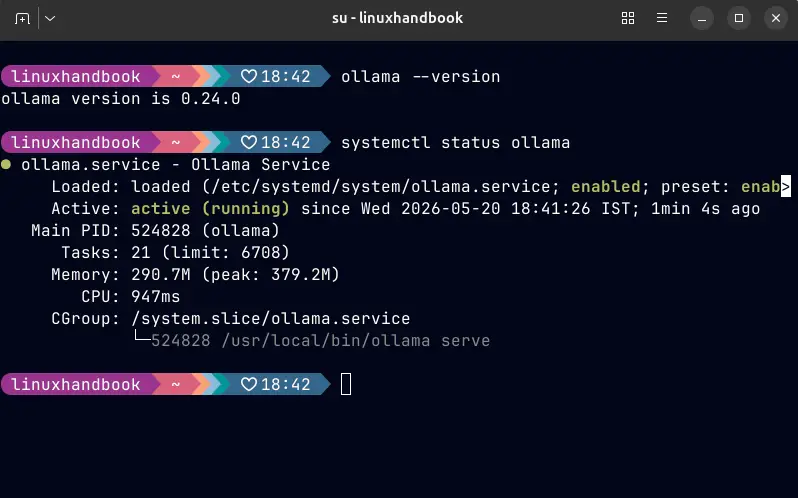
Ollama version and running status
### Step 2: Pull the model
Now download the model. For the CPU-friendly, low-resource setup I recommend:
```bash
ollama pull phi3:mini
```
This will download about 2.3 GB. Grab a coffee. If you have more RAM available (16 GB+) and want slightly better answers, you can also try:
```bash
ollama pull gemma2:2b
```
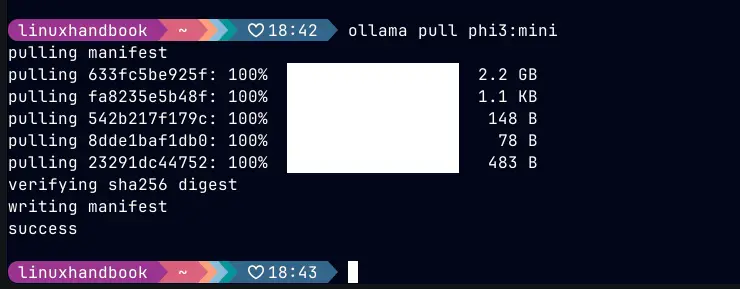
pulling phi3:mini model through ollama
To verify the model is installed and working, test it immediately:
```bash
ollama run phi3:mini "Explain what the ITIM subject is all about."
```
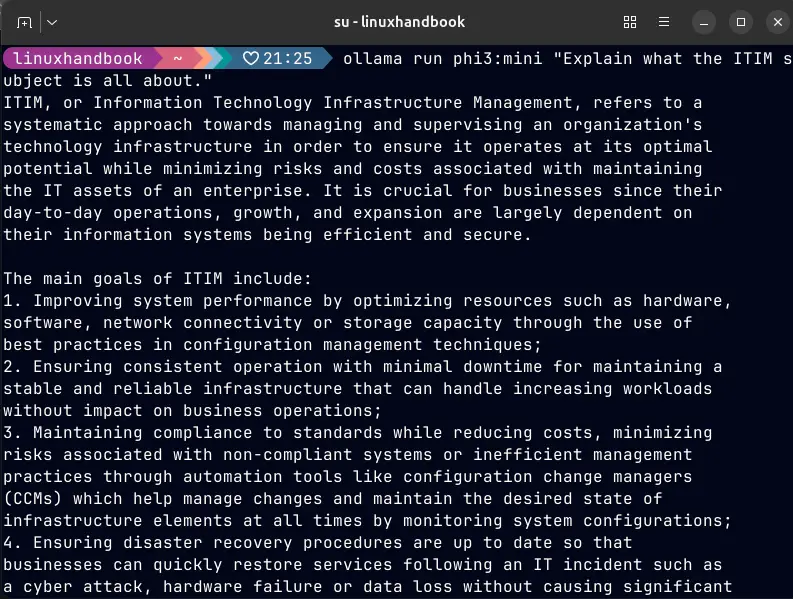
model giving answer to the question
If you see a coherent response, the model is working. We can move on.
## Part 2: Setting up AnythingLLM as the notes interface
[AnythingLLM](https://anythingllm.com/?ref=linuxhandbook.com) is a self-hosted, open-source application that lets you upload documents, point it at a folder, and query them through a clean chat interface. It handles the chunking, embedding, and retrieval pipeline so you do not have to set up a vector database yourself.
### Step 1: Install AnythingLLM via Docker
```bash
docker pull mintplexlabs/anythingllm
```
Create a directory to store AnythingLLM's data (your note indexes will live here):
```bash
mkdir -p ~/.anythingllm
```
Now run it:
```bash
docker run -d \
--network=host \
--cap-add SYS_ADMIN \
-v $HOME/.anythingllm:/app/server/storage \
-e STORAGE_DIR="/app/server/storage" \
--name anythingllm \
mintplexlabs/anythingllm
```
Verify the container is running:
```bash
docker ps | grep anythingllm
```
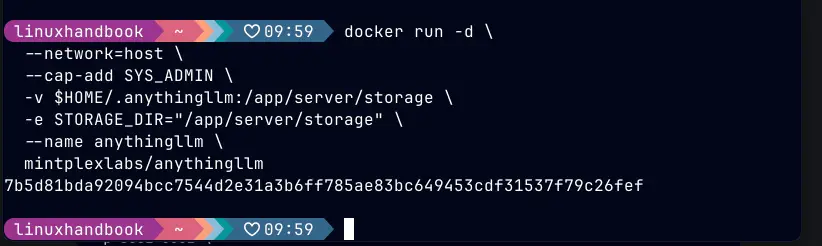
Now open your browser and navigate to: `http://localhost:3001`
AnythingLLM GUI interface
You will see the AnythingLLM setup wizard.
### Step 2: Connecting AnythingLLM to the local Ollama model
During setup, AnythingLLM will ask you to choose an LLM provider. Select **Ollama** from the list.
- Ollama Base URL: [http://localhost:11434](http://localhost:11434/?ref=linuxhandbook.com)
- Model: Select `phi3:mini` from the dropdown (it will auto-detect your installed models)
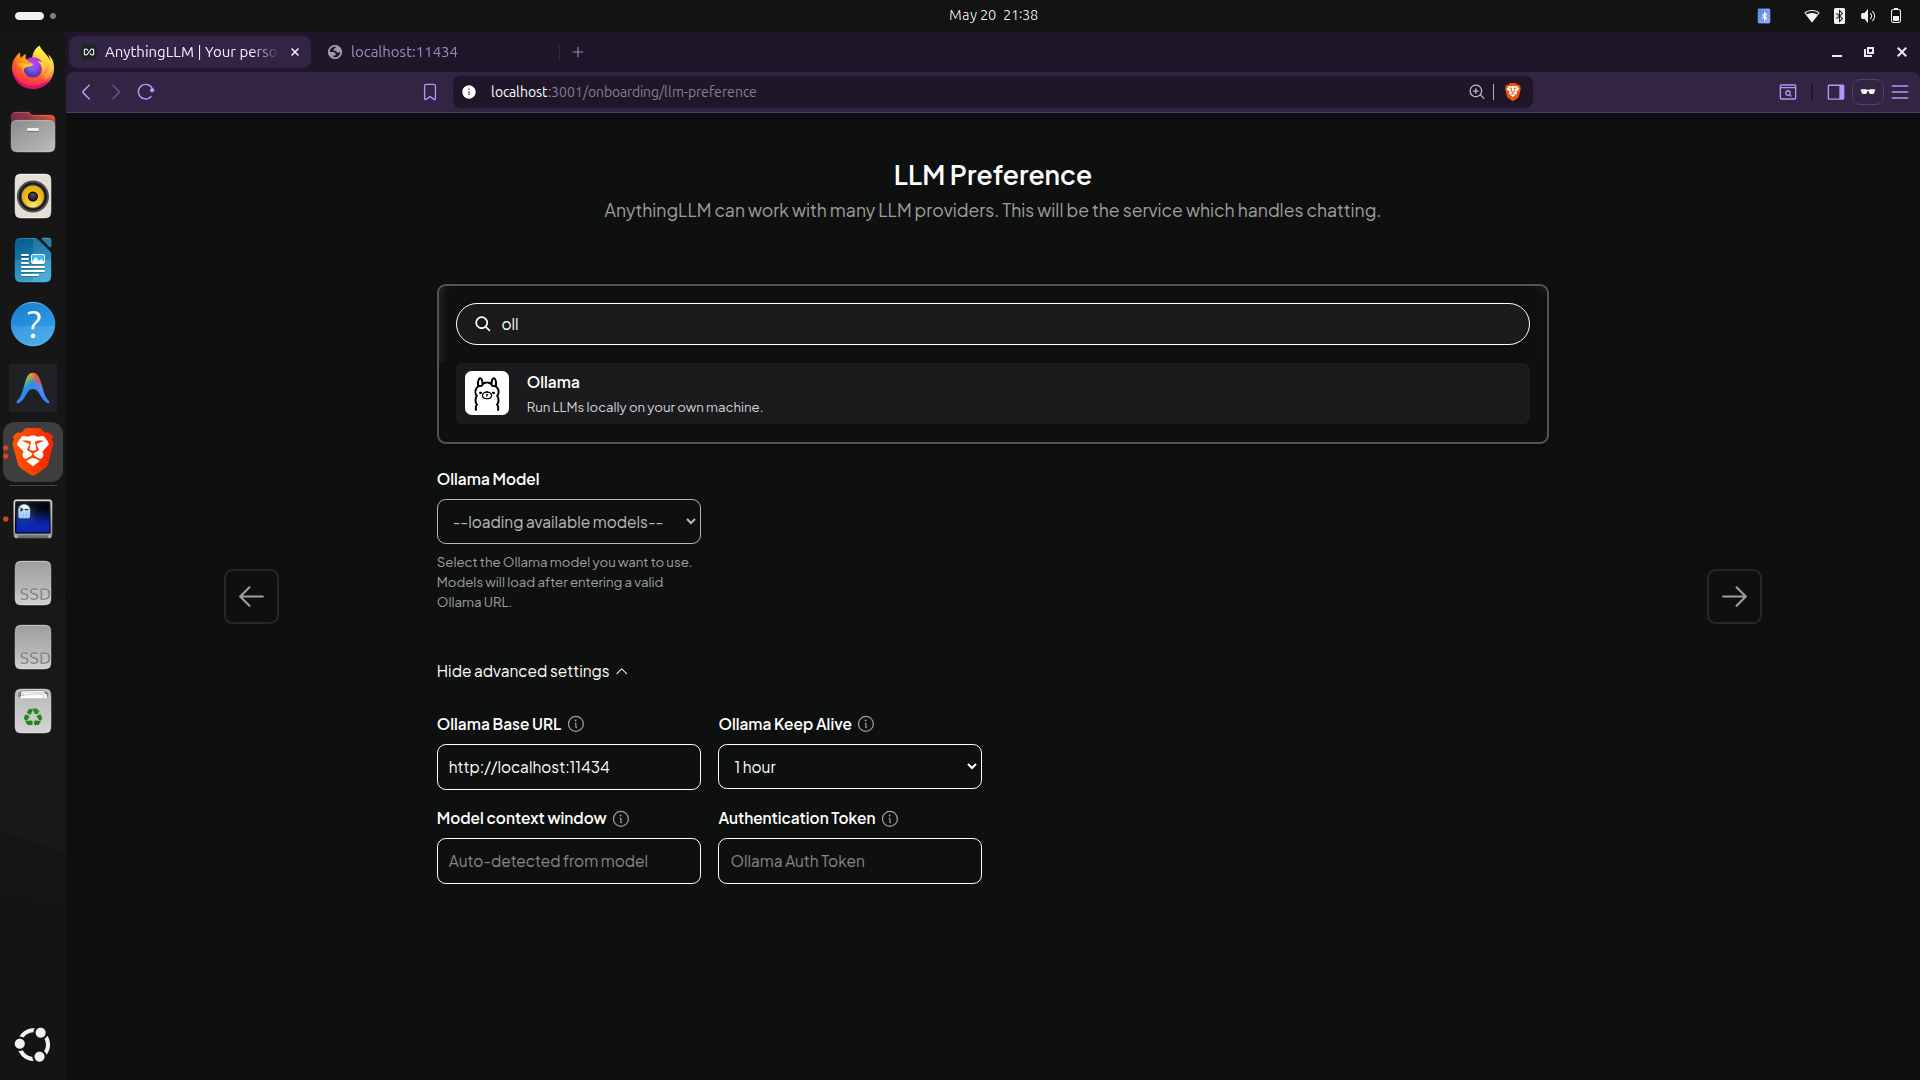
ollama setup for AnythingLLM
For the embedding model, which converts your notes into searchable vectors, stay within Ollama and choose:
```bash
ollama pull nomic-embed-text
```
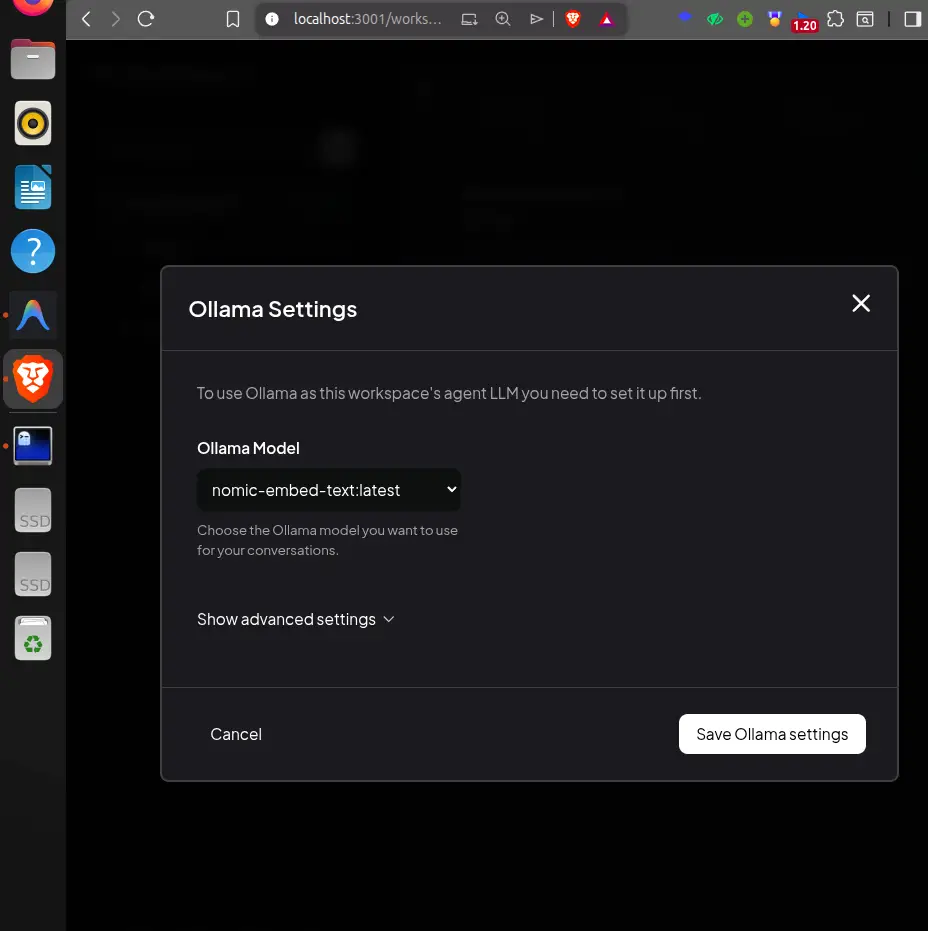
Select the model from the ollama
`nomic-embed-text` is tiny (274 MB), fast, and produces excellent embeddings for English-language text. It is purpose-built for document retrieval, exactly what we need.
## Part 3: Importing the notes
Let's move to connect knowledgebase with AI.
In AnythingLLM, a **workspace** is a scoped knowledge base. Think of it like a project folder; you can have one workspace for your work notes, one for personal research, one for a specific book you are reading.
1. Click **New Workspace** and give it a name (e.g., "My Notes")
2. Click the **Upload Documents** button
3. Drag and drop your Markdown files, PDFs, or text files into the upload area
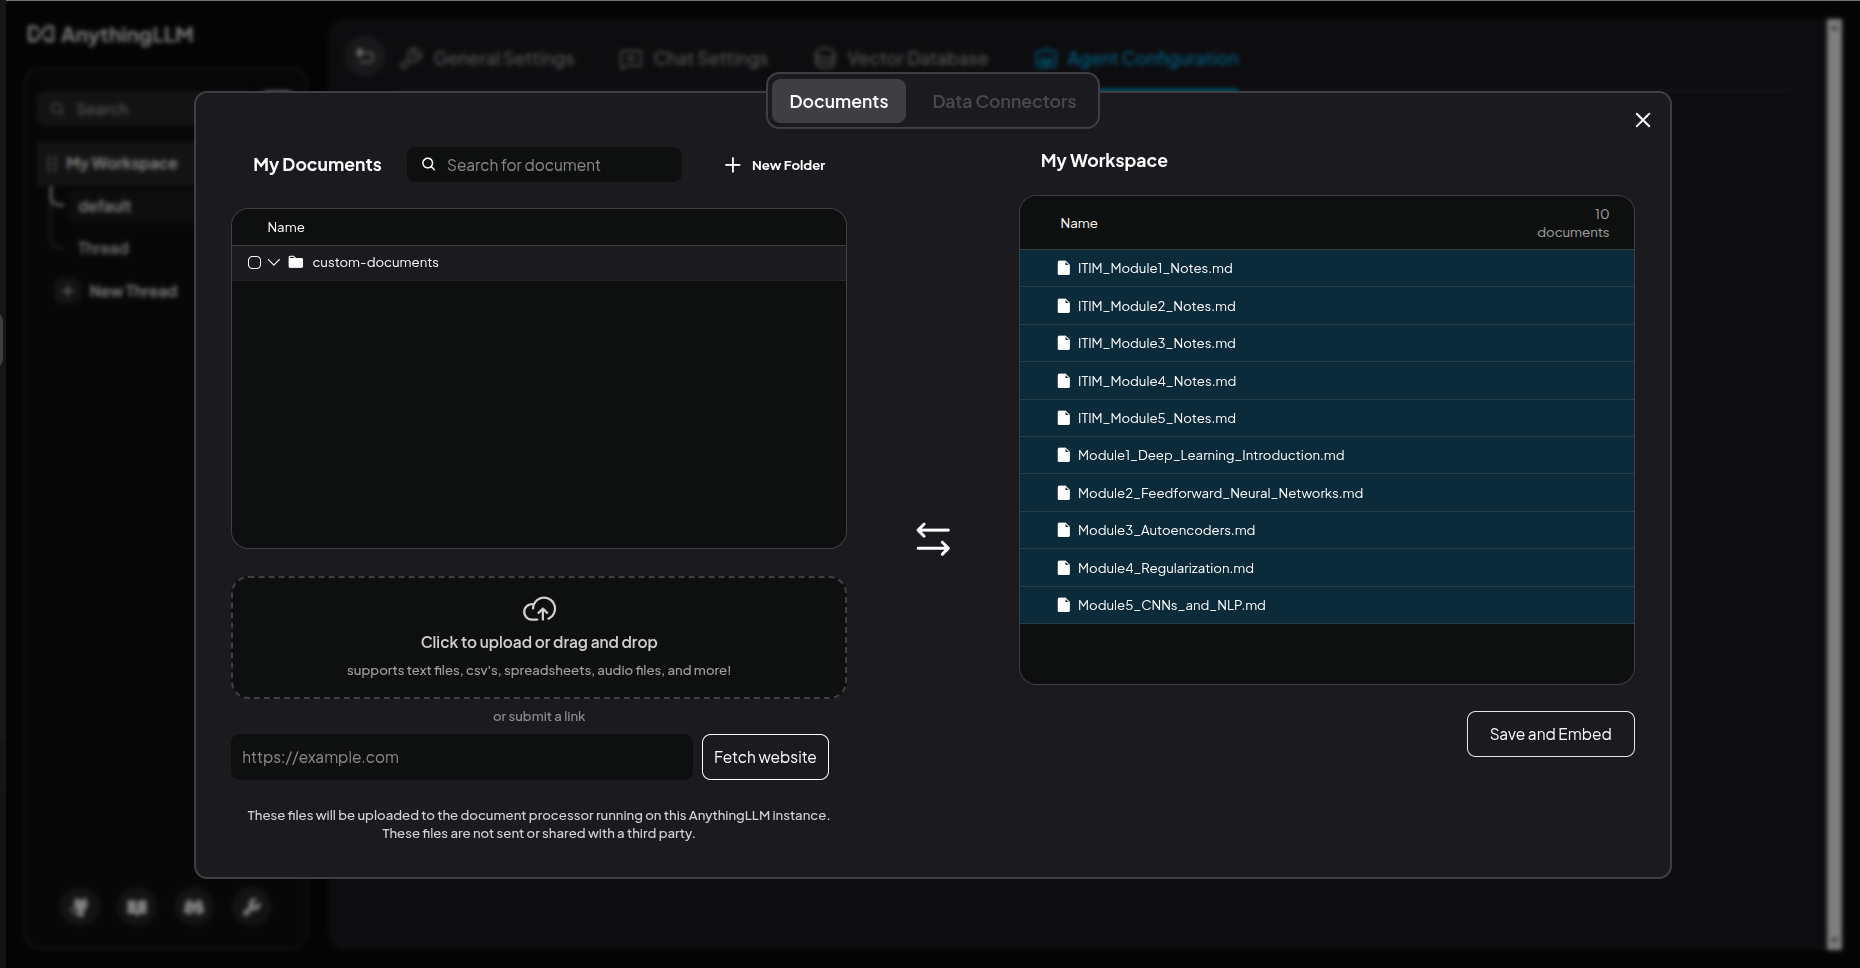
Adding local notes to the workspace
AnythingLLM will split your notes into chunks (typically 500–1000 tokens each) then generate an embedding vector for each chunk using `nomic-embed-text` and then store everything in a local vector database (LanceDB, stored in `~/.anythingllm`).
This process takes a minute or two, depending on how many notes you have.
💡
AnythingLLM supports Markdown, PDF, plain text, DOCX, and even web page scraping. If your notes live in Obsidian, just point it at your vault folder. If they are in Notion, export them as Markdown first.
## Part 4: Querying the notes
Now is the time to make the most of the notes by using AI to question it.
Now the satisfying part. Click on your workspace, type a question in the chat box, and press Enter. To truly see the power of local AI, ask something that ChatGPT could never possibly know. For example, if you uploaded your home server notes:
```
According to my server migration notes, why did I decide to switch from Nginx Proxy Manager to Traefik, and what IP address is my Pi-hole running on?
```
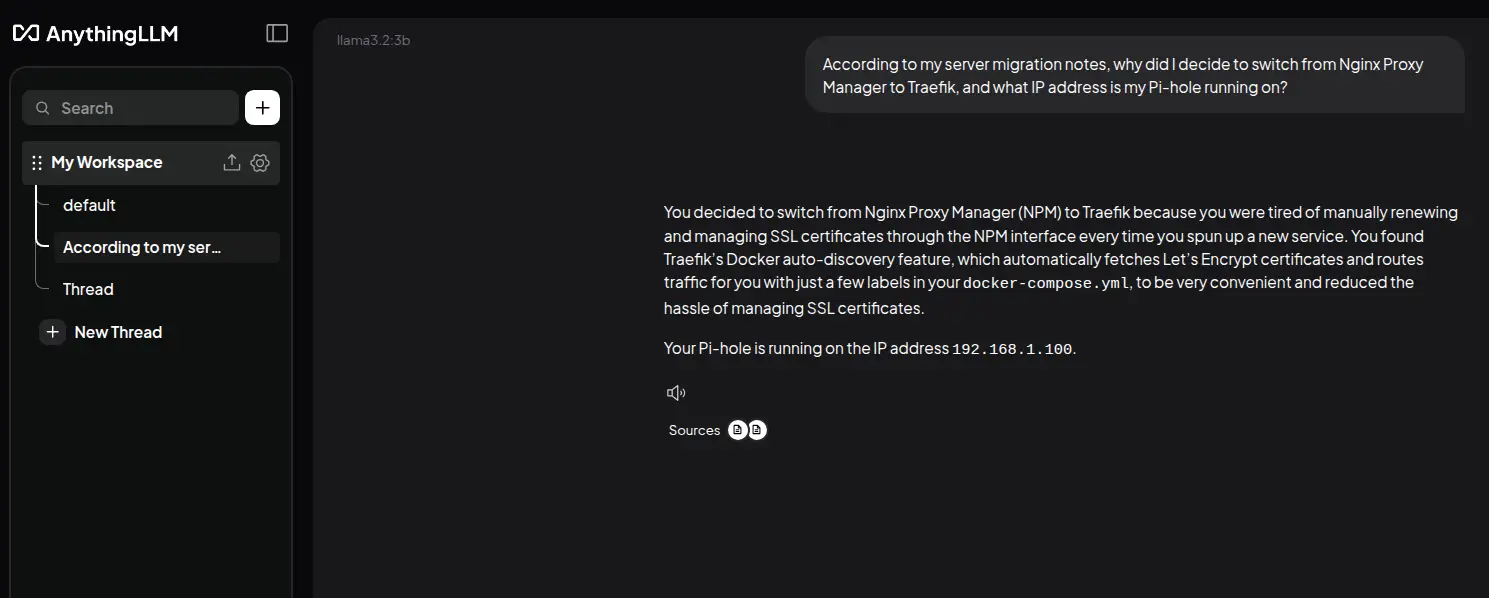
LLM answering form my personal notes
Notice that AnythingLLM shows you ***which notes it used*** to generate the answer. This is the RAG process in action; ChatGPT can tell you what [Traefik](https://traefik.io/traefik?ref=linuxhandbook.com) is, but only ***your*** local AI knows that you switched to it because you were tired of managing SSL certificates manually, and that your Pi-hole is at `192.168.1.100`.
Try a few more highly personalized queries:
```bash
What is the Wi-Fi password for the guest network at my parents' house, and where is the router hidden?
```
LLM asnwering from my home-lab notes
```
When are my parents' birthdays this year, and what exactly did I decide to buy for my brother to fix his noisy keyboard?
```
LLM anwering from my family notes
Each answer is grounded in your notes. The model is not making things up from its training data; it is synthesizing from what ***you*** wrote, which means the answers are accurate to your actual knowledge and context.
## 💡 Keeping things running (optional)
If you want AnythingLLM to start automatically with your system:
```bash
docker update --restart unless-stopped anythingllm
```
And Ollama is already managed as a systemd service, so it will start on boot automatically.
To update the model later if a newer version is released:
```bash
ollama pull phi3:mini
```
Ollama handles versioning for you.
## My experience (so far)
I have been using this setup for a few months now. Here is what changed for me:
**Before:** I would search my notes, find five partial answers in different files, open each one, manually cross-reference them, and then write a synthesis myself.
**After:** I ask a question. In 5–8 seconds, I get a synthesized answer with the source notes cited. I open the sources to verify. Done.
The model is not perfect - Phi3:mini will occasionally miss nuance or misread a technical term from a note. But for a free, offline, CPU-only setup, it is genuinely impressive.
What it is excellent at:
- Summarizing notes on a topic
- Finding connections between notes you forgot existed
- Drafting a starting point for new writing based on your existing research
- Answering "what did I write about X" questions instantly
What to watch out for:
- Very long PDFs (>50 pages) may need to be split before uploading
- Code blocks in Markdown sometimes confuse the chunking
- Plain prose notes work best
- The model will occasionally "hallucinate" if your notes are thin on a topic; always verify
The entire stack is free, open-source, and runs completely offline. Once set up, it requires zero maintenance and adds nothing to your monthly cloud bill.
## Conclusion
The popular mental model of AI is "Cloud service that reads your data". This does not have to be the case and for personal notes, it arguably ***should not*** be.
A small, open model running locally on your laptop is good enough for synthesizing your own knowledge base. It will not beat GPT-4 at coding challenges or creative writing. But for the task of "help me navigate and synthesize the notes ***I*** already wrote", it does the job well.
Your notes are already doing half the work. A local AI just helps you finish the other half.
### LHB Linux Digest #26.07: New ELK Stack Course, Linux in Browser, Best YouTube Channels for DevOps and More
URL: https://linuxhandbook.com/newsletter/26-07/
Last updated: 2026-05-19T13:30:48.000Z
Our 20th course is now available 🍾
This one is about log management with ELK stack.
Actually, it's not ELK. Instead of Elastic Search, we used OpenSearch. The course gives you the basics along with sample labs to follow.
This is available for Pro members only. Not a Pro member yet? [Upgrade to Pro membership](https://linuxhandbook.com/#/portal/signup) and access all 20 courses, 6 eBooks and every other premium content.
[Log Management Course (ELK Stack with OpenSearch)Stop SSH-ing into servers at 2 AM. Learn to centralize, search, and visualize logs across your entire infrastructure using fully open-source tools.Linux HandbookYash Kiran Patil](https://linuxhandbook.com/courses/opensearch/)
The next course in our pipeline is GitOps video course. After that, we are also thinking of creating a course around using AI assistance in typical DevOps scenarios. I'll keep you posted.
_This post is for subscribers only._
### 13 YouTube Channels I Recommend For Learning DevOps for Free
URL: https://linuxhandbook.com/blog/devops-learn-youtube-channels/
Last updated: 2026-05-19T13:05:29.000Z
I have been learning DevOps for a while now. The problem is not finding DevOps content on YouTube. There is plenty of it. The problem is knowing which channels are actually worth your time.
Some channels drop theory at you for 45 minutes without touching a terminal. Others teach outdated tooling. A few are genuinely excellent - structured, practical, updated, and respected by the community. I went through dozens of channels, cross-checked with what the DevOps community recommends and narrowed it down to 14 that hold up in real learning situations.
These are not ordered by subscriber count or popularity contests. They are ordered by how naturally they build on each other - from foundational to advanced, from broad to specialized.
**Short on time?** See the quick overview table below, then jump to the channels that match your current level.
## At a Glance: All 14 Channels Compared
| Channel | Best For | Content Style | Skill Level | Our Pick |
| ------------------- | --------------------------- | ------------------------ | -------------- | ------------------------- |
| TechWorld with Nana | Full DevOps roadmap | Structured courses | Beginner → Mid | 🏆 Top Pick |
| freeCodeCamp.org | Full-length free courses | Crash courses | All levels | Best for complete courses |
| NetworkChuck | Linux, Docker, Networking | Energetic explainers | Beginner | Best entry point |
| KodeKloud | Cert prep + labs | Hands-on lab-style | Beginner → Mid | Best for cert prep |
| Fireship | Fast concept explainers | 100-second / short | All levels | Best quick reference |
| DevOps Directive | Docker, K8s, Terraform | Deep-dive tutorials | Mid → Advanced | Best for depth |
| Kunal Kushwaha | DevOps bootcamp + OSS | Full bootcamp series | Beginner → Mid | Best free bootcamp |
| TrainWithShubham | Real projects + roadmap | Project-driven | Beginner → Mid | 🏆 Editor's Pick |
| That DevOps Guy | Real-world K8s + GitOps | Honest, production-style | Mid → Advanced | Best real-world K8s |
| KubeSimplify | Kubernetes deep dives | Practical demos | Mid → Advanced | Best K8s-focused |
| Bret Fisher | Docker + K8s Q&A | Live sessions | Mid → Advanced | Best for live Q&A |
| Anton Putra | AWS, Terraform, K8s | Production-grade | Advanced | Best production-level |
| Abhishek.Veeramalla | DevOps roadmap + interviews | Projects + roadmaps | Beginner → Mid | Best for interviews |
| Jeff Geerling | Ansible + homelab infra | Practical demos | Mid → Advanced | Best for Ansible |
## TechWorld with Nana - Best for a Complete DevOps Learning Path
TechWorld with Nana is the most recommended DevOps channel on communities and it earns that consistently. Nana covers the full DevOps stack - Docker, Kubernetes, CI/CD, Terraform, Ansible and monitoring - in a structured, course-style format that builds concepts before jumping into commands.
She starts with the basic concepts, builds the fundamentals and then moves towards the advanced concepts and practical approach of the concept. Especially [***Docker and Kubernetes Tutorial for Beginners***](https://youtube.com/playlist?list=PLy7NrYWoggjwPggqtFsI%5FzMAwvG0SqYCb&si=3JkeIMtKOMMDqMZ5&ref=linuxhandbook.com) is one of the most popular and recommended playlists on YouTube.
**Who it's best for:** Complete beginners who want a single channel that takes them from zero to job-ready on core DevOps tooling, without having to stitch together random videos.
🤔
****Why follow this channel?**
Covers the entire DevOps toolchain in a logical sequence. One of the clearest explainers of Kubernetes architecture you'll find anywhere. Videos stay current and playlists are regularly updated as tools evolve.
**Verdict:** Think of this as your DevOps course library. When you need a full course on a specific tool - Terraform, AWS, Kubernetes, this is where you look first.
[Youtube | TechWorld with Nana](https://www.youtube.com/@TechWorldwithNana?ref=linuxhandbook.com)
## freeCodeCamp.org - Best for Full-Length Free Courses on Every DevOps Topic
freeCodeCamp's YouTube channel is not a DevOps-specific channel - it is a massive library of full-length, structured courses across every technical domain, and its DevOps coverage is exceptional. You will find complete, multi-hour courses on Docker, Kubernetes, Terraform, AWS, Linux, and more, all free, no sign-up required.
They usually have one-shot videos of multiple hours, which cover the whole topic in depth, like [Docker Tutorial for Beginners, Kubernetes course - Full Beginner Tutorial, etc.](https://www.youtube.com/playlist?list=PLWKjhJtqVAbkzvvpY12KkfiIGso9A%5FIxs&ref=linuxhandbook.com) They cover a wide range of DevOps topics in full-length videos; you name it, and they have it on their channel.
**Who it's best for:** Anyone who prefers structured, course-style learning, the kind where you sit down, follow along start to finish, and come out the other end having actually learned a tool completely.
🤔
****Why follow this channel?**
Hosts some of the best free full-length DevOps courses on the internet. Courses are taught by respected practitioners, not generalists. Covers tools that smaller channels skip: Jenkins, Ansible, GitHub Actions in depth. Trusted by millions, the quality bar for what gets published here is high
**Verdict:** Think of this as your DevOps course library. When you need a full course on a specific tool - Terraform, AWS, Kubernetes, this is where you look first.
[Youtube | freeCodeCamp.org](https://www.youtube.com/@freecodecamp?ref=linuxhandbook.com)
## NetworkChuck - Best Entry Point for Absolute Beginners

NetworkChuck makes networking, Linux, Docker, and cloud concepts feel genuinely approachable. His style is upbeat, fast-paced, and deliberately beginner-friendly - built around the philosophy that the first goal is to make you comfortable enough to not quit.
He mainly makes videos related to cybersecurity, home labs, self-hosted tools and Linux, which is essential for building the prerequisites for DevOps. His storytelling abilities make you stick with the concept and follow all along.
**Who it's best for*:*** Complete beginners who feel intimidated by technical content and need a first channel that makes them feel like they can actually do this - before moving to more structured learning.
🤔
****Why follow this channel?**
Removes the intimidation factor better than almost any other channel. Linux, networking, and Docker explanations are some of the clearest for newcomers. High-energy style genuinely makes complex topics feel approachable. Great for building foundational context before diving into tools.
**Verdict:** The best channel to remove the intimidation factor before starting a structured DevOps path. Watch a few videos here, then move to a sequenced learning track.
[Youtube | NetworkChuck](https://www.youtube.com/@NetworkChuck?ref=linuxhandbook.com)
## KodeKloud - Best Channel for Learning by Doing and Certification Prep
KodeKloud started as a training platform and its YouTube channel reflects that DNA: every video is designed around hands-on exercises with a clear learning objective. It is the most consistently recommended channel on Reddit when someone asks about CKA, CKAD, or CKS Kubernetes certification prep.
The channel focused on certification prep as well as concept videos on topics like Docker, Kubernetes, Nginx, AWS, etc. [Kubernetes Crash Course](https://youtu.be/XuSQU5Grv1g?si=PWLwe6Eb-IqoPac3&ref=linuxhandbook.com) is one of the most popular video which covers the Kubernetes concepts in the best possible way according to the viewers.
**Who it's best for:** Learners who retain things by doing, not just watching - and anyone preparing for Kubernetes, Docker, or AWS certifications who wants structured prep content that matches the actual exam format.
🤔
****Why follow this channel?**
Community consistently names it as the top cert prep resource. Bridges the gap between "watching a tutorial" and "actually doing the thing". Covers CLF-CO2, CKA, CKAD, Docker DCA, AWS certifications reliably.
**Verdict:** The best structured practice resource on YouTube for DevOps certifications. Watch KodeKloud when you are preparing for CKA, CKAD, or Docker certification - it was built for exactly that.
[Youtube | KodeKloud](https://www.youtube.com/@KodeKloud?ref=linuxhandbook.com)
## Fireship - Best for Fast, Accurate Concept Explainers

Fireship is not a DevOps channel - it is a technology explainer channel with a cult following, and its DevOps coverage is some of the best bite-sized technical content on the internet. The famous "X in 100 seconds" format delivers accurate, dense explanations of Docker, Kubernetes, CI/CD pipelines, Git, and cloud concepts faster than any other format.
**Who it's best for:** Learners at any level who want a fast, accurate reference for a concept they have heard of but do not fully understand - before going deeper elsewhere. Also excellent for keeping up with new DevOps tooling without spending hours on each one.
🤔
****Why follow this channel?**
"Docker in 100 Seconds" and "Kubernetes in 100 Seconds" are legitimately among the best short explainers on the internet. The channel has a cult following for a reason; accuracy and density per minute are extremely high. Great for understanding what something ***is** before committing time to learn it. Covers new tooling rapidly as it emerges in the ecosystem
**Verdict:** The fastest way to understand what something does before committing to learning it. Use Fireship to decide what to learn next, then use a hands-on channel to actually learn it.
## DevOps Directive - Best for Deep, Technically Accurate Tutorials
DevOps Directive is the channel community recommends when someone says, "I want to actually understand Docker and Kubernetes, not just copy commands." Every tutorial is longer than average, technically precise, and built around real use cases rather than simplified toy examples.
He covers the history, installation, demo, practical, deployment, clustering and CI/CD in a complete depth. His [**Best of DevOps Directive YouTube Videos**](https://youtube.com/playlist?list=PLFzuOAehUPHFxhoawwYCh8ENUsR2sxdYm&si=hWX7dFTzSlnIxBVS&ref=linuxhandbook.com) is popular for in depth knowledge of DevOps.
**Who it's best for:**Intermediate learners who already have the basics and want to go deep, understanding not just how to use Docker or Terraform, but why the design decisions exist and how things work under the hood.
🤔
****Why follow this channel?**
Consistently praised in the community for correctness - the tutorials do not cut corners. The complete Docker course is one of the most thorough free Docker resources available. Covers Terraform, GitHub Actions, and CI/CD with real production context. Rare combination of depth and clarity in a single channel
**Verdict:** When you are past the basics and want tutorials that respect your technical intelligence, DevOps Directive is where you go. Fewer videos, higher quality per video.
[YouTube | DevOps Directive](https://www.youtube.com/@DevOpsDirective?ref=linuxhandbook.com)
## Kunal Kushwaha - Best Free DevOps Bootcamp on YouTube

Kunal Kushwaha's DevOps bootcamp is one of the rare examples of a complete, free, structured DevOps curriculum published entirely on YouTube. The bootcamp covers Linux, Docker, Kubernetes, networking, Git, CI/CD, and cloud from scratch, in a sequence that actually makes sense as a learning path.
[DevOps Bootcamp](https://youtube.com/playlist?list=PL9gnSGHSqcnoqBXdMwUTRod4Gi3eac2Ak&si=Q817s0gzF6BmeU1P&ref=linuxhandbook.com) is a popular series in which he has covered the DevOps topics in depth; the teaching style is more of a conversation where you don't feel it as a scripted story.
**Who it's best for:** Beginners and intermediate learners who want a free, structured bootcamp they can follow from start to finish - without paying for a course platform or stitching together random videos.
🤔
****Why follow this channel?**
One of the few YouTube channels offering a genuinely comprehensive, sequenced DevOps bootcamp for free. Heavy emphasis on open source and community, with an active Discord community named WeMakeDevs. The bootcamp format means you always know what to watch next. Strong focus on building real-world projects, not toy examples.
**Verdict:** If you want a free, complete, structured bootcamp that you can follow without paying anyone, Kunal Kushwaha's bootcamp series is the honest answer.
[YouTube | Kunal Kushwaha](https://www.youtube.com/@KunalKushwaha?ref=linuxhandbook.com)
## TrainWithShubham - Best for Project-Based Learning and Roadmap Clarity

TrainWithShubham is built around one idea: learning DevOps by building and deploying real projects. Shubham Londhe focuses on projects that you can put on a resume, CI/CD pipelines, containerized deployments and infrastructure automation and explains the roadmap clearly for learners unsure what to learn next.
The creator teaches in the native language Hindi, so it might be a con for other language users, but for users whose native language is Hindi it provides a clear understanding of the topic that he covers fully. Has one of the best one-shot videos, like [Linux One Shot](https://youtu.be/e01GGTKmtpc?si=fx58pHCvEo5OJ83T&ref=linuxhandbook.com), [Kubernetes One Shot](https://youtu.be/W04brGNgxN4?si=ZF7%5FWIl1psAFj7AM&ref=linuxhandbook.com) and many more.
**Who it's best for:** Beginners and intermediate learners who are actively job-hunting or building a portfolio, and want project-based tutorials that produce something real, not another to-do app deployed locally.
💡
****Why follow this channel?**
A project-first approach means you always have something to show for your learning time. Roadmap content is some of the most practical advice available for DevOps job seekers in 2026\. Active community with live sessions and challenges. Covers the full stack: Docker, Kubernetes, Jenkins, GitHub Actions, Terraform, AWS.
**Verdict:** If building an actual DevOps portfolio is your goal, TrainWithShubham's project-based approach gives you real output for every hour you invest, especially if you are a Hindi audience.
[YouTube | TrainWithShubham](https://www.youtube.com/@TrainWithShubham?ref=linuxhandbook.com)
## That DevOps Guy - Best for Honest, Real-World Kubernetes Content

Marcel Dempers does not make content for clout. That DevOps Guy is built around real Kubernetes setups, actual production decisions, and content that tells you what actually happens when things go wrong, not just the happy path. The channel covers Kubernetes, Helm, GitOps, ArgoCD, and service mesh with a refreshing absence of marketing language.
What makes him truly unique is his distinctive teaching style combined with those nostalgic, retro-style animations that make even the most complex concepts feel simple and fun. His real, no-fluff talk in every video delivers deep, practical knowledge that actually sticks - turning technical topics into something you genuinely enjoy learning.
**Who it's best for:** Intermediate to advanced learners who want Kubernetes content that reflects what real deployments actually look like - including the failure modes, tradeoffs, and operational realities that most tutorials skip.
🤔
****Why follow this channel?**
Community consistently praises it for honesty, he says when things are hard, not just when they work. GitOps and ArgoCD content is among the best available on YouTube. Multi-cluster and production Kubernetes scenarios are covered in depth. No hype, the tone is a practical engineer talking to practical engineers.
**Verdict:** One of the most trusted voices in the Kubernetes space, precisely because Marcel does not oversimplify. When you are ready for production-level content, this channel is a regular stop.
[YouTube | That DevOps Guy](https://www.youtube.com/@MarcelDempers?ref=linuxhandbook.com)
## KubeSimplify - Best Channel Focused Entirely on Kubernetes
KubeSimplify does one thing: Kubernetes. Not Docker fundamentals, not cloud basics, Kubernetes concepts, tools, and ecosystem in depth. The channel covers Helm, Kustomize, GitOps, cluster management, networking, and Kubernetes tooling with a focus on making concepts clear through practical demos.
[The Kubernetes Course](https://youtu.be/EV47Oxwet6Y?si=68ghos%5FLQe7sbssA&ref=linuxhandbook.com) by him is one of the suggested courses for gaining complete knowledge of Kubernetes.
**Who it's best for:** Learners who have Docker and basic Kubernetes knowledge and want to go deep specifically into the Kubernetes ecosystem - Helm, GitOps, cluster operations, RBAC, networking policies, and more.
🤔
****Why follow this channel?**
One of the few channels focused entirely on the Kubernetes ecosystem rather than splitting attention with other topics. Kustomize and Helm content is well-structured and goes beyond basic usage. Covers CNCF projects that most DevOps channels skip. Practical demo-first style that shows things working before explaining them.
**Verdict:** The go-to channel when you are ready to move beyond `kubectl apply` and actually understand how Kubernetes production setups are built.
[YouTube | KubeSimplify](https://www.youtube.com/@kubesimplify?ref=linuxhandbook.com)
## Bret Fisher - Best for Docker and Kubernetes Live Q&A
Bret Fisher has been teaching Docker since before it was cool. His live sessions are a masterclass format that few channels match: real questions from real engineers, answered in real time with actual Docker and Kubernetes context - not scripted scenarios.
[**Cloud Native DevOps and Docker Talk**](https://youtube.com/playlist?list=PLX0bTycx8m-UhIXY2c4-7AXaEokaTdn6S&si=0dvEv9u-MDNKkjJd&ref=linuxhandbook.com) is a series popular for live shows with Q&A and guests from the cloud native ecosystem.
**Who it's best for:** Intermediate learners who have hit real-world problems they cannot find answers to in tutorials - Bret's live Q&A sessions are specifically good for the gap between "tutorial worked" and "production is broken."
🤔
****Why follow this channel?**
Docker live streams answer the questions that tutorials never cover. One of the most experienced Docker practitioners producing free content in 2026\. Q&A format surfaces real engineering problems, not artificial examples. Docker Swarm, Kubernetes networking, and production container issues are handled well.
**Verdict:** Once you have real Docker and Kubernetes problems, not just tutorial exercises - Bret Fisher's Q&A sessions are one of the most valuable resources available for free.
[YouTube | Bret Fisher](https://www.youtube.com/@BretFisher?ref=linuxhandbook.com)
## Anton Putra - Best for Production-Grade AWS, Terraform, and Kubernetes Content

Anton Putra is the channel community calls "underrated gem" on a regular basis, and the description is accurate. The content is production-grade: real AWS architectures, Terraform modules that reflect actual engineering decisions, Kubernetes setups built the way teams actually build them, not simplified for beginners.
[AWS EKS Kubernetes Tutorial](https://youtube.com/playlist?list=PLiMWaCMwGJXnKY6XmeifEpjIfkWRo9v2l&si=BcDQce0YH4TrGjAx&ref=linuxhandbook.com) is one of the recommended playlists for learning production-grade kubernetes learning.
**Who it's best for:** Advanced learners and working engineers who want content that reflects production reality - AWS infrastructure, Terraform state management, Kubernetes cluster operations, observability, and CI/CD at scale.
🤔
****Why follow this channel?**
One of the only free channels producing consistently production-accurate AWS + Terraform + K8s content. Terraform content goes beyond basics into module design and state management patterns. Real architectural decisions are explained, not just commands. Community repeatedly surfaces this channel as underappreciated relative to its quality.
**Verdict:** If there is one underrated channel on this entire list, it is Anton Putra. The quality-to-subscriber-count ratio is remarkable. Subscribe before the rest of the internet catches up.
[YouTube | Anton Putra](https://www.youtube.com/@AntonPutra?ref=linuxhandbook.com)
## Abhishek.Veeramalla - Best for DevOps Roadmap, Real Projects, and Interview Preparation
Abhishek Veeramalla has built one of the fastest-growing DevOps channels by doing something most channels avoid: being explicit about what you need to learn, in what order, and why - from the perspective of someone actively placing engineers into DevOps roles. The channel covers projects, roadmaps, and interview preparation with rare practical clarity.
[DevOps Engineer in 3 months](https://youtube.com/playlist?list=PLdpzxOOAlwvIc1TjTwopNSjRJkzES2ZXk&si=HGDf-igTTHuS%5FWna&ref=linuxhandbook.com) is the playlist many people follow to learn DevOps. He is also covering topics like AI assisted DevOps, Learning, DevSecOps and many more.
**Who it's best for:** Beginners and intermediate learners who want a clear learning roadmap, hands-on project walkthroughs, and honest interview preparation content - especially those targeting their first or second DevOps role.
🤔
****Why follow this channel?**
One of the clearest DevOps roadmap explanations available on YouTube. Project walkthroughs produce resume-ready artifacts. Interview prep content reflects what teams actually ask in 2026 DevOps interviews. Very popular in the global DevOps learner community, active comment sections.
**Verdict:** If you are building toward a DevOps role and want a channel that connects learning to employment outcomes, Abhishek Veeramalla is one of the most practically useful channels on this list.
## Jeff Geerling - Best for Ansible, Homelab Infrastructure and Automation

Special mention for Jeff Geerling, the internet's go-to resource for Ansible, not as a passing topic, but as a deep, ongoing practice. Beyond Ansible, his channel covers Raspberry Pi infrastructure, homelab automation, and systems topics that most DevOps channels do not touch, all with a level of technical depth that reflects decades of hands-on systems work.
[Homelab](https://youtube.com/playlist?list=PL2%5FOBreMn7FrsiSW0VDZjdq0xqUKkZYHT&si=CLkJE6mRZKdmgi4m&ref=linuxhandbook.com) playlist is one of the most popular ones viewers recommend for actual technical depth. [Ansible](https://youtube.com/playlist?list=PL2%5FOBreMn7FplshFCWYlaN2uS8et9RjNG&si=9UkOmVs2-xqKuUXt&ref=linuxhandbook.com) playlist contains all the content about Ansible, your one-stop solution for Ansible concepts.
**Who it's best for:** Engineers who want to master Ansible for real infrastructure automation, homelab enthusiasts who want to take their setup to a professional engineering level, and anyone who wants content that goes deep on systems topics.
🤔
****Why follow this channel?**
Books Ansible for DevOps and Ansible for Kubernetes are community standards; the channel extends that content. Homelab content bridges the gap between learning environments and production patterns. Honest, methodical approach, tests claims rigorously before publishing.
**Verdict:** For Ansible specifically - Jeff Geerling is the answer, full stop. The channel is what trustworthy, technically serious free content looks like.
[YouTube | Jeff Geerling](https://www.youtube.com/@JeffGeerling?ref=linuxhandbook.com)
## FAQ
You will have some questions in mind, so let me answer some of those.
**Do I need to watch all these channels?**
No. Most people get structured value from 2-3 channels at a time. Start with one beginner-friendly channel (TechWorld with Nana, Kunal Kushwaha, or NetworkChuck), add a hands-on or cert-focused channel (KodeKloud), and a specialized one based on your current tool focus. Add the rest as your skill level grows.
**What is the recommended order for a complete beginner?**
A practical sequence: NetworkChuck (comfort with Linux and Docker basics) → TechWorld with Nana (structured DevOps roadmap) → KodeKloud (hands-on labs and cert prep) → DevOps Directive or That DevOps Guy (production depth). Use Fireship throughout as a quick reference when you encounter new concepts.
**Are these channels still actively updated in 2026?**
All channels on this list are actively publishing as of April 2026\. Anton Putra and DevOps Directive publish less frequently but maintain consistent quality.
**Which channels are best specifically for Kubernetes?**
In rough order of depth: KubeSimplify (K8s-focused, breadth of ecosystem), That DevOps Guy (production realism), KodeKloud (cert prep), Anton Putra (cluster operations, Terraform + K8s integration). TechWorld with Nana has solid K8s fundamentals for beginners.
**Are these channels useful for someone already working as a DevOps engineer?**
Yes - specifically That DevOps Guy, Anton Putra, Jeff Geerling, KubeSimplify, and Bret Fisher. These four channels produce content that reflects real production decisions rather than learner-facing introductions. The others are better suited to foundational or intermediate learning.
**Which channels cover cloud platforms (AWS, Azure, GCP) beyond just containers?**
Anton Putra (AWS + Terraform depth), TrainWithShubham and Abhishek.Veeramalla (AWS projects), freeCodeCamp (platform-agnostic full courses), TechWorld with Nana (all three major cloud providers covered). KodeKloud has certification prep for AWS, Azure, and GCP certifications.
## Final recommendation
If you are just starting out: **TechWorld with Nana, trainwithshubham gives you the roadmap, KodeKloud gives you the practice.** Those two together cover what most DevOps learners need through the intermediate stage.
If you are preparing for certifications: **KodeKloud is the standard recommendation for a reason.** The CKA and CKAD prep content is the best free version available.
If you want production-level depth: **Anton Putra for infrastructure, That DevOps Guy for Kubernetes operations, Jeff Geerling for Ansible.** These three channels give you what textbooks and tutorials usually skip.
**If you know of a channel that deserves to be on this list, don't wait and drop it in the comments below!**
### Module 5 Practice Lab
URL: https://linuxhandbook.com/courses/opensearch/elk-module5-practice-lab/
Last updated: 2026-05-19T11:37:56.000Z
_This post is for paying subscribers only._
### Module 4 Practice Lab
URL: https://linuxhandbook.com/courses/opensearch/elk-module4-practice-lab/
Last updated: 2026-05-19T11:36:08.000Z
_This post is for paying subscribers only._
### Kibana for Debugging & Exploration
URL: https://linuxhandbook.com/courses/opensearch/kibana-debugging-exploration/
Last updated: 2026-05-19T11:35:13.000Z
_This post is for paying subscribers only._
### Security Basics
URL: https://linuxhandbook.com/courses/opensearch/security-basics/
Last updated: 2026-05-19T11:30:04.000Z
_This post is for paying subscribers only._
### ML Integration
URL: https://linuxhandbook.com/courses/opensearch/ml-integration/
Last updated: 2026-05-19T11:25:10.000Z
_This post is for paying subscribers only._
### Scaling OpenSearch
URL: https://linuxhandbook.com/courses/opensearch/scaling-opensearch/
Last updated: 2026-05-19T11:20:46.000Z
_This post is for paying subscribers only._
### Visualizations with Kibana
URL: https://linuxhandbook.com/courses/opensearch/kibana-visualization/
Last updated: 2026-05-19T11:12:47.000Z
_This post is for paying subscribers only._
### Kibana Basics
URL: https://linuxhandbook.com/courses/opensearch/kibana-basics/
Last updated: 2026-05-19T11:09:51.000Z
_This post is for paying subscribers only._
### Module 3 Practice Lab
URL: https://linuxhandbook.com/courses/opensearch/elk-module3-practice-lab/
Last updated: 2026-05-19T10:57:23.000Z
_This post is for paying subscribers only._
### Searching & Query DSL
URL: https://linuxhandbook.com/courses/opensearch/searching-query-dsl/
Last updated: 2026-05-19T10:55:44.000Z
_This post is for paying subscribers only._
### Indexing & Mapping
URL: https://linuxhandbook.com/courses/opensearch/indexing-mapping/
Last updated: 2026-05-19T10:54:24.000Z
_This post is for paying subscribers only._
### Why OpenSearch?
URL: https://linuxhandbook.com/courses/opensearch/why-opensearch/
Last updated: 2026-05-19T10:51:29.000Z
_This post is for paying subscribers only._
### Module 2 Practice Lab
URL: https://linuxhandbook.com/courses/opensearch/elk-module2-practice-lab/
Last updated: 2026-05-19T10:48:42.000Z
_This post is for paying subscribers only._
### Parsing & Enriching Logs
URL: https://linuxhandbook.com/courses/opensearch/parsing-enriching-logs/
Last updated: 2026-05-19T10:44:29.000Z
_This post is for paying subscribers only._
### Logstash Fundamentals
URL: https://linuxhandbook.com/courses/opensearch/logstash-fundamentals/
Last updated: 2026-05-19T10:35:51.000Z
_This post is for paying subscribers only._
### Module 1 Practice Lab
URL: https://linuxhandbook.com/courses/opensearch/elk-module1-practice-lab/
Last updated: 2026-05-19T10:34:37.000Z
_This post is for paying subscribers only._
### Your First OpenSearch Setup
URL: https://linuxhandbook.com/courses/opensearch/opensearch-setup/
Last updated: 2026-05-19T10:32:49.000Z
_This post is for paying subscribers only._
### ELK Stack Architecture
URL: https://linuxhandbook.com/courses/opensearch/elk-stack-architecture/
Last updated: 2026-05-19T10:22:16.000Z
_This post is for paying subscribers only._
### Introduction to ELK Stack
URL: https://linuxhandbook.com/courses/opensearch/elk-stack-intro/
Last updated: 2026-05-19T10:19:46.000Z
_This post is for paying subscribers only._
### The ELK Stack Handbook (With OpenSearch)
URL: https://linuxhandbook.com/courses/opensearch/
Last updated: 2026-05-19T10:14:53.000Z
You're debugging logs the hard way.
A single app on a single server is manageable. Ten servers? Fifty containers? Log files become a nightmare you can't grep your way out of.
Your current workflow at 2 AM:
```
$ ssh prod-server-01
$ tail -f /var/log/app.log # nothing obvious
$ ssh prod-server-02
$ grep -r "error" /var/log/ | awk '{print $5}'
# 20 minutes later... still piecing it together
```
The ELK Stack centralizes every log from every service into one searchable, visualizeable system. You go from **reacting to incidents** to **proactively catching them before they happen.**
💡
Why OpenSearch and not Elasticsearch?
In 2021, Elastic moved to a proprietary licence. OpenSearch, Amazon's Apache 2.0 fork, kept everything free: built-in TLS, SQL queries, anomaly detection, and alerting. We use OpenSearch throughout this course. The API is nearly identical to Elasticsearch, so everything you learn transfers directly.
## What you'll learn
🏗️ **ELK Architecture:** How logs flow from your app through Logstash into OpenSearch and out to dashboards.
⚙️ **Logstash Pipelines:** Parse, filter, and enrich raw logs before they hit your index.
🔍 **Query DSL & Indexing:**Search across millions of log events in milliseconds.
📊 **Kibana Dashboards:** Build visualisations that surface patterns raw log files never could.
🔒 **Security & Access Control:** TLS, users, roles — features Elasticsearch charges for, free on OpenSearch.
🤖 **ML-Powered Anomaly Detection:** Let OpenSearch flag unusual patterns before your users notice them.
📈 **Scaling OpenSearch:** From a single node to a cluster that handles production traffic.
💡
Each module has a practice lab. So you learn by doing it.
## Who this course is for?
✅ **Linux / DevOps Engineers:** You manage servers and containers and want a proper observability stack without Elastic's licensing fees.
✅ **Backend Developers:** You deploy apps and want to understand what's actually happening in production when things break.
✅ **SRE / Platform Engineers:** You need centralised logging across microservices and want a self-hosted solution you fully control.
✅ **Teams Migrating Off Elastic:** You're moving away from paid tiers and want to get up to speed on OpenSearch fast.
## Start learning today
Stop reacting. Start observing.
Everything you need to build a production-grade observability stack. Free, open source, and ready to deploy.
Included with Linux Handbook Pro.
### I Stopped Using VMs for Demos, and I Run Linux in the Browser Now
URL: https://linuxhandbook.com/blog/webtop-instead-of-vms/
Last updated: 2026-05-14T07:25:19.000Z
For years, my default setup for Linux demos was simple. Spin up a virtual machine, configure the environment, take a snapshot, and hope nothing breaks during the presentation.
In fact, my old demo setup was a collection of [virtual machines](https://linuxhandbook.com/virtualization/) I'd accumulated over the years. One for Docker demos, another for Kubernetes workshops, and a third one, a Debian box for shell scripting sessions. Each one sat on my SSD, consuming gigabytes of space and demanding occasional updates just to stay usable.
The breaking point came during a Kubernetes workshop I was running remotely. Screen sharing was already choppy because OBS, Chrome, and the VM were all fighting over the same CPU. Then the VM froze mid-demo during a kubectl walkthrough. The audience waited in silence. I got it working again, but the rhythm of the session never recovered.
That evening, I started looking for something better. I found Webtop, and it quietly replaced most of that VM setup.
## What Webtop Actually Is
[Webtop](https://github.com/linuxserver/docker-webtop?ref=linuxhandbook.com) is a Linux desktop environment packaged inside a Docker container and accessible entirely through a browser. You start the container, open a browser tab pointing to port 3000, and a full Linux desktop appears.
[LinuxServer.io](https://www.linuxserver.io/?ref=linuxhandbook.com) maintains this project. The same group provides container images for Jellyfin, Nextcloud, and dozens of other self-hosted tools.
What surprised me when I first launched it was how complete the experience felt. You get a real desktop environment, with the option to choose from XFCE, KDE, MATE, or others, depending on the image, with a terminal, file manager, and the ability to install packages normally through apt, dnf, or whatever the base distro uses. It behaves like a lightweight remote workstation that happens to live in your browser.
## Getting It Running
The quickest path is Docker Compose or [Podman Compose](https://linuxhandbook.com/courses/podman/podman-compose/). Here's the configuration I started with:
💡
Podman is an alternative to Docker. It's rootless by default and daemonless. We have a [free course on Podman](https://linuxhandbook.com/courses/podman/).
```
services:
webtop:
image: lscr.io/linuxserver/webtop:ubuntu-xfce
container_name: webtop
security_opt:
- seccomp:unconfined
environment:
- PUID=1000
- PGID=1000
- TZ=Asia/Kolkata
volumes:
- ./config:/config
ports:
- 3000:3000
shm_size: "1gb"
restart: unless-stopped
```
Install WebTop Using Docker Compose
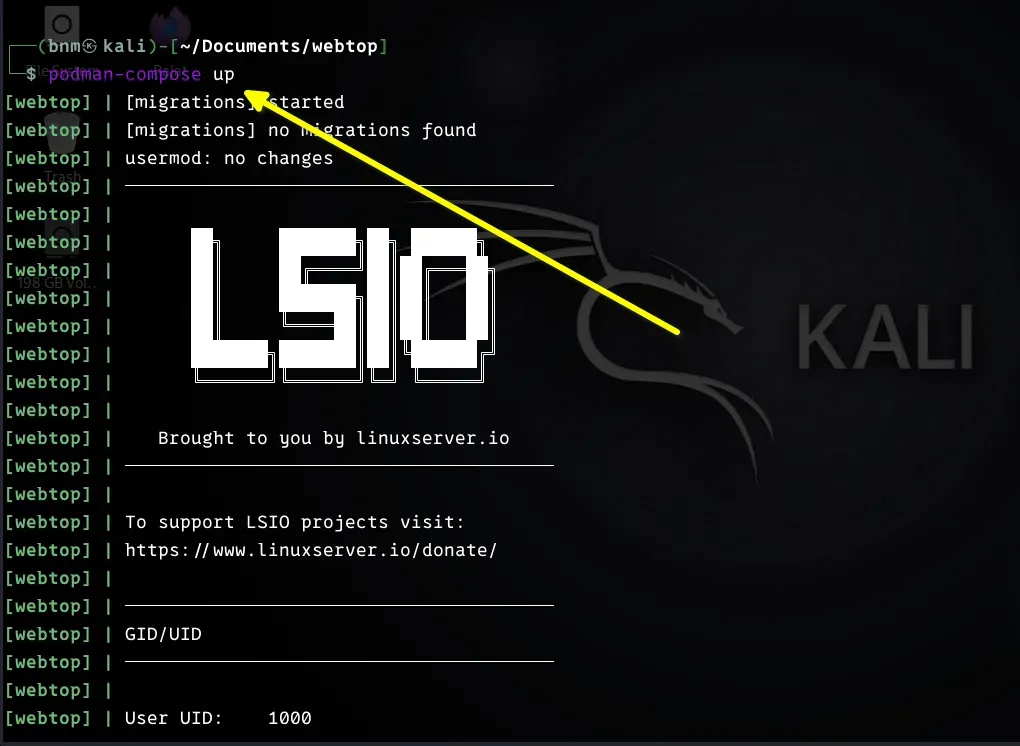
Running `docker compose up -d` and then navigating to `http://[SERVER-IP]:3000, or http://localhost:3000` genuinely all it takes. The first boot took maybe 10 seconds before the desktop was usable.
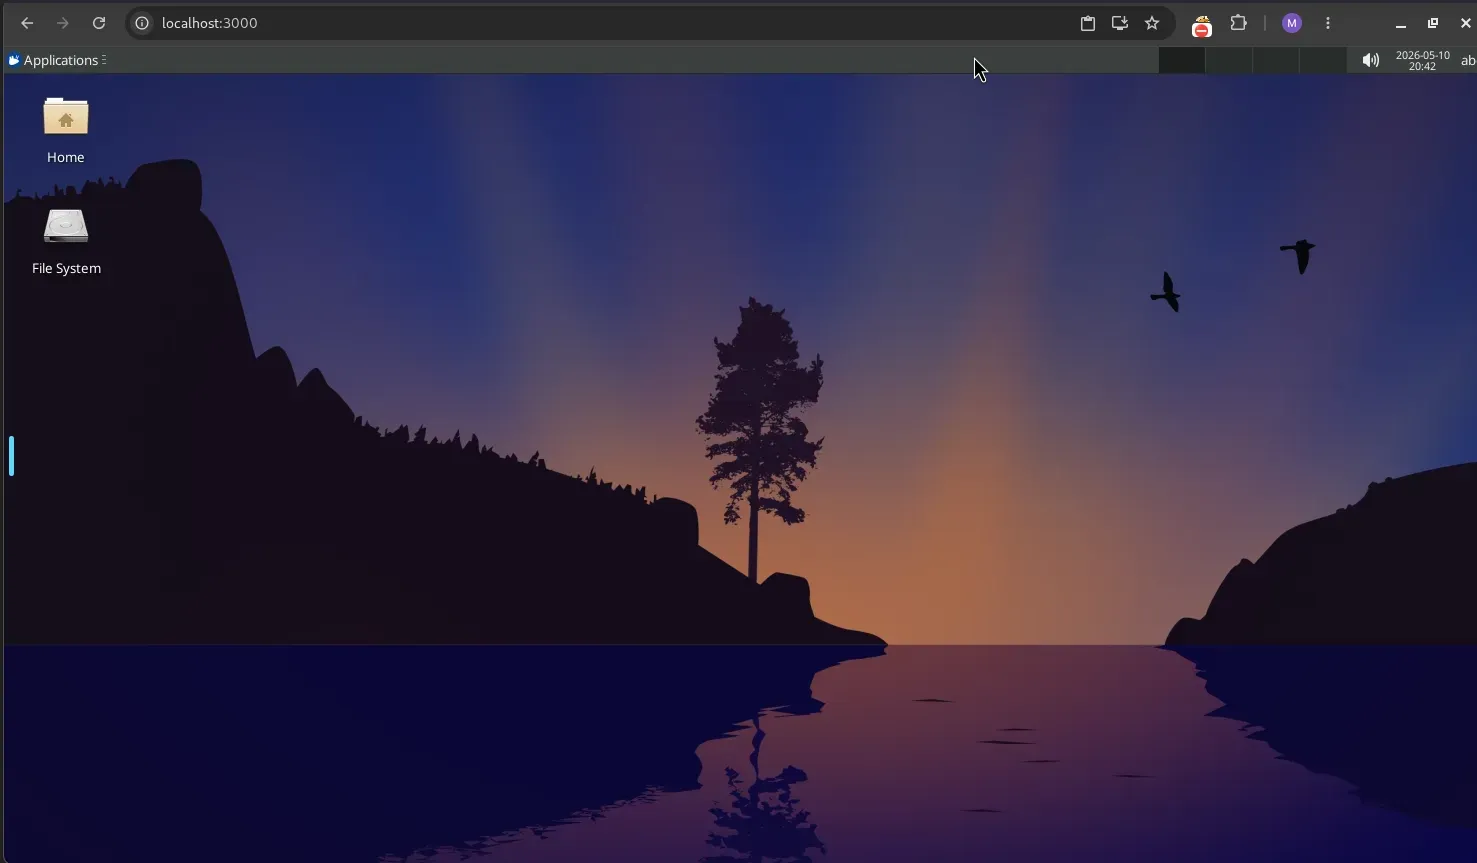
## Choosing the Right Image
Webtop supports multiple distributions and desktop environments. The available combinations include Ubuntu, Debian, Fedora, Alpine, and Arch, each paired with desktop options like XFCE, KDE, and MATE. You can find all related tags on the project's GitHub page.
From my practical experience, XFCE consistently performs best for demos and workshops. It's lighter on resources, and the responsiveness during screen sharing is noticeably better than KDE. KDE is visually polished and worth running if you have headroom, but when your machine is also running OBS, a browser, and a video call simultaneously, the extra weight shows.
Alpine is worth knowing about if you need something extremely minimal. Its image is tiny and starts almost instantly, but package availability is limited compared to Ubuntu or Debian. For most demo scenarios, `ubuntu-xfce` hits the right balance of familiarity, package ecosystem, and performance.
## Why This Works Better for Demos Than VMs
Recovery feels dramatically simpler. If I break something during a session, and with live demos, this happens. Restoring a VM means hunting for the right snapshot, waiting for it to load, and hoping the snapshot captured the right state. With Webtop, recovery looks like this:
```bash
docker rm -f webtop
docker compose up -d
```
That's it. A fresh environment in seconds.
Resource usage is another area where the difference is noticeable. A traditional Ubuntu VM with 8 GB allocated holds that memory whether it's being used or not. Containers are far more cooperative with the host system. After moving most of my demo environments to Webtop, I noticed the laptop fan spinning less during presentations and screen sharing becoming smoother.
## Building Reproducible Demo Environments
One thing I missed initially about VMs was the snapshot workflow. It's the ability to freeze a perfectly configured state and return to it. Webtop doesn't work that way, but the Docker approach is actually cleaner once you adjust your thinking.
Instead of snapshots, I build custom images. Here's an example Dockerfile for a Kubernetes demo environment:
```dockerfile
FROM lscr.io/linuxserver/webtop:ubuntu-xfce
RUN apt-get update && apt-get install -y \
docker.io \
kubectl \
helm \
neovim \
tmux \
htop \
git
```
Building that with `docker build -t demo-webtop .` produces an image I can launch anywhere, including on my homelab server, a VPS, a colleague's machine, and get an identical environment every time.
There are no multi-gigabyte VM disk files to transfer. The image is versioned, shareable, and rebuildable from scratch if needed. For a Kubernetes workshop I ran recently, I published the image so participants could run their own copy locally, which would have been considerably more complicated to coordinate with traditional VM images.
## Accessing It Remotely
Browser-based access turned out to be more valuable than I expected. I can reach my Webtop environments from any device with a browser. That portability genuinely changed how I work while traveling.
For remote access, I put Webtop behind a reverse proxy with HTTPS and authentication. Running it directly to the internet without any protection is a bad idea. You'd be serving an unauthenticated Linux desktop to the world. Here is an example configuration for Caddy:
💡
Caddy is a web server written in Go. What separates it from Nginx or Apache is its automatic HTTPS behavior. The moment you point a domain at a server running Caddy and add it to the Caddyfile, Caddy contacts Let's Encrypt, obtains a certificate, and begins renewing it before it expires.
```
webtop.lhb-tut.com {
basicauth {
bndev $2a$14$ebc7C6dlwFafmtZmfQ4vKe2ToQsTe6nWbV3k3ky6HAwLQr76u1l8m
}
reverse_proxy webtop:3000
}
```
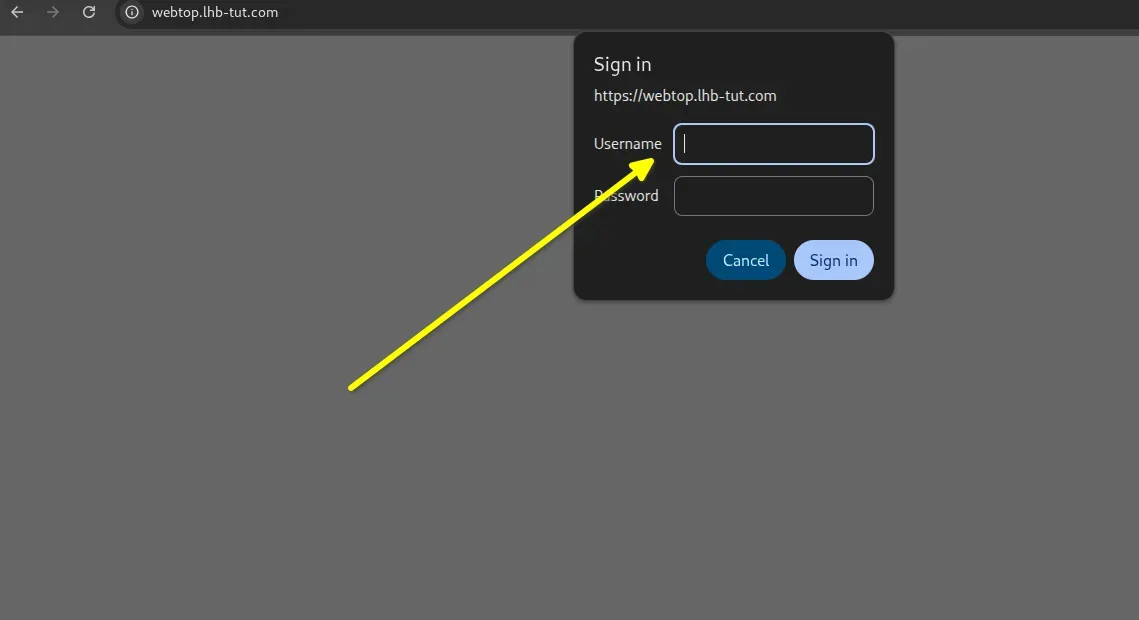
Securing Webtop with Caddy basic authentication
My current setup uses Tailscale for network-level access control and Caddy for HTTPS termination.
Traefik and Cloudflare Tunnels are both solid alternatives, depending on your existing infrastructure. The key principle is the same regardless of tooling: don't expose port 3000 publicly without something in front of it.
## What It Doesn't Handle Well
Webtop isn't a universal replacement for VMs, and overselling it would be dishonest. There are categories of work where I still reach for a traditional hypervisor without hesitation.
Kernel development and anything requiring full `systemd` Support needs a real VM. Container isolation isn't equivalent to hardware virtualization, and some low-level work simply requires full-stack virtualization and nested virtualization.
💡
With nested virtualization, a guest VM itself acts as a hypervisor and runs additional VMs inside it.
Low-level networking labs where you need to demonstrate VLAN behavior, DHCP servers, or raw packet analysis at the hardware interface level are also better suited to VMs, because container networking abstracts away exactly the things you're trying to show. Similarly, malware analysis and security sandboxing, where strong isolation is the whole point, shouldn't be done in a container environment.
GPU-accelerated workloads, video editing, and anything that genuinely needs graphics hardware won't be served well by Webtop. The rendering pipeline is inherently software-based, and the limitations are obvious in GPU-heavy applications. For terminal work, admin demos, and development environments, this is rarely relevant, but it's worth knowing upfront.
## Practical Situations Where It Shines
Training sessions where participants need identical environments are where Webtop provides the most obvious value. Instead of distributing VM images and debugging hypervisor incompatibilities across fifteen different laptop configurations, participants open a browser tab. That's a meaningful reduction in setup overhead and the inevitable "it doesn't work on my machine" troubleshooting.
The disposable workstation use case is one I didn't anticipate valuing, but I use it regularly. Sometimes I need a clean Linux environment to test a script, verify a package installation, or try something I don't want running on my main machine. Spinning up a Webtop container, doing the work, and removing it takes a minute. The equivalent with VMs took considerably longer and left behind disk state to clean up.
## Final Thoughts
I went into Webtop expecting curiosity. What I found was something that genuinely improved a recurring frustration in my workflow. The demo environment problem, maintaining multiple VMs, managing snapshots, and dealing with hypervisor overhead, completely went away.
The tradeoff with VMs isn't that containers are strictly superior. The point is that for the specific problem of running Linux environments for demos, workshops, and quick testing, the browser-based container approach solves the actual pain points without introducing new ones.
If you're maintaining a collection of demo VMs and spending time managing snapshots and debugging hypervisor issues, it's worth an hour to spin up Webtop and see how it feels. The barrier to trying it is low enough that the experiment costs almost nothing.
### This Self-hosted App Saved me $10 a Month
URL: https://linuxhandbook.com/blog/shlink-review/
Last updated: 2026-05-12T07:39:43.000Z
If you've ever pasted a Bitly link into your marketing email and then checked your stats at the end of the month, only to find the analytics you actually wanted are locked behind a $10/month or $29/month plan, you've already felt the frustration that **Shlink** was built to solve.
**Shlink** is a self-hosted, open-source URL shortener built in PHP. It gives you your own short domain (like `yourdomain.com/abc`), full visit tracking with geolocation, a REST API, a web dashboard, custom slugs, and more, all running on your own server. No per-link limits, no monthly bills, no vendor lock-in.
With nearly **4.9k stars on GitHub** and **151 releases** at the time of this writing, Shlink is not an experimental side project. It's a mature, actively maintained tool with real production deployments.
**Try it yourself**: [Shlink on GitHub](https://github.com/shlinkio/shlink?ref=linuxhandbook.com#self-hosted) | [Official website](https://shlink.io/?ref=linuxhandbook.com)
## What Is Shlink, Exactly?
Let's start with the basics. Shlink (short for "short link") is a PHP application that you run on your own server. You point a short domain at it, and from that moment on, every link you create under that domain is yours, the data, the tracking, the slugs, everything.
Think of it as the backend engine that powers a URL shortener service. Shlink itself doesn't have a graphical UI built in, but it comes with two ways to control it out of the box:
**A command-line interface (CLI)** \- run `shlink short-url:create https://your-long-url.com` and get a short link back instantly.
**A REST API** \- every operation available in the CLI is also exposed through a well-documented HTTP API, so you can integrate Shlink into any application or script.
And then, because most people don't want to manage links from a terminal forever, there's a **separate web client** called [Shlink Web Client](https://app.shlink.io/?ref=linuxhandbook.com), a progressive web app that connects to your Shlink API and gives you a proper dashboard to manage everything visually.
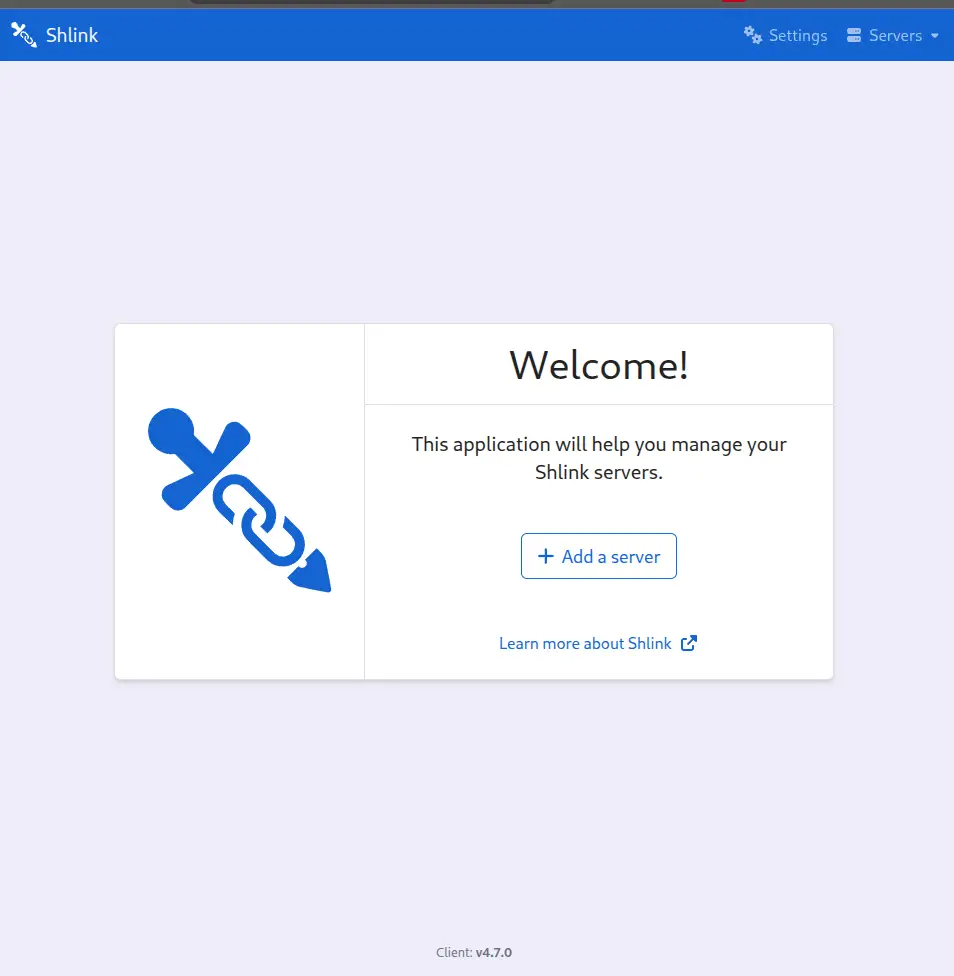
Shlink Web Client.
You can use the hosted version at `app.shlink.io` (it talks directly to your own self-hosted server), or you can self-host it too. This separation of concerns - backend API + frontend client is a deliberate architectural choice that makes Shlink incredibly flexible for integrations.
## How Does It Compare to Bitly?
Before diving into the features, let's be honest about who Bitly is and what they charge.
Bitly's free tier limits you to **50 links/month**. **2 QRs/month** (yes, only two). Branded links with your custom domain require the **Growth plan at \~$29/month**. Detailed analytics and API access push you toward the **Premium plan at \~$199/month**. And the free tier obviously comes with a lot of ads.
Now here's the thing - Shlink gives you all of the following completely free, running on your own VPS:
| Feature | Shlink (Self-Hosted) | Bitly Free | Bitly Growth (\~$29/mo) |
| -------------------- | ----------------------- | ----------------- | ----------------------- |
| Custom domain | ✅ Unlimited | 2 pages | 5 pages |
| Monthly links | ✅ Unlimited | 50 links | 500 links |
| Visit analytics | ✅ Full detail | ❌ | Upto 4 months data |
| Geolocation tracking | ✅ | ❌ | ✅ |
| REST API access | ✅ Full | ❌ | ✅ |
| QR code generation | ❌ handled by web client | ❌ | ✅ |
| Data ownership | ✅ 100% yours | ❌ Bitly's servers | ❌ Bitly's servers |
The trade-off is real: Bitly is plug-and-play, while Shlink requires a server to run on and some initial setup time. But if you already have a VPS or a home server, the case for Shlink is very strong.
**The $10/month savings angle**: If you're on even the cheapest Bitly paid plan ($10/month Core) just for the extra links, you're paying $120/year for something you could own outright. The math is obvious.
## Getting Shlink Running
The fastest way to get Shlink up is with Docker. The official image is published on both Docker Hub and GitHub Container Registry, and it handles all PHP dependencies internally.
**Quick Setup:**
```yaml
services:
shlink:
image: shlinkio/shlink:stable
container_name: shlink_review
restart: unless-stopped
ports:
- "8888:8080"
environment:
# The domain Shlink will use to build short URLs
DEFAULT_DOMAIN: localhost:8888
# HTTP only for local testing (no SSL cert needed)
IS_HTTPS_ENABLED: "false"
# GeoLite2 key for geolocation — get a free one at https://www.maxmind.com/en/geolite2/signup
# Leave as REPLACE_ME to start without geolocation (everything else works fine)
GEOLITE_LICENSE_KEY: "REPLACE_ME"
# Use SQLite — no external DB container needed for local testing
DB_DRIVER: "sqlite"
```
You can use this compose and have to replace the placeholder for the Geolite key with you key. After setting up you will be able to see the container running.

Shlink Container running.
There is a full list of commands for the CLI interaction of the shlink at the [official documentation](https://shlink.io/documentation/command-line-interface/entry-point/?ref=linuxhandbook.com).
## The Web Client: Your Dashboard for Everything
Once your Shlink backend is running, you connect it to the [Shlink Web Client](https://app.shlink.io/?ref=linuxhandbook.com). This is a **Progressive Web App (PWA),** meaning you can install it on your desktop or phone like a native app, and it works entirely in your browser.
Here's the key thing to understand: the web client **never stores your link data**. It just communicates with your own Shlink server via the REST API. The hosted version at `app.shlink.io` is simply a UI; all your data stays on your server.
Let's setup web-client to see how efficient it is to manage your server through a GUI.
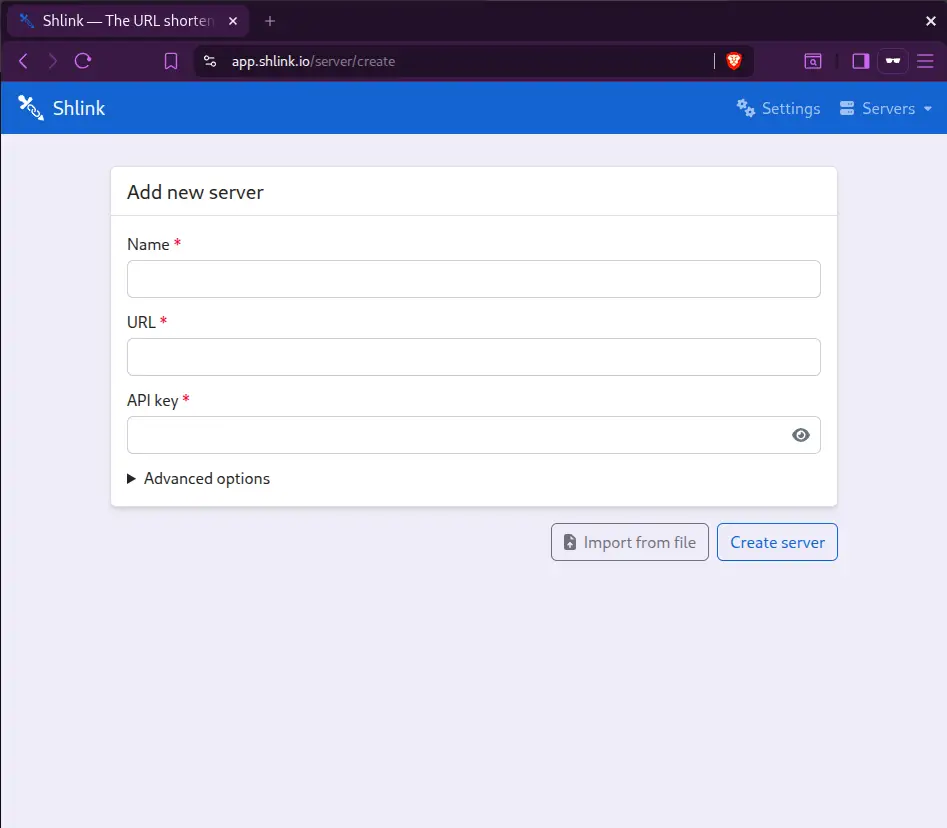
Create server setup on shlink web-client.
On this, you need to set up the name, URL and the API key generated by you through running the container. You can run the command:
```bash
docker exec -it shlink_review shlink api-key:generate
```
after configuring the server will be connected in 30-40 seconds.
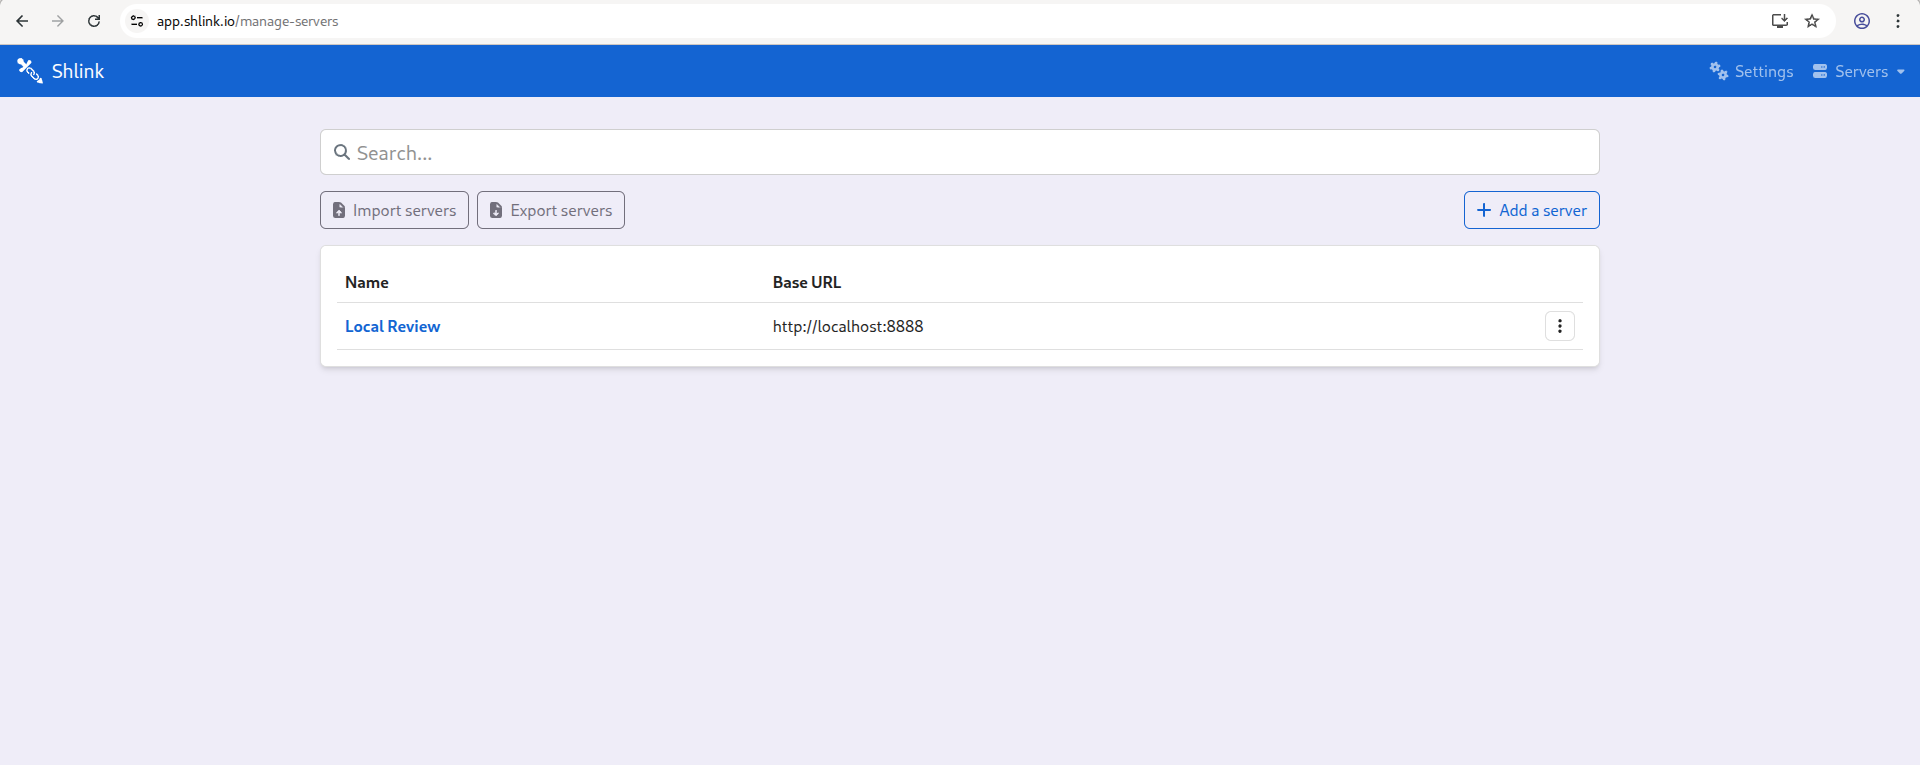
Self-Hosted server connected to web-client
In this you can create short URLs by clicking on Create short URL:
Shlink in action.
After setting up, the short links are activated and you get the analytics like visits, oprhan visits, short URL, tags, etc.
Hompage of shlink.
I was simply able to redirect to the main URLs from the short URL generated by shlink, it was consistent and no complex configurations for making a shortened URL.
Stats shown in shlink for every URL.
You get detailed stats according to the days, visits, visualizations, location, context, and exporting options for the stats report.
**Don't want to manage a server?** Shlink is available on [PikaPods](https://www.pikapods.com/pods?run=shlink&ref=linuxhandbook.com), which handles all the hosting for you with a one-click setup. Pricing starts at \~$2.3/ per month, and Shlink gets a portion of the revenue to fund the project.
## Core Features Worth Knowing About
### Custom Slugs and Multi-Segment Slugs
By default, Shlink auto-generates short codes like `s.yourdomain.com/abc123`. But you can set your own human-readable slug: `s.yourdomain.com/linux-guide` or even multi-segment slugs like `s.yourdomain.com/articles/linux-guide`.
Custom slug feature of shlink.
### Visit Tracking and Analytics
Every click on a short URL gets tracked. Shlink records: **Date and time** of the visit, **Country, region, and city**(via MaxMind GeoLite2 geolocation), **Device type** (desktop/mobile/tablet), **Browser and OS,** **Referrer**(where the visitor came from).
IP addresses are **anonymized by default**, which is what makes Shlink GDPR-compliant out of the box.
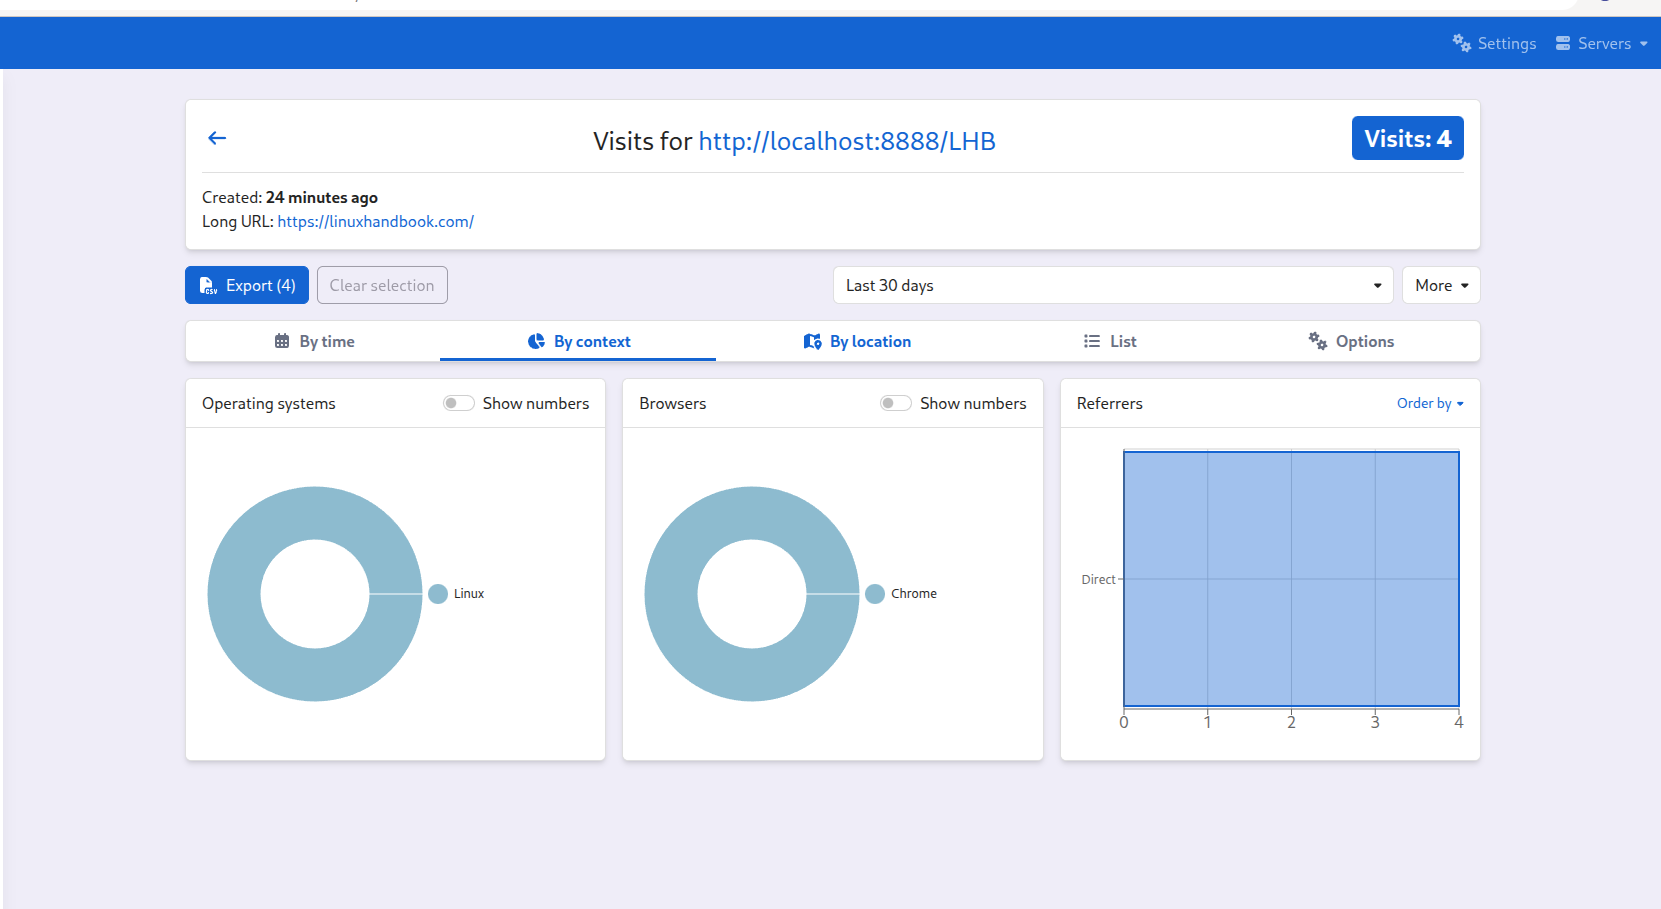
Analytics provided by shlink.
### Limited Access and Expiry
This feature alone is worth highlighting. You can set a short URL to: **Expire after a certain date** \- perfect for time-limited promotions or event links, **Expire after a maximum number of visits** \- create a link that only the first 100 people can use, and after that it shows a 404.
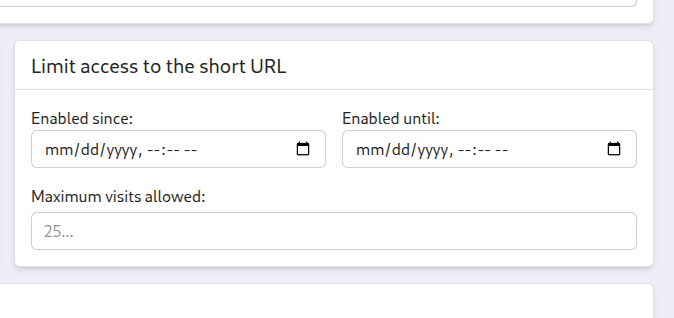
Limited Access and Expiry provided by shlink.
### Dynamic Redirects (Rule-Based)
Here's where Shlink goes beyond being a "simple" URL shortener. You can set up rules that redirect visitors to different destinations based on: **Geolocation**, **Device type**, **Language** and **OS.** This turns a short link into a smart redirect engine, which is something you'd normally need a dedicated link management platform to do.
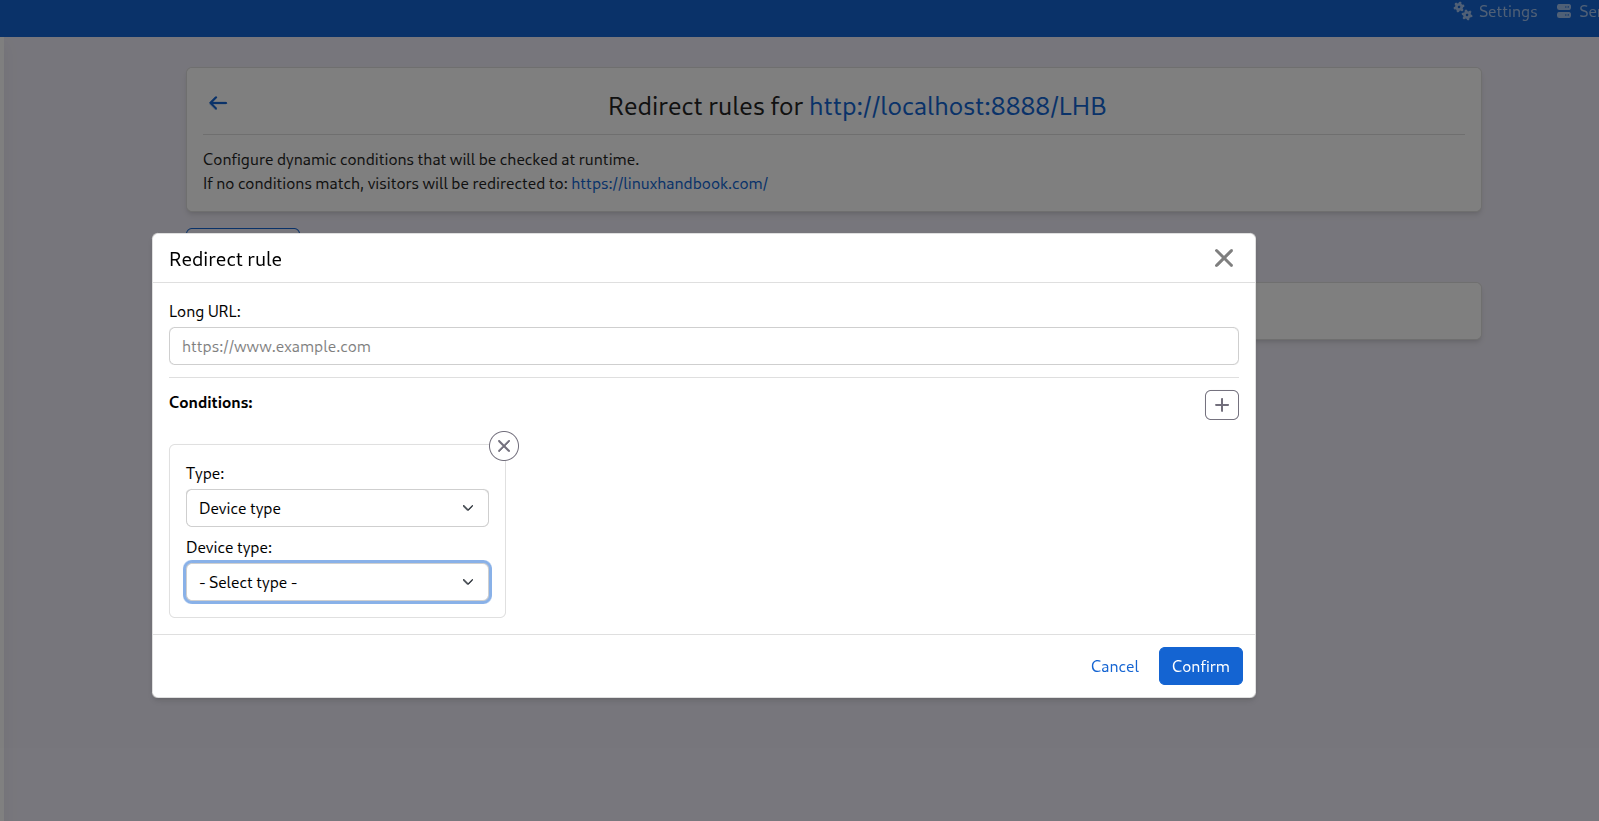
Dynamic redirects for the Short URLs.
## The REST API and CLI: For When You Want to Automate
Shlink's API is well-documented at [api-spec.shlink.io](https://api-spec.shlink.io/?ref=linuxhandbook.com), with an interactive sandbox where you can try every endpoint. Every operation you can do from the web client is available via the API and a few things (like API key management) are only available from the CLI or API, not the web client.
REST API spec documentation for shlink.
Some examples of what you can do with the CLI inside the Docker container:
```bash
# Create a short URL with a custom slug
docker exec my_shlink shlink short-url:create https://itsfoss.com/linux-guide --custom-slug linux-guide
# List all short URLs
docker exec my_shlink shlink short-url:list
# View visit stats for a specific short URL
docker exec my_shlink shlink short-url:visits linux-guide
# Generate a new API key with a name
docker exec my_shlink shlink api-key:generate --name "automation-script"
```
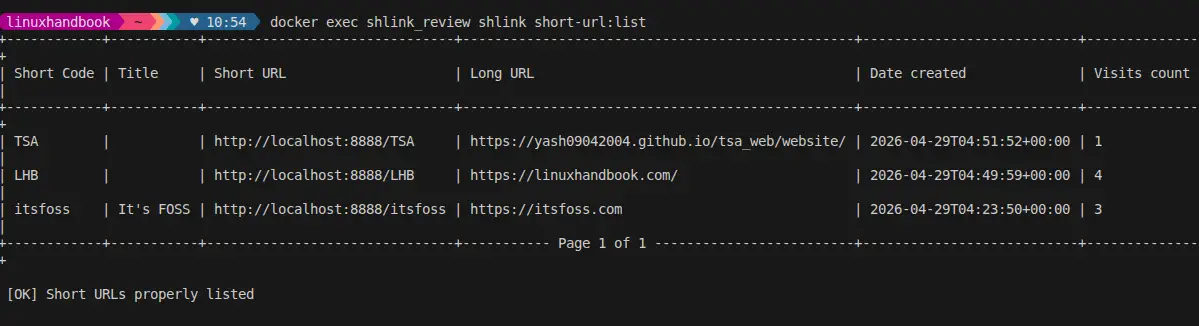
Shlink CLI in action.
The API makes Shlink a building block for larger systems. If you run a website, you can integrate Shlink to automatically generate short links for every new article you publish. If you send newsletters, you can use it to wrap all your links and get click tracking without any third-party service touching your subscriber data.
## Importing From Bitly (and Others)
If you're currently using Bitly and want to migrate, Shlink has a built-in importer. It can import existing short URLs from Bitly, YOURLS, CSV, Shlink, and kutt.
Import is performed from the command line, by running the `short-urls:import` command.
This command will guide you through the import process, asking you to provide the source from which you want to import, together with all required information for this process to succeed. The import preserves the original short codes where possible, so your existing links don't break after migration.
You can always refer to [official documentation](https://shlink.io/documentation/advanced/import-short-urls/?ref=linuxhandbook.com) for specific importing steps from different platforms.
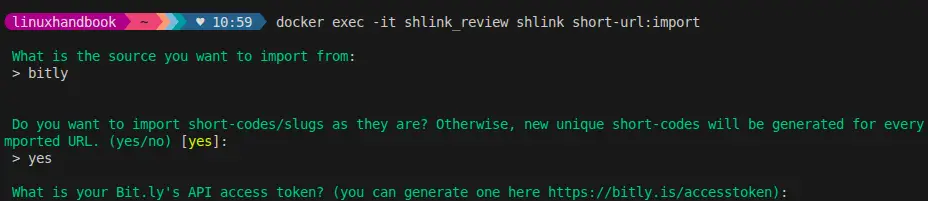
Importing URLs form Bitly.
## What Shlink Doesn't Do Yet
**There's no built-in multi-user authentication**. Shlink uses API keys for access control; there's no "create an account with a username and password" UI. If you want multiple people to manage links, you create separate API keys for them. This works, but it's not the polished team management experience you'd get from a SaaS product.
**The setup requires some technical comfort.** You need to understand Docker (or PHP server setup), DNS configuration, and reverse proxy configuration to get Shlink running with HTTPS and custom domains. It's not hard if you've done it before, but it's not a one-click install for beginners either.
**The GeoLite2 license key requirement is a minor friction point.** MaxMind's license key is free, but you have to register and include it manually. Without it, geolocation doesn't work. It's a licensing compliance thing, not a Shlink design flaw, but it adds a step.
**Real-time updates need extra infrastructure.** Shlink supports real-time visit notifications through Mercure or RabbitMQ, but you have to set those up separately. If you don't, the web client just refreshes on a polling interval, which works fine for most people.
## What Works Really Well
**The custom domain support is genuinely good.** Most self-hosted shorteners make you pick one domain. Shlink's multi-domain support means you can run personal, professional, and team link shorteners all from one installation.
**The analytics are far better than Bitly's free tier.** Country, device, browser, referrer - you get all of this without paying anything beyond your server cost.
**The API is excellent.** Every feature is accessible via the API with consistent, well-designed endpoints. If you want to integrate URL shortening into your workflow or build tooling around it, Shlink is designed for this use case.
**The Docker image is production-ready.** Non-root user execution (since v4.0.0), multi-architecture support (amd64 and arm64), proper versioning with `stable` and tags, it's thoughtfully packaged.
**151 releases and 4.9k stars.** This is not a tool that gets abandoned after six months. Shlink has been actively developed since 2016, maintained by [Alejandro Celaya](https://www.alejandrocelaya.com/?ref=linuxhandbook.com), and has a real community around it.
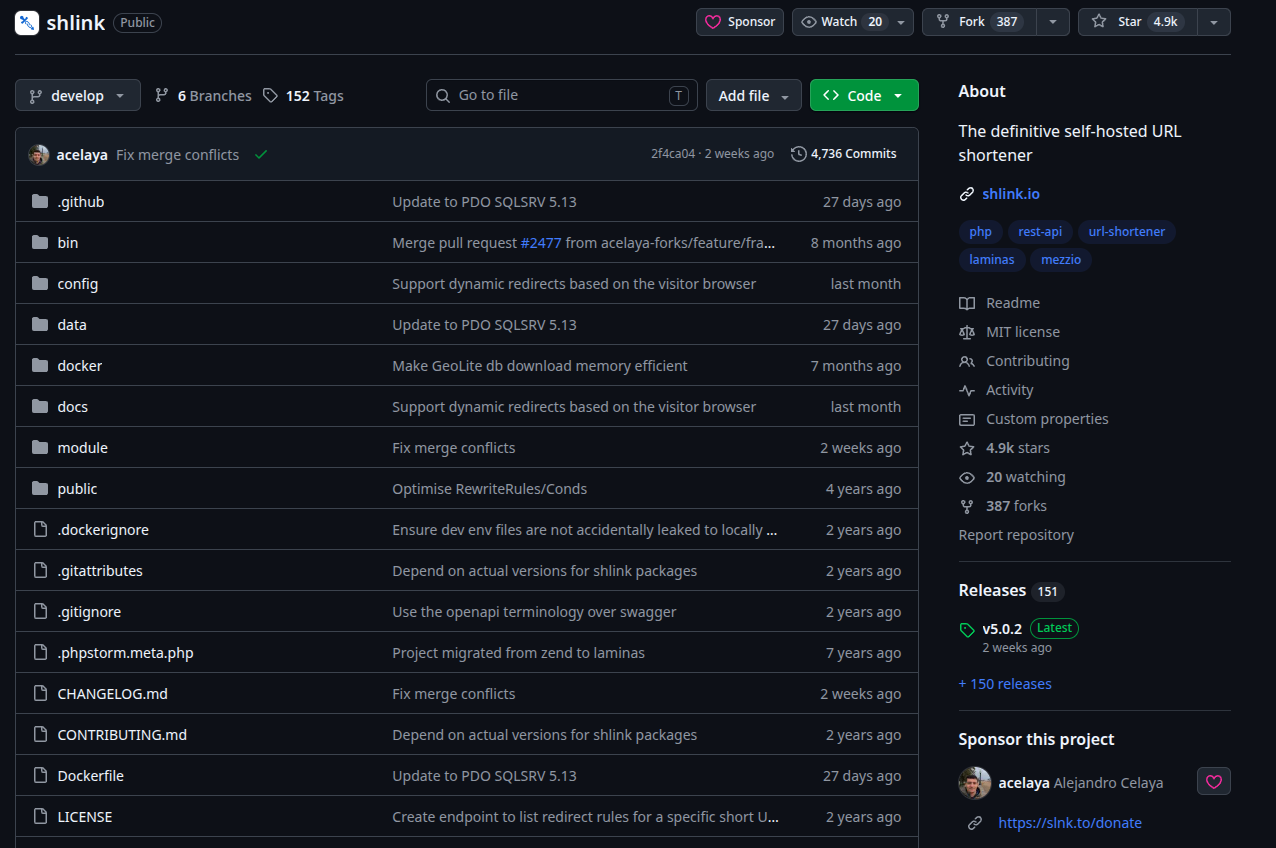
Github Page of shlink.
## Conclusion
Shlink does one thing and it does it very well: it gives you a professional-grade URL shortener that you actually control. The custom domain support, visit analytics, dynamic redirects, and REST API together make it a legitimate replacement for Bitly across most use cases, without the monthly subscription.
The setup does require some server knowledge, but it's well within reach for anyone who has deployed a Docker application before. The documentation is thorough, the project is actively maintained, and if you don't want to manage a server at all, PikaPods makes it a one-click deployment.
If you're currently paying Bitly $10–$30 a month for features that Shlink provides for free, this is worth a serious look.
### I Tried Self-Hosting This Authentication Project from CNCF (And It Was a Humbling Experience)
URL: https://linuxhandbook.com/blog/keycloak-experiment/
Last updated: 2026-04-20T10:38:06.000Z
In a world where authentication services charge per user and lock you into their ecosystem, Keycloak offers something rare: enterprise-grade identity management that you can run on your own infrastructure, completely free. No vendor lock-in, no monthly bills, no user limits.
After spending several days setting up [Keycloak](https://github.com/keycloak/keycloak?ref=linuxhandbook.com), integrating it with Portainer via OAuth, configuring social login with GitHub, and wrestling with the documentation gaps, here's what you need to know before diving in.
## What is Keycloak?
Keycloak is an open-source Identity and Access Management (IAM) solution that handles authentication and authorization for modern applications. Think of it as a self-hosted alternative to Auth0, Okta, or AWS Cognito, but without the per-user pricing or vendor lock-in.
It's a [CNCF](https://www.cncf.io/?ref=linuxhandbook.com) (Cloud Native Computing Foundation) project under the Apache 2.0 license, which means it's backed by a strong community and actively developed. It includes featuers like Single Sign-On (SSO), Social login (GitHub, Google, Gitlab, etc.), OAuth 2.0 and OpenID Connect (OIDC) and many more.
The selling point isn't just the feature list - it's that you get all of this without paying per user or worrying about what happens if the vendor shuts down.
## The Setup Challenge
Yes, I am mentioning it as a challenge because in the official documentation, there is no proper `docker-compose` file to set up the whole database with Keycloak. You're left piecing together environment variables from different documentation pages. After many trial-and-error attempts, here's my custom `docker-compose.yml` that actually works:
```YAML
services:
postgresql:
image: postgres:16
container_name: keycloak_db
environment:
POSTGRES_USER: keycloak
POSTGRES_DB: keycloak
POSTGRES_PASSWORD: SUPERsecret
volumes:
- ./postgres_data:/var/lib/postgresql/data
networks:
- keycloak
keycloak:
image: quay.io/keycloak/keycloak:26.5.3
container_name: keycloak
depends_on:
- postgresql
command: start-dev
environment:
- KC_BOOTSTRAP_ADMIN_USERNAME=admin
- KC_BOOTSTRAP_ADMIN_PASSWORD=admin
- KC_DB=postgres
- KC_DB_URL=jdbc:postgresql://postgresql:5432/keycloak
- KC_DB_USERNAME=keycloak
- KC_DB_PASSWORD=SUPERsecret
ports:
- "8081:8080"
networks:
- keycloak
networks:
keycloak:
```
In this,we have mentioned PostgreSQL container for the database, `./postgres_data` ensures your users and configurations survive container restarts and stay persistent using volumes, `KC_BOOTSTRAP_ADMIN_USERNAME` and `KC_BOOTSTRAP_ADMIN_PASSWORD` create the initial admin account, port mapping is done as `8081:8080` because port 8080 is often already taken on development machines, a **it,** custom network `keycloak` ensures Keycloak and PostgreSQL can communicate by service name.
Save the above file as docker-compose.yml and run the following command:
```bash
mkdir -p keycloak && cd keycloak
# Save the compose file above
docker-compose up -d
```
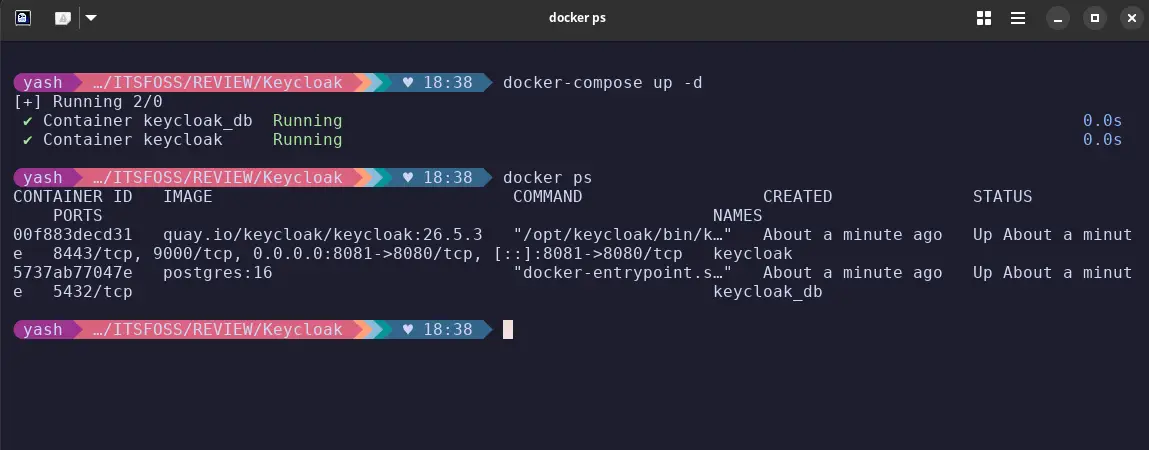
Keycloak running as a container.
Within 30-60 seconds, you'll have Keycloak running at `http://localhost:8081`.
## Initial Configuration
When you first access Keycloak, you'll land on the admin console login page. Use the credentials you set in `username` and `password` (in this case, `admin` / `admin`).
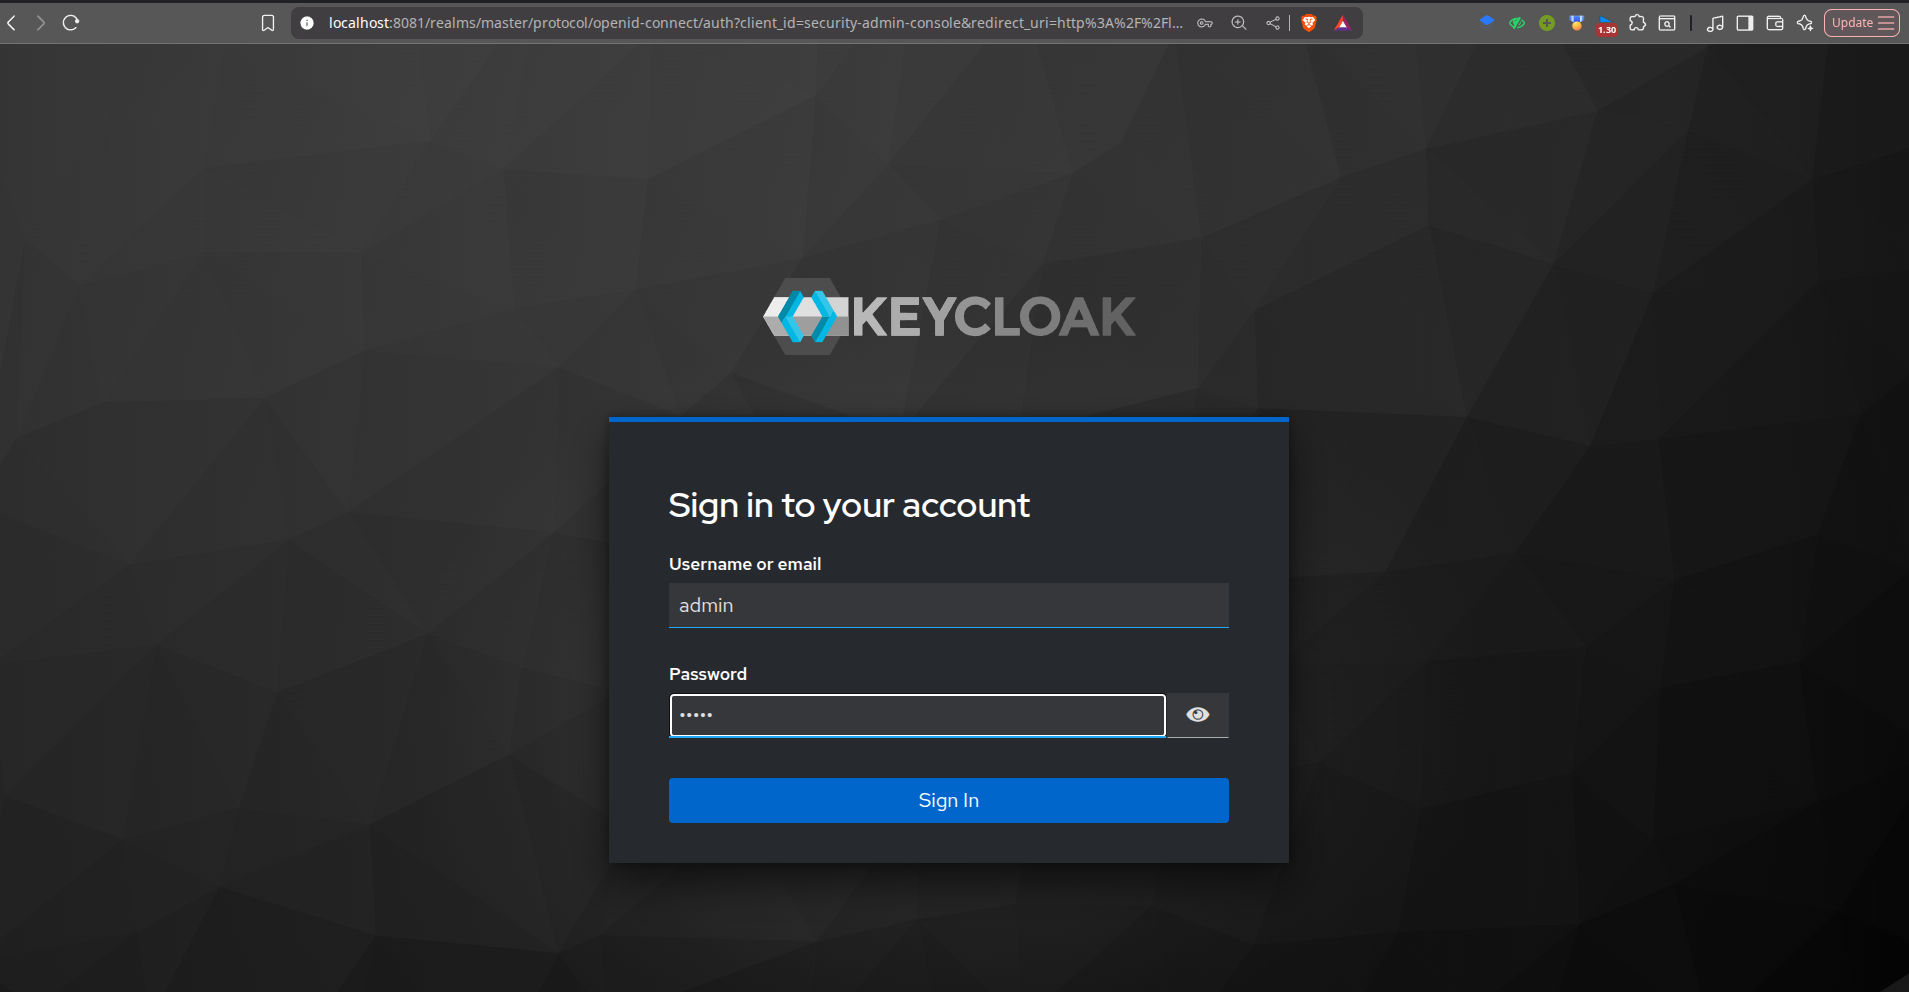
Initial Login Page.
Once logged in, you'll see the **master realm**. Realms in Keycloak are isolated spaces for managing users, clients, and authentication policies. The master realm is for administrative purposes only - you can create a separate realm for different applications.
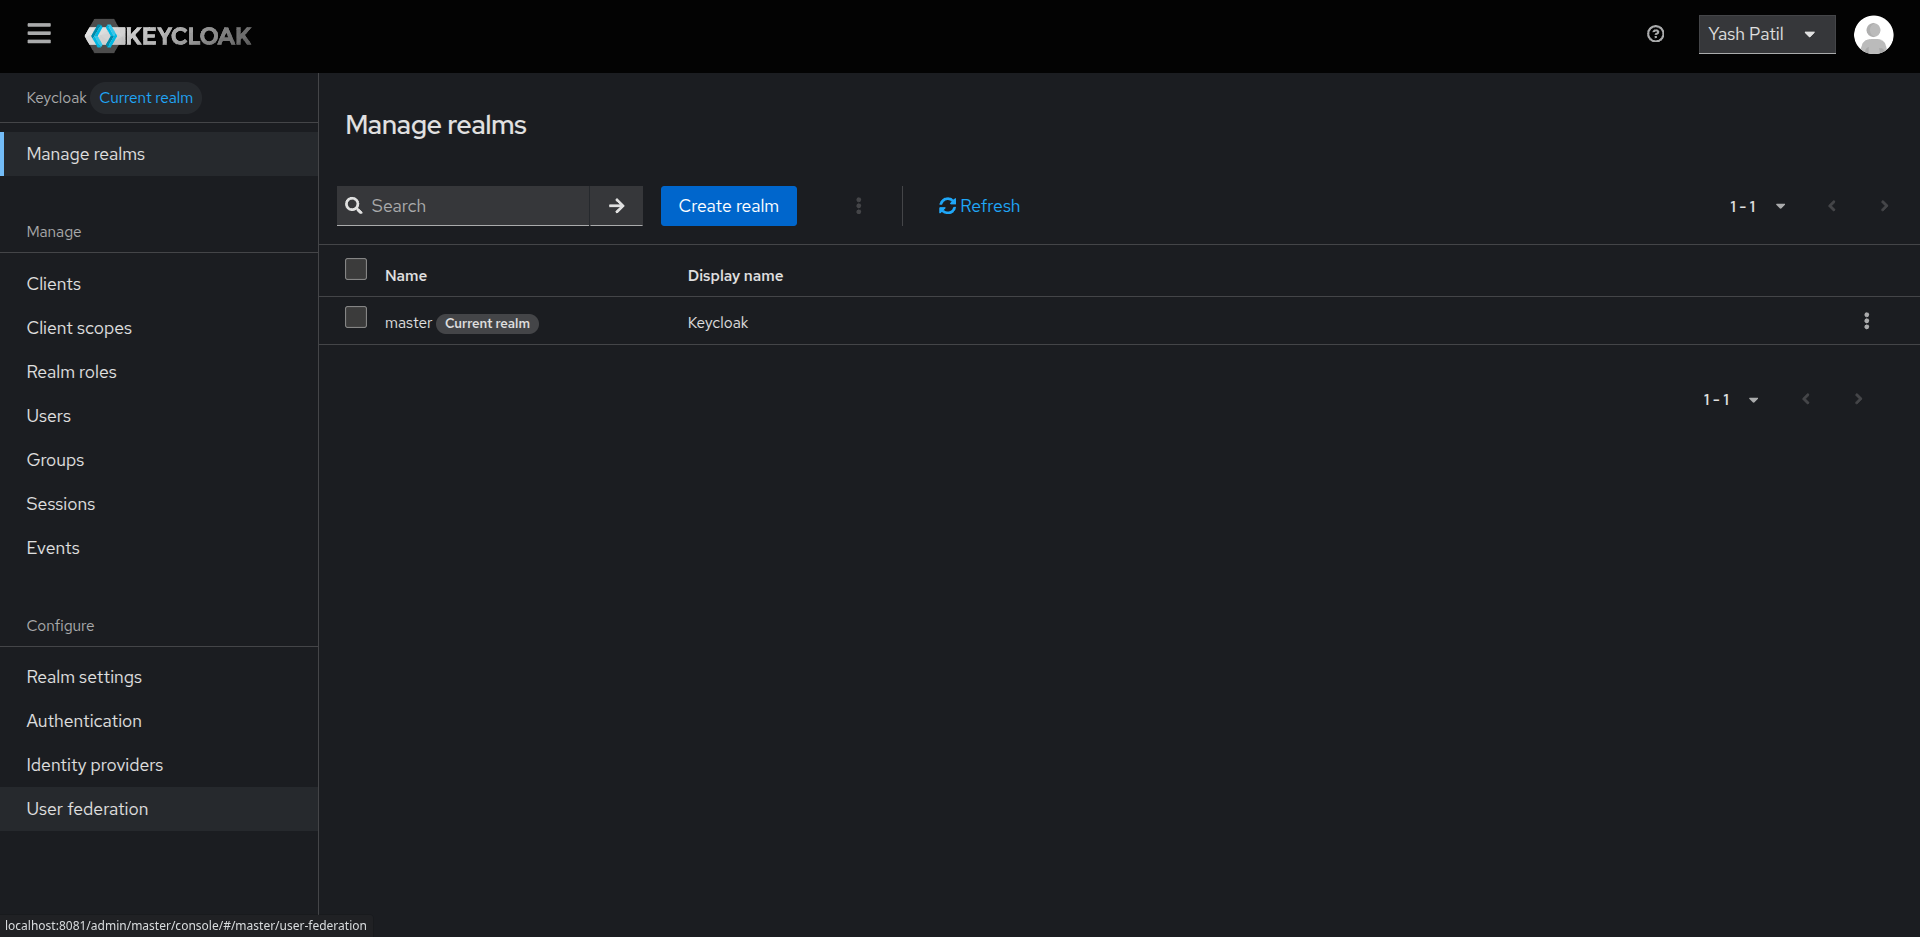
Managing realms in keycloak.
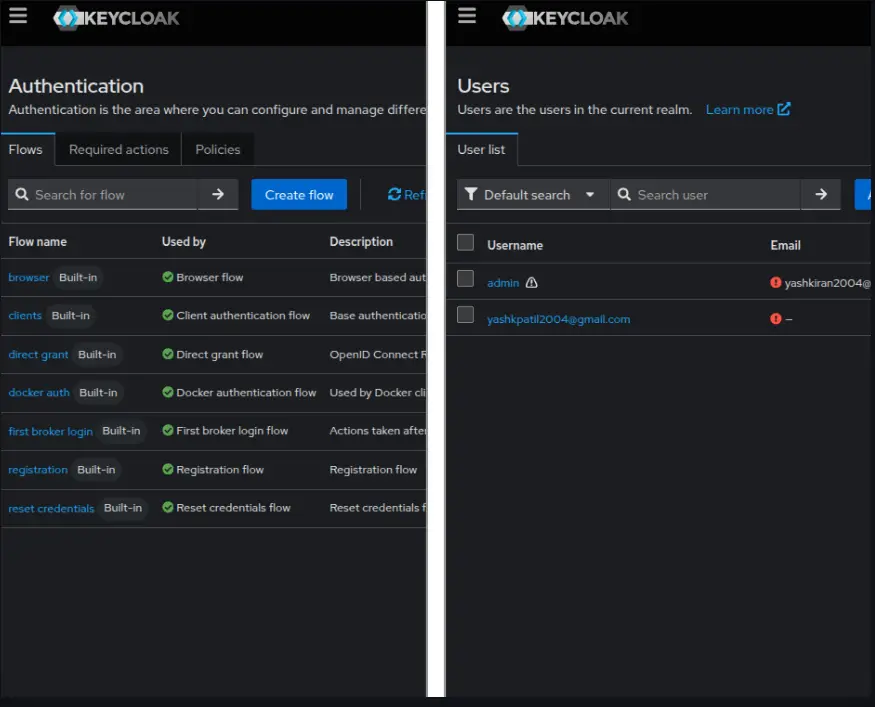
Authentication and Users in keycloak.
You can add Users, Groups, Events, etc., for your specific realm. You can add an email and verify it, which can be used later to add users and authenticate them.
## Real-World Test: Portainer OAuth Integration
The best way to understand Keycloak is to integrate it with a real application. Portainer (a Docker management UI) supports OAuth authentication, making it a perfect test case.
For this purpose, I have my Portainer running on port 9000, which shows me all the containers, images, networks, services, etc., running on my host machine.
You can run Portainer on your own by using the following command:
```bash
docker run -d -p 9000:9000 -p 9443:9443 --name portainer --restart=always -v /var/run/docker.sock:/var/run/docker.sock -v portainer_data:/data portainer/portainer-ce:lts
```
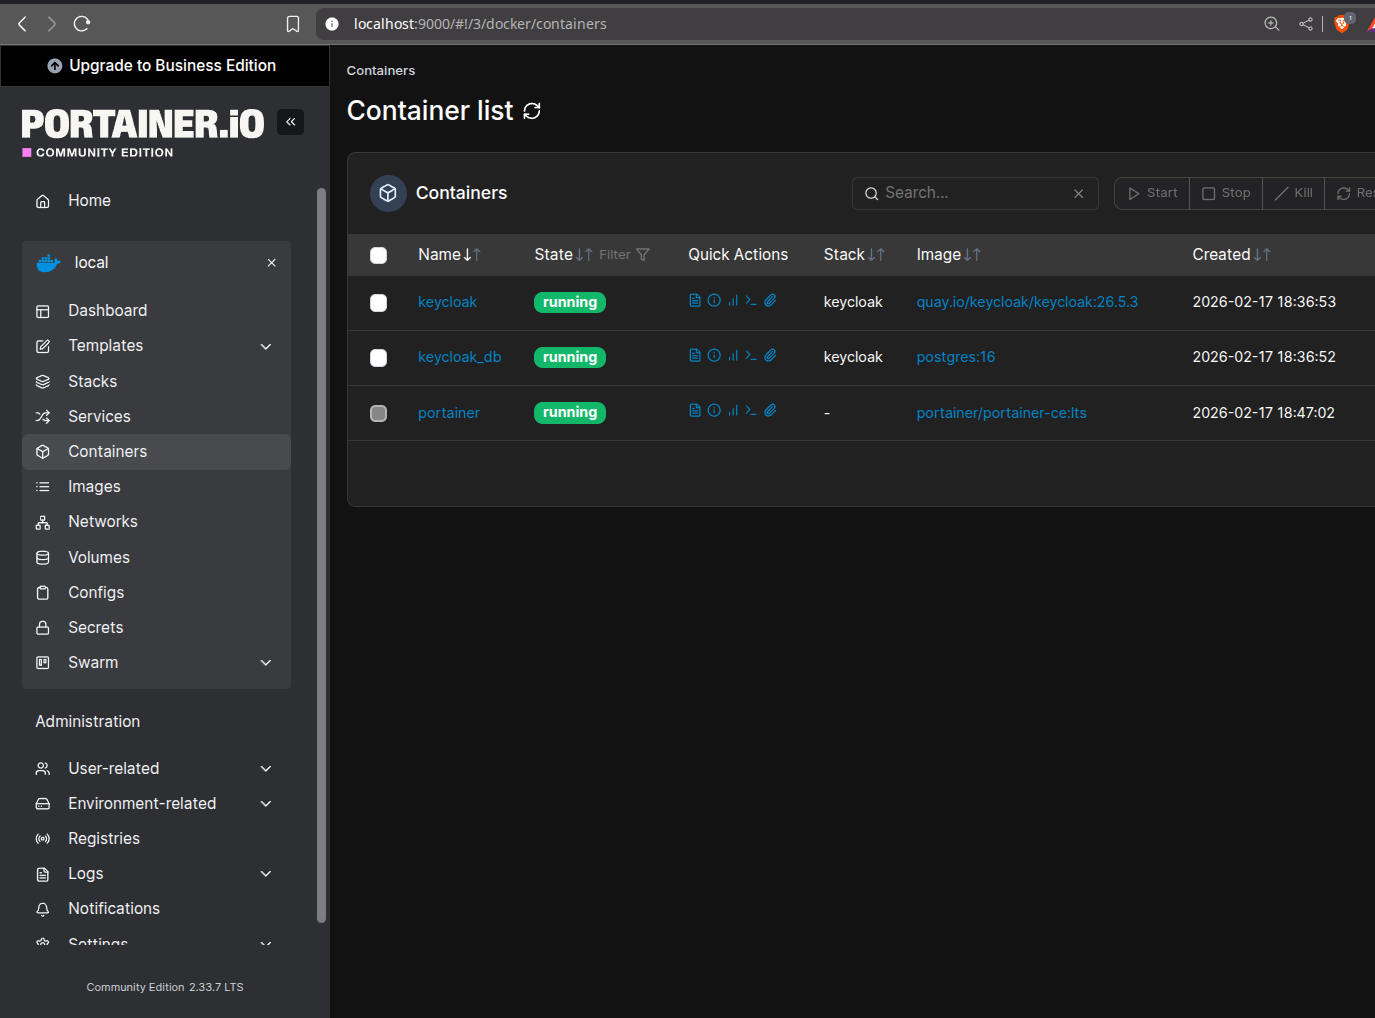
Self hosted Portainer running on localhost:9000\.
You will see the Portainer running on `localhost:9000` and showing all the results of your Docker stuff.
**Creating an OAuth Client:** For this, navigate to your **realm,** then open **Clients** and click on **create client**, here you need to paste the following so that it successfully connects to the portainer running on the system.
```Text
Client ID: portainer
Client authentication: ON (this generates a client secret)
Valid redirect URIs: http://localhost:9000/*
Valid post logout redirect URIs: http://localhost:9000/*
Web origins: http://localhost:9000
```
Client configurations in keycloak.
Save the client, then go to the **Credentials** tab and copy the **Client Secret**. You'll need this for Portainer.
**Configuring Portainer:** In Portainer, go to **Settings,** then **Authentication,**,navigate to **OAuth**, where you need to configure some things inorder to connect to the client created at keycloak and the portainer Oauth.
```Text
Client ID: portainer
Client secret: (paste the secret from Keycloak)
Authorization URL: http://localhost:8081/realms/myrealm/protocol/openid-connect/auth
Access token URL: http://localhost:8081/realms/myrealm/protocol/openid-connect/token
Resource URL: http://localhost:8081/realms/myrealm/protocol/openid-connect/userinfo
Redirect URL: http://localhost:9000/
User identifier: email
Scopes: email openid profile
```
Custom auth support in Portainer.
Then save the configurations and you are ready to test your Keycloak authentication.
**Testing the flow:** The actual test is to see if we can log out from the Portainer and see the login with OAuth, and as expected, after logging out from the portainer the login with OAuth button is visible in the Portainer.
Keycloak OAuth in action.
which redirects to the Keycloak sign-in page and if you have added the same user in the Keycloak with an active login session, then you will be able to log in to Portainer and be redirected to the homescreen with that user; the entire process happens seamlessly.
To be honest, as it is seamless in execution, I found it very complex and time consuming to configure the proper urls, as for the self hosted websites and architechture you need to configure the urls correctly handling the routes perfectly, otherwise there are many errors, like not redirecting to the correct destination, OAuth failed, url does not contains needed parameter, etc. that I faced during the configuration.
## Social Login Integration
One of Keycloak's standout features is built-in support for social login providers. Adding GitHub authentication takes about 5 minutes. I tested with GitHub Identity Provider.
**Setting Up:** In Keycloak, you can have options to add an **Identity Provider;** I have taken GitHub for example. There is a list of options for the Identity provider, you can choose any as per your need.
Identity providers supported in keycloak.
For GitHub, you need to go to your GitHub Profile → Settings → Developer settings → OAuth Apps → New OAuth App and set the Auth callback URL as `http://localhost:8081/realms/master/broker/github/endpoint`
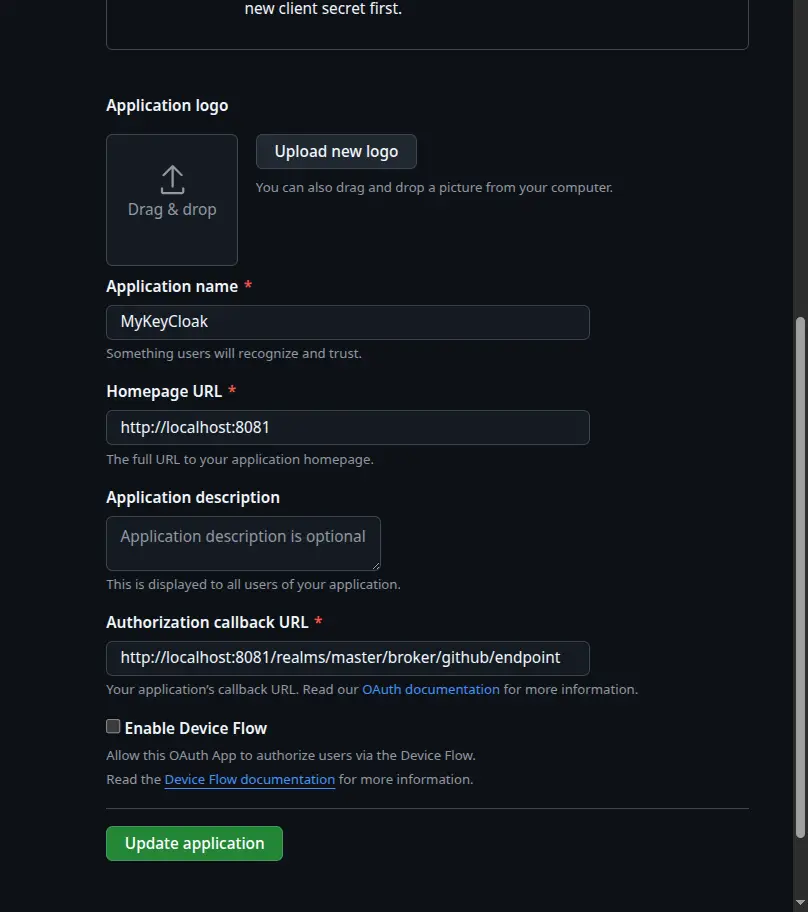
Setting OAuth for Github through keycloak.
Copy the **Client ID** and **Client Secret** from GitHub into Keycloak and save the identity provider configuration.
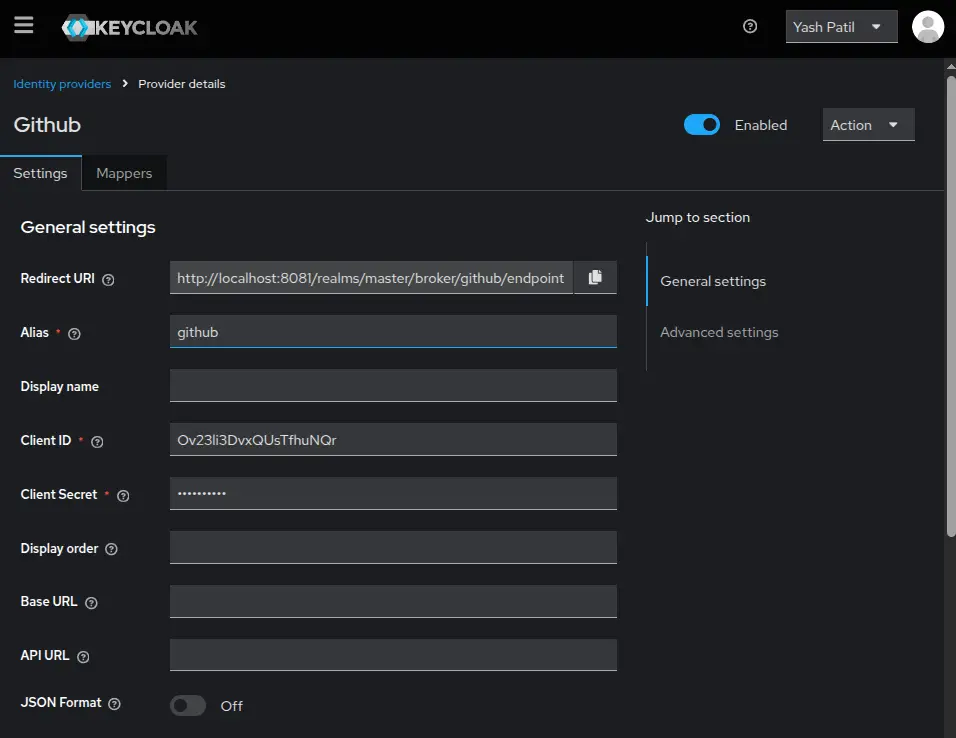
Settings for Identity Provider with credentials.
When a user logs in via GitHub for the first time, Keycloak automatically creates a user account and links it to their GitHub identity. You can see linked accounts in the user's account console.
After doing this, I was able to get the expected GitHub Identity Provider in the login window.
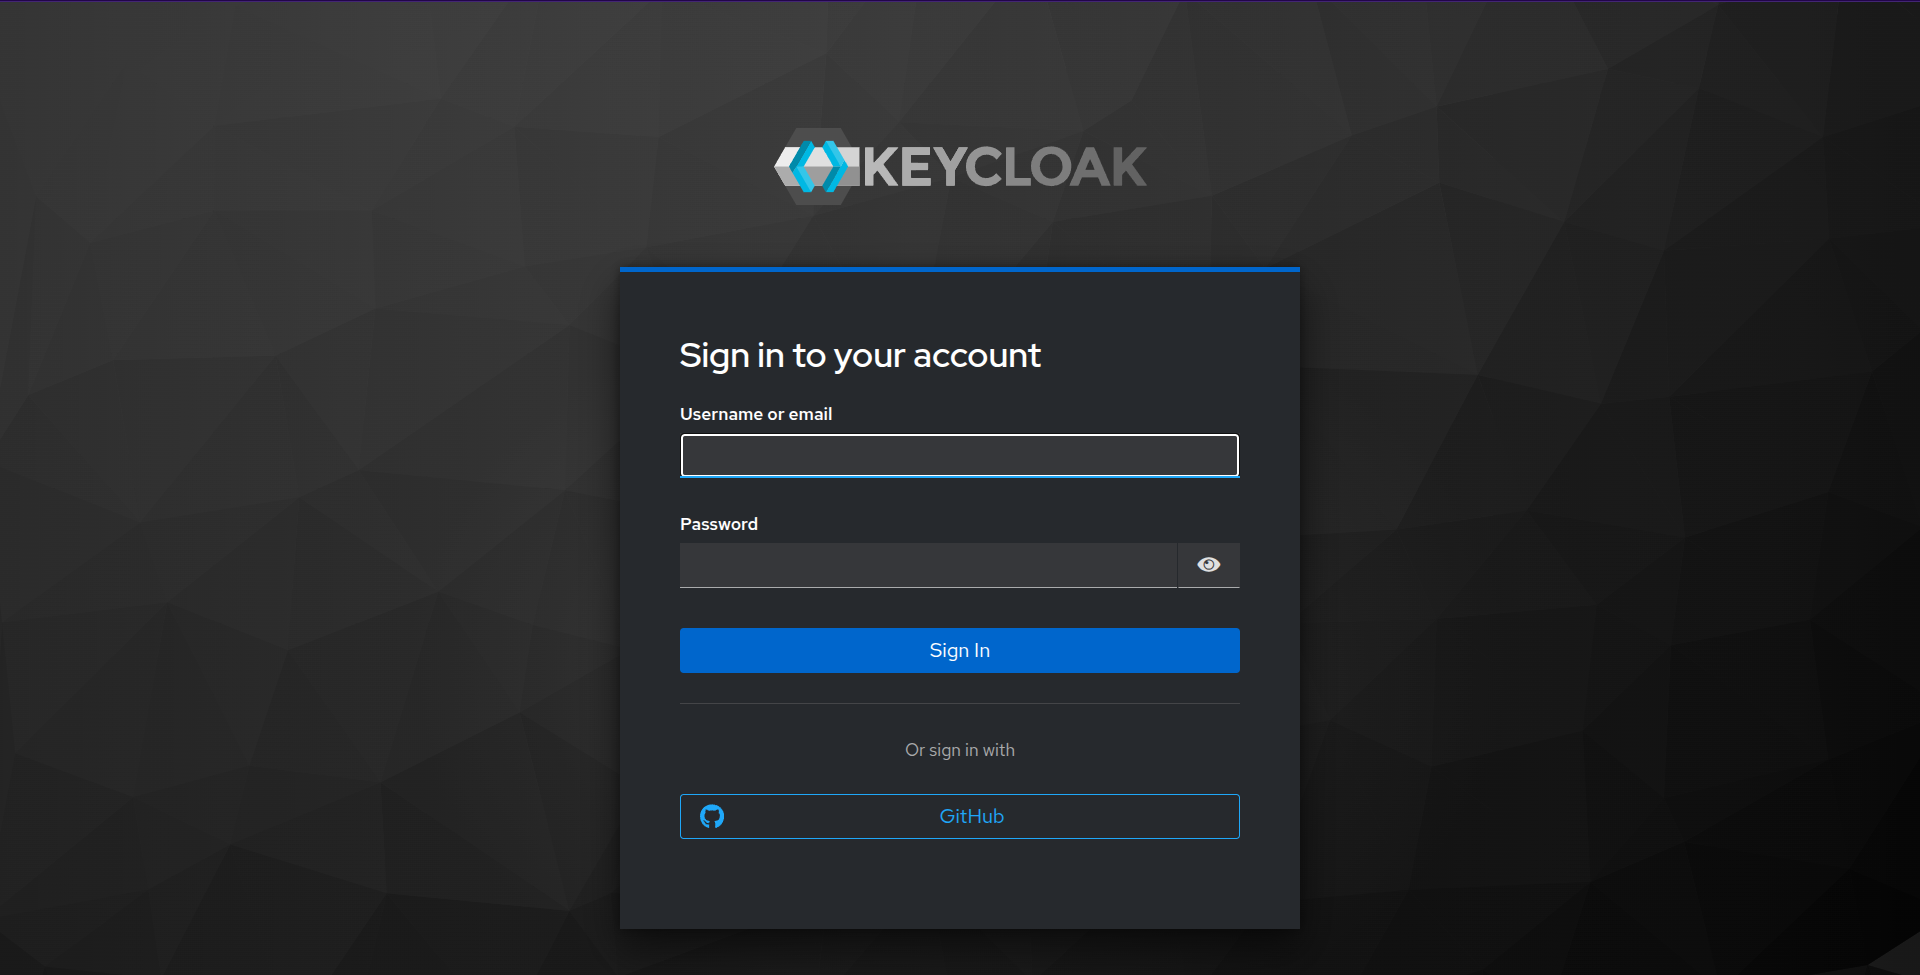
GitHub added as Sign In option in keycloak.
This same process works for Google, Facebook, Twitter, Microsoft, and 20+ other providers. You can even enable multiple social logins simultaneously, giving users the choice.
## What Works Really Well In Keycloak
Multi-factor authentication, social login, user federation with LDAP/Active Directory and fine-grained authorization policies - features that cost hundreds of dollars per month on SaaS platforms are all included. No per-user pricing, no feature gates. Which gives **Enterprise Features for free**.
Keycloak implements OAuth 2.0, OpenID Connect, and SAML 2.0 correctly. This means it works with virtually any modern application that supports these protocols. You're not locked into proprietary APIs.
You can customize login themes to match your brand, create custom authentication flows (e.g., require email verification before MFA), and even write custom extensions in Java. The level of control is unmatched, giving **Flexibility and customization**.
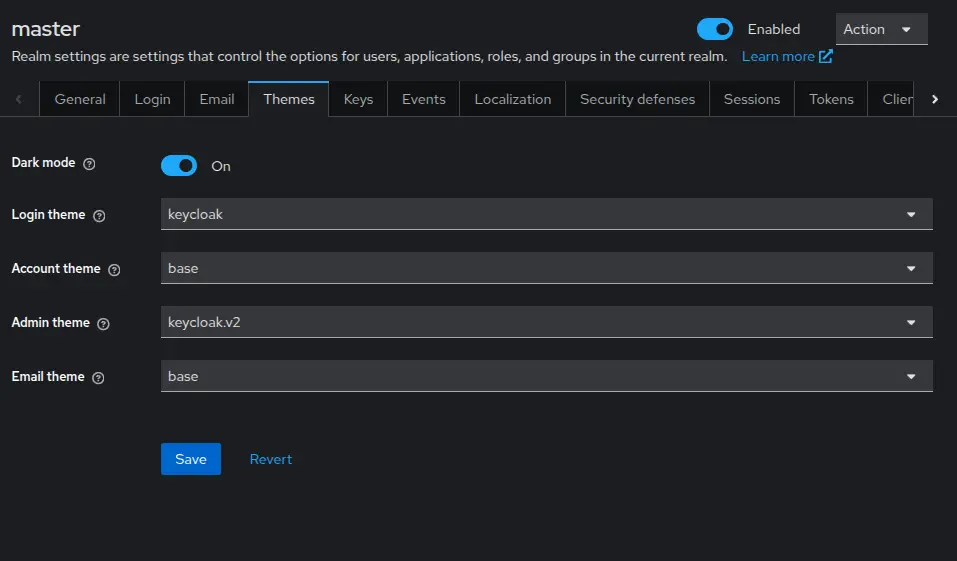
Customization options in keycloak.
As a CNCF project with backing from Red Hat, Keycloak receives regular updates, security patches, and new features. The community is active, and GitHub issues get responses signifying **active development**.
The experience of testing the Keycloak was seamless in terms of **performance**.
## Where Keycloak Falls Short
No tool is perfect, and Keycloak has some significant limitations you should know about upfront.
**Documentation gaps.** The official docs are comprehensive but scattered. The biggest pain point: there's no official `docker-compose` example that includes a production database. You're left piecing together environment variables from different pages. This is why the custom `docker-compose` file above took trial and error to get right.
**Steep learning curve.** Keycloak has a lot of concepts: realms, clients, client scopes, protocol mappers, identity providers, user federation, and authentication flows. For someone new to IAM, the admin console can be overwhelming. Expect to spend a few days just understanding the terminology.
**Scalability and Multi-Tenancy.** Keycloak can struggle with a high number of realms (multi-tenant environments), experiencing performance degradation in the Admin Console and realm management. While newer versions are improving,, earlier and default configurations have limitations.
**Resource hungry.** Keycloak is a Java application that needs a PostgreSQL database. It's not lightweight like some self-hosted tools. Expect at least 512MB of RAM for Keycloak alone, plus database overhead. Startup time is 30-60 seconds, not instant.
**Default Security Configuration.** The default password hashing iterations are low, which requires administrators to manually tune security to prevent brute-force attacks. Keycloak can struggle with a high number of realms (multi-tenant environments), experiencing performance degradation. While newer versions are improving, earlier and default configurations have limitations.
## Conclusion
Keycloak delivers enterprise-grade identity and access management without the enterprise price tag. The setup complexity is real - the lack of official Docker Compose examples and the steep learning curve are genuine barriers - but the features you get in return make it worthwhile.
Is it overkill for a simple single-app project? Absolutely. If you just need basic username/password authentication, Keycloak is too much. But if you're building a multi-app ecosystem, need SSO across services, want social login without vendor lock-in, or require features like MFA and user federation, Keycloak is one of the best self-hosted options available.
The `docker-compose` file above solves the biggest setup hurdle. Once you're past the initial configuration, Keycloak is remarkably powerful and flexible.
### LHB Linux Digest #26.06: DIY Linux Learning Labs, Docker Tools, Drone Logs and More Linux Stuff
URL: https://linuxhandbook.com/newsletter/26-06/
Last updated: 2026-04-07T14:41:32.000Z
True learning begins when you actively work on something. That’s why a balance of theory and hands-on practice is essential.
To address this, we are creating labs. These are small, guided projects designed to help you practice on your Linux system. When you work through them yourself, you naturally encounter challenges you didn’t anticipate. In this way, these labs help prepare you for real-world scenarios.
You can test it out with this lab where [you have to build an automated image optimization system](https://linuxhandbook.com/labs/automated-image-optimization/).
[Building an Automated Image Optimization PipelineIn this lab, you’ll build an automated process that watches a folder for new images and automatically optimizes them.Linux HandbookRoland Taylor](https://linuxhandbook.com/labs/automated-image-optimization/)
I'll be making a collection of such labs for your learning pleasure. Stay tuned.
That's not the only change. We have a [blog section](https://linuxhandbook.com/blog/) now. As I am reorganizing the content on Linux Handbook, it makes sense to write blogs around tools and tips we discover as a Linux user.
_This post is for subscribers only._
### Building an Automated Image Optimization Pipeline
URL: https://linuxhandbook.com/labs/automated-image-optimization/
Last updated: 2026-04-07T13:57:04.000Z
Optimizing images for the web is a common step in website design and development, but it can also be one of the most tedious. With all the steps like resizing, compressing, stripping metadata, and exporting multiple formats, it can eat chunks of time that rack up quickly when you’re just trying to work your blog, portfolio, or even a small business website.
This lab exercises will show you how to not only make that process easier, but automate it in a way that can be replicated on your own system or even a Linux server.
## 🎯 The goal
For this Linux Lab project, we'll be building a simple, fully automated image processing pipeline that does the following:
- Watches a specific folder for new images
- Automatically optimizes them using ImageMagick
- (Optionally) Generates web-friendly WebP copies
- (Optionally) Moves images into section-specific folders like `optimized/blog/img/` for rapid reference and deployment
- (Preferably) Runs the automation as a systemd user service
By the time we're finished, you’ll have a reusable automation that you can implement on your desktop or server, with minimal overhead, no need for configuration, and **no need for Docker or any external services**.
## Prerequisites
Before you dive in, there are a few dependencies that should be taken care of first. The details may differ slightly for your distro, so please be aware that you may need to consult your distro's documentation where necessary to install the correct packages. Once this stage is done, however, you should be able to follow everything just the same on most distributions.
**You'll need to install:**
- ImageMagick: for resizing and compressing images in common formats
- inotify-tools: for watching the target folder for any new files
- (optionally) webp: for converting images to the WebP format
**On Ubuntu systems, you can run:**
```bash
sudo apt update
sudo apt install -y imagemagick inotify-tools webp
```
**On Fedora, you can use:**
```bash
sudo dnf -y install ImageMagick inotify-tools libwebp-tools
```
📋
As with Fedora, the ImageMagick package may not always be called `imagemagick` in your distro repository. Be sure to check before attempting to install on other distros, as package names are typically case-sensitive.
Once you've installed these packages, you're ready to move on to setting up the project folders.
## Building out the project folders
For this endeavor, we'll build a single parent folder with three sub-directories. Technically, you can place the three sub-directories anywhere you like, but for keeping things organized, we'll keep them in a dedicated folder for this tutorial.
**The structure we'll use looks something like this:**
- `~/image-lab:` the parent folder
- `/incoming:` where you'll drop original images for optimization
- `/optimized:` where optimized images will be saved
- `/logs:` for storing a simple log file with timestamps and actions
**To create these folders, you just need to run the following command:**
```bash
mkdir -p ~/image-lab/{incoming,optimized,logs}
```
This will automatically create the sub-directories with `~/image-lab` for you.
_This post is for subscribers only._
### Watchtower Discontinued! Here Are Alternative Projects for Your Docker Containers
URL: https://linuxhandbook.com/blog/watchtower-like-docker-tools/
Last updated: 2026-04-04T11:14:23.000Z
There are plenty of [tools that help you use Docker containers more effectively and smoothly](https://linuxhandbook.com/blog/docker-workflow-tools/). One of the most popular was Watchtower. Was...because the project has been discontinued in December 2025.
If you've been running Watchtower to automatically keep your containers updated, you're not alone in suddenly wondering what's next after [the repo has been archived](https://github.com/containrrr/watchtower?ref=linuxhandbook.com).

Watchtower's GitHub repo was archived on ****December 17, 2025**. Read-only. Done.
Good news - the alternatives are actually ***better***. Here are some solid tools worth your time in my opinion and experience.
## **Diun - D**ocker **I**mage **U**pdate **N**otifier

It is a CLI application written in [Go](https://golang.org/?ref=linuxhandbook.com) and delivered as a [single executable](https://github.com/crazy-max/diun/releases/latest?ref=linuxhandbook.com) (and a [Docker image](https://crazymax.dev/diun/install/docker/?ref=linuxhandbook.com)) to receive notifications when a Docker image is updated on a Docker registry.
Diun does one thing: **watches your images and notifies you when they're updated**. It will not touch your containers. That's intentional. If you've ever had Watchtower silently pull a Postgres major version upgrade at 2 am, you'll appreciate this approach. You stay in control of when the actual update happens.
**Quick compose setup:**
```yaml
services:
diun:
image: crazymax/diun:latest
volumes:
- "./data:/data"
- "/var/run/docker.sock:/var/run/docker.sock"
- "./diun.yml:/diun.yml:ro"
environment:
- "DIUN_WATCH_SCHEDULE=0 */6 * * *"
restart: always
```
and make one `diun.yml`:
```yaml
# diun.yml
watch:
schedule: "0 */6 * * *"
providers:
docker:
watchStopped: true
notif:
discord:
webhookURL: https://discordapp.com/api/YOUR/WEBHOOK
```
You can mention your webhook URL for Slack, Telegram, Discord, etc. if there is any update, you will receive it like:
credit: [crazymax.dev/diun](https://crazymax.dev/diun?ref=linuxhandbook.com)
This will notify you in all supported applications, just like what we have received on Discord: the hostname, provider, the date it was created, platform and the Docker Hub link.
**Use this if:** You want awareness without the risk of surprise updates. Great for production-adjacent setups.
[GitHub | Diun](https://github.com/crazy-max/diun?ref=linuxhandbook.com)
## **Tugtainer**

Tugtainer is a self-hosted app for automating updates of your Docker containers. Relatively new (October 2025), devs say not production-ready yet. But moves fast — v1.25.0 dropped March 2026.
Tugtainer gives you a proper web dashboard to manage container updates. Think Portainer, but focused specifically on the update workflow.
**Quick setup:**
```bash
# create volume
docker volume create tugtainer_data
# pull image
docker pull ghcr.io/quenary/tugtainer:1
# run container
docker run -d -p 9412:80 \
--name=tugtainer \
--restart=unless-stopped \
-v tugtainer_data:/tugtainer \
-v /var/run/docker.sock:/var/run/docker.sock:ro \
ghcr.io/quenary/tugtainer:1
```
Hit `http://your-server:3000` and you get this:
Some of the main features are: Notifications to a wide range of services, Per-container config (check only or auto-update), Automatic/manual check and update, Automatic/manual image pruning and Linked containers support (compose and custom).
**Use this if:** You want a UI to manage your homelab updates. Especially good for Docker Compose setups.
[GitHub | Tugtainer](https://github.com/Quenary/tugtainer?ref=linuxhandbook.com)
## **WUD** \- **What's Up Docker**

WUD is the closest thing to a drop-in Watchtower replacement - but it's smarter. It has a web dashboard, notification support, and can auto-update containers. The key difference? It lets you set **thresholds**.
```bash
WUD_TRIGGER_DOCKER_LOCAL_THRESHOLD=patch
```
With that set, WUD auto-updates `1.2.3 → 1.2.4` but just ***notifies*** you for `1.2.3 → 1.3.0` or a major bump. Watchtower had no concept of this.
**Quick setup:**
```yaml
services:
wud:
image: getwud/wud:latest
ports:
- "3000:3000"
volumes:
- /var/run/docker.sock:/var/run/docker.sock
environment:
- WUD_NOTIFIER_TELEGRAM_BOTTOKEN=your-token
- WUD_NOTIFIER_TELEGRAM_CHATID=your-chat-id
- WUD_TRIGGER_DOCKER_LOCAL_THRESHOLD=patch
restart: unless-stopped
```
If you hit `localhost:3000` you will get a simple, minimalist UI.
Notifications go to Slack, Telegram, Discord, Gotify, Ntfy, Pushover, email and more.
**Use this if**: You want something close to Watchtower's auto-update behavior, but with actual guardrails and a dashboard.
[GitHub | WUD](https://github.com/getwud/wud?ref=linuxhandbook.com)
## **dockcheck**

The odd one out - it's a bash script. And it's my personal favorite.
The trick: dockcheck uses `regctl` to **compare image digests directly** against the registry. It never pre-pulls images just to check for updates. Saves bandwidth, doesn't hit Docker Hub rate limits, and is just plain faster.
Install `regctl` first:
```bash
curl -L https://github.com/regclient/regclient/releases/latest/download/regctl-linux-amd64 \
-o /usr/local/bin/regctl && chmod +x /usr/local/bin/regctl
```
```bash
curl -fsSL https://raw.githubusercontent.com/mag37/dockcheck/main/dockcheck.sh -o dockcheck.sh
chmod +x dockcheck.sh
./dockcheck.sh
```
You will get output like this:
credit: cdn.jsdelivr.net
You get a numbered list of containers with updates available. Pick which ones to update, or type `a` for all. Clean and simple.
To automate it, just cron it:
```bash
# Every Sunday at 3AM, auto-update all, send notification
0 3 * * 0 /home/user/dockcheck.sh -a -n >> /var/log/dockcheck.log 2>&1
```
It also supports image backups `-b` so you can roll back if something breaks, and parallel checks with `-x N`, for more flag you can check `-h` flag for help.
**Use this if:** You're comfortable with the terminal, run a Linux homelab, and want something lightweight and auditable (it's a bash script, you can read the whole thing).
[GitHub | dockcheck](https://github.com/mag37/dockcheck?ref=linuxhandbook.com)
## **Cup**

Cup might be the fastest update checker on this list. It claims to scan **58 images in 3.7 seconds** on a **Raspberry Pi 5**!
The secret is that instead of pulling images to compare them, it makes minimal API calls - one auth request per registry, then lightweight manifest HEAD requests. This means it **never burns through Docker Hub's pull rate limits**, which matters a lot now that Docker Hub has been tightening limits for unauthenticated users.
**Quick setup:**
```bash
#Pull the image
docker pull ghcr.io/sergi0g/cup
#Run the image with port mapping
docker run -tv /var/run/docker.sock:/var/run/docker.sock -p 9001:9001 ghcr.io/sergi0g/cup serve -p 9001
```
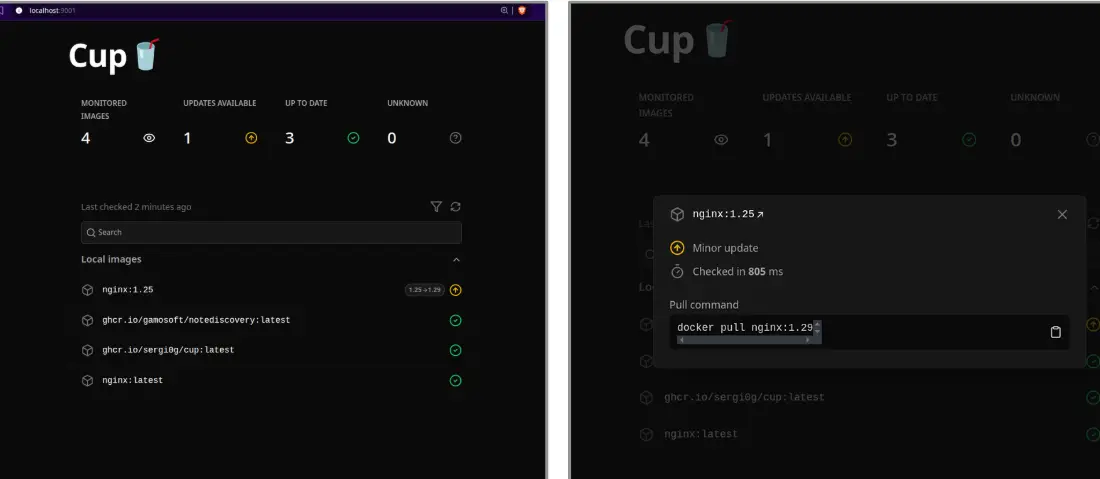
Then, if you visit `localhost:9001` you will get a simple look where you will see all the monitored images, updates available and up-to-date images with a command given to update to the latest image.
It tells you what's out of date and leaves the rest to you - via a cron job, a webhook consumer, or just checking the dashboard manually. It supports Docker Hub, ghcr.io, Quay, lscr.io, Gitea and more.
**Use this if:** You're hitting Docker Hub rate limits with other tools, or just want the fastest possible update check without anything auto-touching your containers.
[GitHub | Cup](https://github.com/sergi0g/cup?ref=linuxhandbook.com)
## **Dockwatch**

Simple UI driven way to manage updates & notifications for Docker containers. Dockwatch comes from the **Notifiarr** team; the same folks who built one of the best notification routing systems in the self-hosted world. That DNA shows.
It's built around a beautiful web UI and a genuinely impressive notification system. The kind of thing you'd show someone to convince them that self-hosting is actually fun.
**Quick compose setup:**
```yaml
services:
dockwatch:
image: ghcr.io/notifiarr/dockwatch:latest
ports:
- "3001:80"
volumes:
- /var/run/docker.sock:/var/run/docker.sock
- ./dockwatch/config:/config
restart: unless-stopped
```
Once you're done, run the command:
```bash
docker compose up -d
```
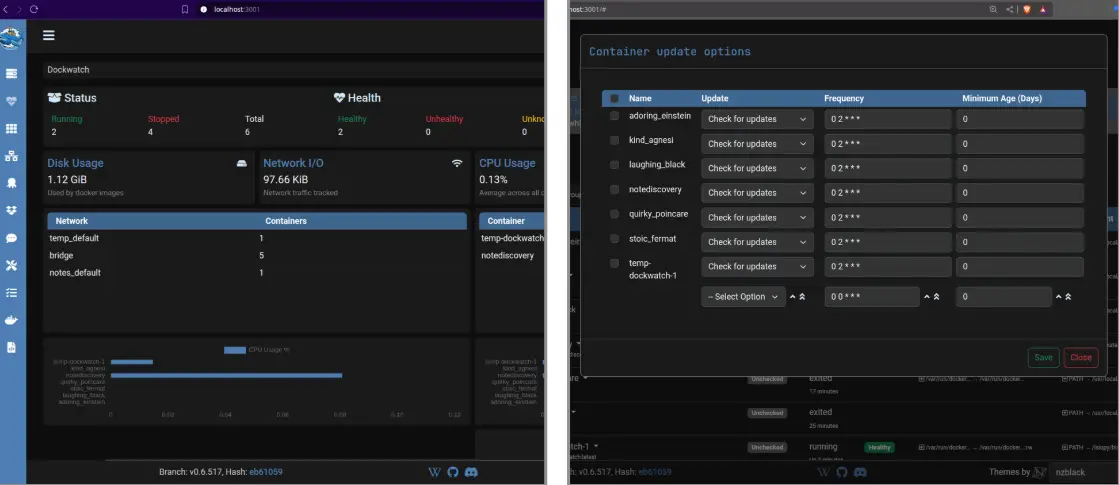
Then visit the `localhost:3001`, you will see the advanced setup, which shows a beautiful UI giving you information about disk usage, network I/O, CPU usage, memory usage and updates available for the images.
**Use this if**: You want a feature-rich dashboard with serious notification chops, especially if you're already in the Notifiarr/Servarr ecosystem.
[GitHub | Dockwatch](https://github.com/Notifiarr/dockwatch?ref=linuxhandbook.com)
## **nicholas-fedor/watchtower**

For Those Who Don't Want to Change Anything. Okay, real talk. Maybe you've been running Watchtower for years. Your whole homelab is tuned around it. Your cron jobs reference it. Your muscle memory knows the flags. You don't want to learn a new tool.
Fair. Enter **nicholas-fedor/watchtower** \- a community-maintained fork that picks up exactly where the archived original left off.
```bash
# Before (archived, no longer works on newer Docker versions):
image: containrrr/watchtower
# After (actively maintained):
image: nickfedor/watchtower
```
**Quick setup:**
```yaml
# Get the compose file
curl -L https://raw.githubusercontent.com/nicholas-fedor/watchtower/refs/heads/main/examples/default/docker-compose.yaml -o docker-compose.yaml
# Run command
docker compose up -d
```
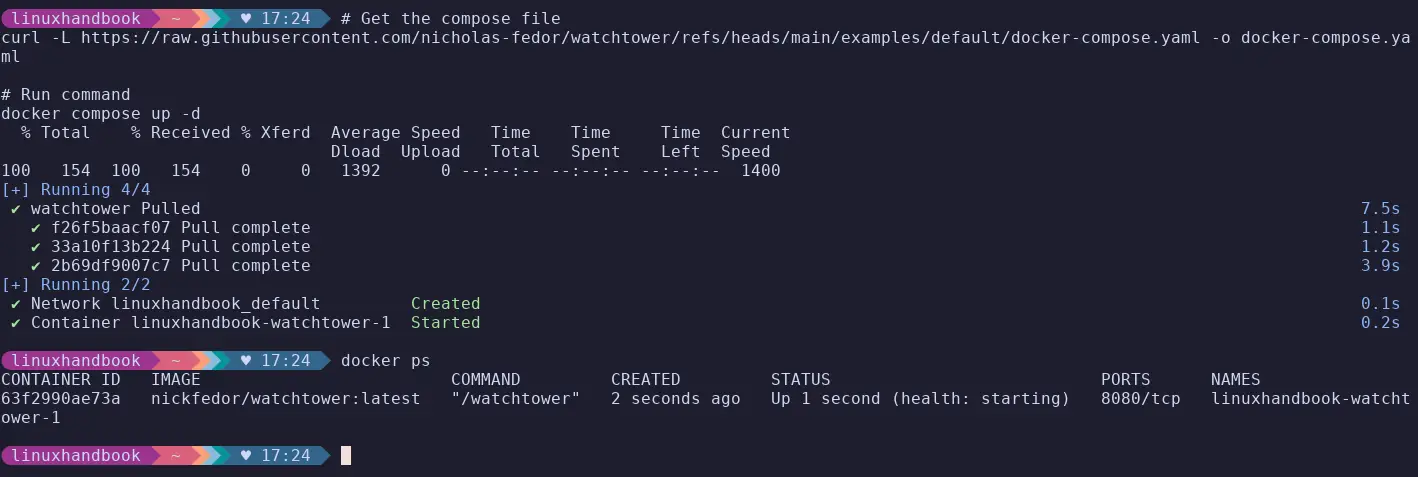
After this, the expected behaviour is it will monitor all running containers on the host and every 24 hours, it will poll if the monitored containers have updated image digests; if available, it will pull the updated image without changing the previous configurations.
auto-updates everything it can see, by default. There's no semantic versioning awareness, no dashboard, no diff before it updates
**Use this if:** You want zero migration friction and just need the original Watchtower to keep running on modern Docker.
[GitHub | nicholas-fedor/watchtower](https://github.com/nicholas-fedor/watchtower?ref=linuxhandbook.com)
## **So, which one to choose?**
Yes, if you are impressed with all of these here, I will give you one line suggestions:
Want notification-only, no auto-updates - **Diun** or **Cup**, Want a web UI for your homelab - **Tugtainer** or **WUD** or **Dockwatch**, Closest Watchtower replacement with smarter auto-updates - **WUD**, Terminal-first, minimal dependencies - **dockcheck**, Running Kubernetes or Swarm - Only **Diun** supports that, Want zero migration from the original Watchtower - **nicholas-fedor/watchtower**, Already in the Notifiarr/Servarr ecosystem - **Dockwatch** is a natural fit.
***Know another tool worth adding? Drop it in the comments.***
### I Like This Fuzzy Search Finder Better Than Find Command in Linux
URL: https://linuxhandbook.com/blog/fzf-command/
Last updated: 2026-03-30T11:06:23.000Z
There are two main tools for searching files in Linux:
- find for [finding files by names](https://linuxhandbook.com/find-files-by-name/) and attributes
- [grep for finding files](https://linuxhandbook.com/grep-command-examples/) by its content
You [combine find with xargs](https://linuxhandbook.com/xargs-command/) and you have an outstanding search tool in your hands.
I am not denying the power of find command. I have just explored another tool that does the same job with much more ease.
That tool is fzf, an interactive command line utility that implements a fuzzy search algorithm to search through all sorts of list: files, command history, processes, hostnames, bookmarks, git commits, and so on.
As you can imagine, it has the ability to make your life a lot easier.
💡
Fuzzy searching means the tool will search through the files for not exact matches, but approximate matches.
I have explored fzf, liked it and I am going to share the features I love in fzf. I hardly touch find now.
## Search and Selection
[fzf](https://github.com/junegunn/fzf?ref=linuxhandbook.com) can be run by simply entering the command in the terminal. It searches through all the files that are the working directory where the command is being run. The basic usage is quite simple and can be understood easily. To start, just enter:
```
fzf
```
As soon as you run the command, fzf opens up and starts listing all the files inside the current working directory. You can see at the bottom two numbers in a fraction, the numerator denoting how many files match the search prompt and the denominator denoting how many total files it is searching through.
0:00
/0:06
1×
🚧
If you run the command and not input anything, it will keep evaluating the files in the working directory, more often than not spiking the CPU and RAM usage.
There are a number of ways to input the search, which work like this:
To fuzzy search for a keyword simply as it is:
```
keyword
```
This is the way to get exact-matched results, i.e. item that include the keyword:
```
'keyword
```
This is how you look for items that either start or end with the keyword:
```
'keyword'
```
To find items that start with the keyword:
```
^keyword
```
To find files that end with .ext extension.
```
.ext$
```
There are options using which you can find anything *but* the keyword you're looking for.
To find all files which do not include the keyword:
```
!keyword
```
This finds all files to that do start with the keyword:
```
!^keyword
```
Find all the files that do not have the .ext extension:
```
!.ext$
```
These options might seem like they're a bit much to remember, but as you get used to the program, remembering the syntax will become second nature.
After you give the input, you get the list of items matching the criteria, with the most relevant results closest to the search bar at the bottom. When you press enter on a result, fzf exits with the file location displayed. You can even navigate using the mouse, scrolling and clicking the results.
## Preview Mode
Using the preview mode, you can run a command that you specify for every selection that you get from fzf.
For example, if you want to read every single file that you select when you search for something, you can use the *cat* command to do so:
```
fzf --preview 'cat {}'
```
The working of this command can be seen better in a video.
0:00
/0:09
1×
### Previewing Images
You can use the preview window to even see photos on a terminal that supports graphics (duch has [Ghostty](https://itsfoss.com/ghostty-terminal-features/?ref=linuxhandbook.com)) using Chafa, Kitty, ImgCat etc. The best, in my experience, has been Chafa. You can see how to install it [here](https://hpjansson.org/chafa/download/?ref=linuxhandbook.com). Now to preview images, enter this command:
```
fzf --preview 'chafa {}'
```
0:00
/0:09
1×
## Display Modes
There are 3 different display modes that come with fzf: default, full and minimal modes. On plain application with the command, the difference in the interface doesn't seem like much:
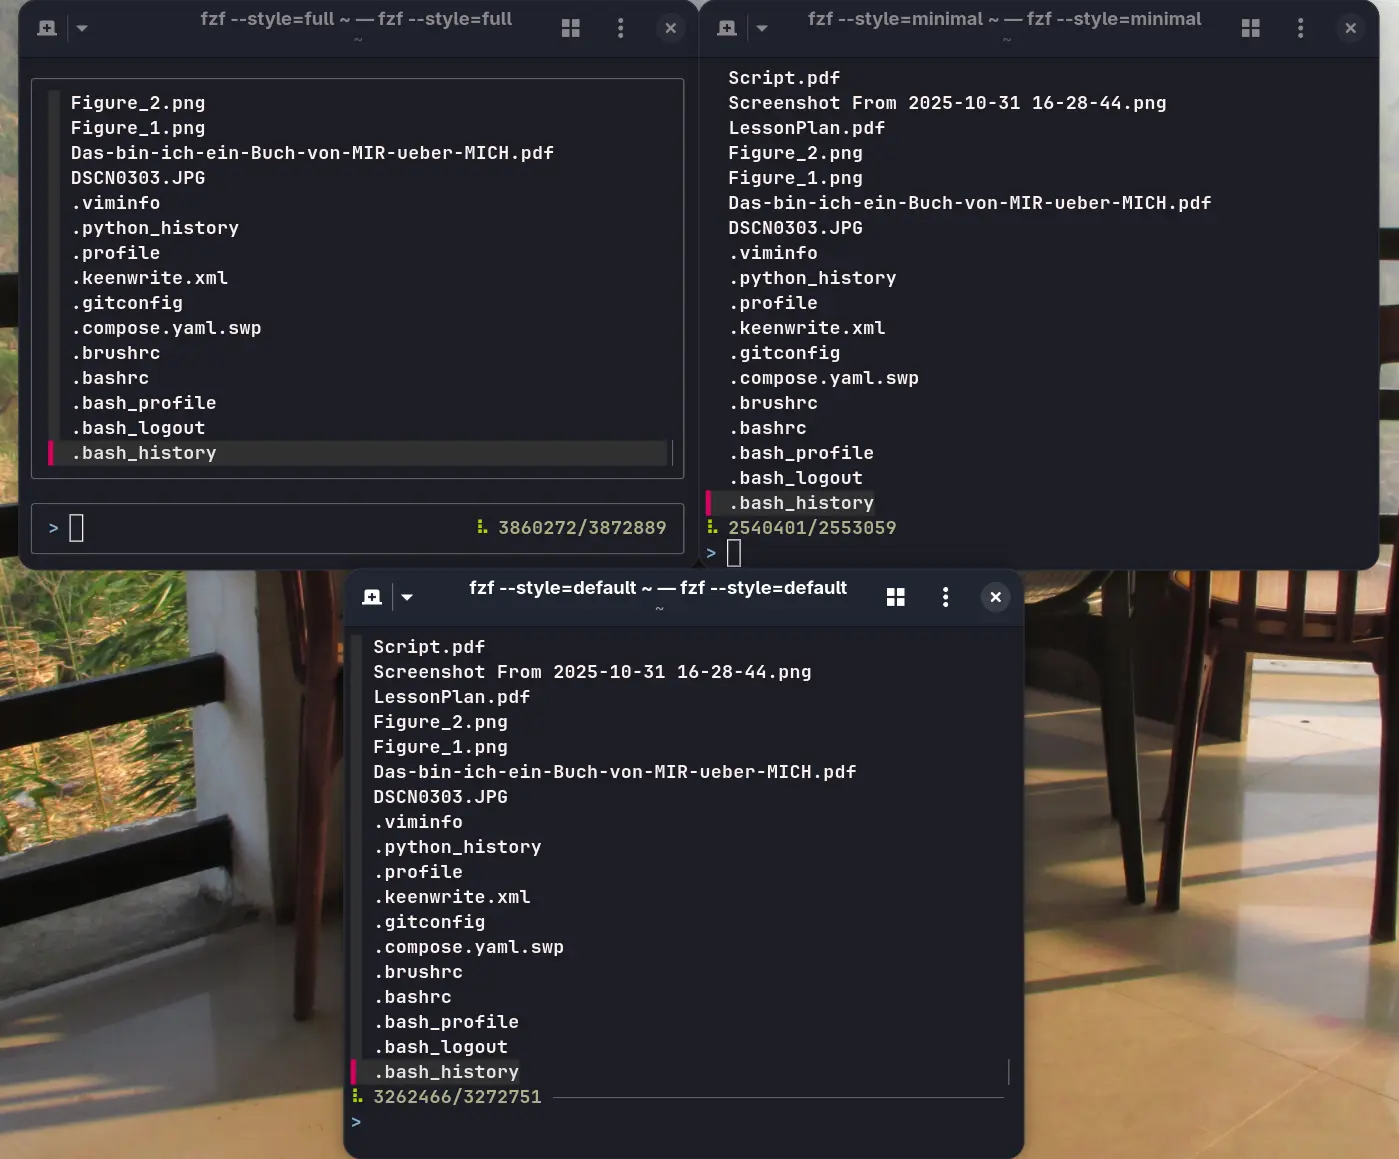
But there are a huge number of attributes you can modify to change the look of fzf as you please. Some of the most useful ones are:
### Height
Using this, you can choose how much of the terminal window fzf will occupy:
```
fzf --height=40%
```
Setting the value at \~100 will cause fzf to occupy the entire window.
### Border
By default, fzf has no solid border. But it does offer a number of options if you want one:
```
fzf --border=