How to Deploy ONLYOFFICE Docs Server on RHEL/CentOS
ONLYOFFICE is an excellent open source alternative to Microsoft Office. You can self host it for online office and collaboration. Here's how to deploy on RedHat/CentOS distros.
ONLYOFFICE Docs is a web-based office package that is designed for local deployment and comes with a free desktop client for Linux, Windows and macOS. The suite is open-source and combines collaborative editors for text documents, spreadsheets, presentations and fillable forms that are highly compatible with the OOXNL formats (DOCX, XLSX and PPTX). ONLYOFFICE Docs is also equipped with a viewer for PDF and DjVu files and can convert such files to other formats.
ONLYOFFICE Docs offers a set of standard editing tools and features for collaborative work, including, Fast and Strict co-editing modes, Track Changes, Version History, comment and user mentions, document comparison and real-time communication.
With ONLYOFFICE Docs, it’s possible to create a collaborative environment on a Linux server by integrating the suite with a file-sharing platform or a DMS service. The most popular integration examples include Nextcloud, Seafile, ownCloud, Redmine, WordPress, Confluence, SharePoint, Alfresco, Chamilo, Liferay, Moodle, etc.
This detailed guide will help you install and configure the most recent version of ONLYOFFICE Docs (Community Edition) on CENTOS and RHEL.
Prerequisites:
- CPU: a dual-core processor with 2 GHz or higher;
- RAM: at least 2 GB;
- HDD: at least 40 GB of free disc space;
- Swap space: at least 4 GB;
- OS: RHEL 7/CentOS 7 minumum
Additional requirements:
- PostgreSQL: v12.9+
- NGINX: v1.3.13+
- RabbitMQ
To start the installation process of ONLYOFFICE Docs, you need to install and set up NGINX, PostgreSQL and RabbitMQ in your RHEL /CentOS server.
Version 7.2: what’s new
At the moment, the latest version of ONLYOFFICE Docs is the recently released v7.2 that comes with a lot of new features, UI improvements and new languages.
For example, v7.2 offers new interface themes (Dark Contrast and Same as System), ligatures support, new types of interactive fields (Phone Number, Email Address and Complex Field) and new field parameters in fillable forms, Paste Special hotkeys, support for OLE spreadsheets and a brand-new plugin manager that allows you to install and delete third-party plugins for ONLYOFFICE Docs with a few clicks.
Step 1: Install the required dependencies
Let's go ahead and install the dependencies.
Installing NGINX
The first component you need to install is the latest version of the NGINX package. To set up the corresponding yum repository on RHEL 7/CentOS 7, let’s create a file named /etc/yum.repos.d/nginx.repo. The file should have the following contents:
[nginx-stable]
name=nginx stable repo
baseurl=http://nginx.org/packages/centos/$releasever/$basearch/
gpgcheck=1
enabled=1
gpgkey=https://nginx.org/keys/nginx_signing.key
[nginx-mainline]
name=nginx mainline repo
baseurl=http://nginx.org/packages/mainline/centos/$releasever/$basearch/
gpgcheck=1
enabled=0
gpgkey=https://nginx.org/keys/nginx_signing.key
After that, you need to install NGINX. This can be done with this command:
sudo yum install nginx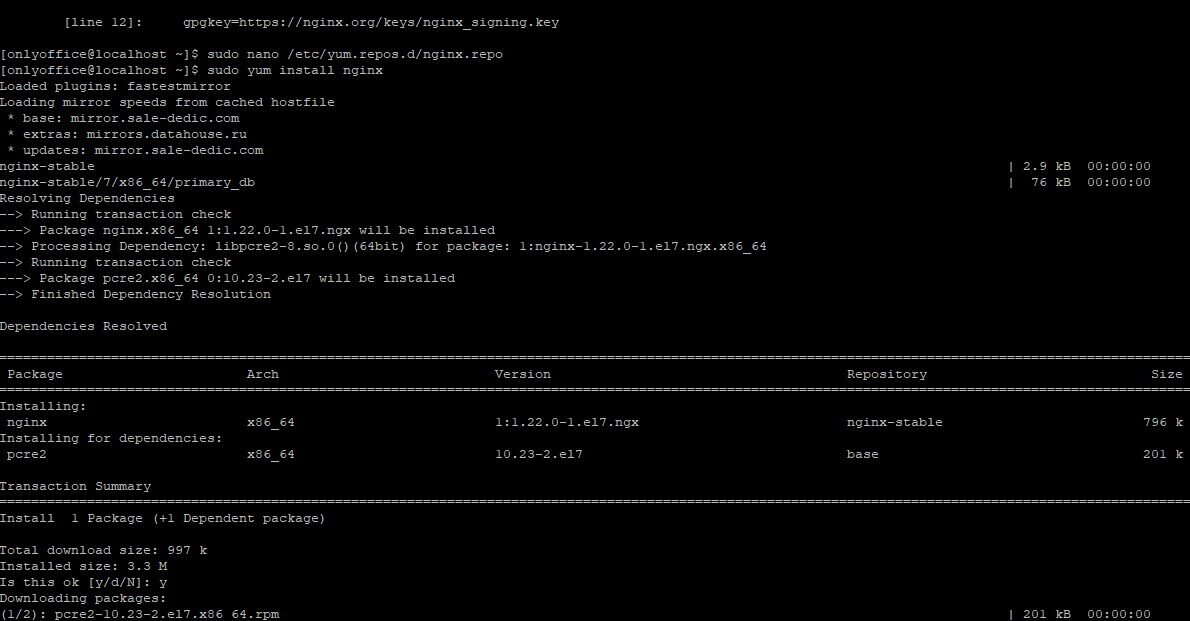
Now you need to make some edits to the /etc/nginx/nginx.conf configuration file as follows:
user nginx;
worker_processes 1;
error_log /var/log/nginx/error.log warn;
pid /var/run/nginx.pid;
events {
worker_connections 1024;
}
http {
include /etc/nginx/mime.types;
default_type application/octet-stream;
log_format main  '$remote_addr - $remote_user [$time_local] "$request" '
'$status $body_bytes_sent "$http_referer" '
'"$http_user_agent" "$http_x_forwarded_for"';
access_log /var/log/nginx/access.log main;
sendfile on;
#tcp_nopush on;
keepalive_timeout 65;
#gzip on;
include /etc/nginx/conf.d/*.conf;
}
Now you can proceed with installing other components.
Installing the EPEL repository
To install the EPEL repository, you need to launch the following command:
sudo yum install epel-releaseInstalling and configuring PostgreSQL
Let’s install the PostgreSQL version that is included in your version of RHEL/CentOS:
sudo yum install postgresql postgresql-serverNext you need to Initialize the PostgreSQL database. This can be done the following way:
sudo service postgresql initdb
sudo chkconfig postgresql on
After that, it’s time to turn on the “trust” authentication method for the IPv4 and IPv6 internet protocols. For this purpose, you need to open the /var/lib/pgsql/data/pg_hba.conf file with a text editor. You need to find host all all 127.0.0.1/32 ident and replace it with the following string:
host all all 127.0.0.1/32 trustAlso, you need to find host all all ::1/128 ident and replace it with this:
host all all ::1/128 trustOnce this is done, you need to save the changes and close the text editor. Let’s restart the PostgreSQL service with this command:
sudo service postgresql restartNow you can create a PostgreSQL database and user but you need to run the following command first:
cd /tmpThis is required to prevent warning messages if running from the root. Let’s create a database and user:
sudo -u postgres psql -c "CREATE DATABASE onlyoffice;"
sudo -u postgres psql -c "CREATE USER onlyoffice WITH password 'onlyoffice';"
sudo -u postgres psql -c "GRANT ALL privileges ON DATABASE onlyoffice TO onlyoffice;"
Of course, it’s possible to use any name and password.
Installing RabbitMQ
Another component to be installed is RabbitMQ. This can be done with this command:
sudo yum install rabbitmq-serverNext you need to start this service:
sudo service rabbitmq-server start
sudo systemctl enable rabbitmq-server
Installing mscorefonts
Finally, you need to install the cabextract and xorg-x11-font-utils packages:
sudo yum install cabextract xorg-x11-font-utilsIf you are running CentOS 7.8, the fontconfig component is also required. Let’s install it with this command:
sudo yum install fontconfigNow you can install the msttcore fonts package:
sudo rpm -i https://deac-ams.dl.sourceforge.net/project/mscorefonts2/rpms/msttcore-fonts-installer-2.6-1.noarch.rpmWhen all the required components are installed, you can proceed with the installation of ONLYOFFICE Docs.
Step 2: Install ONLYOFFICE Docs
Adding the ONLYOFFICE Docs repository
Before you start the installation process, you need to add the ONLYOFFICE Docs repository. This can be done with the following command:
sudo yum install https://download.onlyoffice.com/repo/centos/main/noarch/onlyoffice-repo.noarch.rpmInstalling ONLYOFFICE Docs
To install ONLYOFFICE Docs, you need to run this command:
sudo yum install onlyoffice-documentserver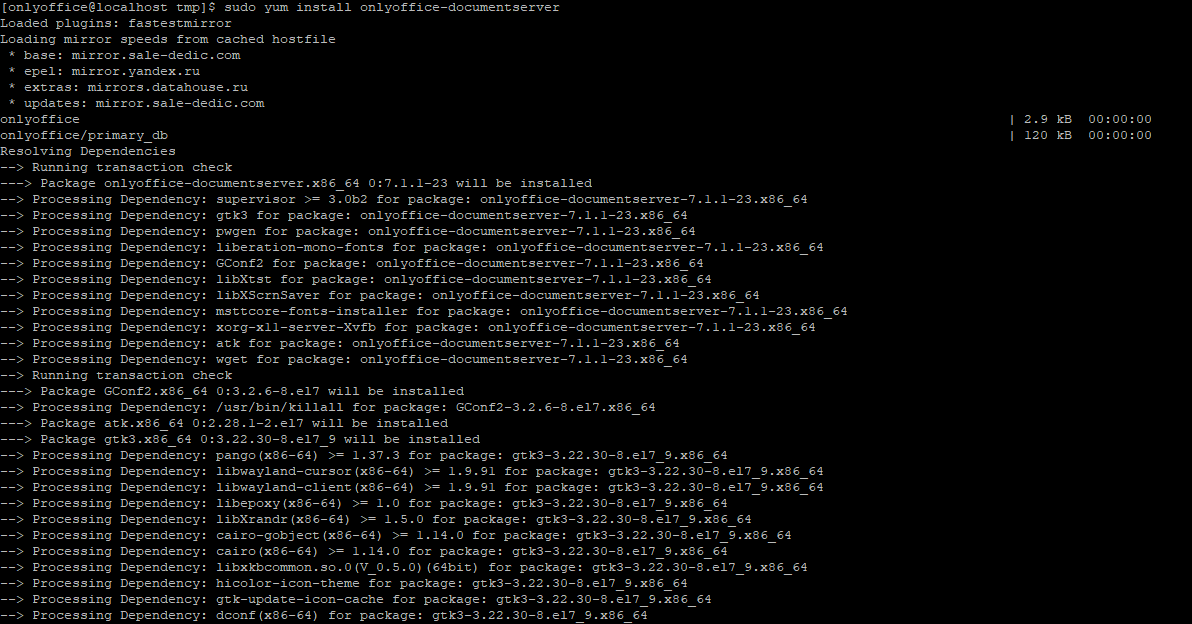
After that, you need to run the required dependent services:
sudo service supervisord start
sudo systemctl enable supervisord
sudo service nginx start
sudo systemctl enable nginx
After installation, ONLYOFFICE Docs will run as a process. Its package will be updated like any other RPM package.
Step 3: Change the default port for ONLYOFFICE Docs
By default, ONLYOFFICE Docs uses port 80 for incoming connections. To change the default port, you need to specify the required port number the DS_PORT environment variable with this command:
export DS_PORT=<PORT_NUMBER>After that, you can proceed with the configuration of ONLYOFFICE Docs.
Step 4: Configure ONLYOFFICE Docs
Running the configuration script
To configure ONLYOFFICE Docs, you need to run the following script:
bash documentserver-configure.sh
After that, you need to specify the PostgreSQL and RabbitMQ connection parameters. Let’s use the following data for this purpose:
PostgreSQL parameters:
- Host: localhost
- Database: onlyoffice
- User: onlyoffice
- Password: onlyoffice
RabbitMQ parameters:
- Host: localhost
- User: guest
- Password: guest
Adding a firewall exception
To avoid problems with your firewall, let’s add the corresponding exception with these commands:
sudo firewall-cmd --zone=public--add-port=80/tcp --permanent
sudo firewall-cmd --reload
Step 5: Launch ONLYOFFICE Docs
When yo are done with the configuration of ONLYOFFICE Docs, you need to open your web browser and type http://localhost in the browser address bar. You will see the ONLYOFFICE Docs welcome page where you can find further information on how to enable document examples or integrate ONLYOFFICE Docs with your web application using the API.

Conclusion
Congratulations! You have just successfully installed ONLYOFFICE Docs on RHEL/CentOS. You hope this article will help you to set up the ONLYOFFICE online office suite on your server and enjoy all the benefits of real-time document collaboration.

LHB Community is made of readers like you who like to contribute to the portal by writing helpful Linux tutorials.